

The Clock/Diaper Bench

Yes, you read that right … clocks & diapers. Projects have been piling up here at the Workshop and any piece that can pull double duty moves right to the top of the list. Here’s the story.
Two very nice things happened this Spring to alter the trajectory of events: 1. the Rocky Mountain clock was completed; and 2. my wife and I became Grandparents for the first time. Now, these events have only one thing in common and that is they both highlight the need for more furniture in our home. You see, to keep the brass movement away from the dusty workshop during construction that clock was routinely assembled-disassembled-reassembled over the course of a couple months on a card table that sits in our “dining” room - a low surface with many other uses. Surely, a purpose-built clock bench would be useful for the next Project. More importantly, we may soon be watching our new granddaughter a few days a week and that same card table seems to be the only diaper changing station available in our recently downsized existence - again, center stage for what might be considered a behind the scene task. It’s not that we don’t have the spare bedroom space, it’s that we lack the proper furniture.
Furniture, those structures all about us that assist our daily existence, are among the most valuable things we will ever purchase without an instruction manual. While most furniture items are constructed to do a specific job, their use, assumed by the maker and implied by the form, is ultimately up to the owner. Thus, furniture leads a precarious existence. Should the need for that job ever disappear, what was once a necessity becomes dispensable and soon begins to resemble junk. Put another way, pieces that get used persist, those that don’t get the boot (vinyl covered living room sets excepted). I was reminded of this hard fact while perusing my latest library book sale find in search of clock/diaper bench inspirations. Easy Mission-Style Woodworking Projects by Edward F. Worst is a fascinating 74 page collection of furniture plans that reads today like a history book. The work is actually a Dover re-publication of chapters 1-3 from a more serious text, Problems in Woodwork, first published in 1921 as a guide for middle school “manual training” (aka shop) teachers. In it you will find obsolete? plans for not one, but TWO clothesline winders, a pen and ink stand, a shoe polishing stand, two versions of a smoking stand and the object of my interest for this Project, the telephone table. Let me be emphatic in stating there is absolutely nothing wrong with the furniture in these plans other than they had lost their purpose over time.

Inspiration for the Clock/Diaper bench
Let’s face it, the past century has witnessed a catastrophic furniture extinction. It’s a dangerous world out there and even items designed to satisfy multiple functions are not invulnerable, for example the billiard table/davenport. While I have never sat nor played a rack on one, I cannot imagine this early twentieth century item was well suited for either activity, and there’s the rub. Even when conditions are favorable (note that both billiard tables and davenports exist among us), to survive, furniture must ultimately be good at its job. With these cautions in mind, let’s move on to our Project.

Rare sighting of a billiard table/davenport
from: Mission Furniture: How to Make It, Henry Haven Windsor (1909).
Design
Admittedly, there was a pretty low risk of failure for this Project as both of its intended uses, clockmaking and child clean-up, only required a sturdy bench top surface for success. And since most of its existence will be spent unused in either capacity, the primary function of this item is to merely look good. Thus, I was searching for a classic design and, in particular, a design where “looking good” in the background was the main mission. Indeed, clock benches have a recognized form, no doubt having evolved to suit a clockmaker’s vocational needs and comfort. But they look kinda “boxy” and, at 42 inches in height, are too tall for diaper changing work. Store-bought diaper changing tables, of which we were a proud owner some 30 years ago, also have a recognizable form. Ours was a three drawer chest fashioned from spray painted particle board onto which was snapped a vinyl covered pad. The problem is that neither of these fully functional items look particularly attractive when not in use. And that’s what clicked for me when I came upon the plans for a telephone table. Back in the day, the job of this furniture item was to sit near the wall where the telephone plug was mounted, support the phone and provide a table and seat for the telephone user. We had a telephone table in our home while I was growing up. I recall we never talked on the phone unless seated at this table, and we rarely sat at that table unless we were on the phone. Our telephone, on a party line with a neighbor down the road, was rarely used and so, although vital for its mission, that telephone table sat in a corner of the kitchen and for the bulk of its life simply tried to look good. Its 1940s design was that of a modified chair, but earlier models were more like slender desks and something that could be easily modified to serve a clock/diaper bench function. The exemplar for our Project is that item on the far left of the book cover, above. I reproduce the nicely detailed plan for this table below, although since all of the dimensions were being enlarged it was of little practical use. I just like the nostalgia of the candlestick telephone rendered lightly in its intended position (upper left).
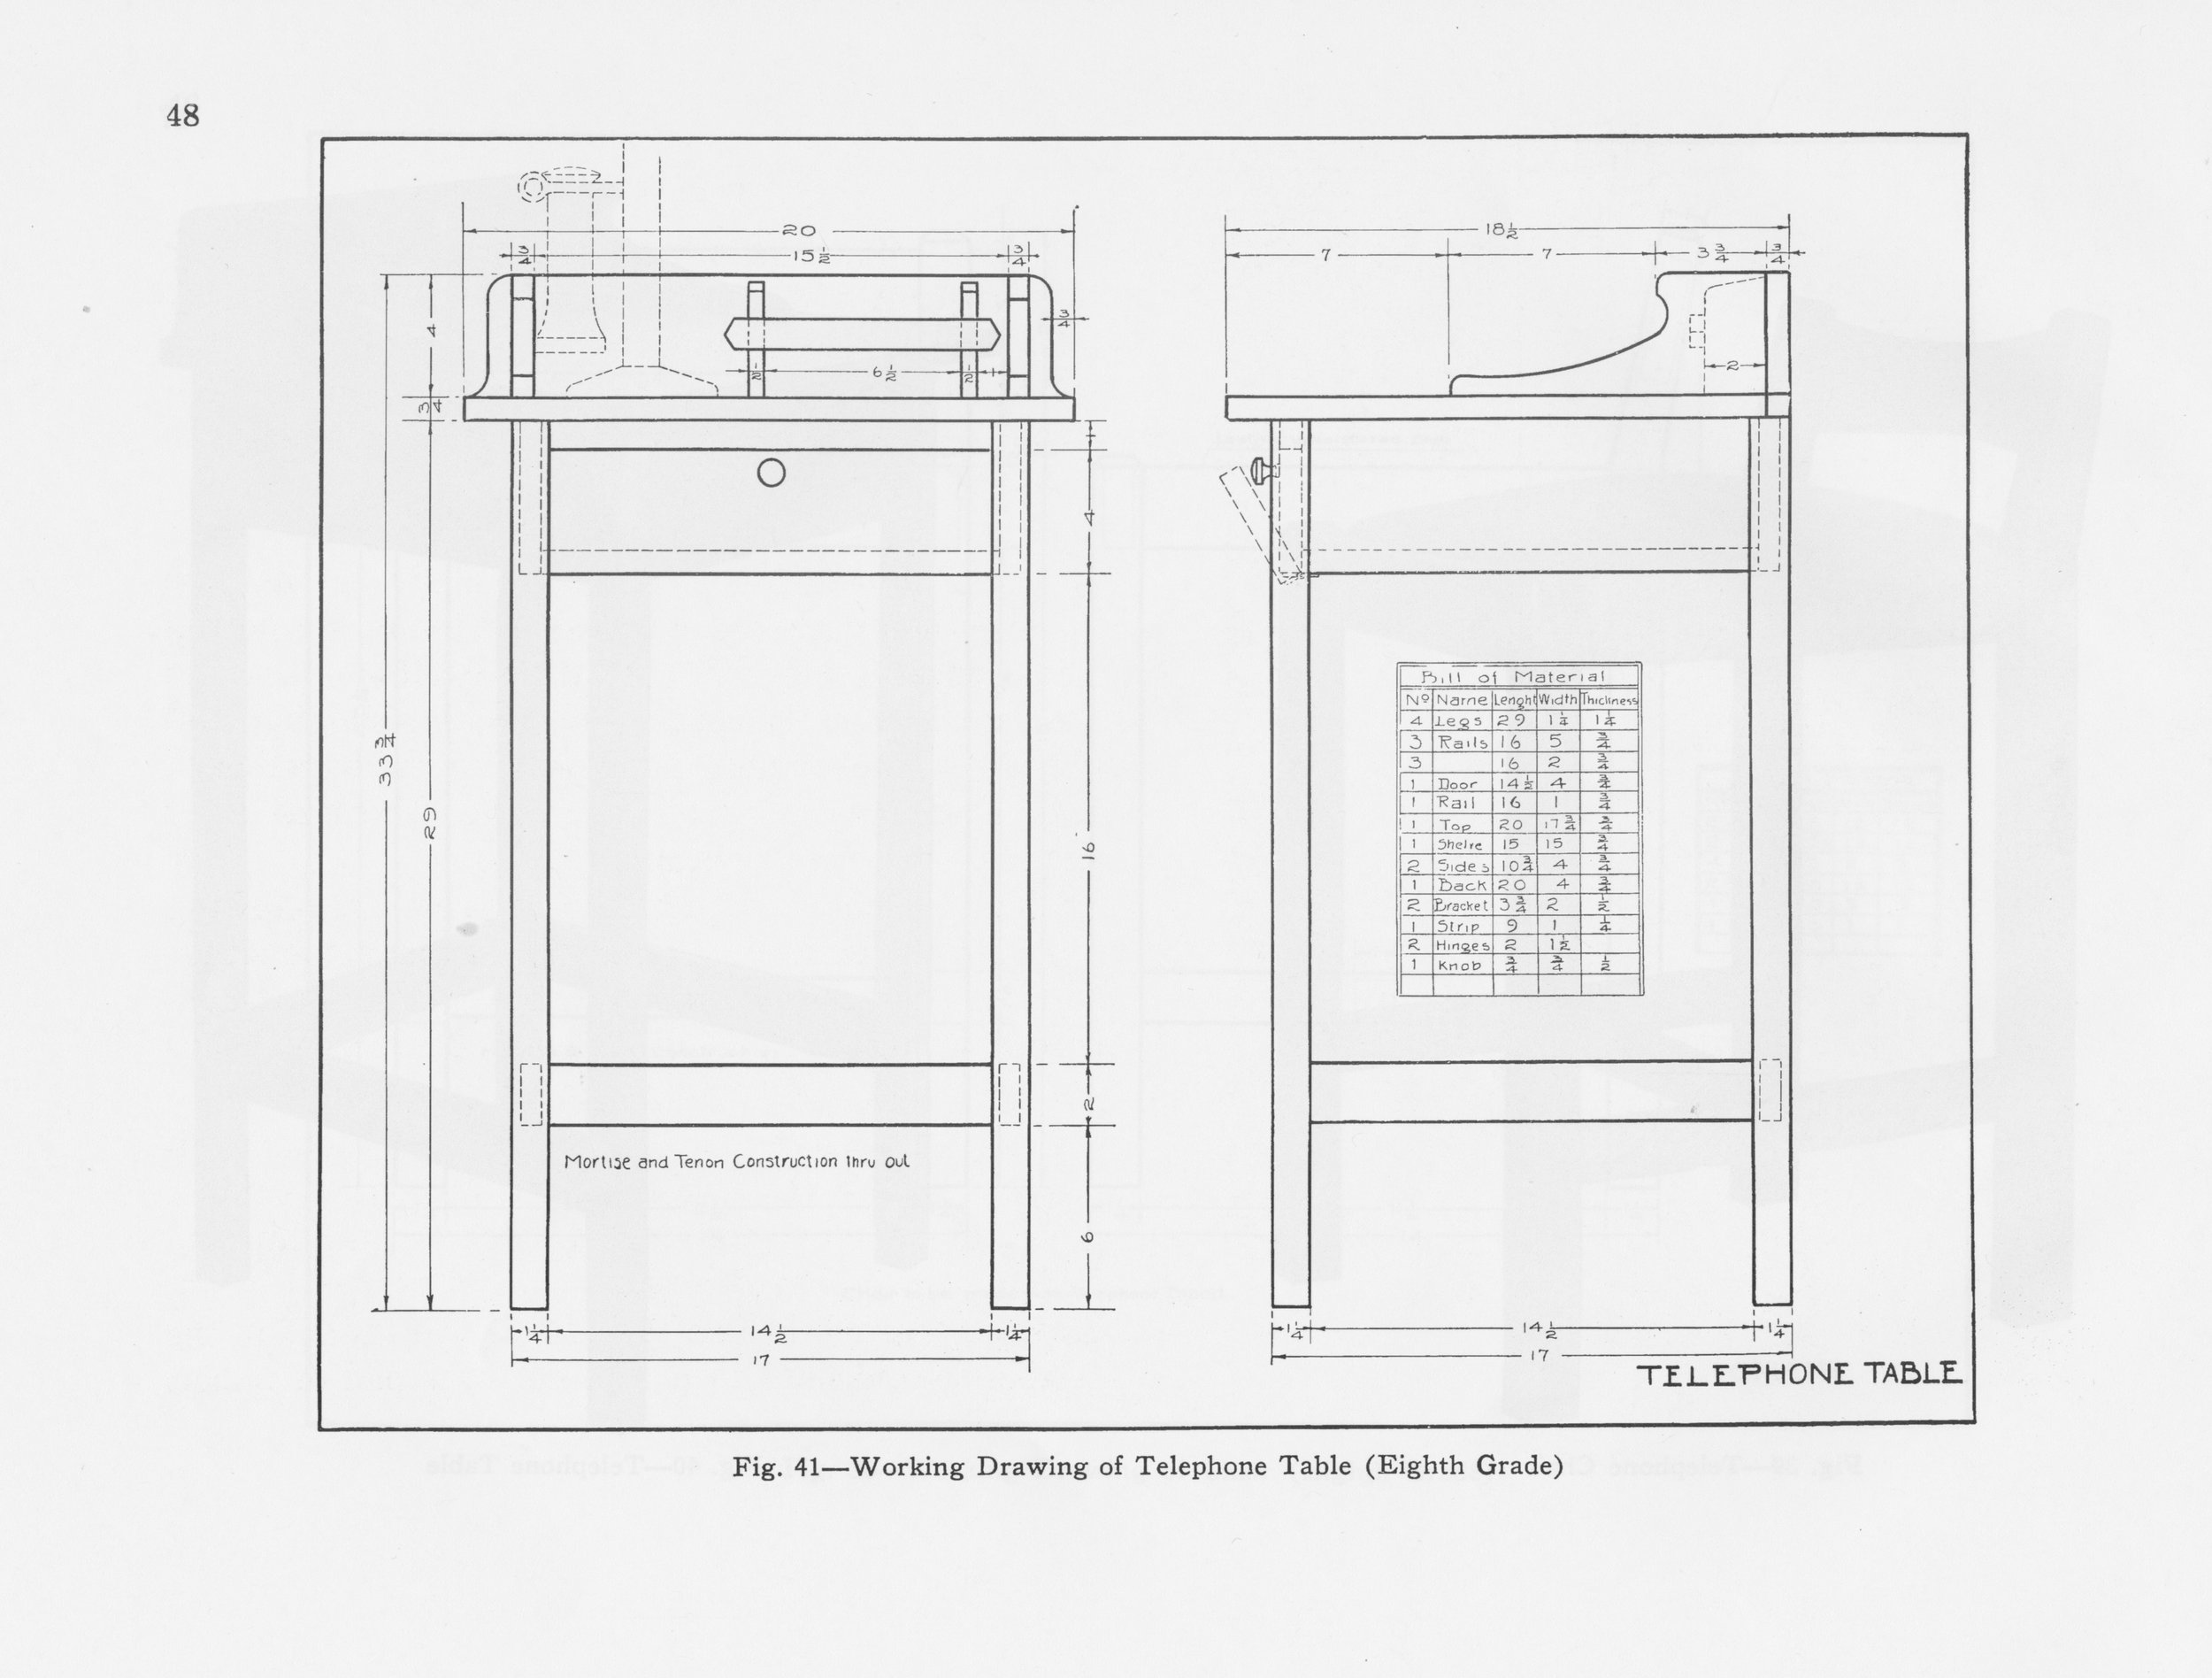
Plans for a telephone table.
from: Worst, Edward F. Easy Mission-Style Woodworking Projects, Dover, Mineola, NY, 2005, p. 48.
The book’s plan includes a hinged door compartment for stowing the telephone book (ask your Mom), whereas ours would include a fully functional inset drawer here - two drawers, actually. My rough plan, below, kept the 42 inch clock bench height but this was reduced a few inches during construction to avoid having to also make a step stool for the diaper changer’s use. I kept the open leg work but added a vertical brace in the center. Looking good so far.
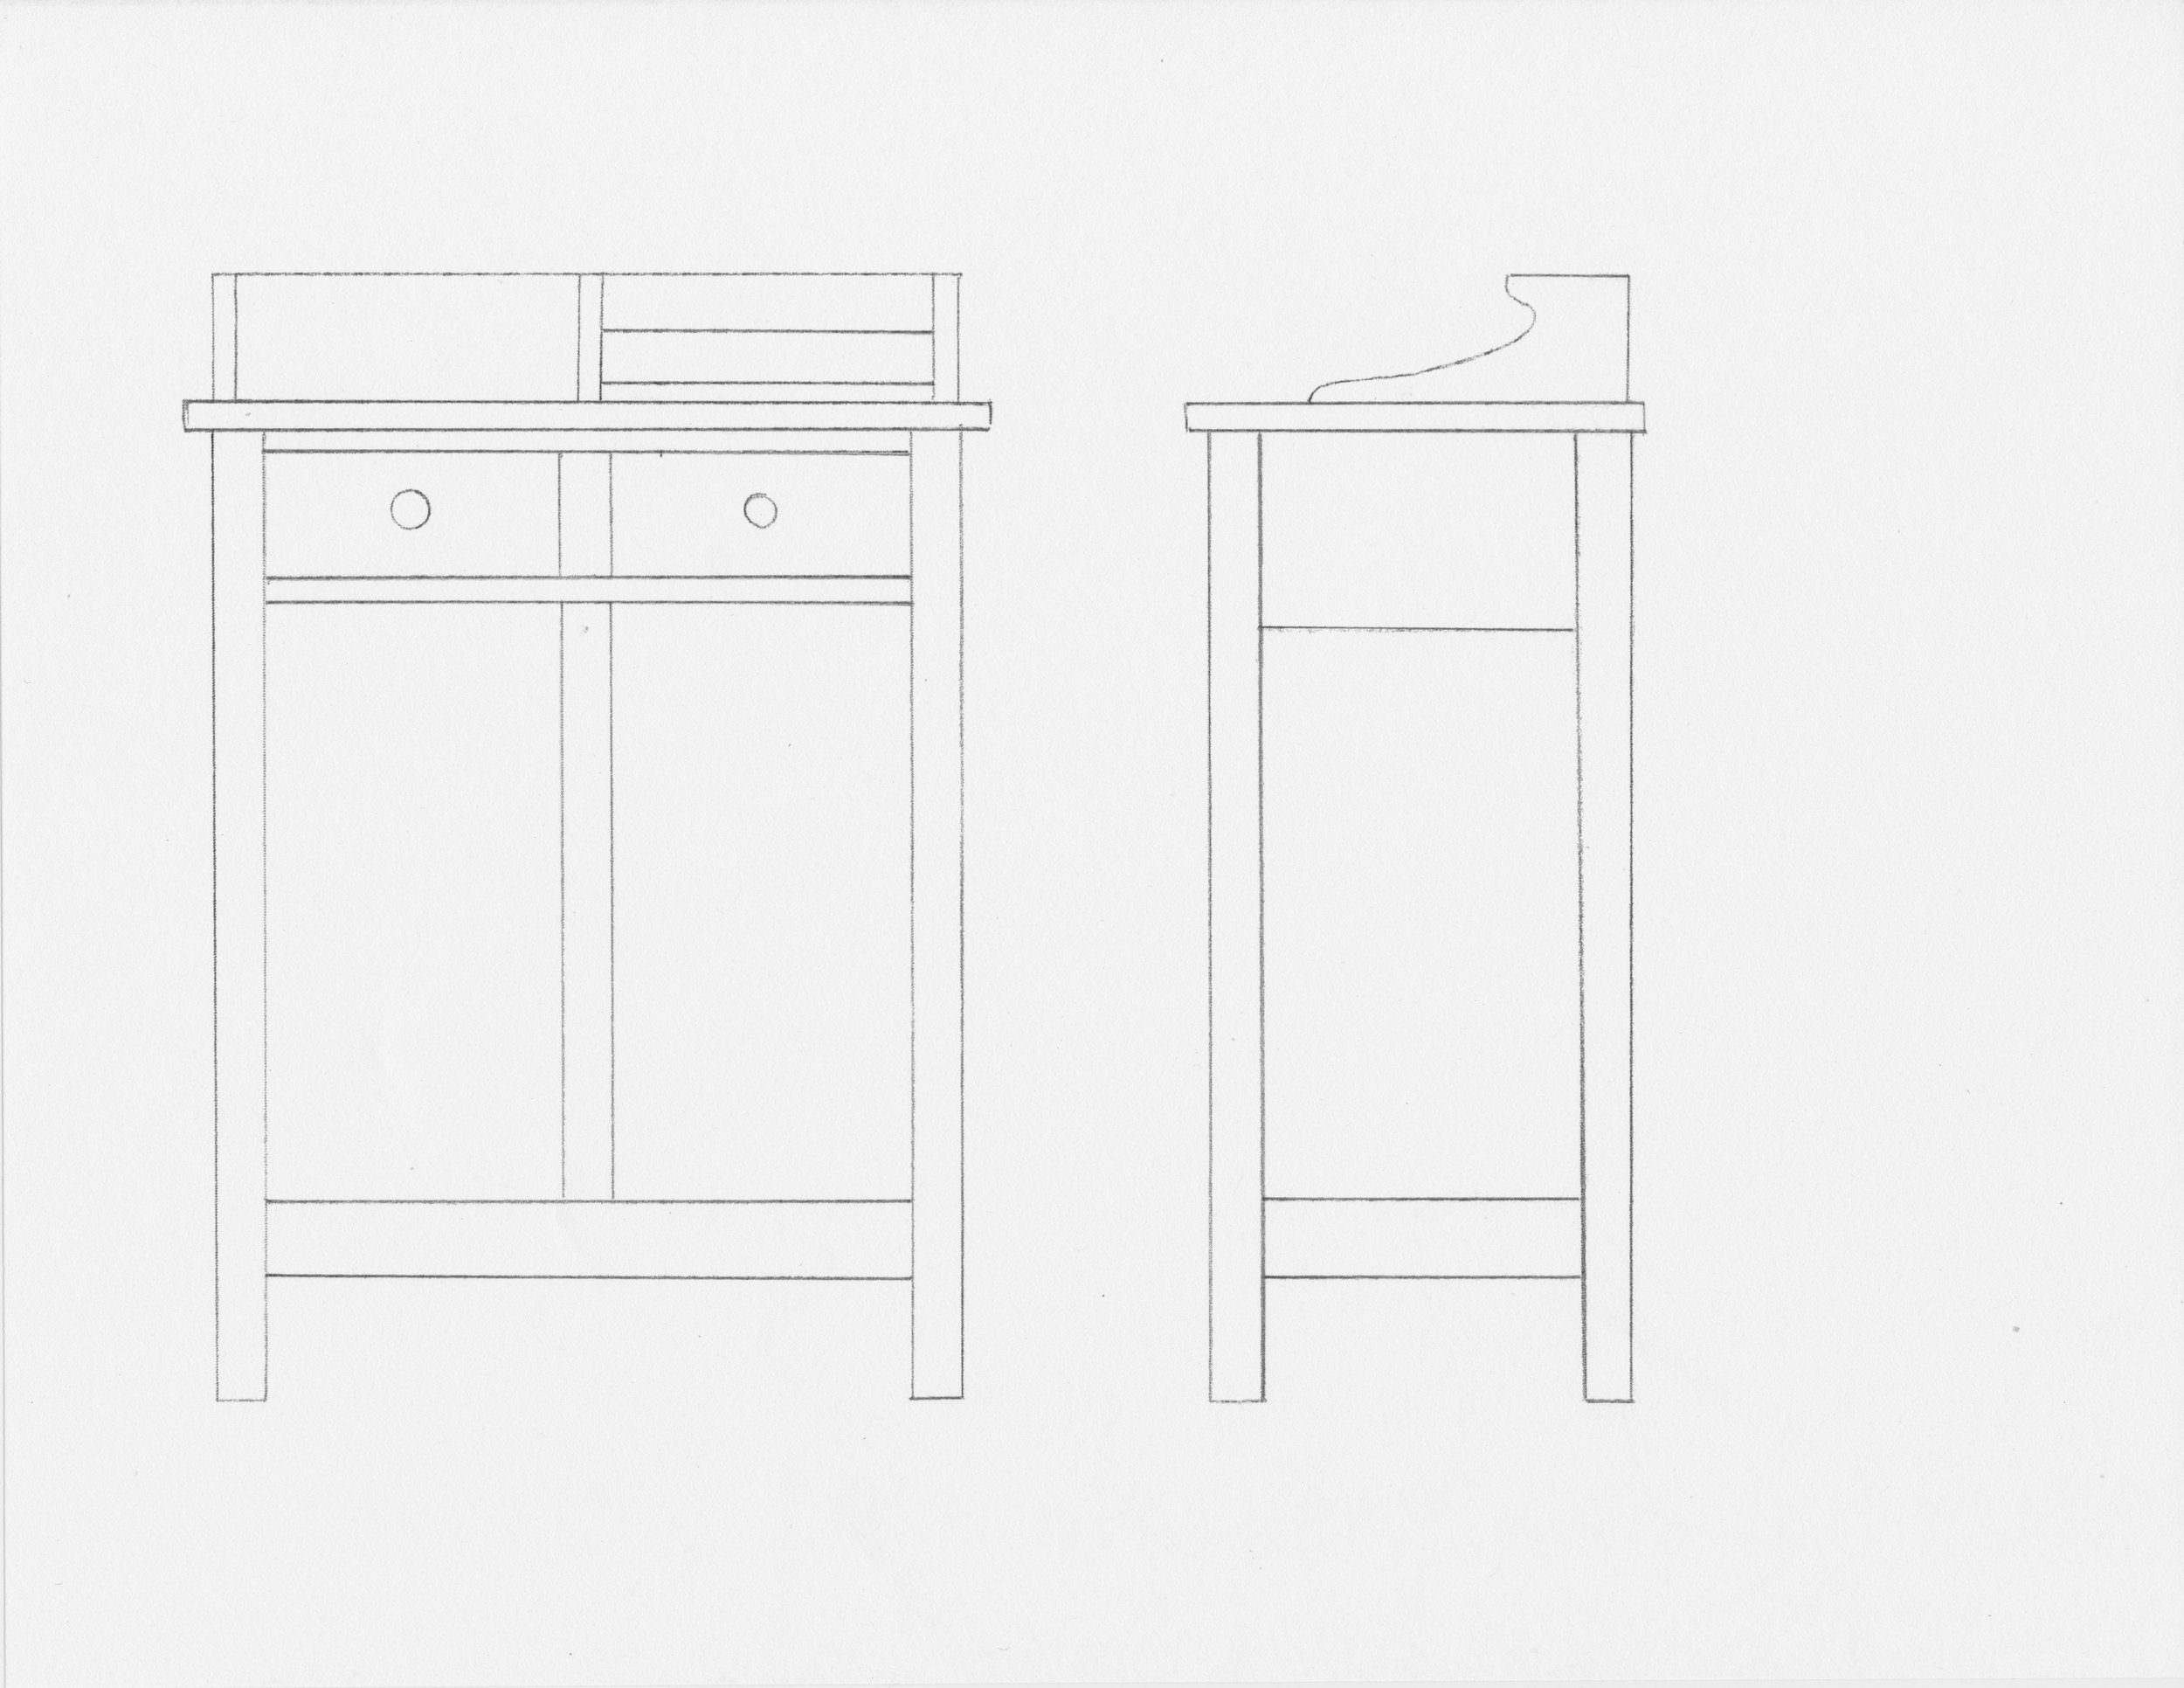
Clock/Diaper bench plan
Materials
In keeping with the tradition of mission furniture the original piece was done in quarter sawn white oak. I also wanted some nice solid hardwood for this piece but was not married to oak. Since time was of the essence and I had recently “workshop equilibrated” some cherry and ash boards for a Korean shelf project, I thought these could be nicely re-purposed here instead. In particular, I had some 4/4 quarter sawn cherry boards that should make for nice and stable leg parts. The table top would come from a 5/4 ash specimen, also with tight and uniform grain. 4/4 Cherry flat sawn boards would be used for the remaining external parts and various oaks and poplar for the draw components. I found some turned Shaker knobs for the drawers to complete the piece in keeping with the original design.

Cherry planks marked for cutting
Dimensioning
When making tables I like to start with the legs. In the end they will be the least conspicuous element, but during construction that’s where all of the joinery occurs. Our square legs would be 2 x 2 in. but since my boards were only half of this width they would first needed to be thickness planed, ripped and edge joined together. These were then smoothed with the scraper and cut to 35 in. length - as mentioned, a bit shorter than planned but a more convenient height for diaper operations. They would now be heavily morticed to accept the top and bottom rails that would connect it all together. This process can be made simple by adhering to common distances throughout: 1/4 in. set backs; 5/8 in. mortice depth; 1/2 in. wide tenons, etc. A few stop blocks and some forethought as to the order of operations and it all comes together rather easily. The tenoned pieces were fashioned last so that they could be formed to exactly match the width of the morticed openings. This was done at the table saw with a dado blade and then parred further with a shoulder plane to get a nice, “squeaky” fit. To join the center “post” I decided to use dowels instead of tenons. I always wanted to try my Dad’s old Dowl-it (no “e”) doweling kit and found that it worked smooth and accurate for this purpose. A very convenient contraption invented in 1949 and still in production, today.

The Dowl-it self-centering drill guide in use
The parts were then smoothed with a card scraper and readied for assembly.
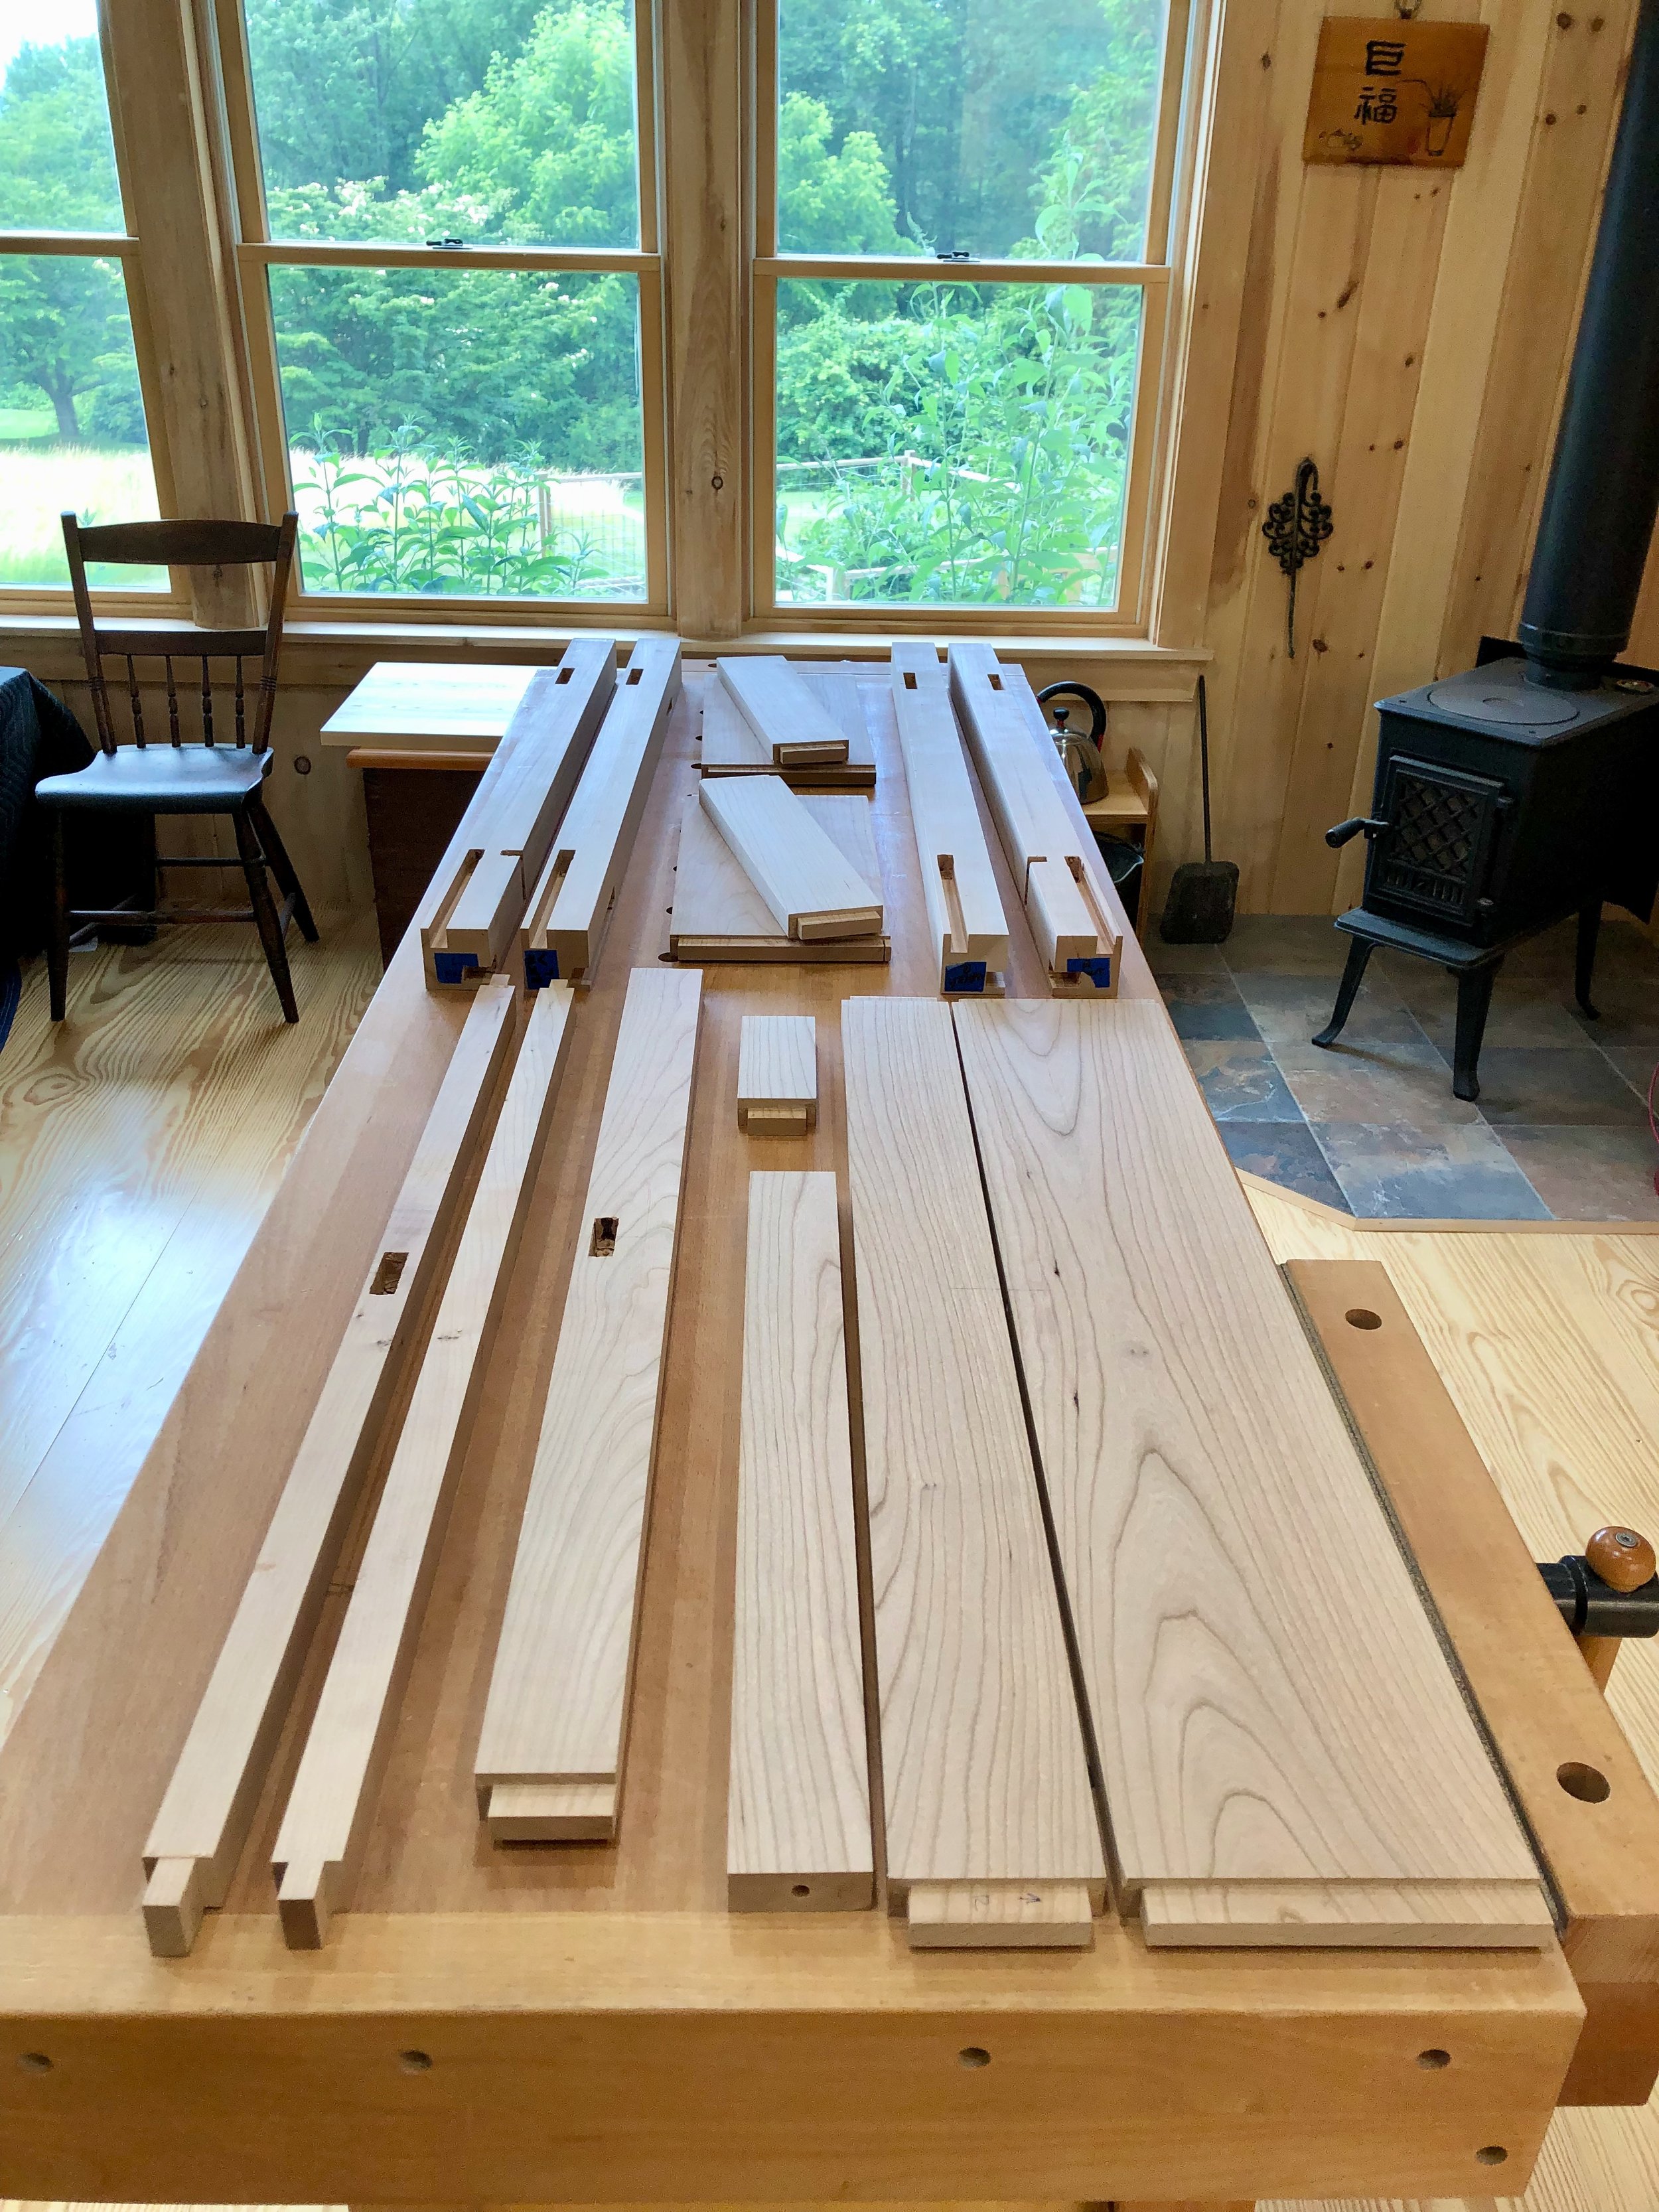
All 15 leg parts ready to go.
I decided to use 3/4 in. plywood as a bottom shelf for the drawers to run on and this would be attached by pocket screws to the frame elements during assembly. The other interior parts assisting drawer operation were made out of scrap oak pieces. For the table top I cross cut a beautifully figured 5/4 ash board in half, thickness planed to a uniform 1 1/8 in. depth and edge joined the two pieces with the aid of wooden biscuits. This was then smoothed and cut to final dimensions with a track saw.
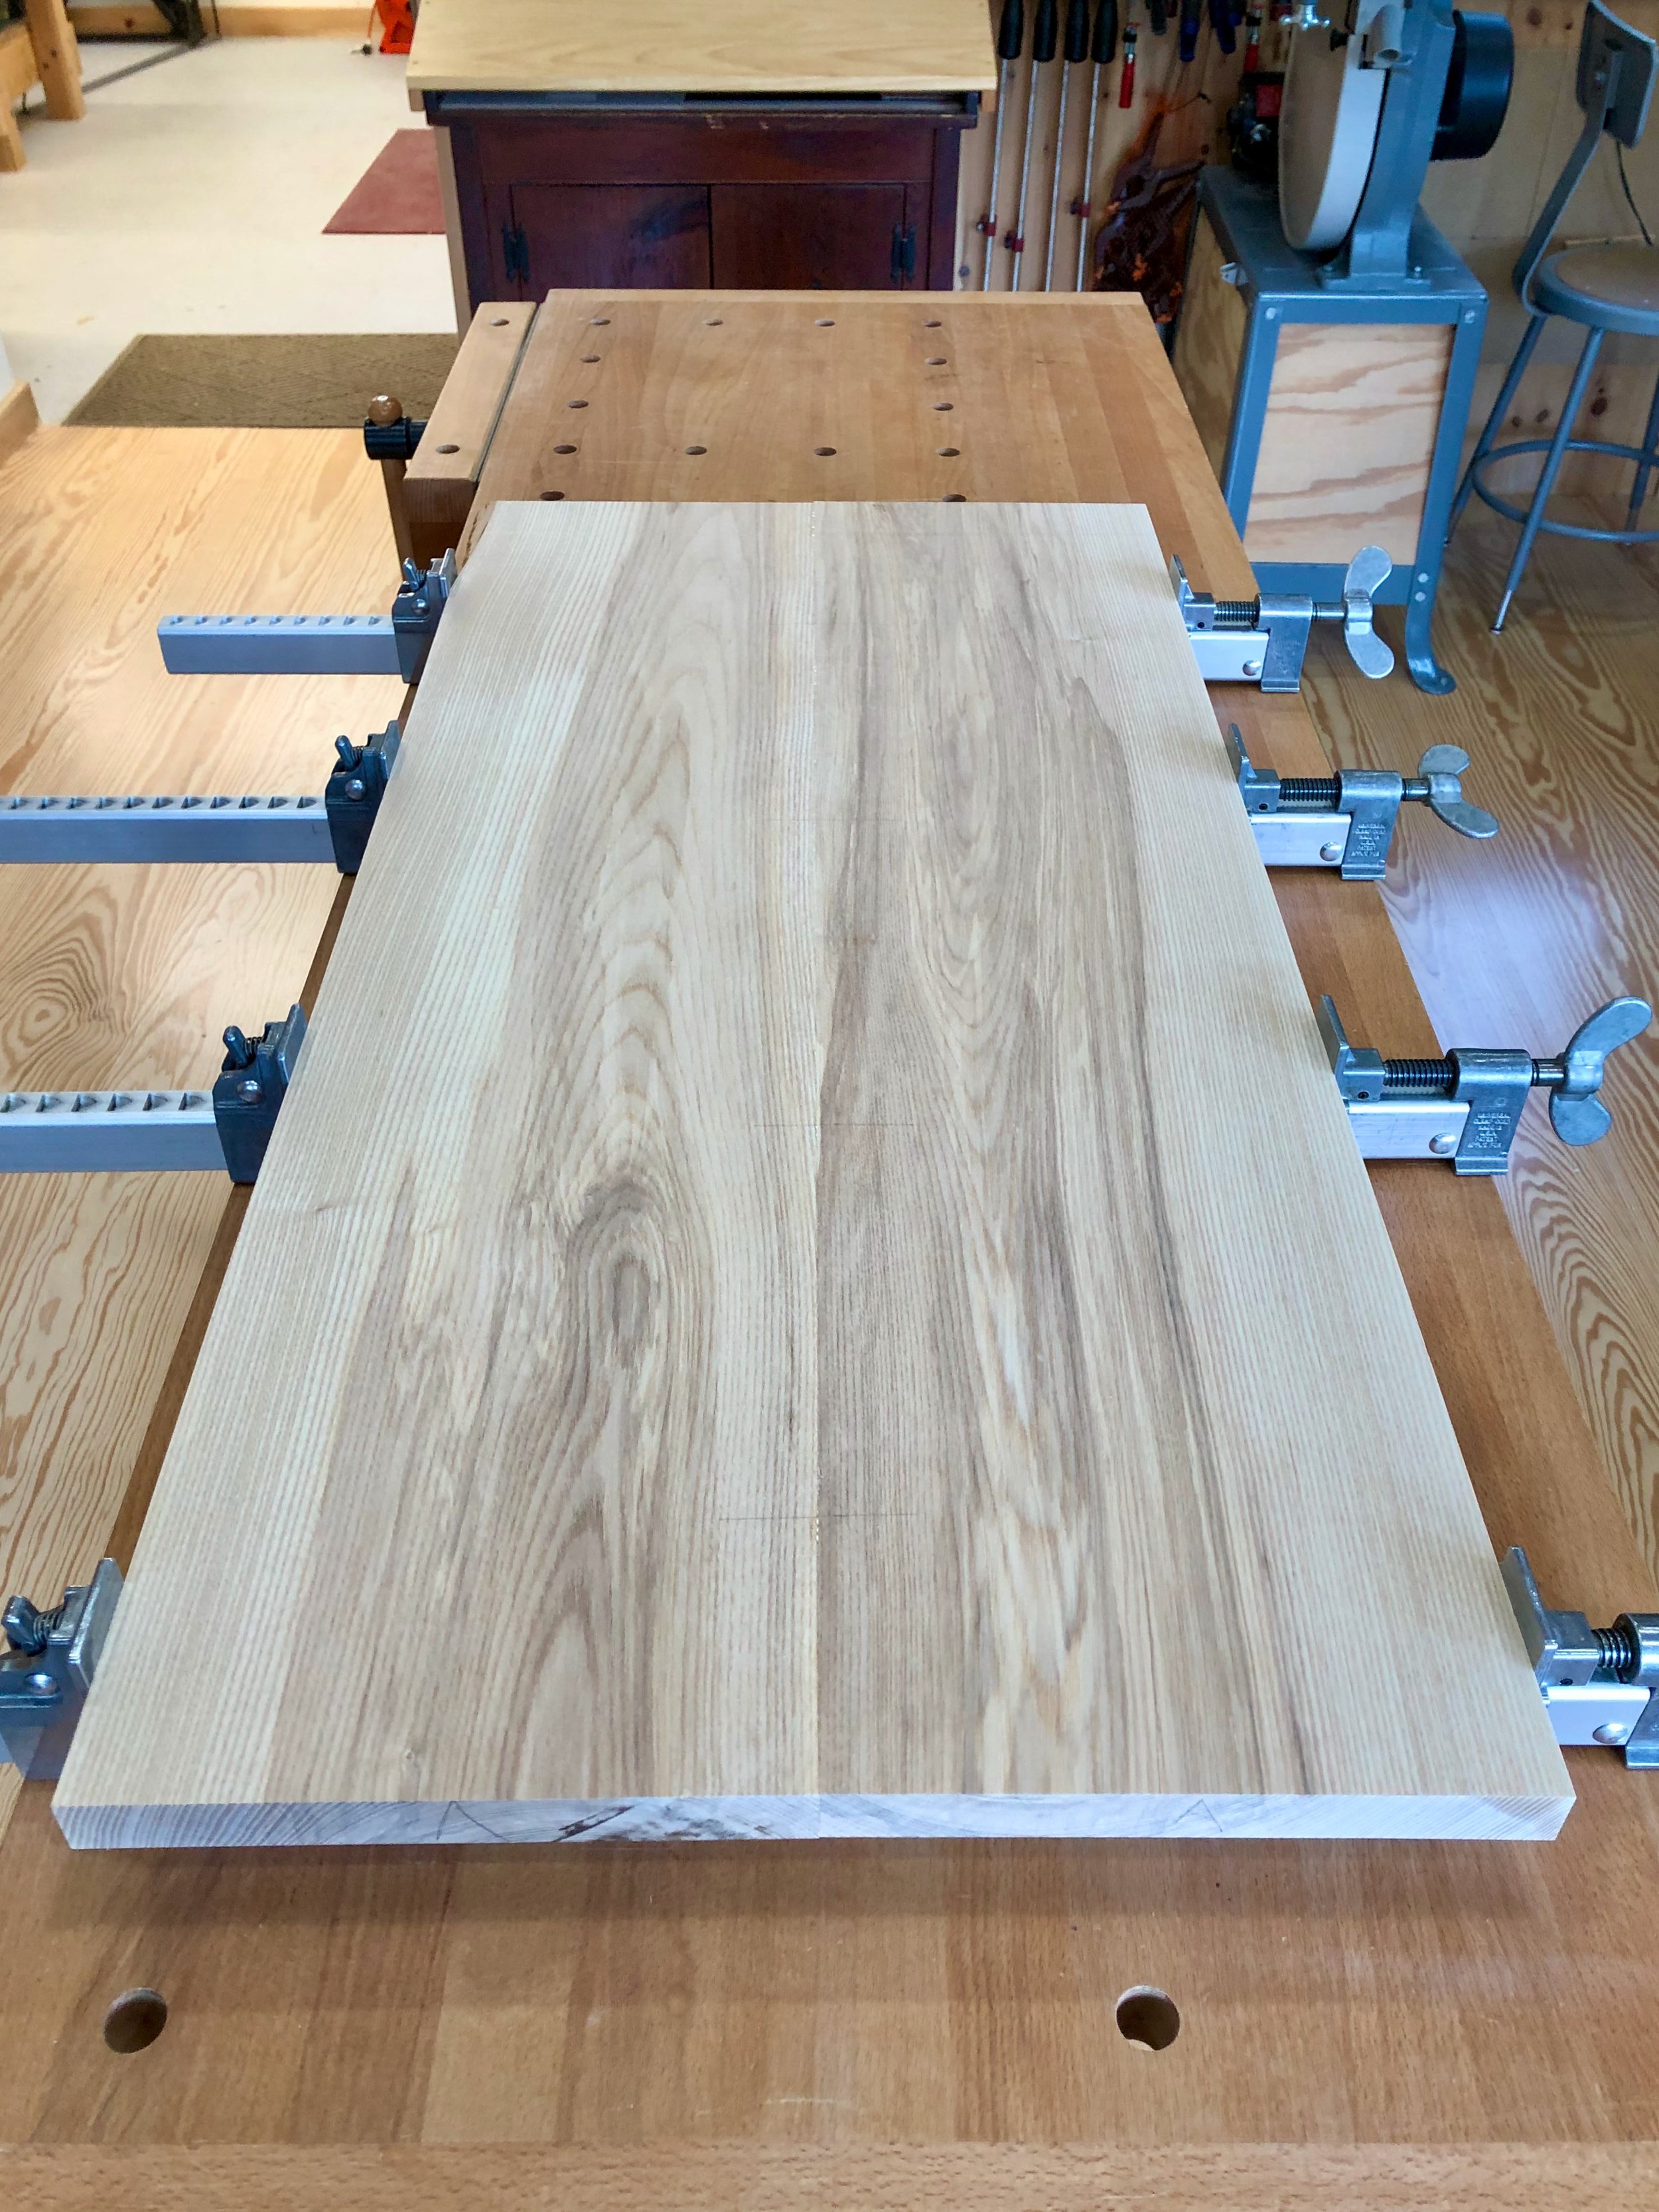
Glueing ash to form the top
Assembly & Finish
I chose to assemble the frame at this point, even though the trim elements for the tabletop would still need to be made. This would let me get started on the drawers, and the bench could also be carried back into the house for emergency diaper use should construction go slow. First, two legs and their connecting stretchers were glued together - one set in the morning and then the second set directly on top of that one in the afternoon. This maneuver lets me be sure that they are identical to one another.
Glueing the second leg assembly, templated on top of the first
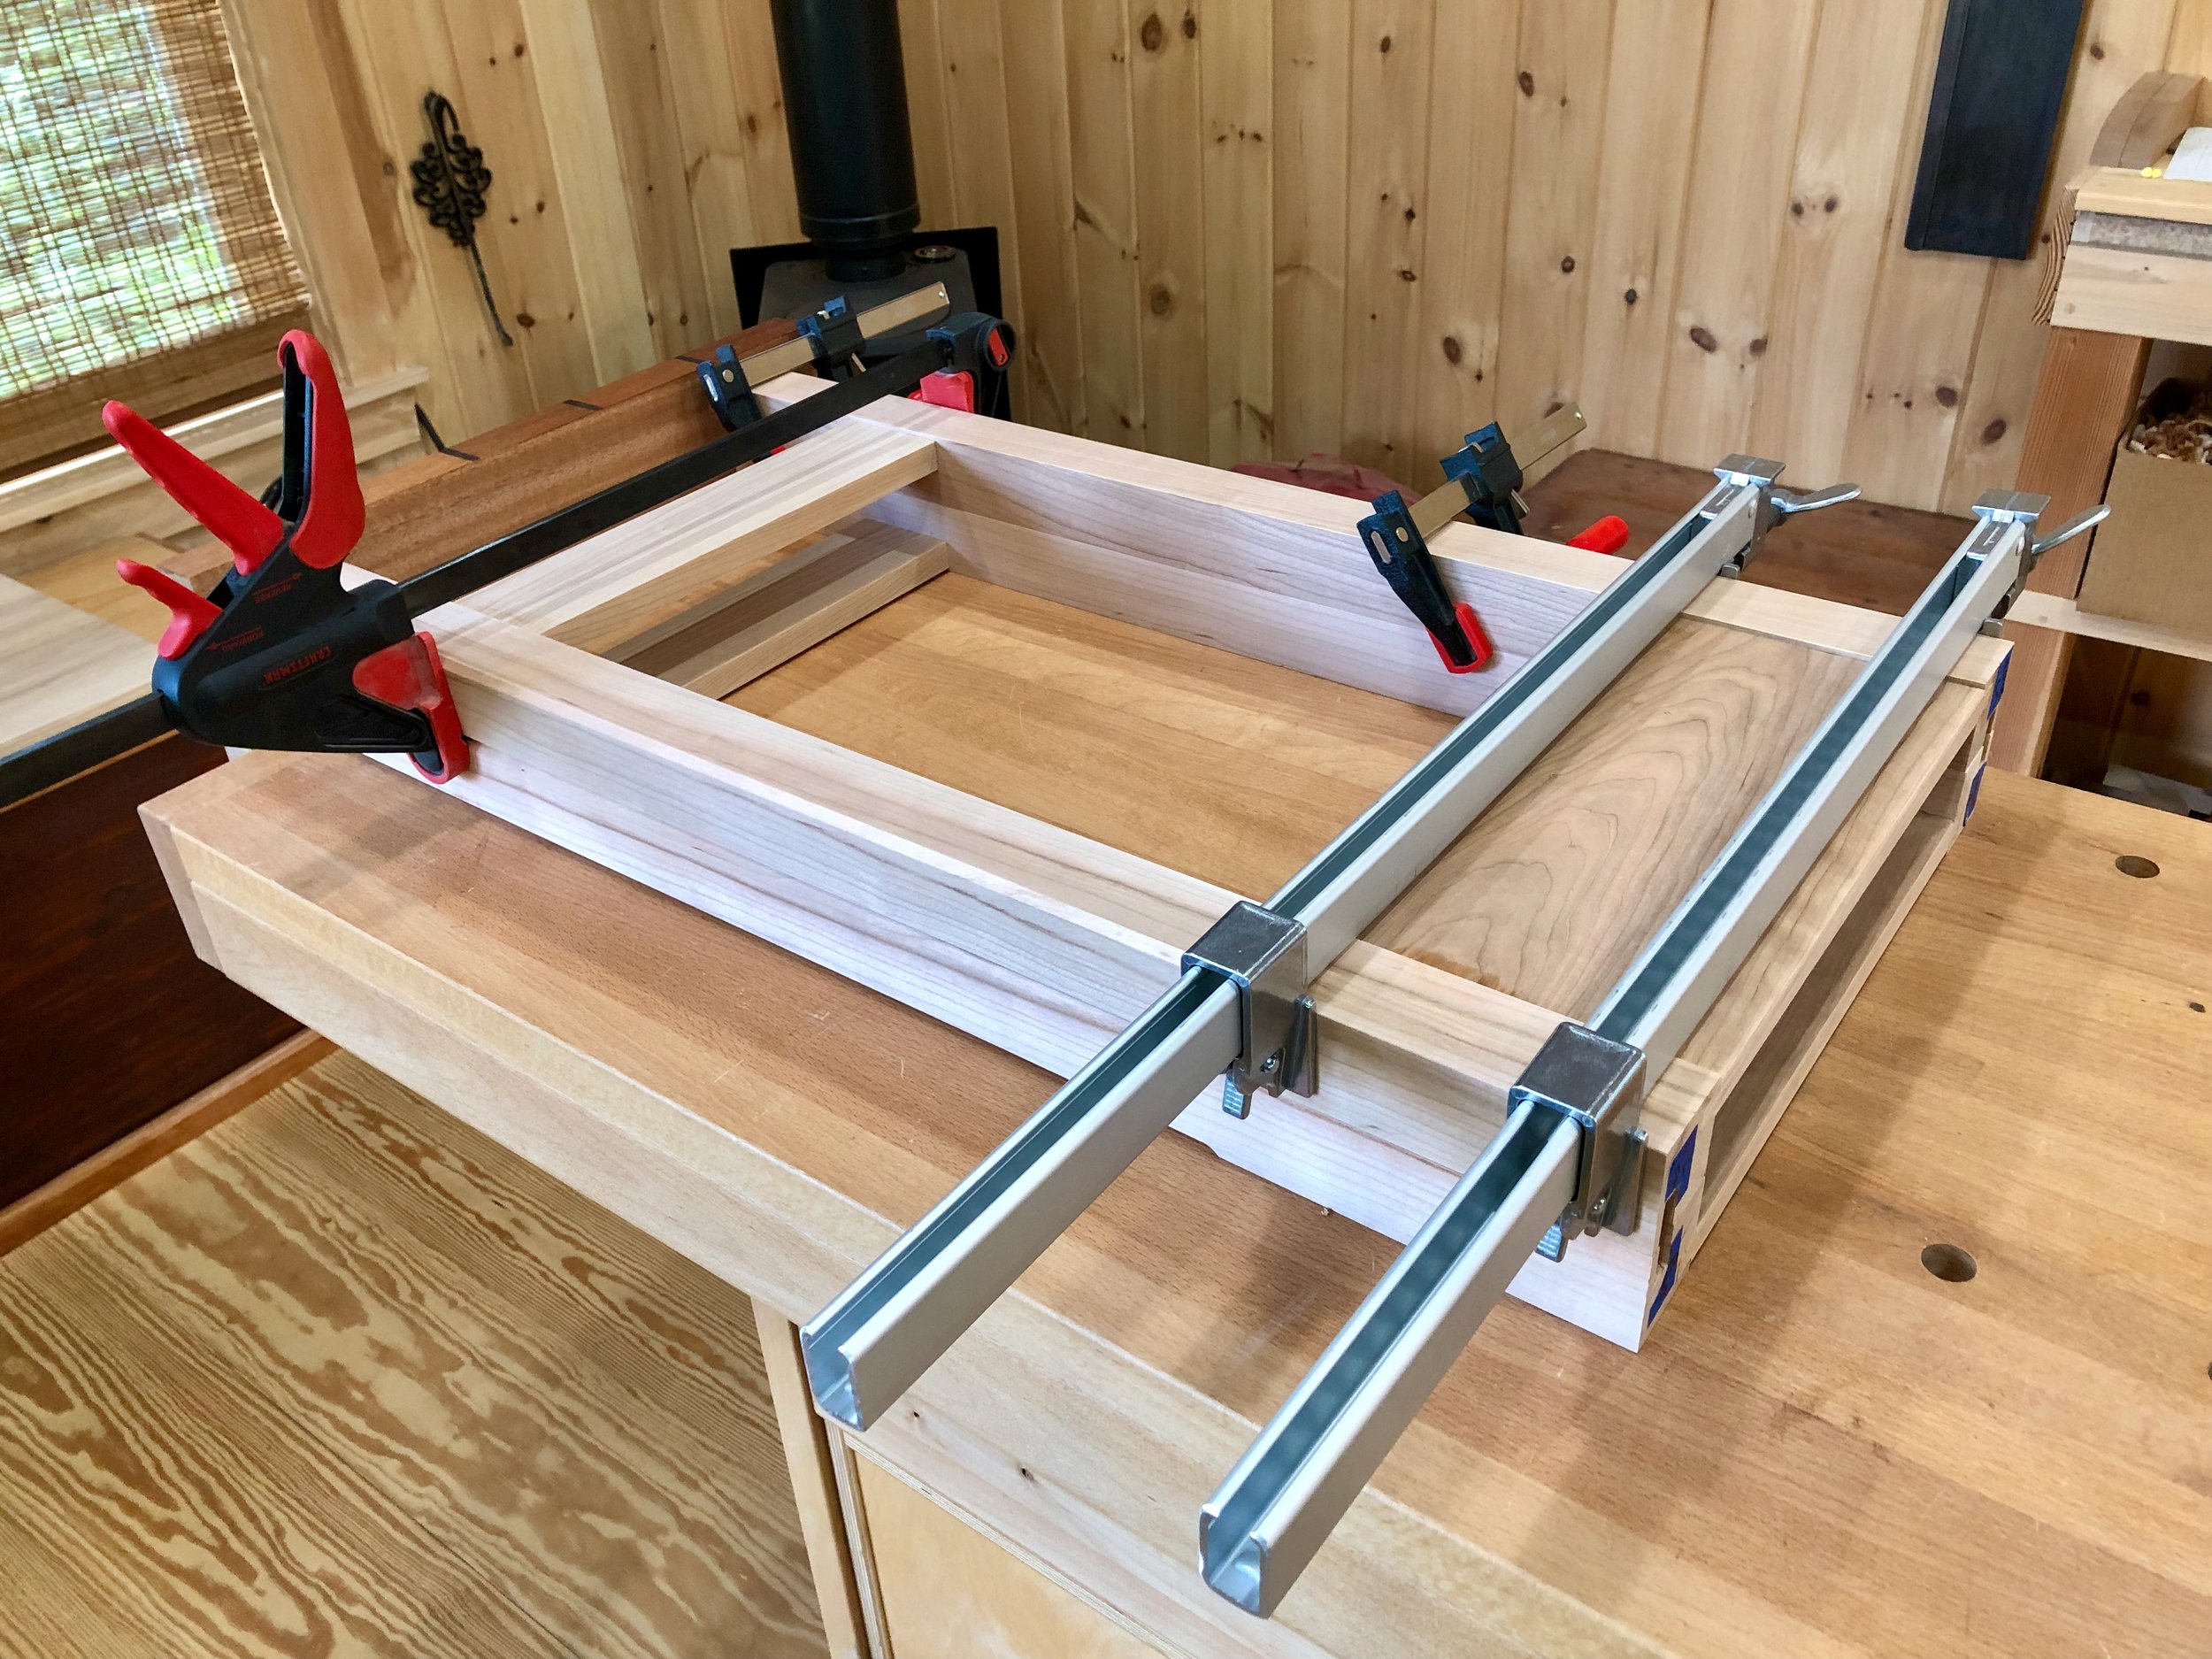
Glue-up of the entire frame was accomplished the following day, employing extra assistance from my wife to limit the potential for catastrophe. These pieces can get both heavy and unwieldy towards the end of the tenon pounding & clamping process, but glue doesn’t care. The interior drawer parts were then cut from oak and glued/screwed in place.

Frame intact
Next came the drawers. I bought an extra 4/4 cherry board from a local yard and this would furnish both the drawer fronts and trim along the tabletop. The drawers were put together with the rabbeted half-dovetail joinery used in recent projects. It’s a clean, quick and easy method that yields a handsome product. You recall the sequence: [fit the drawer front; create the box and bottom; futz with the carcass dry fit; glue and dowel the drawer parts together; keep on futzing until you like the way it all looks and operates] x 2. Enjoyable work yet I sometimes wonder if we pay cabinetmakers enough.

Drawers complete
The final element is the trim on top that creates a border for the back and sides of the workspace. This was made from 3/4 in. cherry boards using finger joints to mate the corners. The shop-made finger joint jig used for the Rocky Mountain Clock served nicely here. First the trim’s back board was cut on both ends and then the two sides were taped together and the fingers cut-out in a single session.

Both side trim pieces being cut as one using the finger joint jig.
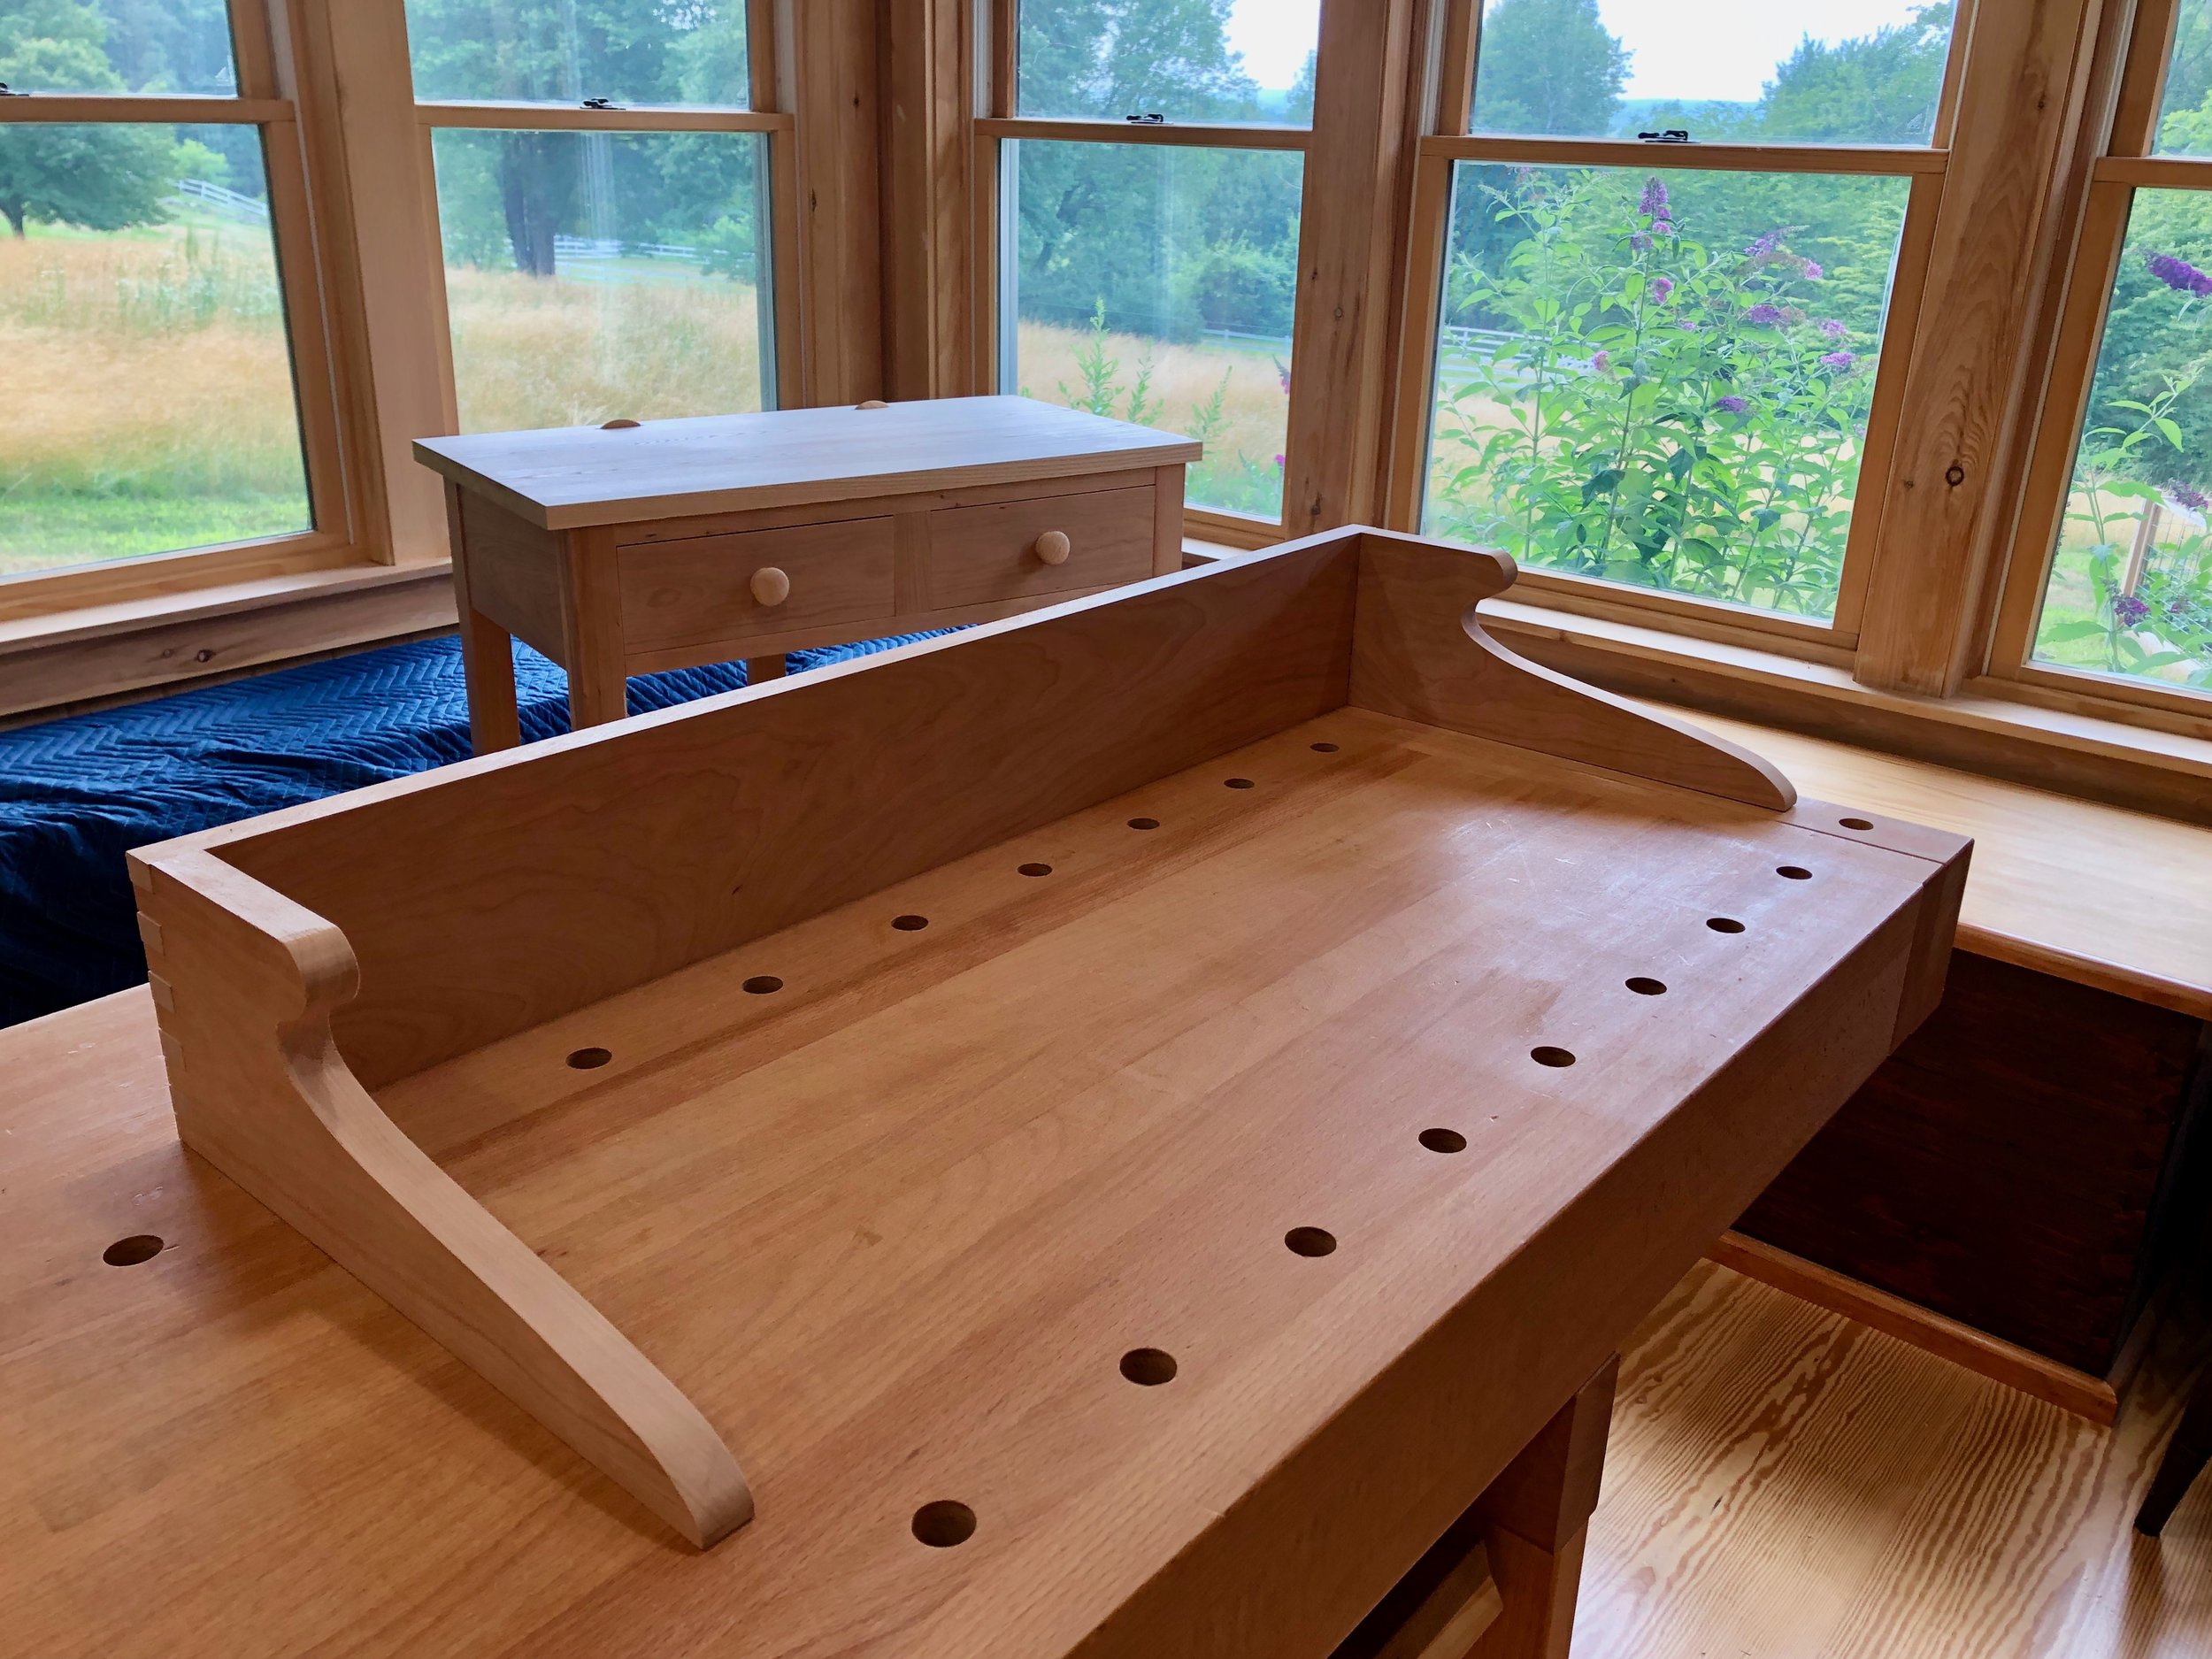
These side pieces, still taped together were then cut to a pattern on the bandsaw and finally made smooth with a rasp and sandpaper. To me this simple curve, copied from the original plan, evokes both the style and innocence of the 1920’s. Biscuits were inserted along the back to assure a uniform and secure attachment of the trim to the table top, and that top was then secured to the upper legs by way of four figure 8 “table irons”. Finally, a hole was drilled in each drawer front for the knobs.
Dry fit table trim
To prepare the piece for finishing, a light, whole body hand-sanding was conducted. This removed extraneous clamp marks and gave a uniform surface all around. The piece was then sealed and preserved with 3 applications of (satin) gel polyurethane. This coating is very durable and, to me, it is the best way to finish cherry wood without concern for splotching. The knobs, obtained on Amazon.com via China, were of some unidentified hardwood and, while each sports a different grain pattern(?), I decided to leave them alone and not stain them any darker. The existing color contrast of the ash and cherry was enough without adding a competitor. It seemed to work. Following a final (cloth) diaper buff the 1920s telephone table turned clock/diaper bench was complete.

Now, let’s put it to use.

