

Cool Costumer
Still intrigued by 100 year-old plans found in the book: Easy Mission-Style Woodworking Projects, I decided to reproduce a useful item for our bedroom while waiting for the next’s Project’s lumber to equilibrate in the shop. Here’s the story.
I have long sought a place other than the floor to stage my “in-use” clothing at night. You know, garments that are too clean to wash, but too “used” to put back into the dresser and so you plan to wear them another day. Then I read about the project on p. 45 of this former manual for middle school shop teachers titled “The Costumer” and was excited to think that a few days of effort in the Workshop and my search might be over. I reproduce that text here:
“The Costumer shown in Fig. 37 is a very good beginning problem for an eighth-grade boy. It is a large piece of furniture to the boy, and one that he will take great interest in. It is a very useful article when finished, for there is no home in which it cannot find a place, either in the reception hall or bedroom.”
Bingo!, right? Now, at first I was put off by the taunts: Beginning problem? Eighth-grade boy?, but then I remembered that the author was referring to boys from the Greatest Generation who would one day persevere in World War II to save civilization and I made my peace. Now all I needed to do was make Fig. 37 in the Workshop.

Fig. 37
from: Worst, Edward F. Easy Mission-Style Woodworking Projects, Dover, Mineola, NY, 2005, p. 45.
Design
I generally do not follow published plans in my work, but vowed to stick close with this one and, in doing so, consciously try to put myself into the world of a 1920s middle-schooler. That world was simpler, yet harder than today’s, especially outside of the big cities. At my father’s farm house in rural Michigan, life in the 1920’s meant no electricity, no indoor plumbing, no automobile (or tractor), cooking with wood or coal on a big steel stove and few conveniences. His “middle school” was the second room of a two-roomed schoolhouse that lacked, among other things, wood shop facilities. I should ask if the family owned a costumer. It was surely a different time.
Anyway, that plan is reproduced below. It looks to be a straight-forward build and the accompanying text suggests alternatives for the joinery depending on your preference for nails, screws or dowels. I’m leaning toward dowels and will probably forego the wooden clothing pegs for store-bought brass as long as the “look” can be maintained. I also intend to use electricity.

Nicely detailed “working drawing”.
Materials
Cherry wood, a new 5/4 flat sawn plank and some left-over 4/4 material from earlier Projects, would be used for the costumer. Brass hardware from FurnitureKnowledge.com would be used for the hooks.

Cherry, cherry, cherry!
Dimensioning
The finished girth of the pole and leg pieces is 2x2 in. and so the first step was to rip the 1 in. deep boards into 2 in. wide strips, flatten one face and then glue them together in pairs. This created two sufficiently thick “leg” pieces and a 64 in. log “pole”. The rough constructs were then run through the jointer and thickness planer to create square, 2x2 parts.
Starting with the legs, I first needed to relieve material from the undersides. This began by using a 1 inch Forstner bit on the drill press, to create “semi-circle” cavities near both ends of each leg.
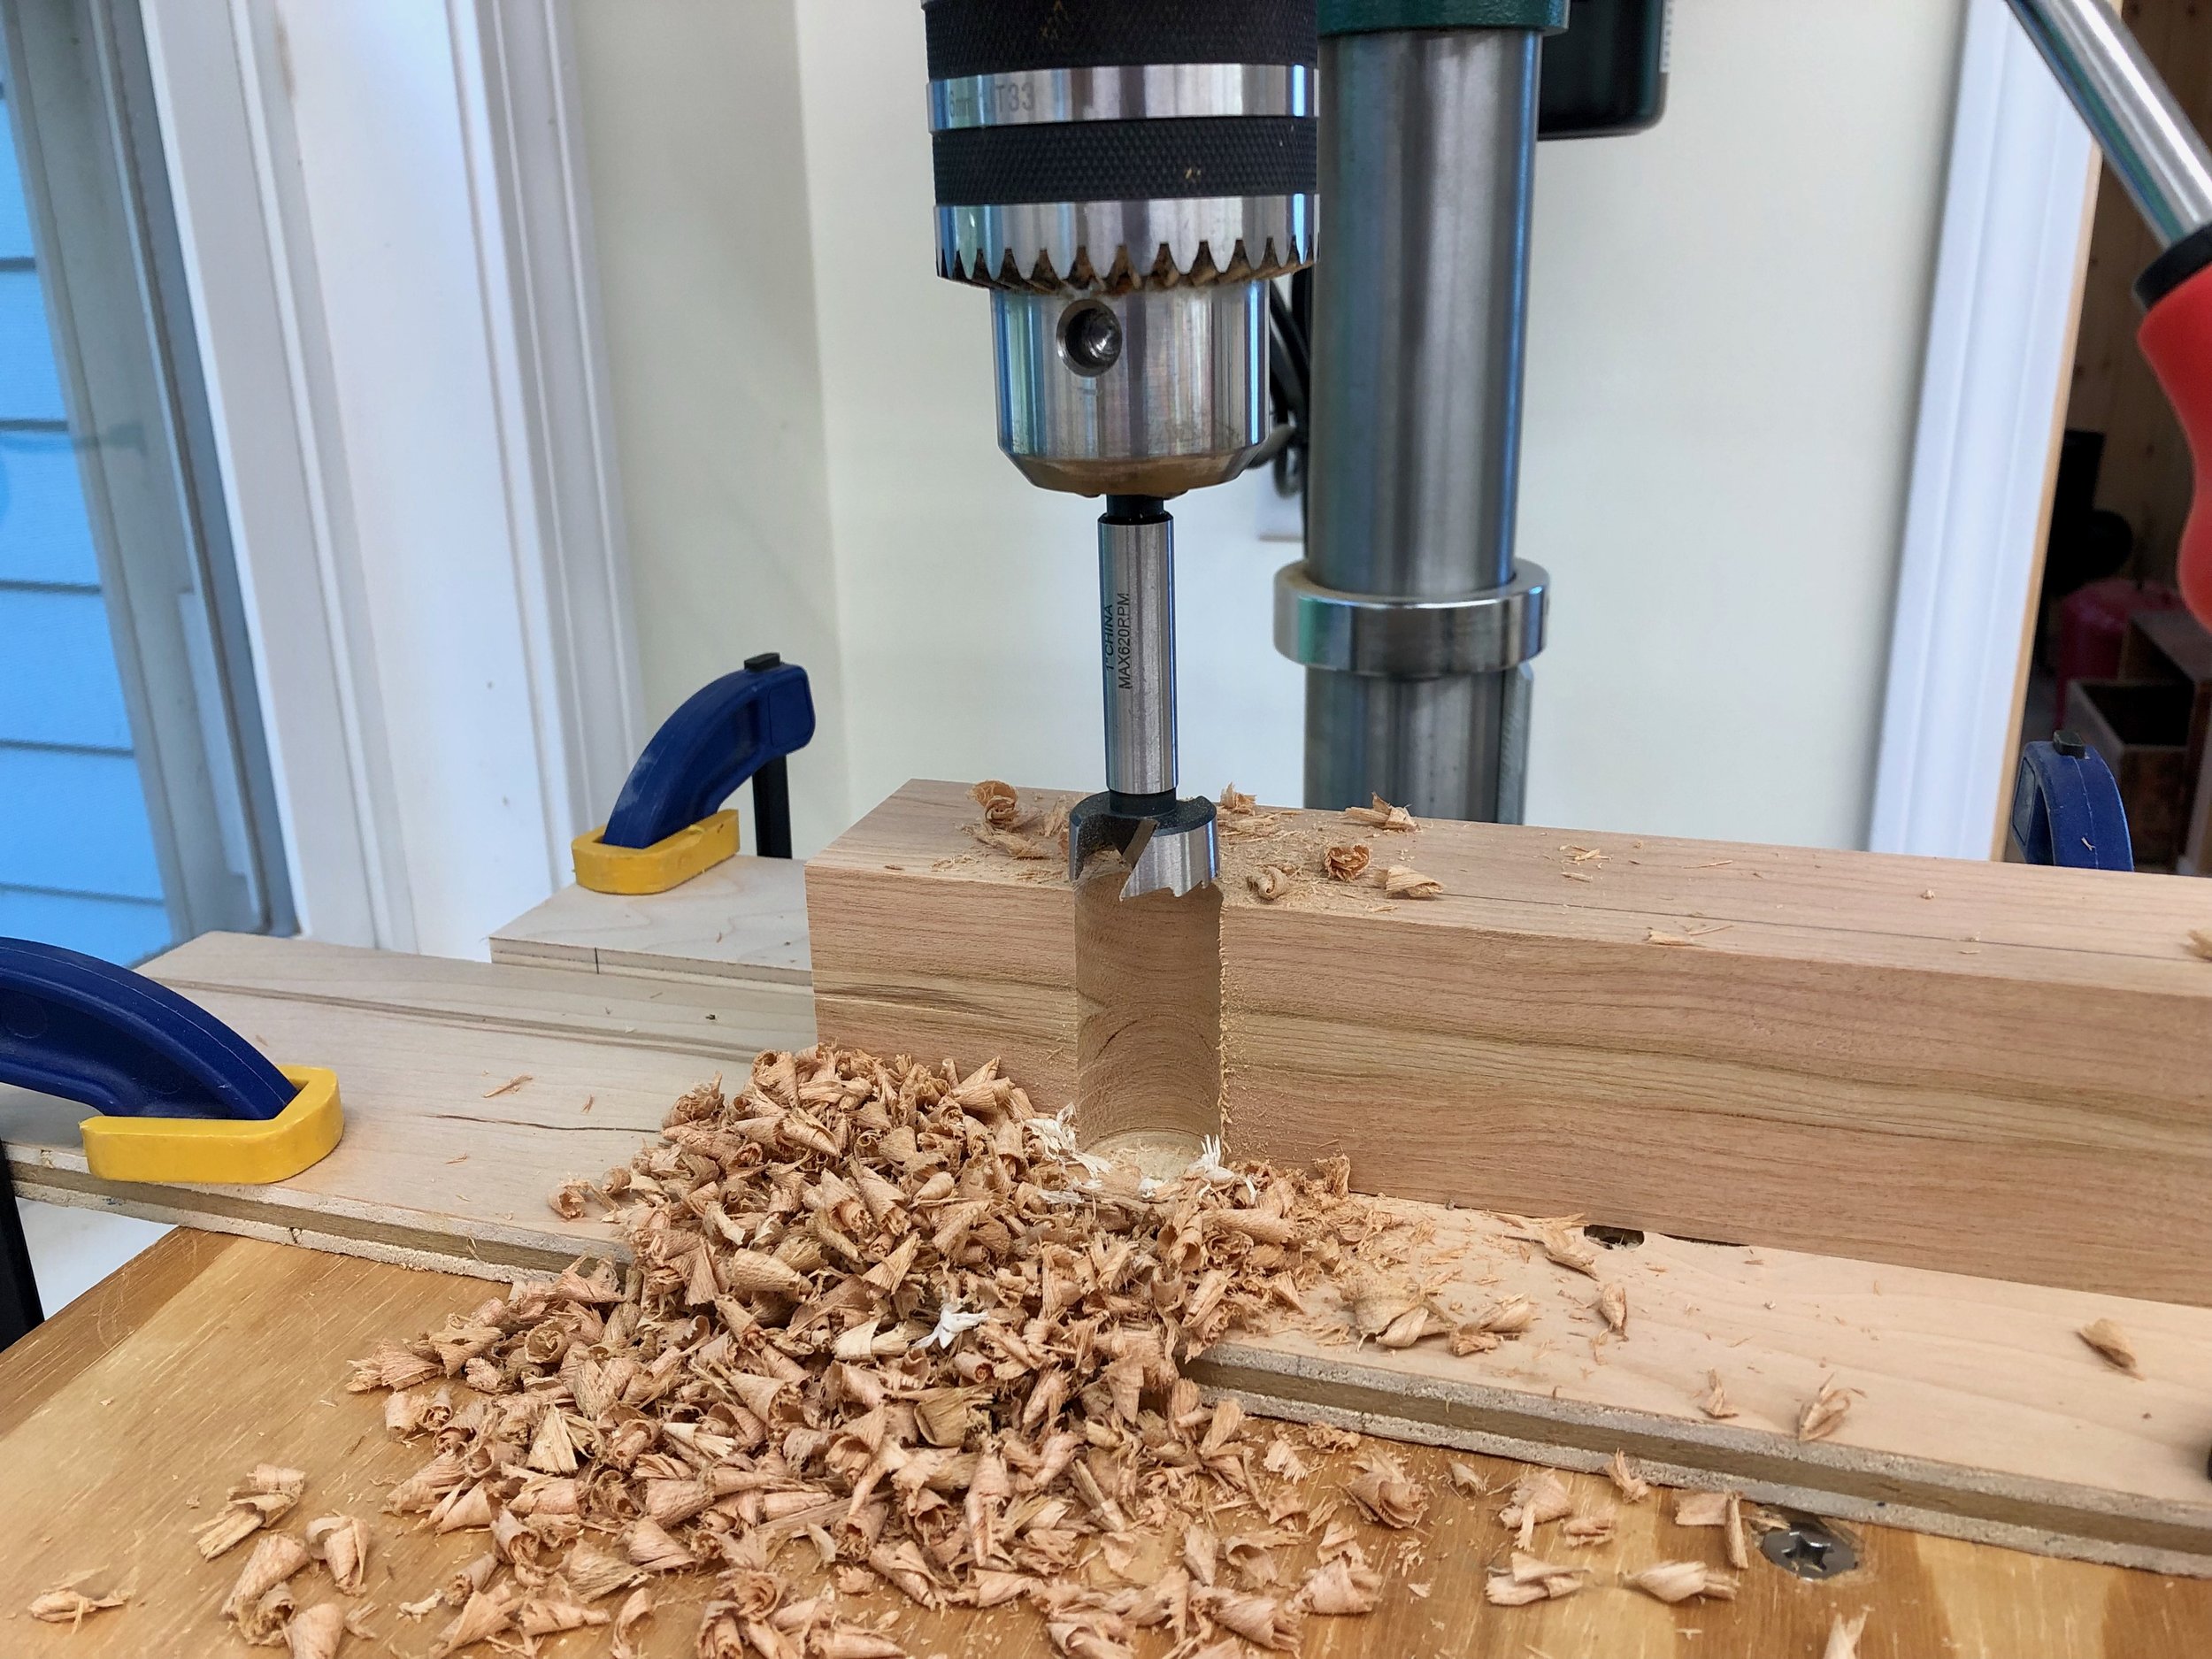
Drilling semi-circles
The material in between the gaps was then removed at the band saw and the resulting surface smoothed with sandpaper. To round the ends of the legs I first drew the desired arc in pencil by tracing the lid of a varnish can. Next the corners were chopped-off at the miter saw and then the extra wood was carefully shaved down to the mark on a disc sander. The picture below shows the penultimate and ultimate forms.
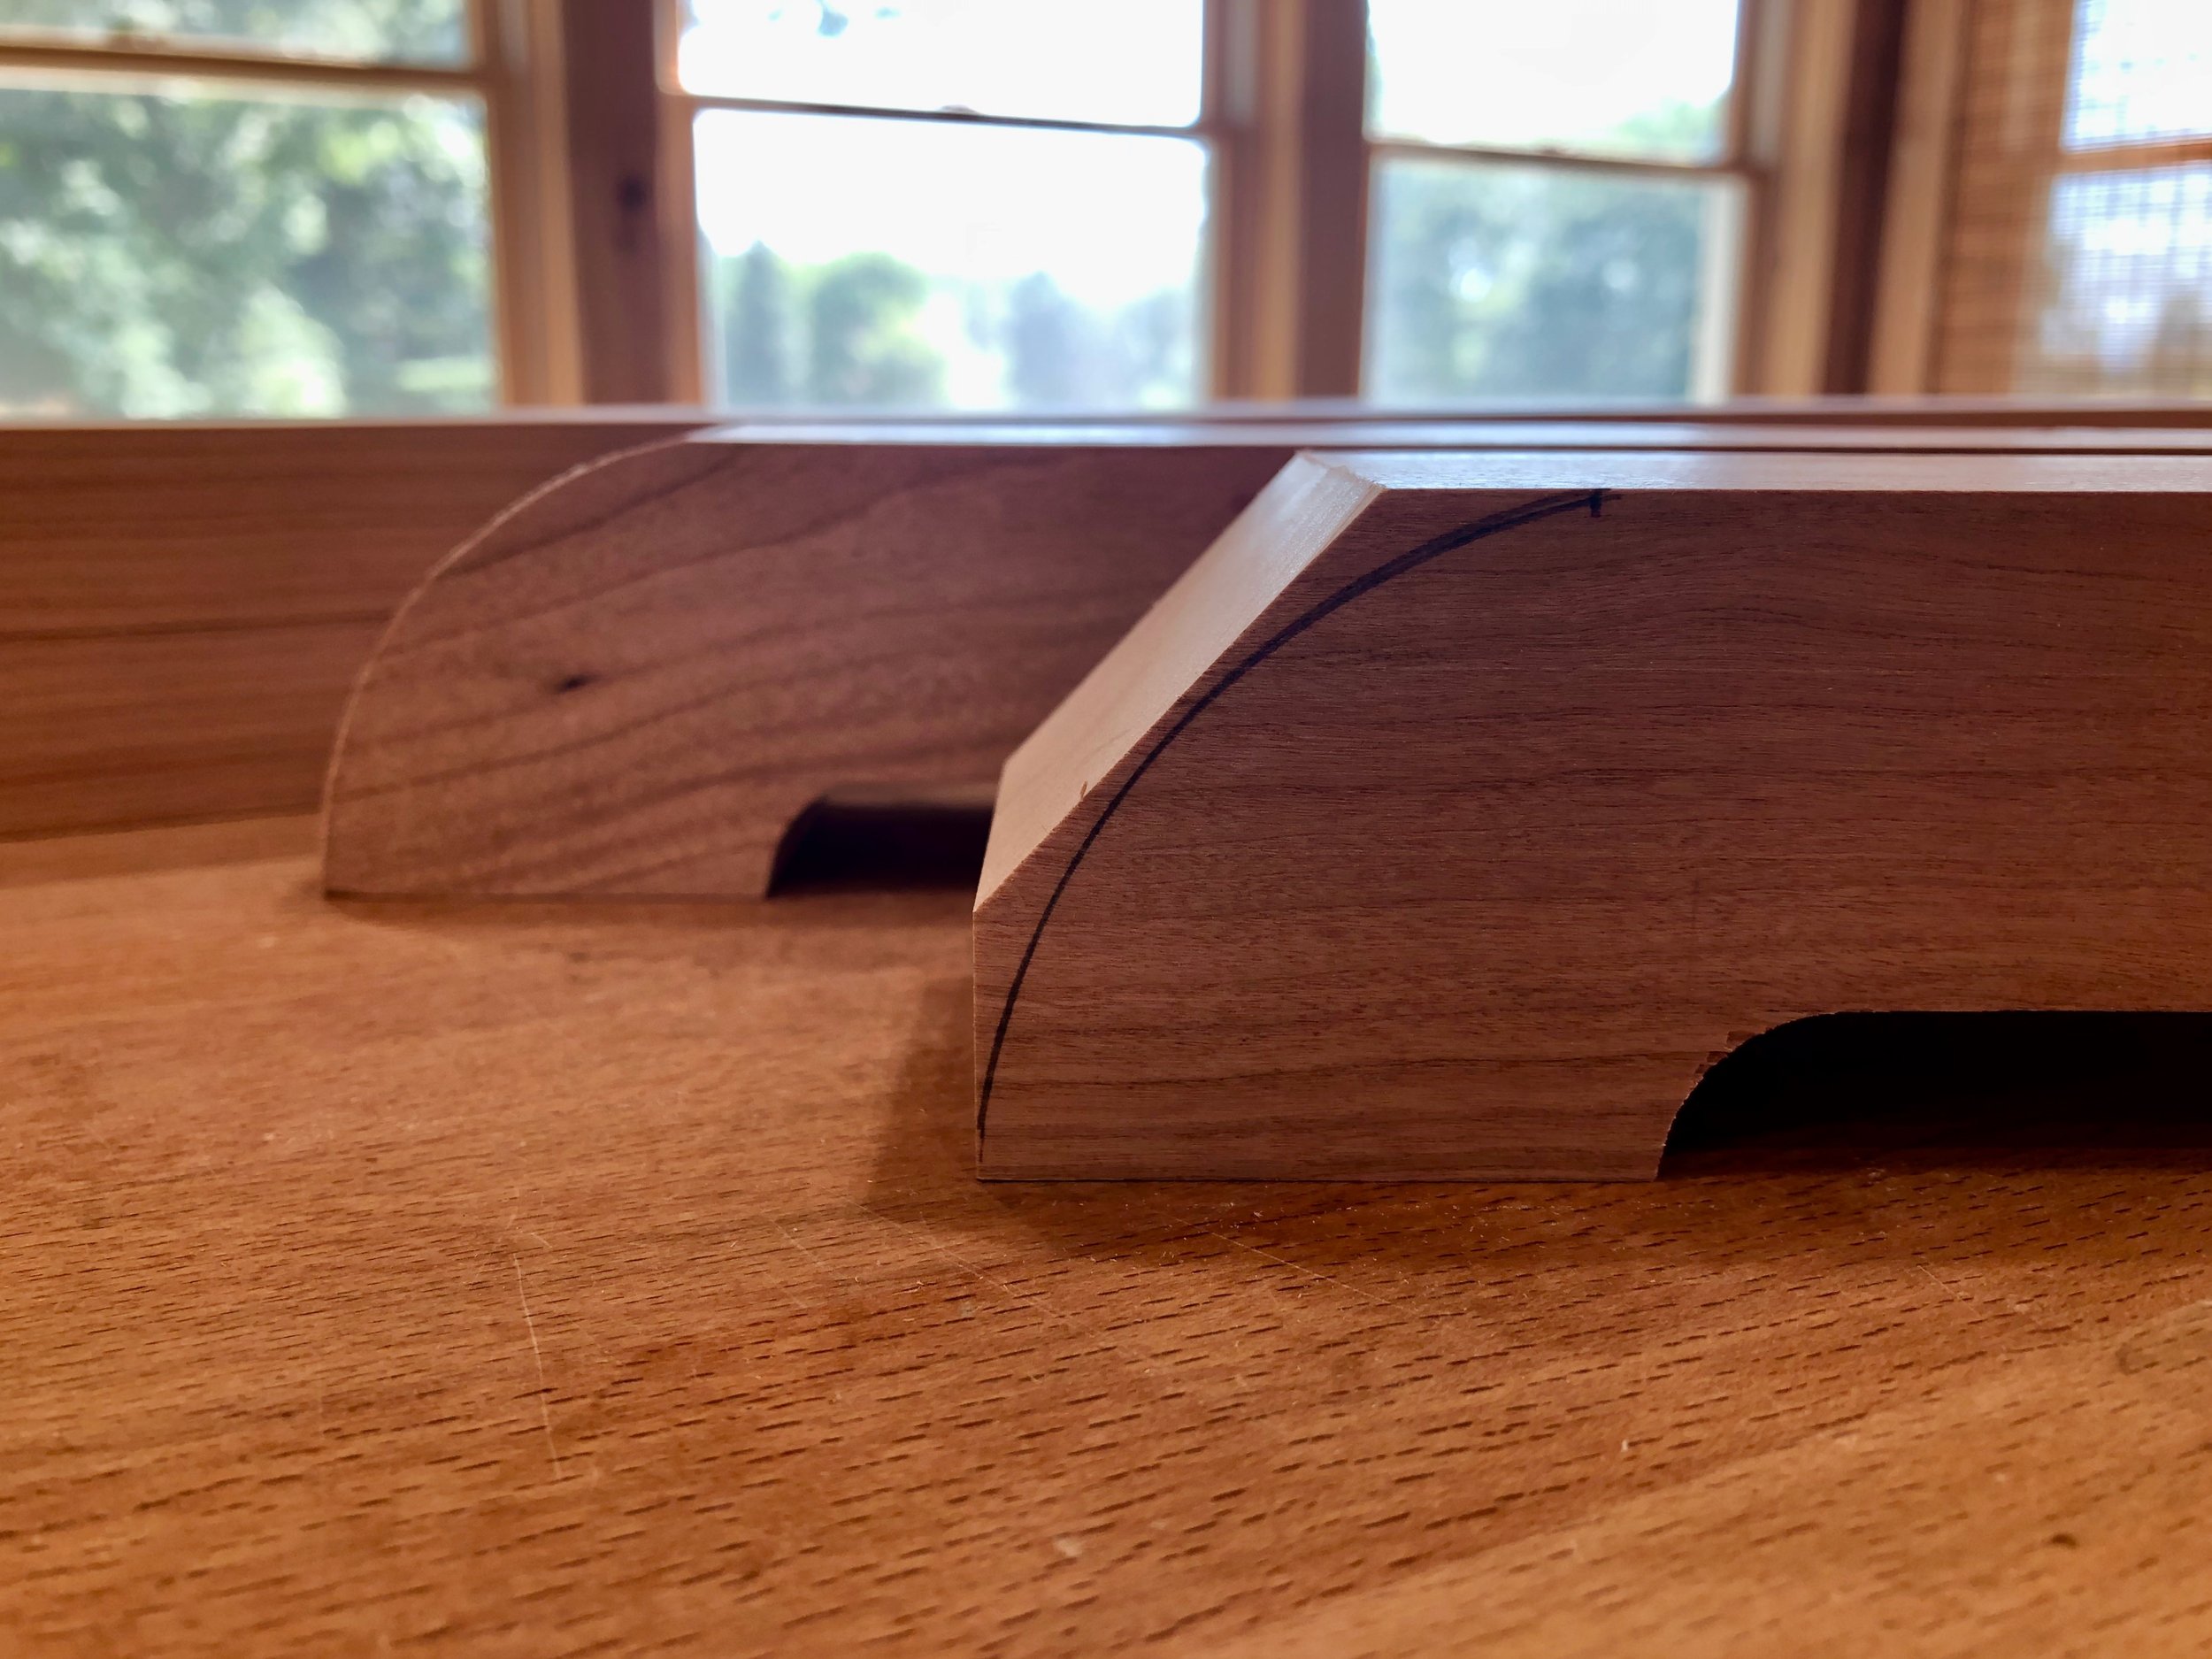
Shaping the leg ends
The legs then needed to be connected to each other in a “cross-lap” joint. This involves cutting wood out of the central portions of both pieces: a 2 inch wide groove from the top of the lower leg; and the same sized groove from underneath the upper one. The depth of each groove equals half of the total thickness and this was found by bisecting the depth of the lower leg, cutting the groove to this depth and then using that result to mark the upper leg before cutting - no measuring. The “cutting” was done with a dado blade on the table saw assisted by my cross cut sled. Nice and clean! Next, a 1 inch square socket was created through the center of both leg pieces. Working one leg at a time, I used the 1/2 inch bit on my mortiser to cleanly cut these out.

Morticed, cross-lapped leg parts
On to the pole. The 2x2 in. pole, fashioned as described above, would need a tenon approximately 1 1/2 in. long to fit within the morticed legs. There are a few approaches to creating tenons and I had been using the dado blade/table saw method on the last few Projects. This generates a lot of sawdust but is a nice way to reproducibly make a series of identical parts. However, I only needed to cut a single tenon in this case, and that 64 in. furniture “part” deserved respect. I did not feel I could accurately and safely work the end of this pole using the table saw. The one tool in my shop that can securely position long parts is the sliding miter saw with a 5 foot table extending off the left side. These tools are normally used to cut (chop) all of the way through a board, but my tool also comes with an adjustable “stop” to hold the blade above the platen should you wish. When used as a sliding saw this feature then allows for cutting accurate grooves and dados into a board. I used this depth stop for the first time to make the four shoulder cuts for this tenon. The four rip cuts to form the so-called tenon “cheeks” were accomplished on the band saw where a ball bearing stand could be used to support the aft portion of the pole during the cut. A slot was then sawed into the center of the tenon for an eventual wedge.
The final dimensioning step was to make the four braces that support the pole. The plan called for 3/4 in. boards here but since another function of the “braces” is to lower the center of gravity, and since I would be using heavy brass hooks instead of wooden pegs up top, I decided to impart more mass by using 1 in. thick stock instead. The instructions also call for the braces to be “sawed out with the turning saw and finished up with the spoke shave and file.” I will instead be using the electrically powered equivalents: a band saw and router. While I am enthused by the nostalgia of hand tool woodworking, I feel I am still trying to get proficient with the power tools in my shop and so favor those techniques … for now. “Choice” is another luxury available today that was not present in the good old days.
For the four braces, I first prepped some 5/4 cherry stock to 1 in. thickness. I then turned to a 3/4 in. plywood scrap and rendered the desired pattern freehand with a pencil. This shape was cut out at the band saw and smoothed to the line using a drum sander to create a plywood “pattern”. The pattern was next used as a template to trace with pencil on the fresh cherry boards, taking advantage of the existing flat and square edges. These lines were “followed” on the band saw (1/4 in. blade), doing my best to stay 1/16 in. or so to the outside of the marks. To create the true curved edges I then added plywood “lips” to the bottom and back side of the pattern so that it could be temporarily screwed into the rough cherry brace along the flat edges. With the pattern on top I could then run these constructs along a flush trimming bit on the router table to create identically shaped and smooth braces (see photos below).
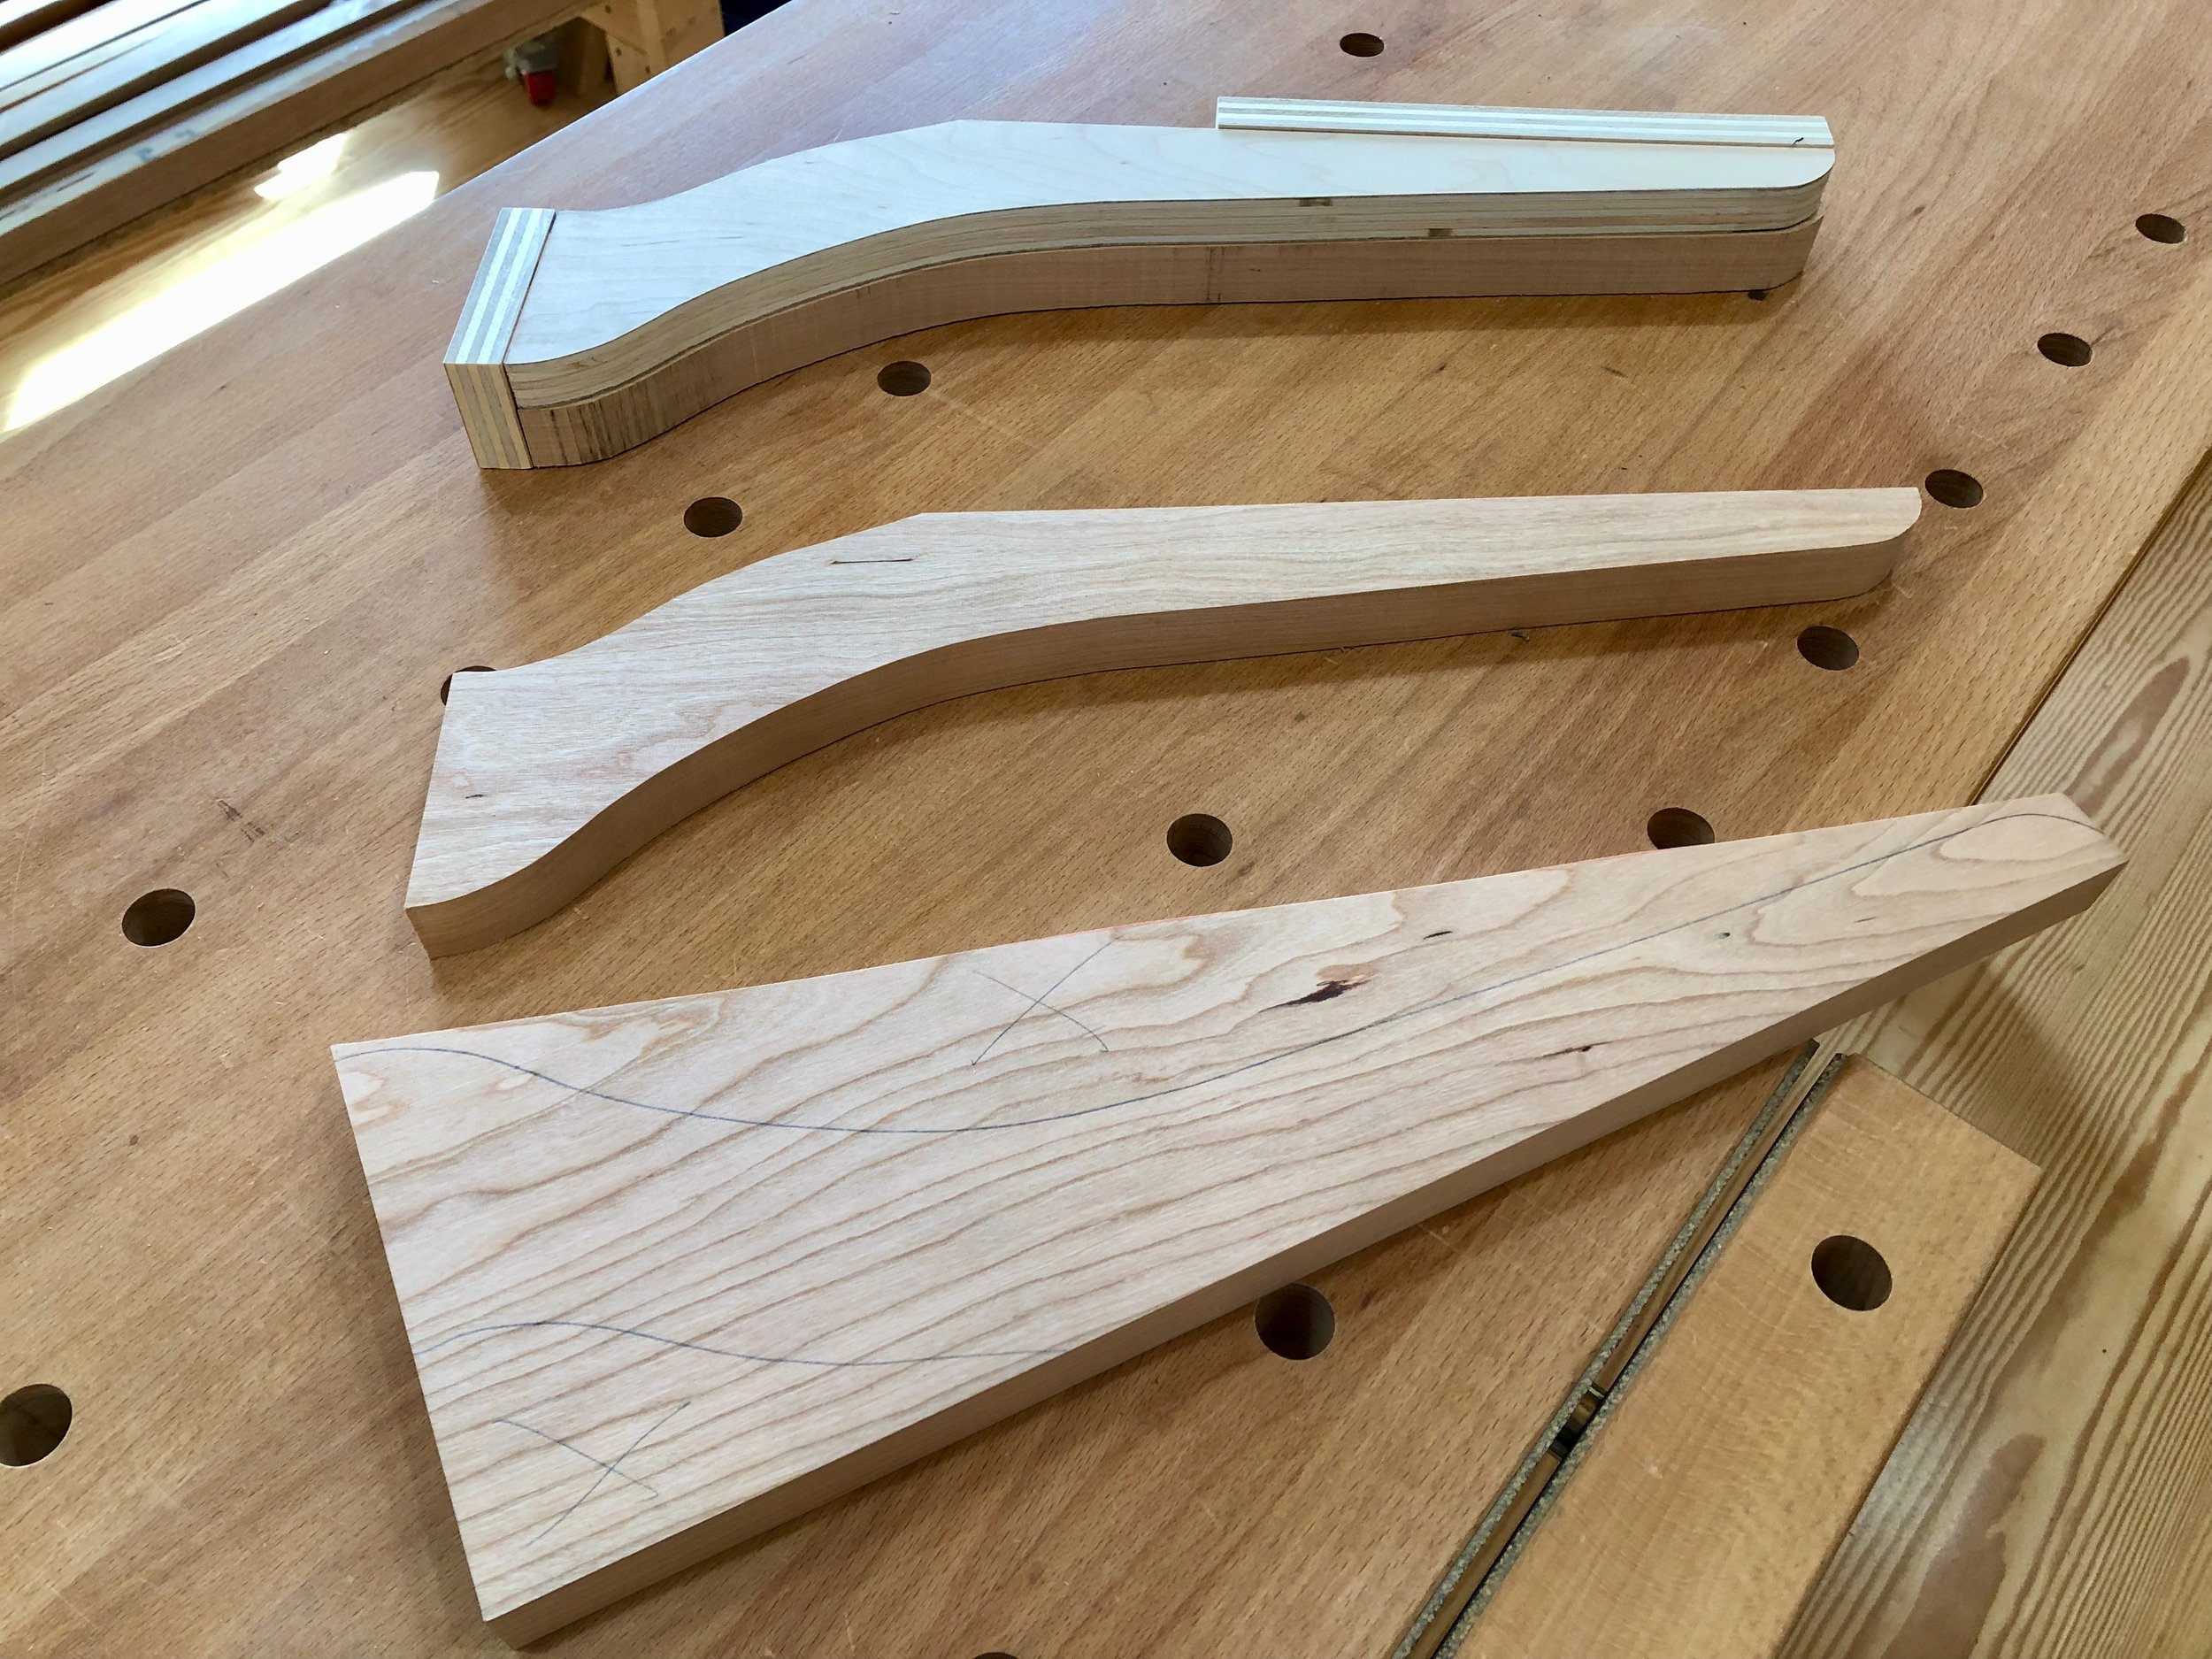
3 of the 4 braces shown in various stages of formation.
bottom: marked board ready for rough cut;
top: rough cut board attached to pattern jig;
center: finished brace
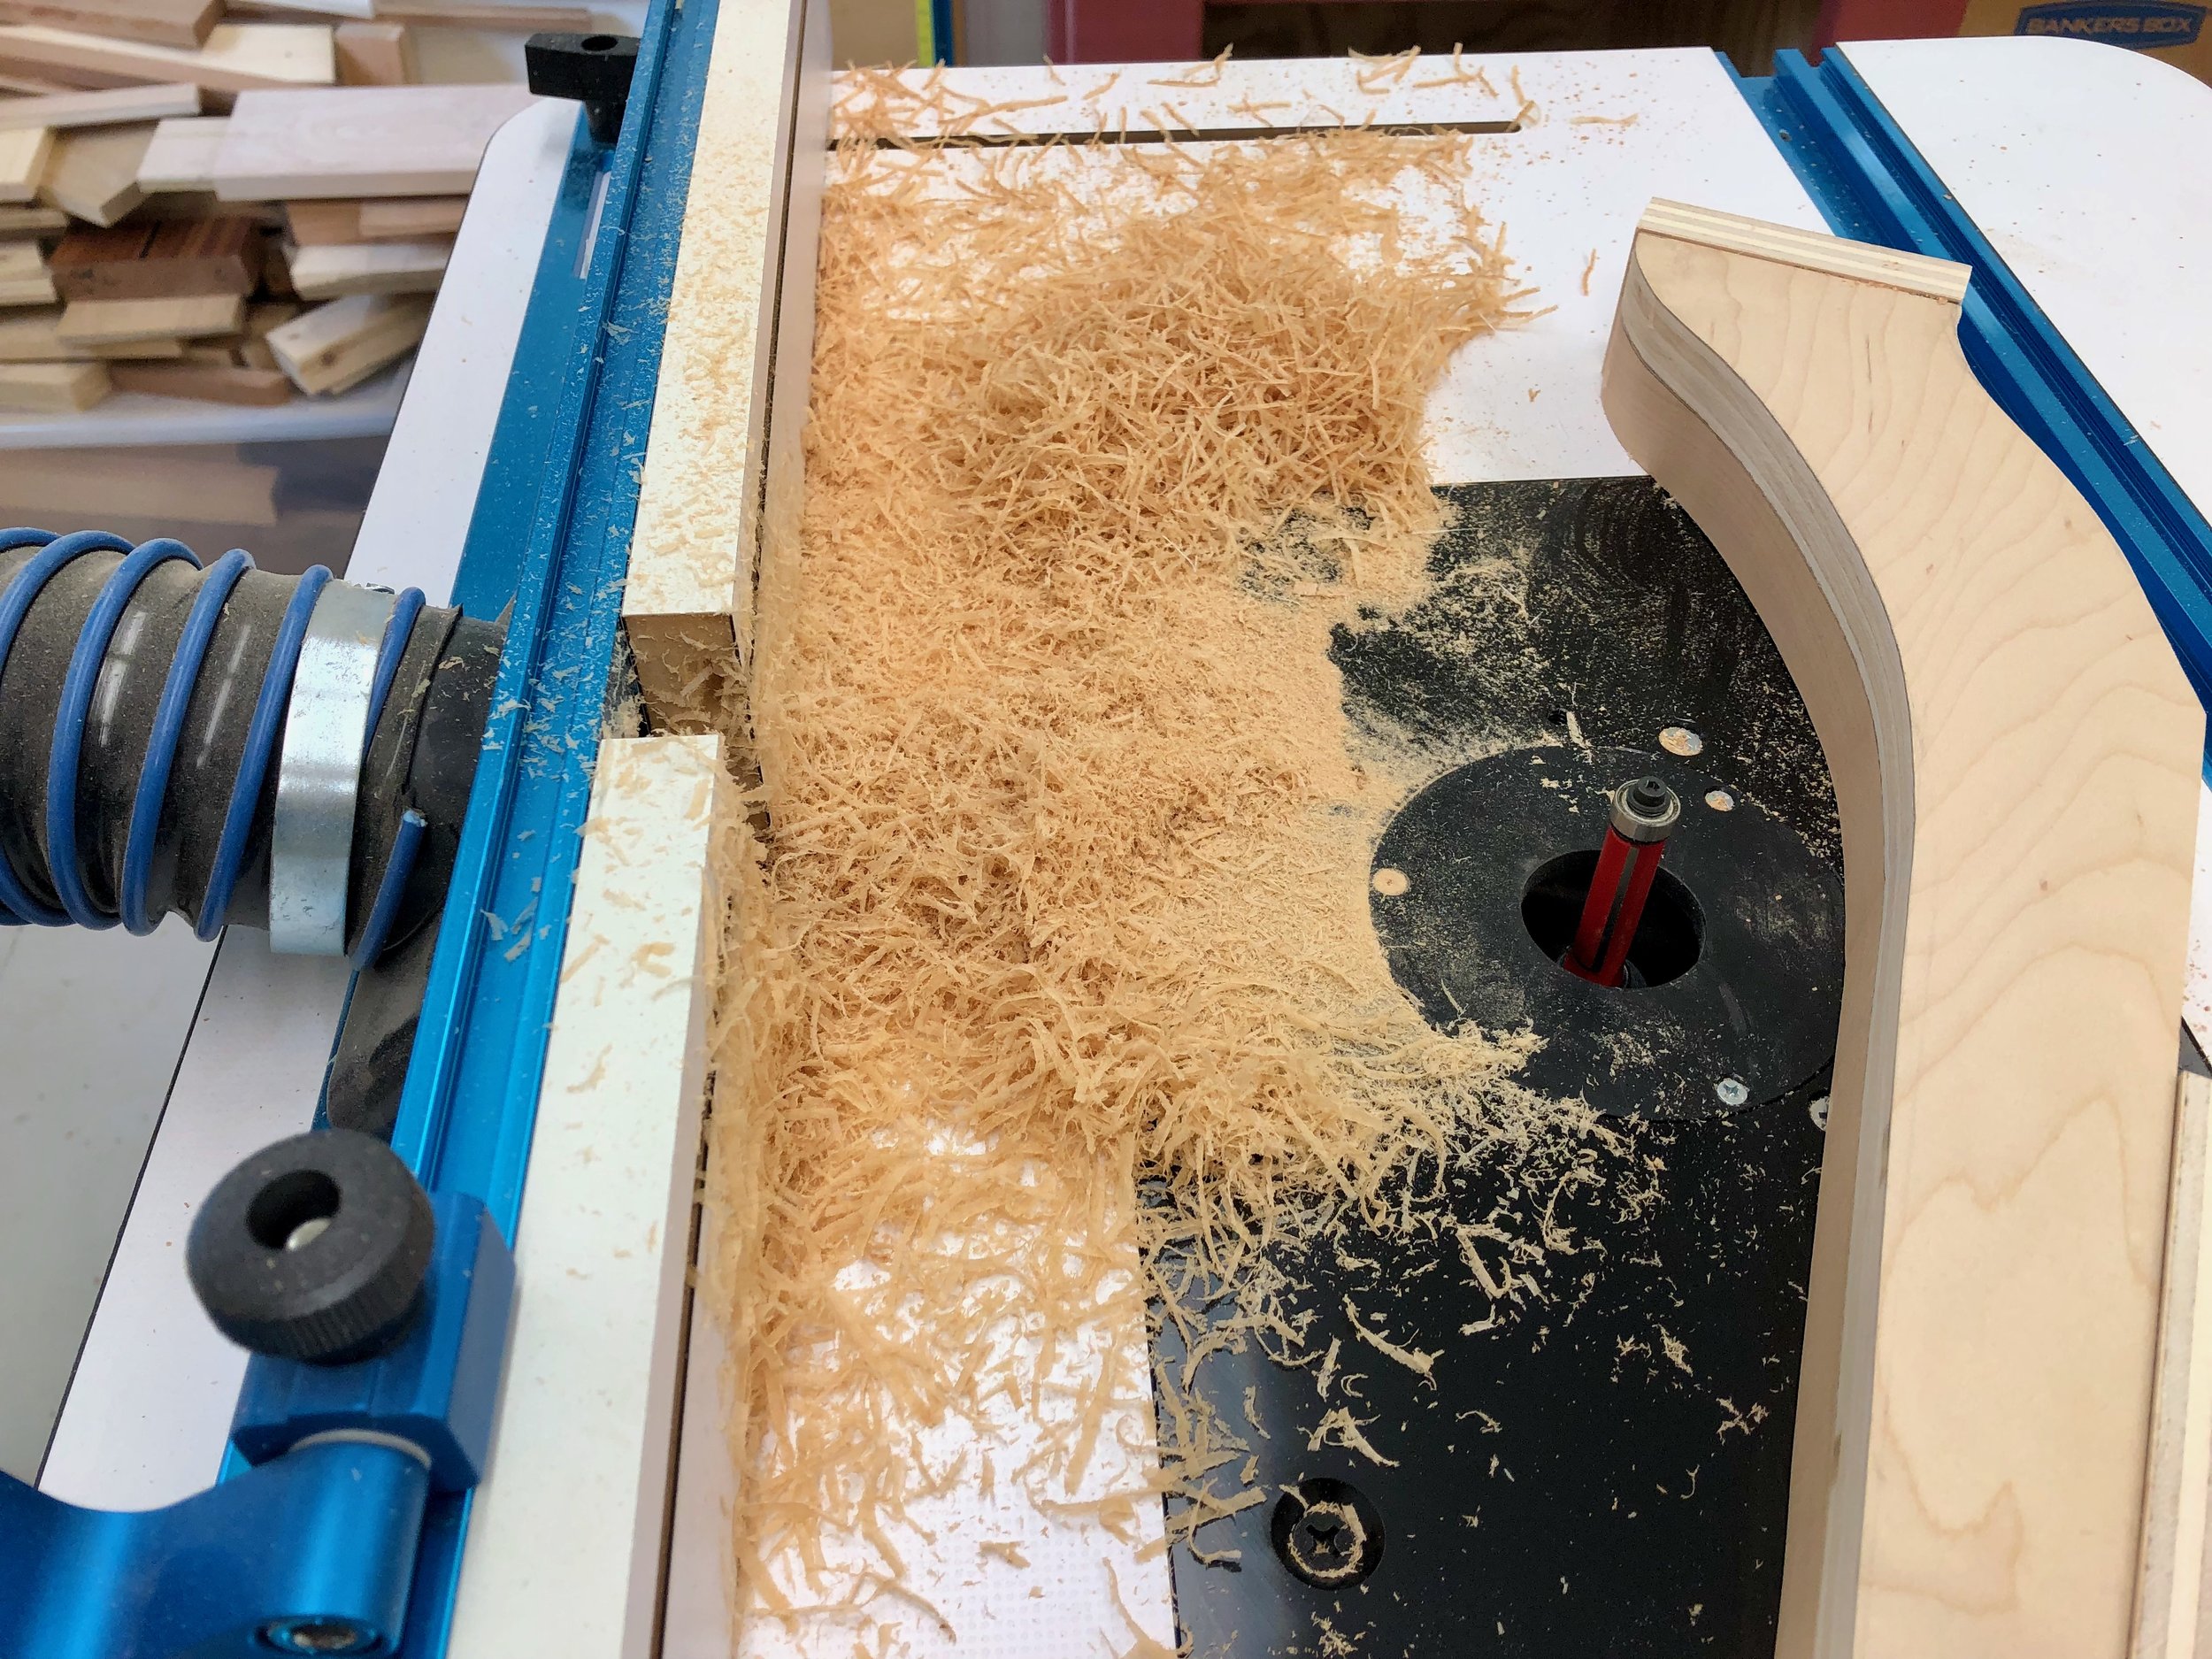
Cherry brace and pattern after having run through the flush trimming bit at the router table.
The braces will be glued to the pole with the help of dowels to keep everything aligned and so 5/16 in. wide holes were drilled into the pole and braces using a Dowl-it jig and hand drill. Dowels of the same diameter were then cut from a maple rod and sharpened slightly with a pencil sharpener.
The very last steps before assembly were to cut the top of the pole to form a peak, scrape and sand the surfaces and then round-off the sharp edges. The miter saw was used to clip the sides 1/2 inch from the top, as per the plan. There are two ways to do this miter cut: 1. tilt the blade to a calculated degree matching the smallest angle of a 1/2 in. by 1 in. right triangle and slice perpendicular to the pole (then rotate and chop again, four times); or 2. pivot the blade on the platen to align the laser line with the cut line and chop (rotate, etc x 4). Choice #2 appeared to be the more foolproof and after four such chops it made for a stately feature on top. All parts were then scraped and sanded to #220 grit. A small round-over bit on the router table was used to uniformly grace the edges.
Assembly & finish
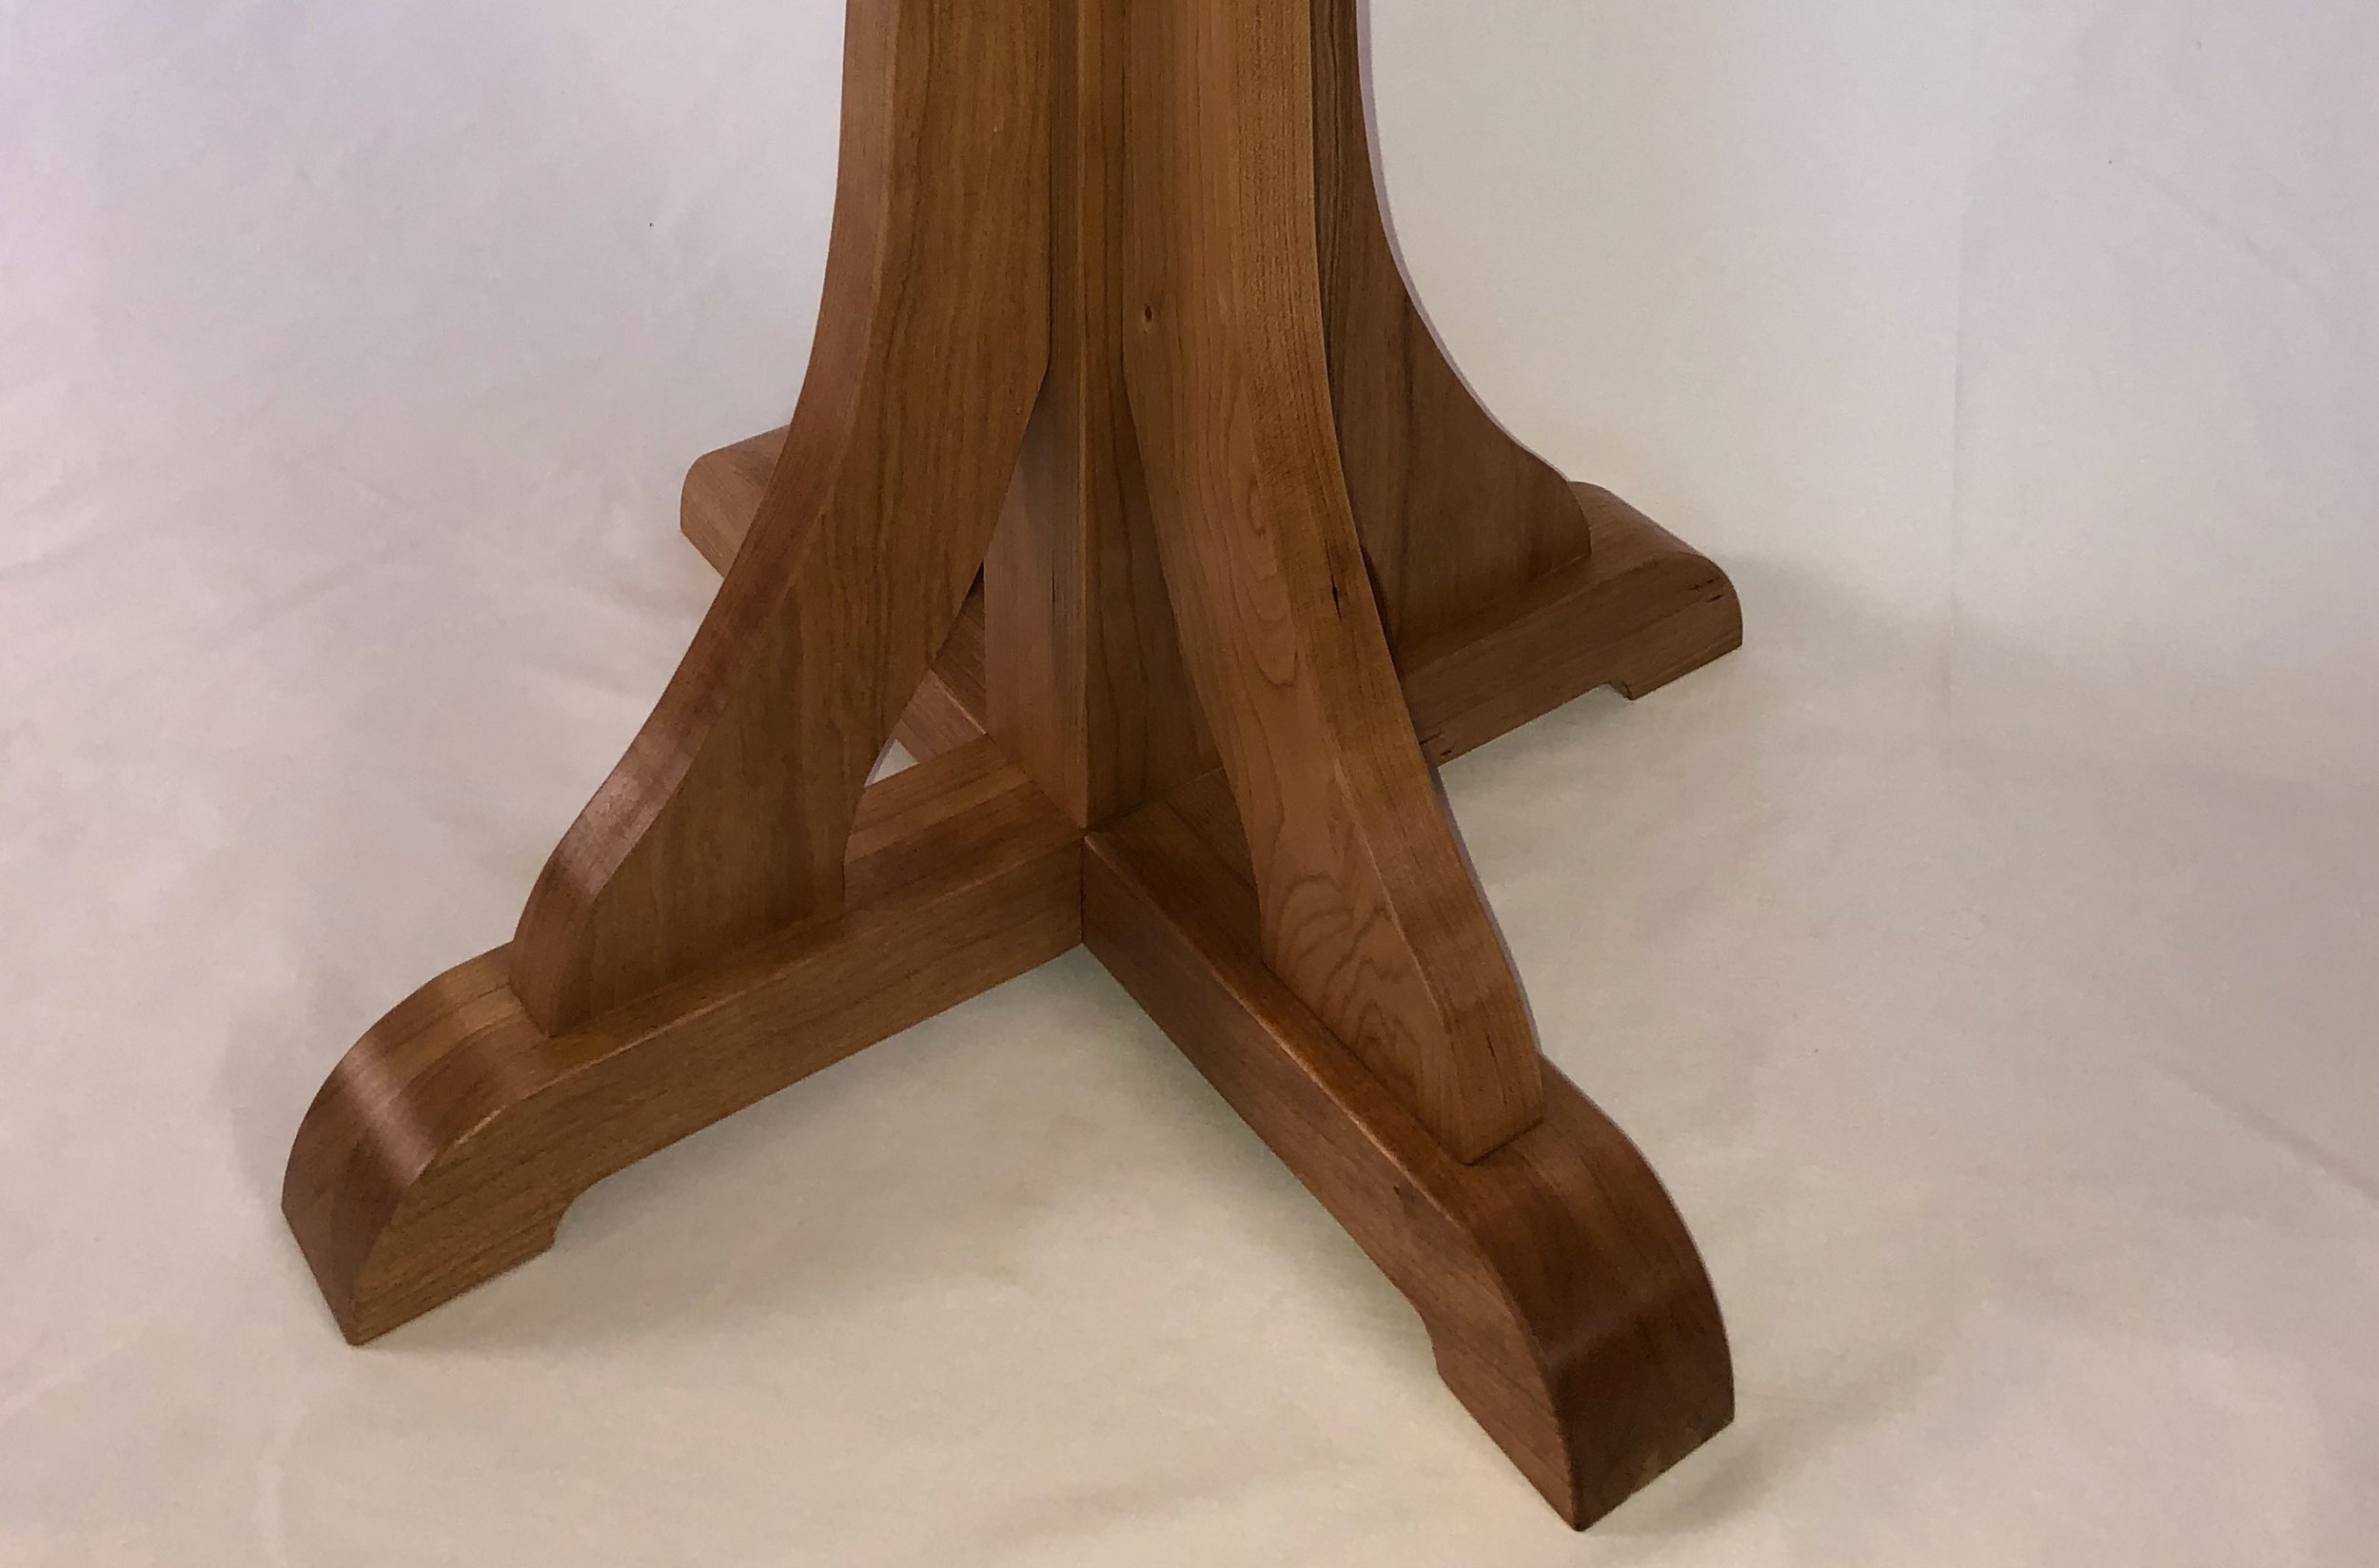
The doweled construction method pretty much dictates the order of assembly on this one. First glue the dowels on to the pole, and then the braces followed by the two leg pieces. Next, a wedge was tapped into the slotted pole tenon to snug everything up. Lastly, before the glue set, screws were used to secure each brace to the legs. Three applications of a gel polyurethane finish was applied followed by attachment of the brass hooks to complete the Costumer, a worthy version of Fig 37.

Mission-style Costumer
Postscript
This was an easy & satisfying Project, and one that utilized every machine in my workshop (bolded for reference in the above story). Of course, it all could have been done as the plan intended without electric tools; instead using handsaws, hand planes, and various other blades and borers. That hand-crafted piece, just as functional, would in many ways be more valuable. The value “add” would come from the extra time and effort applied during construction, but it is unlikely the average furniture buyer would notice any difference between the two versions. That value is only realized by a knowing woodworker or furniture connoisseur who can appreciate the skills required to make things by hand.* And there’s the trap. Does a furniture maker use his/her skills to seek the admiration of peers, even at a price point that makes the product unavailable to most?, or should the aim be to maintain quality and still satisfy the many? In the early 20th century, Gustav Stickley, whose antique furniture now commands high prices, sought the latter. His factories mass produced high quality, mission-style furnishings of inspired design, “… intended primarily to fill, in the most direct and natural way, the actual needs of American home life.”** A costumer of similar design to Fig. 37 sold for $7.00 in Gustav Stickley’s 1912 catalog. Today, the Stickley Furniture Company, a descendant of his brothers’ L.& J.G. Stickley Furniture Co., sells a reissue of their 1909 version for $949.00. (sigh)
* As a collector, I would love to own a costumer made by 8th grade hands from the past century. All of its marks, nicks and unevenness would make mine look flawed by comparison.
**Craftsman Furniture Catalog, Gustav Stickley 1912, p.3.