

Clock No. 1

I have been fantasizing about clocks a lot lately. They are fun to dream of while working on heavier things. I keep a list of the ones I’d like to build some day that continually shuffle in their mental order of construction, mostly early American classics. Of course, the desire to make a clock completely of my own design is there too, and recently I decided to convert some doodles into a drawn plan. I was looking to make a shelf clock that could serve as a housewarming gift for good friends of ours, and what I was trying to create was a timepiece that could be used in any room. This small clock required a simple case design and one that, although made of wood, would not look “old-fashioned”. It should also be a case that is easily constructed in the event I ever choose to duplicate for sale. Mission and Shaker styles both satisfy these criteria and I was hoping I might create something original that could fit within these canons. I call this design Clock No. 1.
Design
I favor elemental shapes in my wooden objects, things like right angles and arcs. These are disciplined features that, in concert with the material’s “untrained” texture, can achieve a satisfying harmony. Seductively curved mouldings and scrollwork have their place, but they too often compete with the natural character of wood. Circles, with some rectangular joinery will be the theme of this clock. Semicircles will define the bottom edges of the case and thereby create the feet. A box joint will form the connection between the top and sides, and I will do my best to hide the other seams so as not to distract. The clock’s back would be accessed via a door (hinged or sliding, TBD). And in place of numerals I could use dowel pegs made from the same wood as the case; the dark end grain should provide a pleasing contrast.

Clock No. 1 rough sketch
Materials
When building a clock the first decision to be made concerns the movement: mechanical or quartz? To wind or not to wind, that is the question, for clock case dimensions are affected by a mechanical movement’s bulk and pendulum swing. All else being equal, I prefer mechanicals for the life that these clocks bring to a home. But the current Project is for a vacation home and that changes things. I know from experience the sorry scene of opening the door to your retreat and being met by a “dead” clock on the mantle. Admittedly, it is an easy task for the clockwinder to resuscitate and then march the live timepiece through the gong sequence until it, once again, reaches its own meridian. However, this task begins to feel Sisyphean and grows old over time … quartz it is. Battery-operated quartz clock movements are easy to find and I picked one up at a new source for me, the Norkro Clock Co.
I can imagine that this clock would look nice in a variety of woods but, given that it is a lightweight clock with thin walls, I decided to use quarter sawn lumber to reduce the propensity for warp. That decision pretty much limits the choice to those woods commonly milled in this orientation, namely: oak, ash or cherry. I chose cherry.
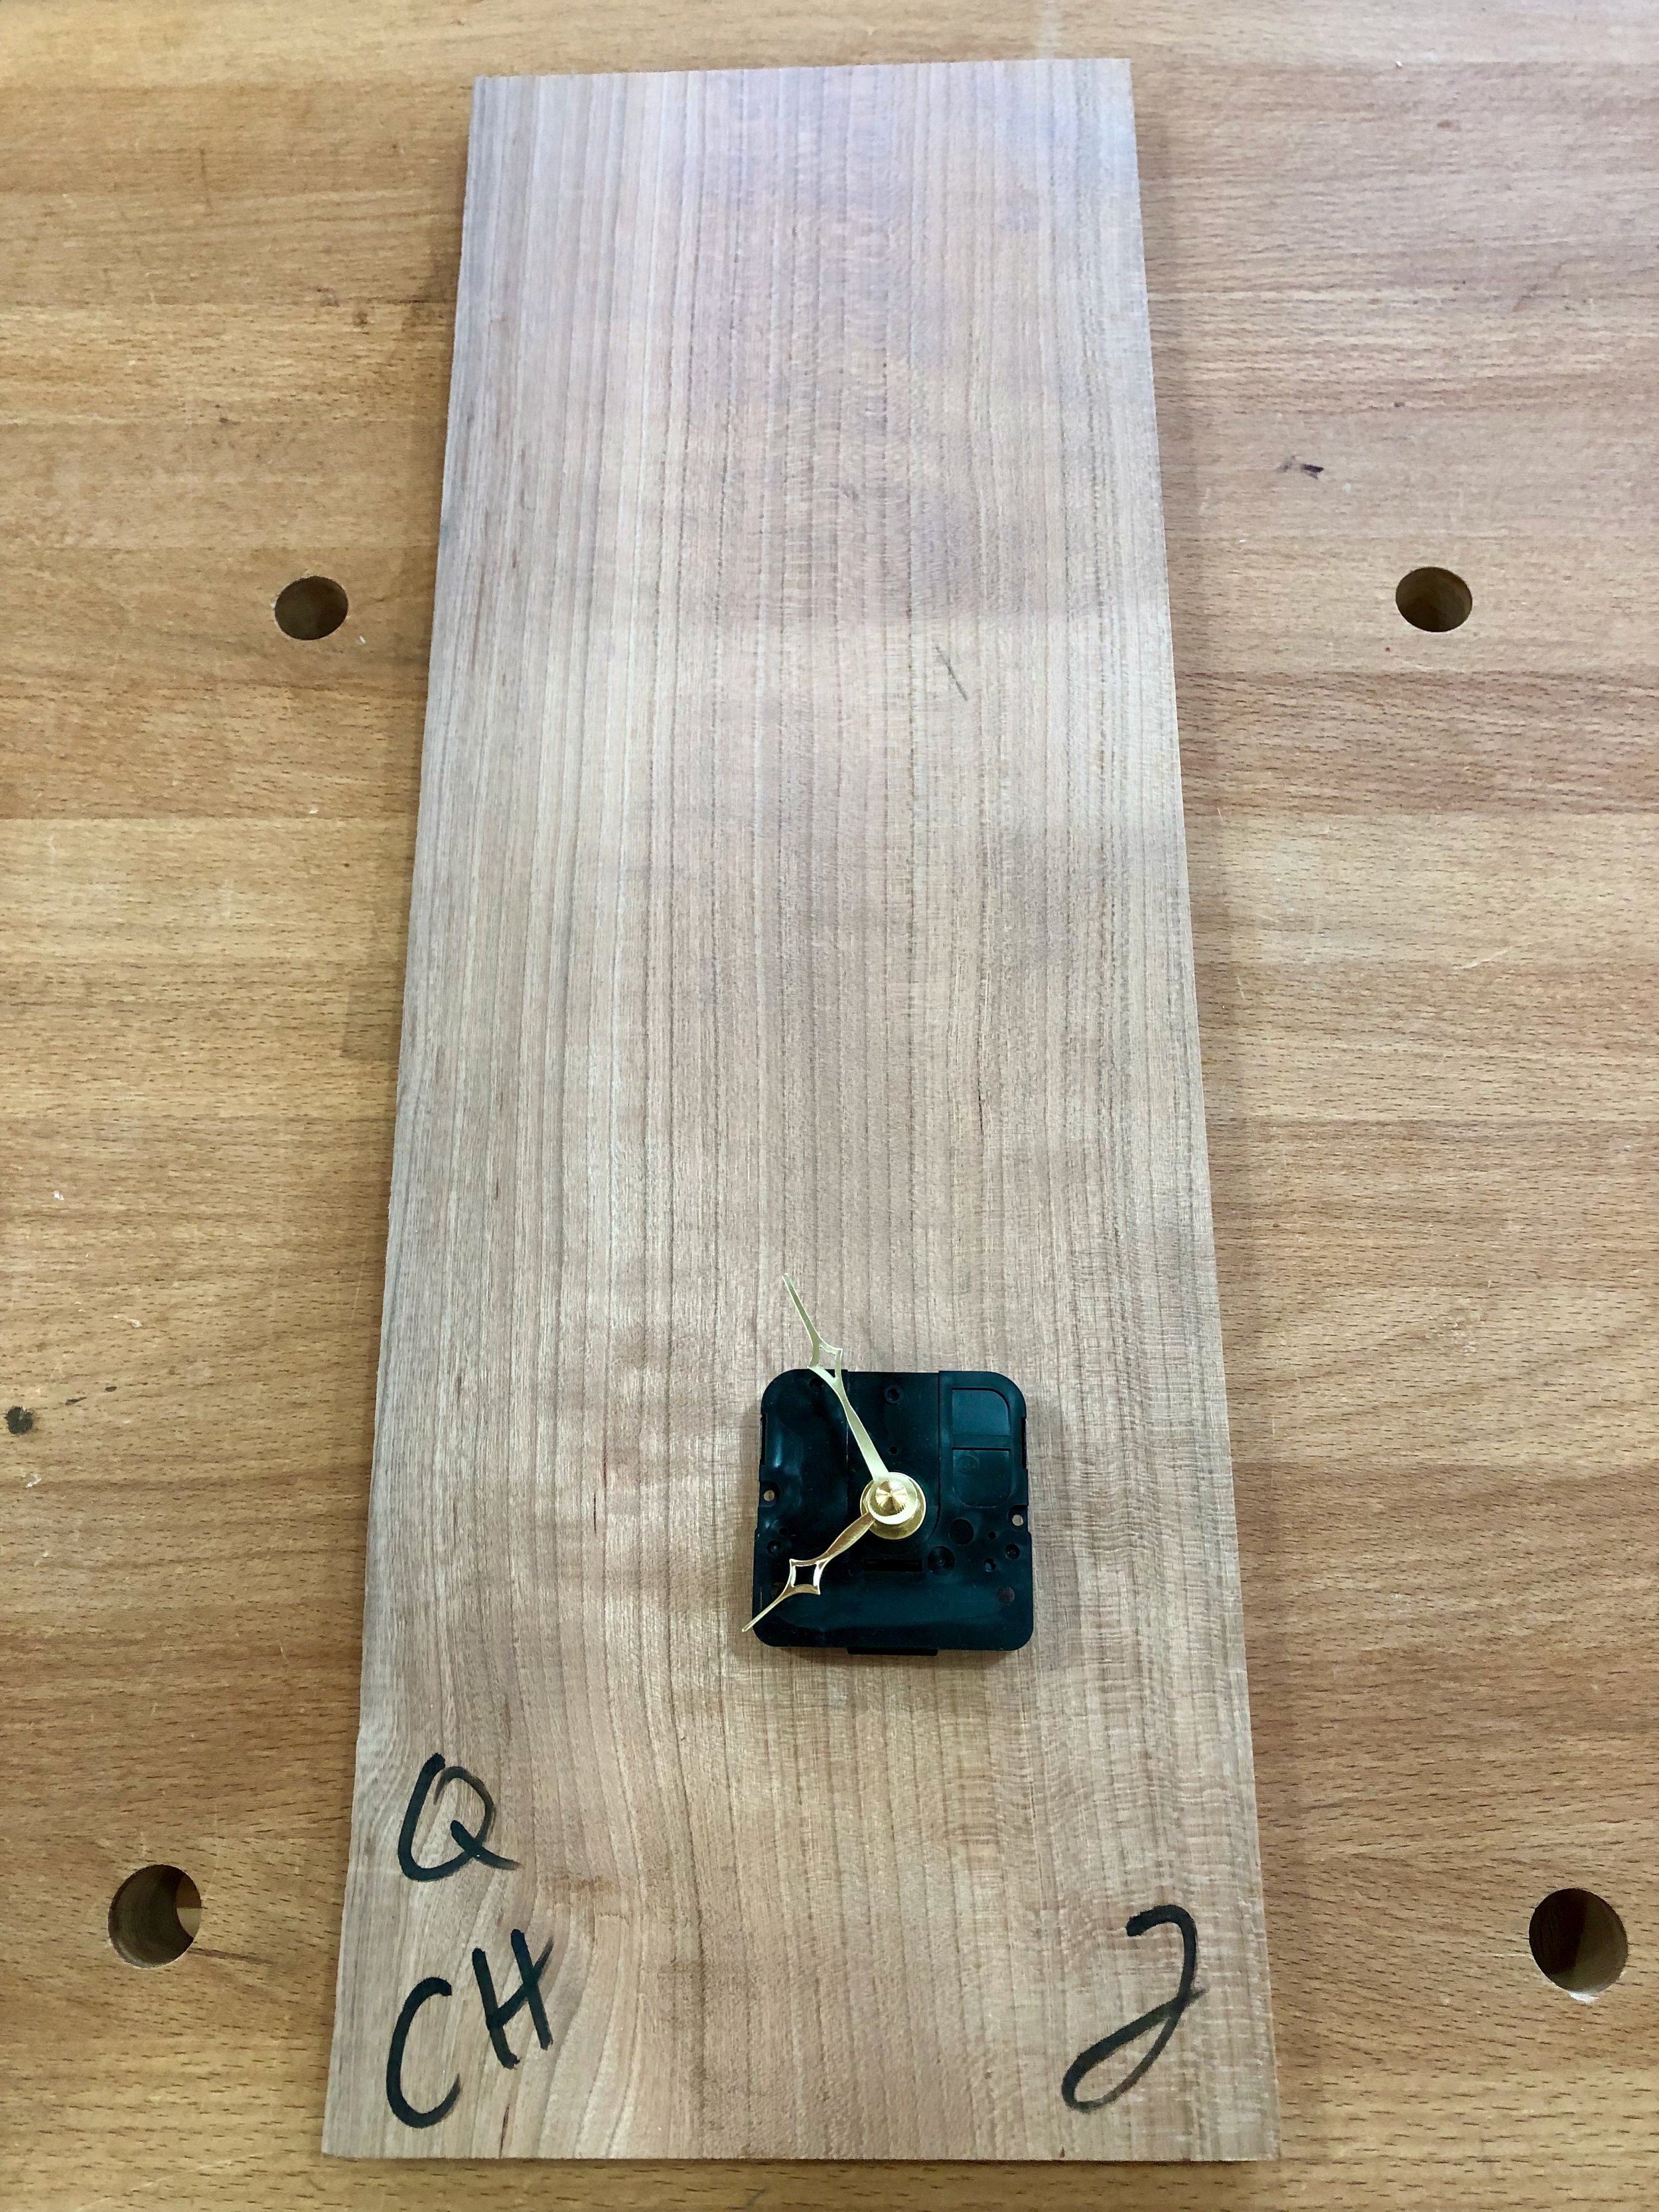
Clock materials
Dimensioning
To begin, the 3/4 in. thick cherry board would need to be sliced into two thinner boards of 1/4 inch depth. This was accomplished by re-sawing in half at the bandsaw and then reducing these boards further (while flattening) to the exact dimension on a thickness planer. Next, the mill marks were removed using a card scraper and the grain patterns inspected carefully in order to assign stock-to-parts as artfully as possible (i.e., which portions of wood to use for the front, sides, top, bottom and back). Once labelled with tape, including interior vs exterior, the parts were trimmed to their proper widths at the table saw. During this operation both edges of the front and one edge of each side were cut at a 45 degree angle. During assembly these would all come together in mitered joints which, if executed properly, would leave an invisible seam.
After cross-cutting the front and sides to [proper height + 1/2 inch] it was time to cut the semicircular bottom edges. There are 3 common ways to cut circles using power tools and these involve either the router, drill press or band saw. I needed to make semi-circles of two different radii on small boards and for these reasons cutting at the band saw was chosen as the proper method. Way back during construction of the Stationery Chest I made a circle-cutting jig for my small bandsaw that has served me well ever since. Onto this jig, the boards were mounted individually at the circle centers with a bolt inserted at the exact height of the finished front or side piece (this is where the extra 1/2 inch comes in), the jig was slid into place on the band saw table and the board was then rotated in one smooth operation to slice out a perfect semicircle. Slick.

Cutting out the front board in a “clockwise” spin
Once the semicircles were cut, and the bottom 1/2 inch trimmed away, the next step was to fashion the box joint along the top and side pieces. I decided to use the table saw for this operation and this required that I first construct a new jig for the task. The “fingers” of this joint are small rectangles, 3/8 in. wide x 1/4 in. tall, which become the critical dimensions defining the new jig made along the lines of a larger version that I have described previously. This jig, used with a dado stack on the table saw, worked well to reproducibly cut the cavities at fixed distances along the joint edge. Taped together, both side parts were cut at the same time to ensure perfect alignment.

Cutting the box joint fingers
After the sides were complete, the fingers for one half of the top were cut-out. The sides and front were then dry fit and the top was dropped into place to mark its exact width, prior to sizing and then cutting the other half of the box joint. Next, the front edge of the top was trimmed back by the width of the front board so that everything would fit together properly. This happened to also be the width dimension for the interior shelf and so that was cut to size using the same fence setting at the table saw. The shelf, or bottom, is a structural element and would be supported by a shallow groove, easily cut into the side boards at the table saw using the cross-cut sled. The last part to fashion was the door which was cut from the remaining stock to fit the cavity of the dry-fit case. Since the door would have no structural support, I chose to rip the board in half and then glue it back together along the centerline. This corrected a slight bow and should help to ward-off future warp.
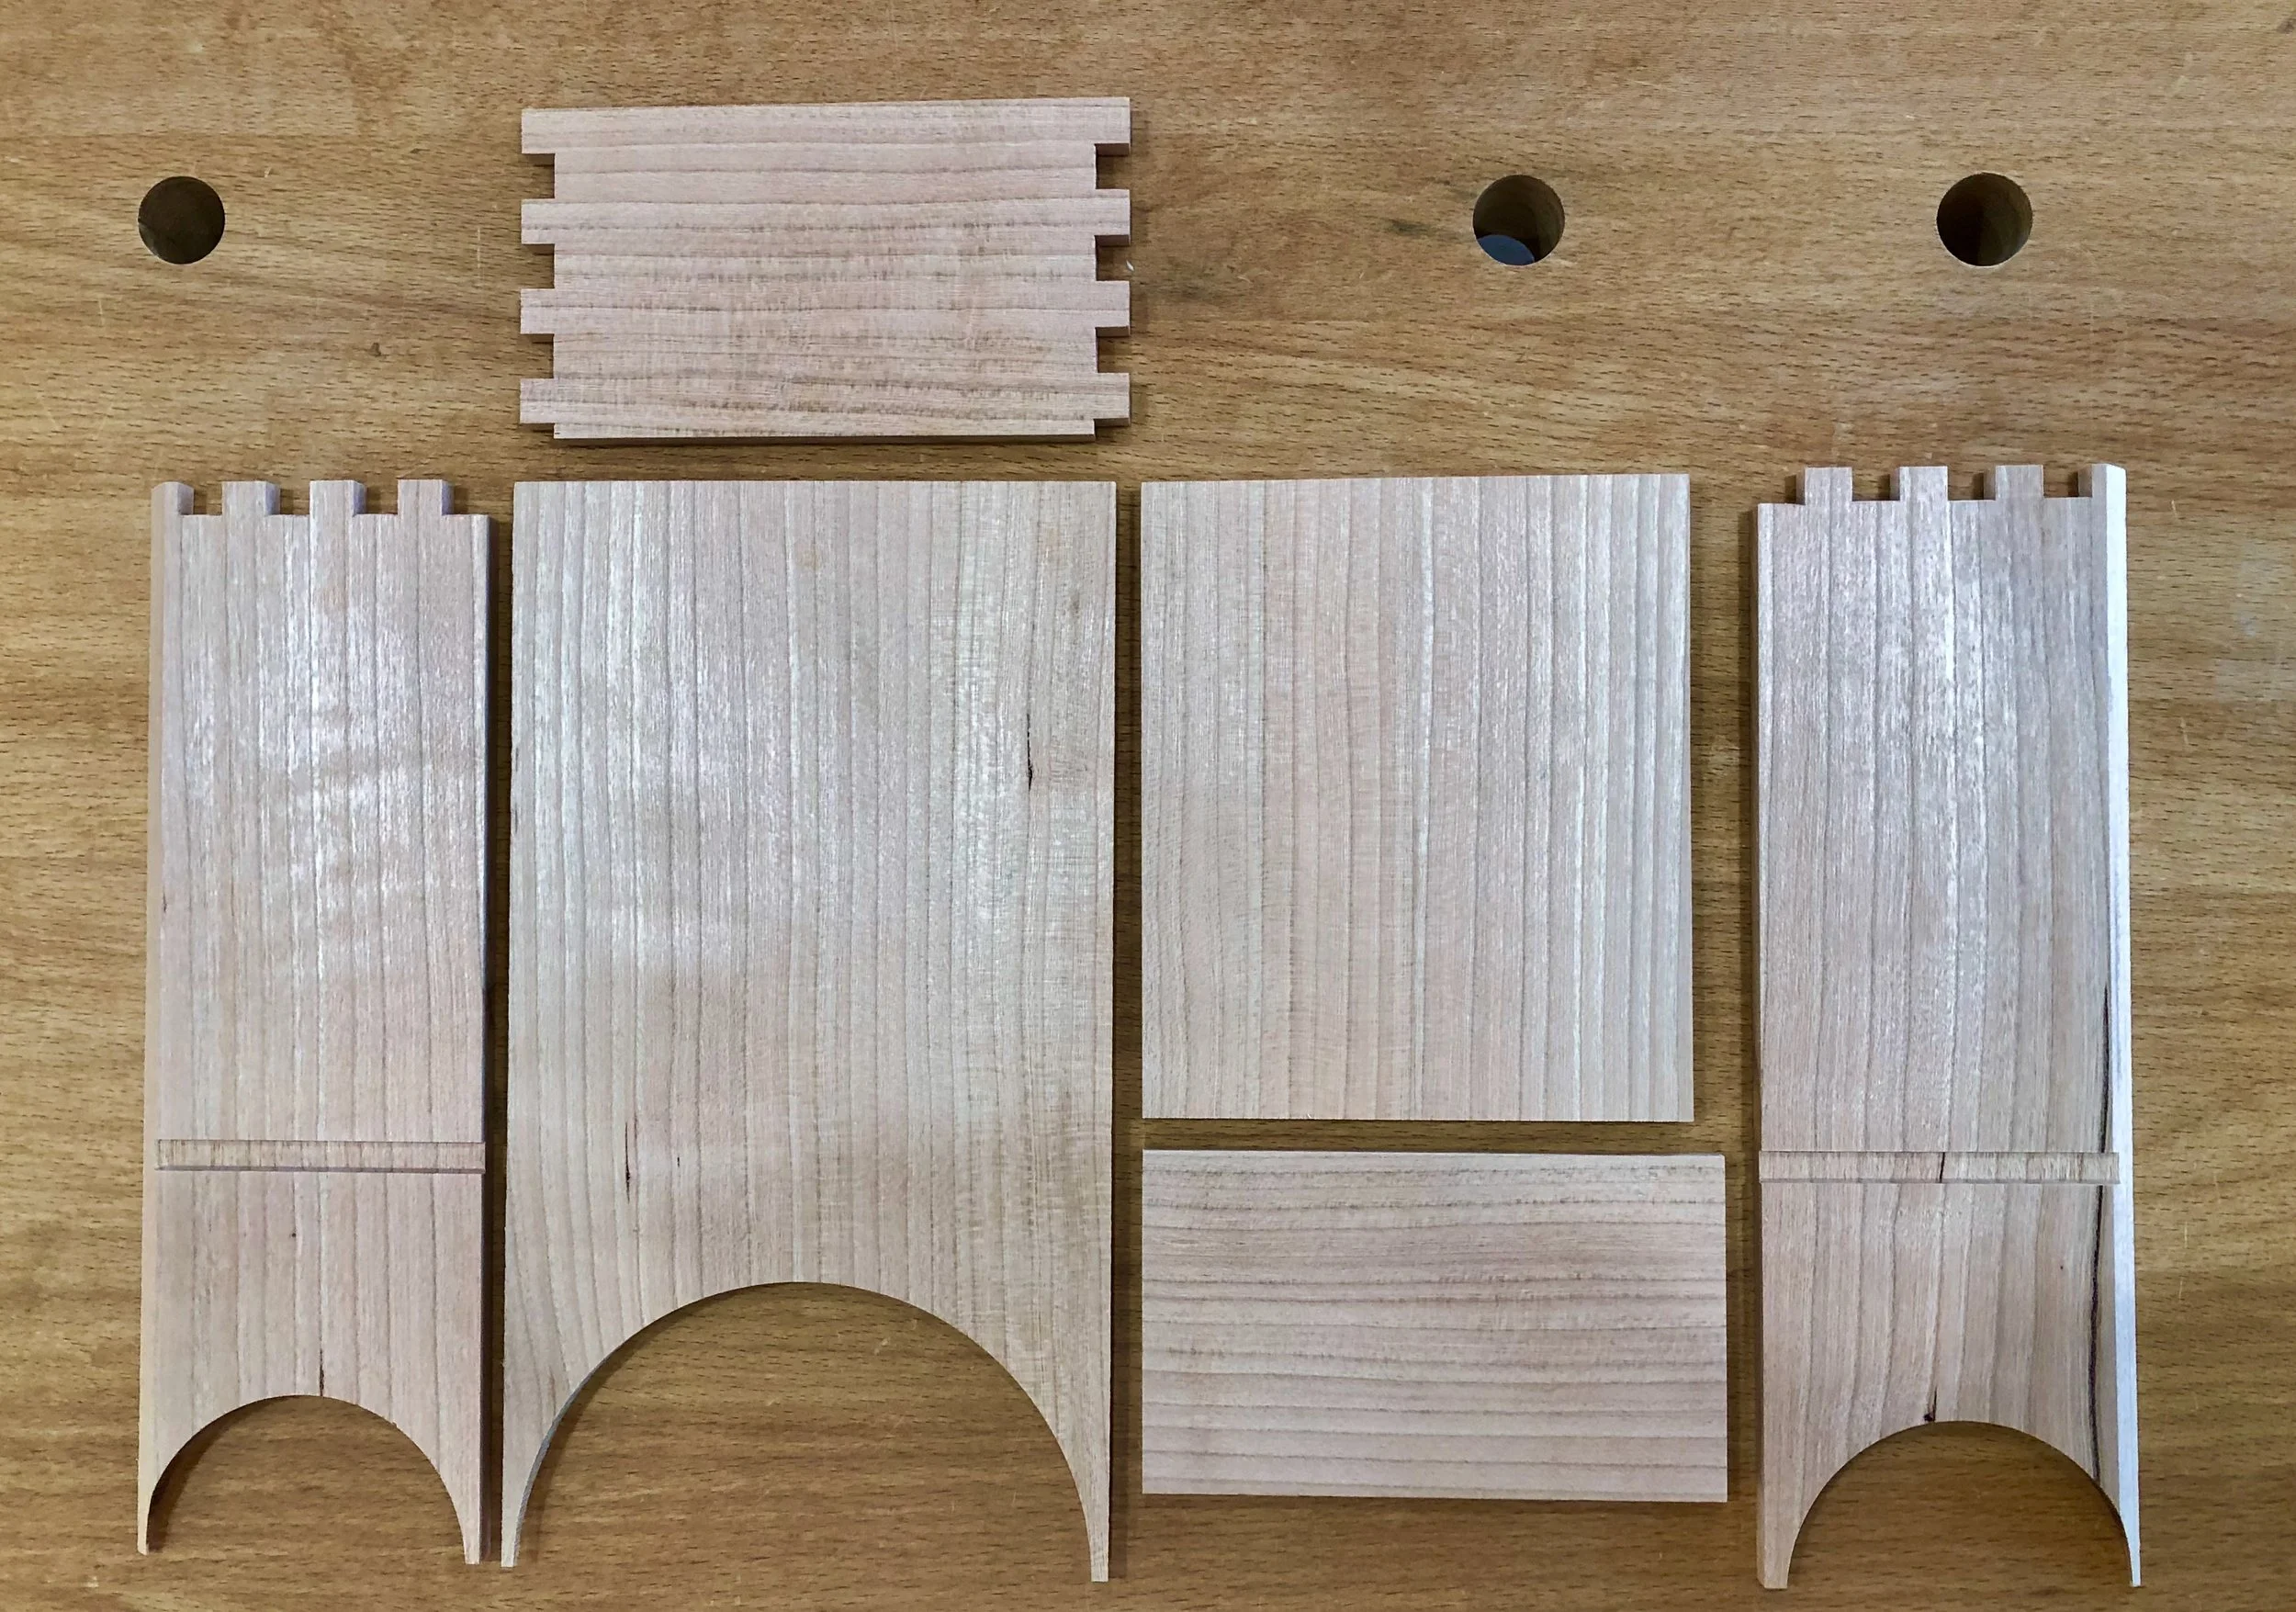
Clock case parts
The final operation prior to assembly was to make the clock face. Holes drilled in a 4 inch circle surrounding a central opening would form the dial. These holes would then be filled with shop-made cherry dowels to take the place of numerals. Rather than draw on the face board, I first made a template of the dial on hdf material and then used this to guide a hand drill to make the production cuts. The dowels were fashioned with a dowel plate and hammer using cherry scraps.
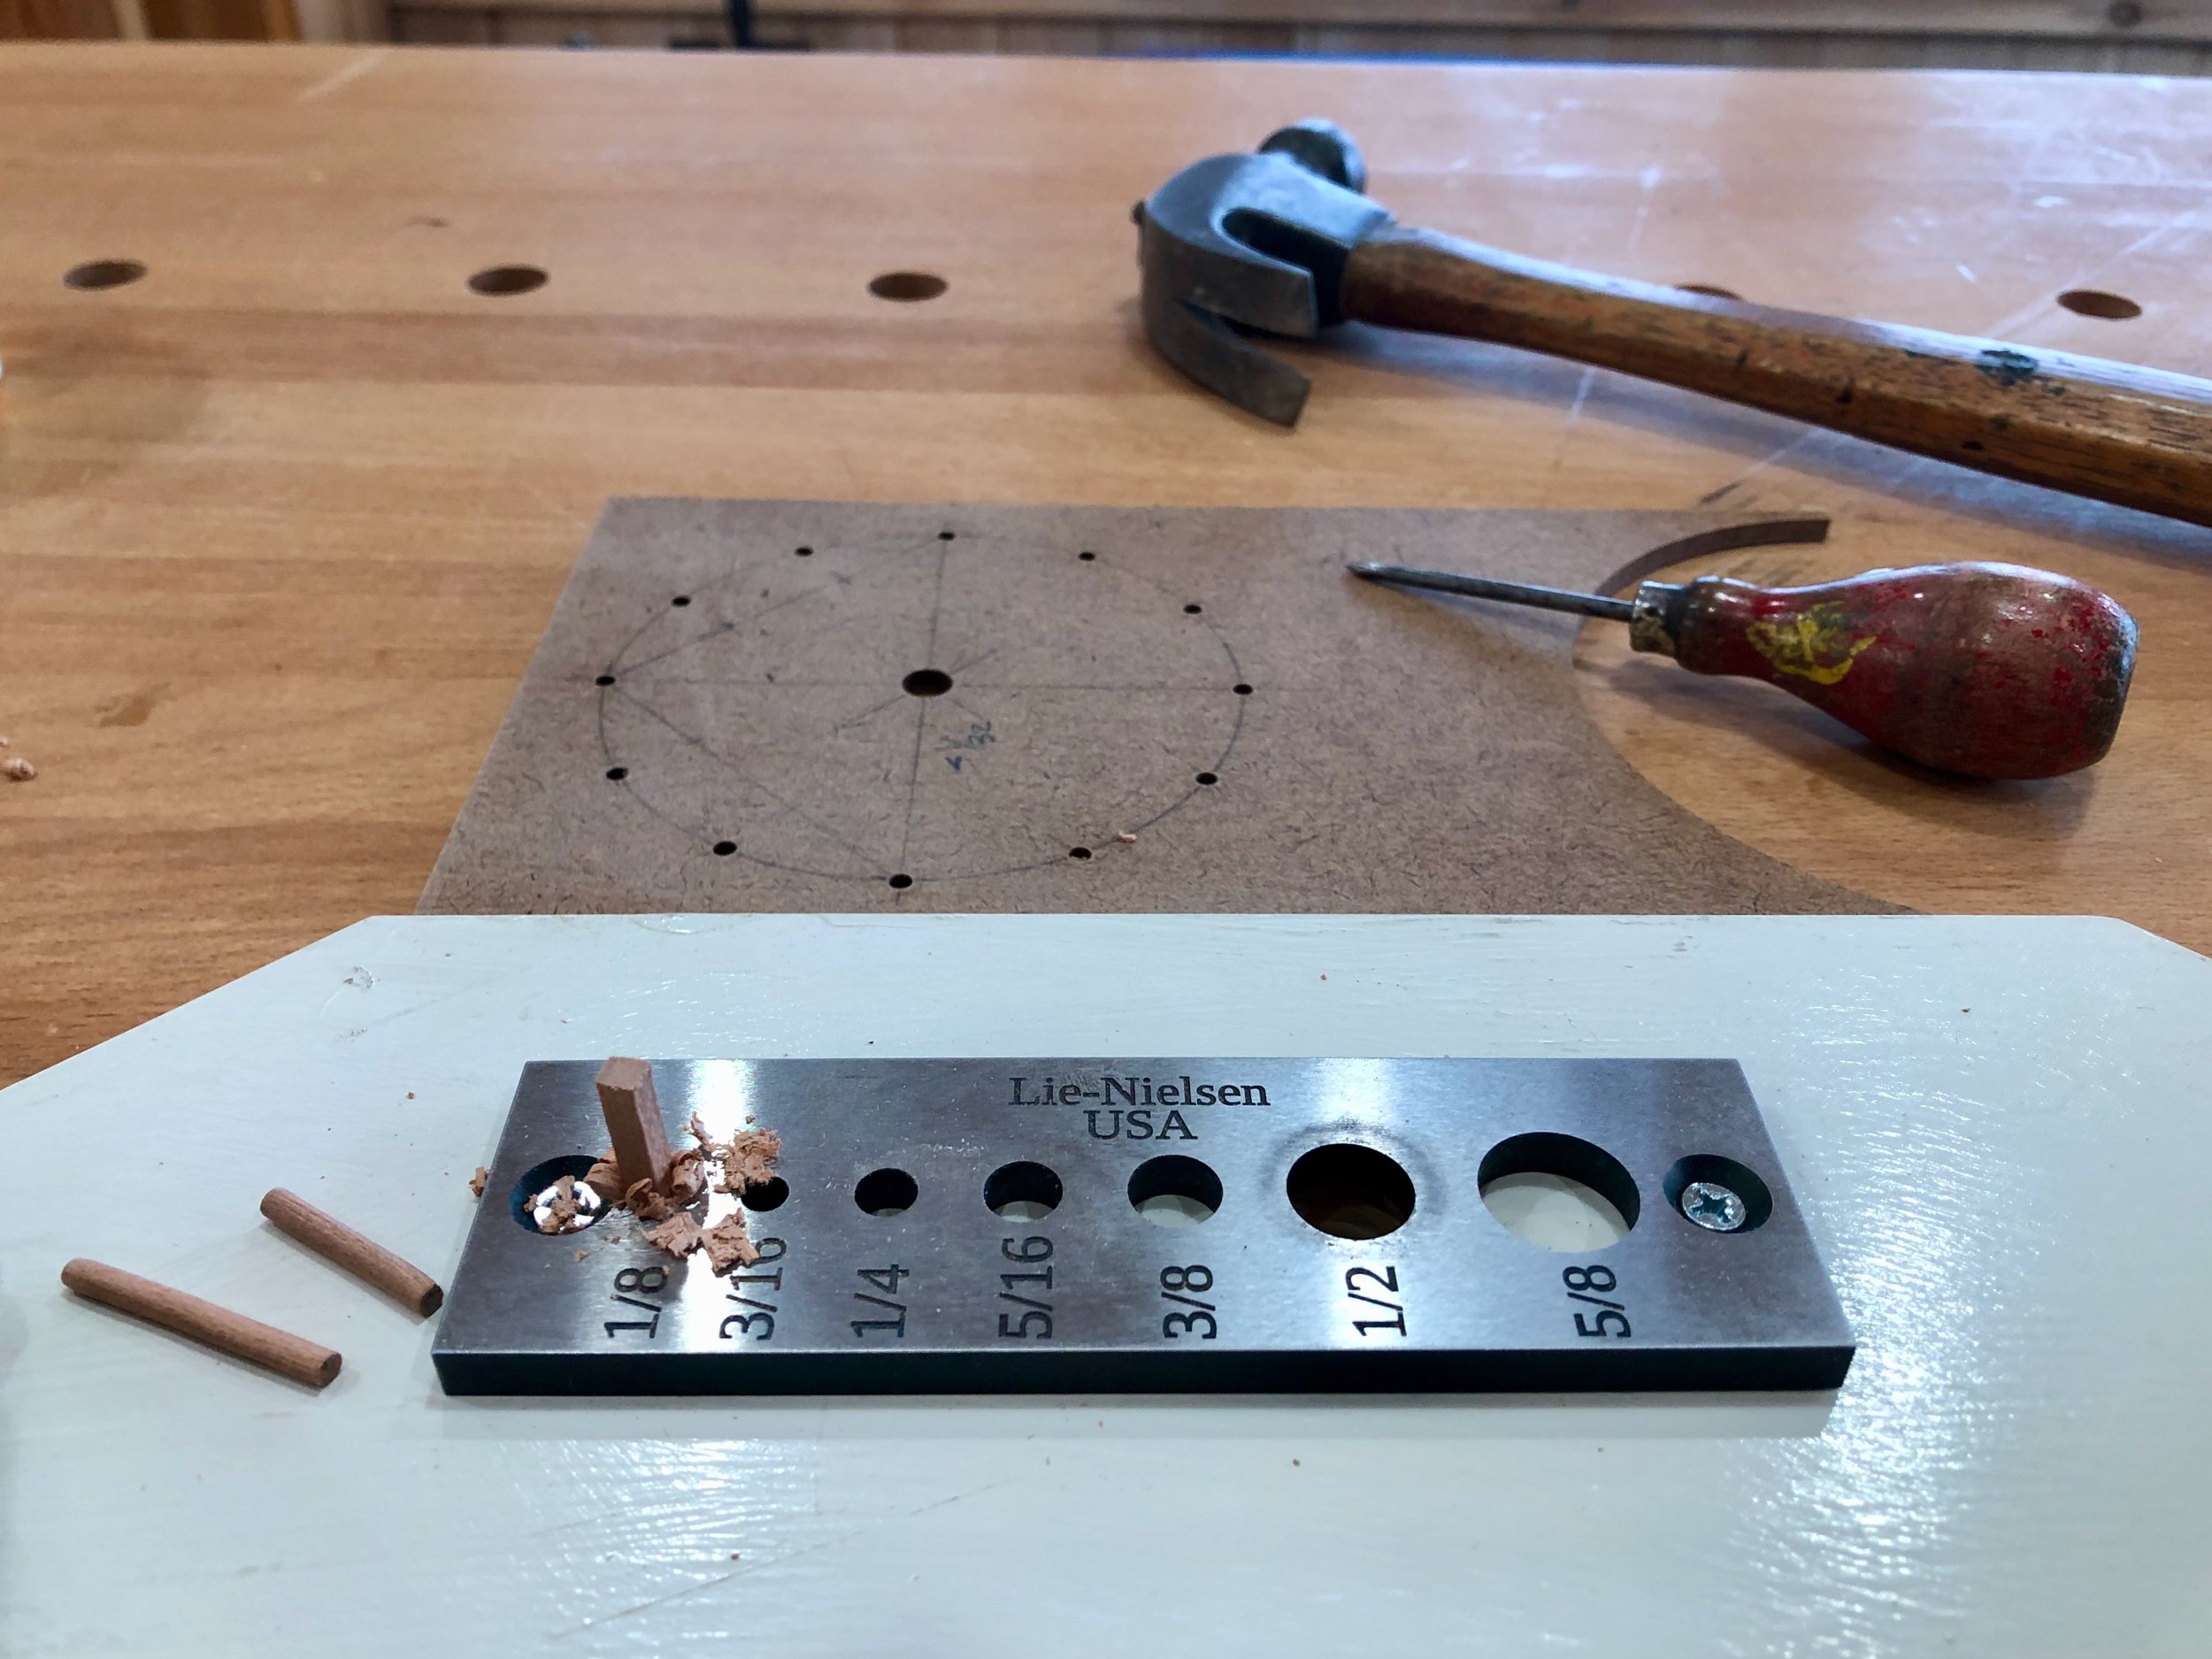
Dowel-making with face template in background
With assistance from the template, the dial was created by drilling the 12-hole circle into the case front and then tapping a short dowel into each opening. A small dab of glue was applied to the back of each peg to secure these in place. The protruding ends were then removed with a Japanese flush cutting saw and the face sanded smooth to 220 grit. A center hole for the clock stem was then drilled to complete the clock face.
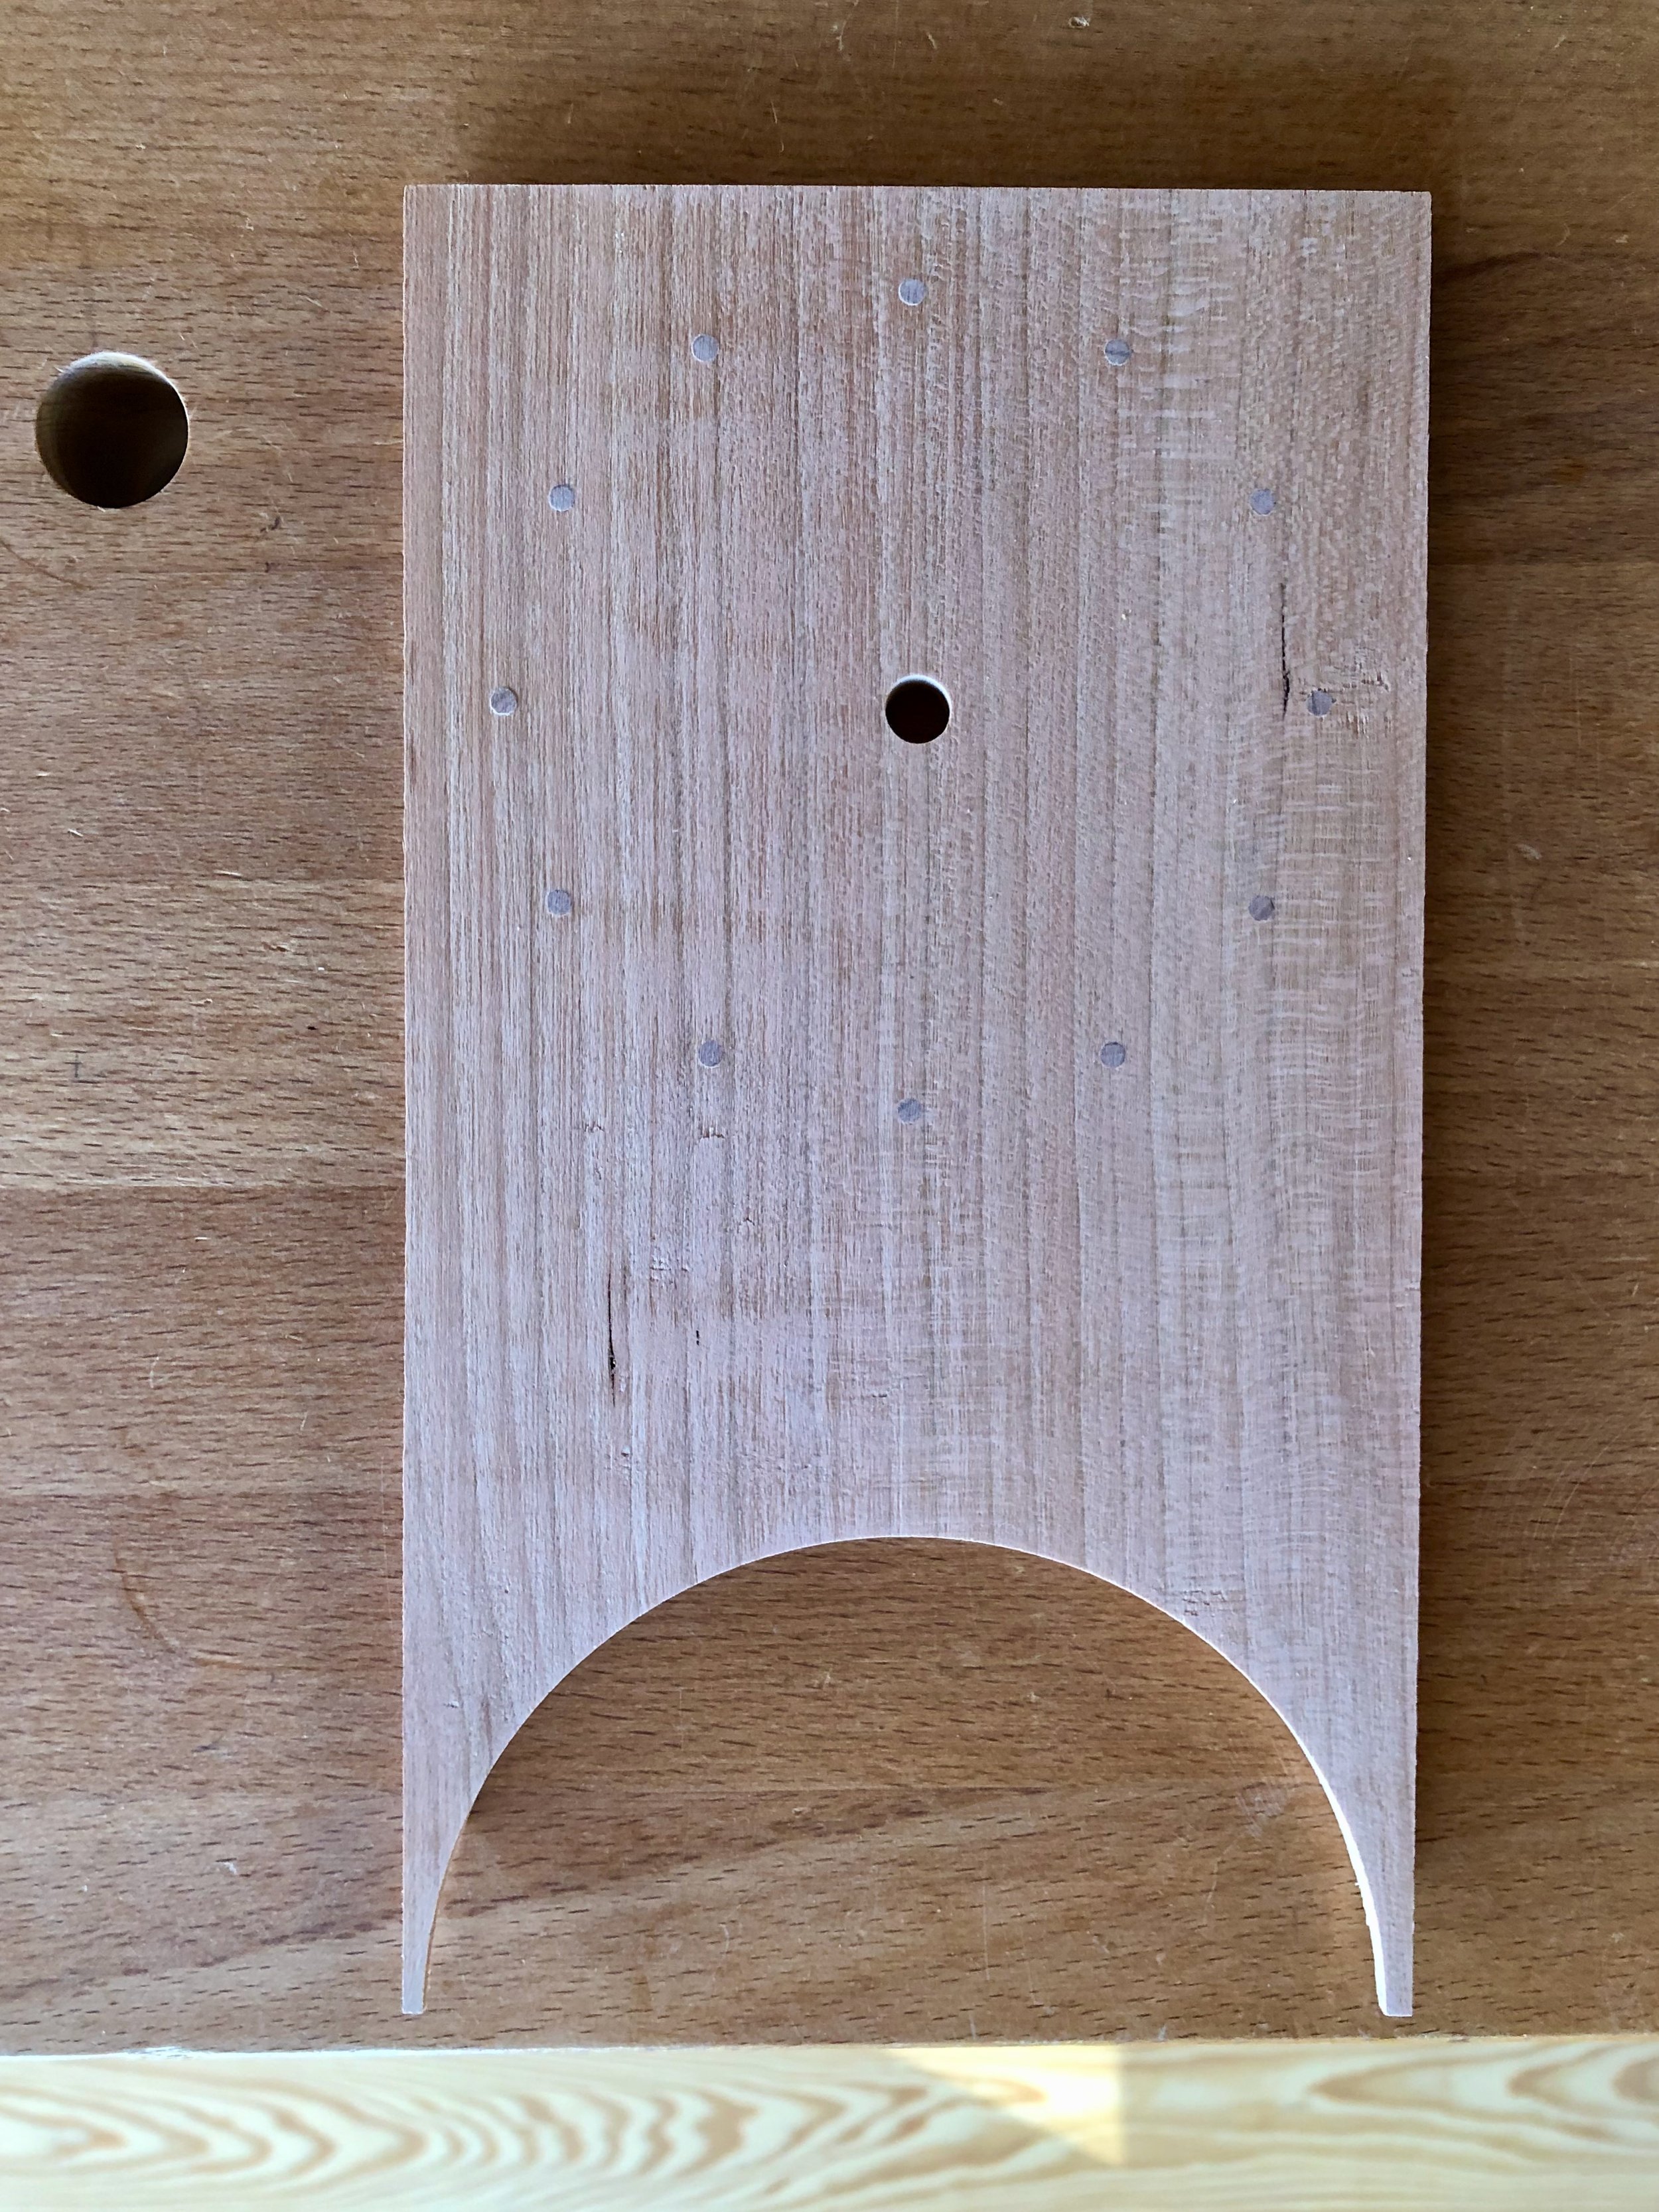
Clock face (bare wood)
Assembly & Finish
After sanding all of the parts smooth it was time to glue them together. The first step was to assemble the finger-jointed top and sides. These were put together as tightly as possible by hand and then the shelf board was slid into place and the whole carcass squared-up and cinched with clamps. Lying on its back, the structure could then receive the mitered front board which was aligned and clamped firmly into position. It is always difficult to snap a good picture during glue-up, the awkward disposition of clamps and devices evoke a scene in the dentist’s chair during an expensive procedure, but I tried my best in the below.
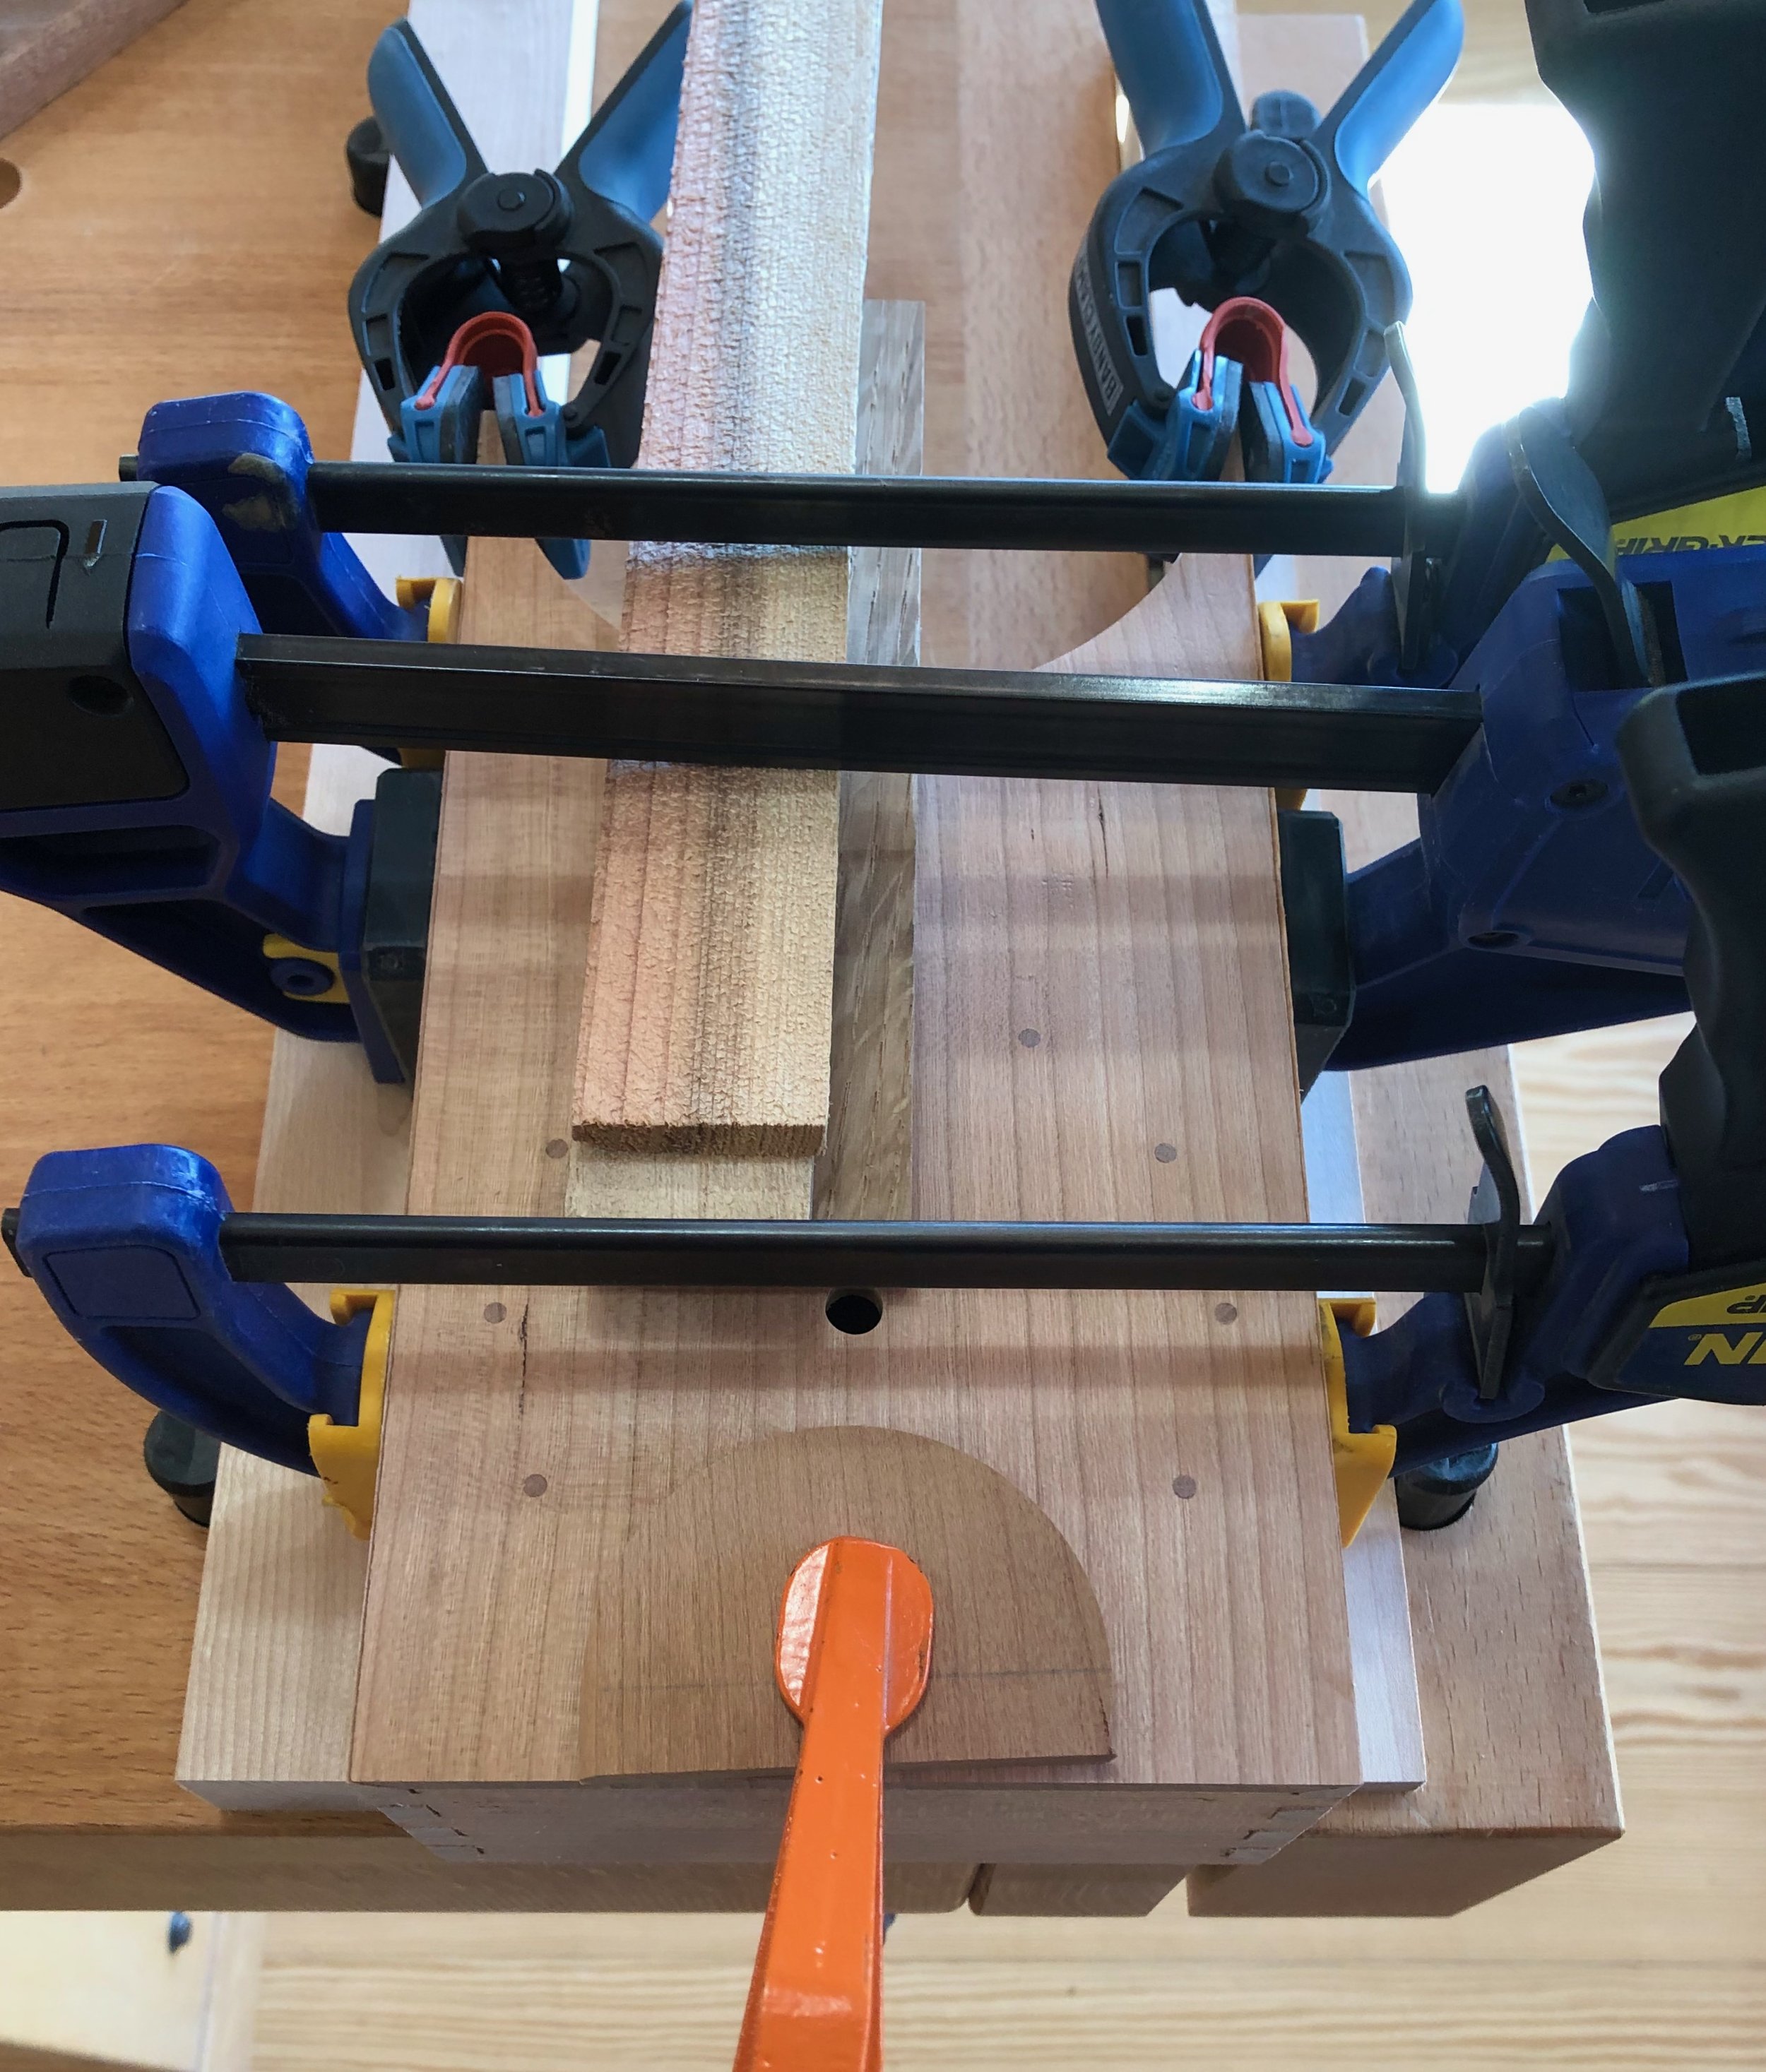
Case undergoing assembly
Unclamped, the case held together nicely but still required some grooming. The protruding box joint fingers were trimmed flush with a block plane, while the mitered edges were crimped to invisibility using a burnisher. I also trimmed the interior of the 1/4 in. thick sides (down near the bottom) so as not to interfere with the dainty statement of the 1/8 inch wide feet. A few joint gaps were beautified using thin cherry scraps and the whole carcass was then sanded down to 220 grit.
I chose to use hinges for mounting the door at the back of the case. Ultimately, the door will be attached following the finishing steps, but it is best to align and drill the screw holes at this point. I used the smallest pair of brass butt hinges I could find. As a handle I decided to simply drill a 3/4 in. circular finger pull. Clean.

Door mounted on the backside
Finally, I mounted a small rare earth magnet within the cavity that could mate with a hack-sawn screw to serve as the door catch. On to the finish.
I find the character of this wood to be fascinating and so I took some time to experiment with finishes, specifically comparing gel polyurethane with an oil-based wiping varnish (also polyurethane). I wanted to highlight the color variations in the wood, including the patches of punch card-like ray flecks, without inducing the blotching for which cherry is prone. I also wanted to maximize the contrast of the dowel end grain with the surface wood to make the face pop. Working on test pieces, I found that the gel polyurethane imparted a brighter, more orange, color to the wood, whereas the oil varnish gave a greener tint when compared side-by-side. The final surface was also smoother with the gel product (build-up filling the tiny valleys, perhaps?) and so this finish was applied to the clock case and door in three coats.
After the finish had dried, I attached the door hinges and then mounted the clockworks. The final design decision for Clock No. 1 was the choice of hands. The gold colored hands originally purchased for this clock turned out to be too bright, with not enough contrast against the wooden face. I liked the style, but not the finish and so I procured a similar set of hands in black. These did the trick!
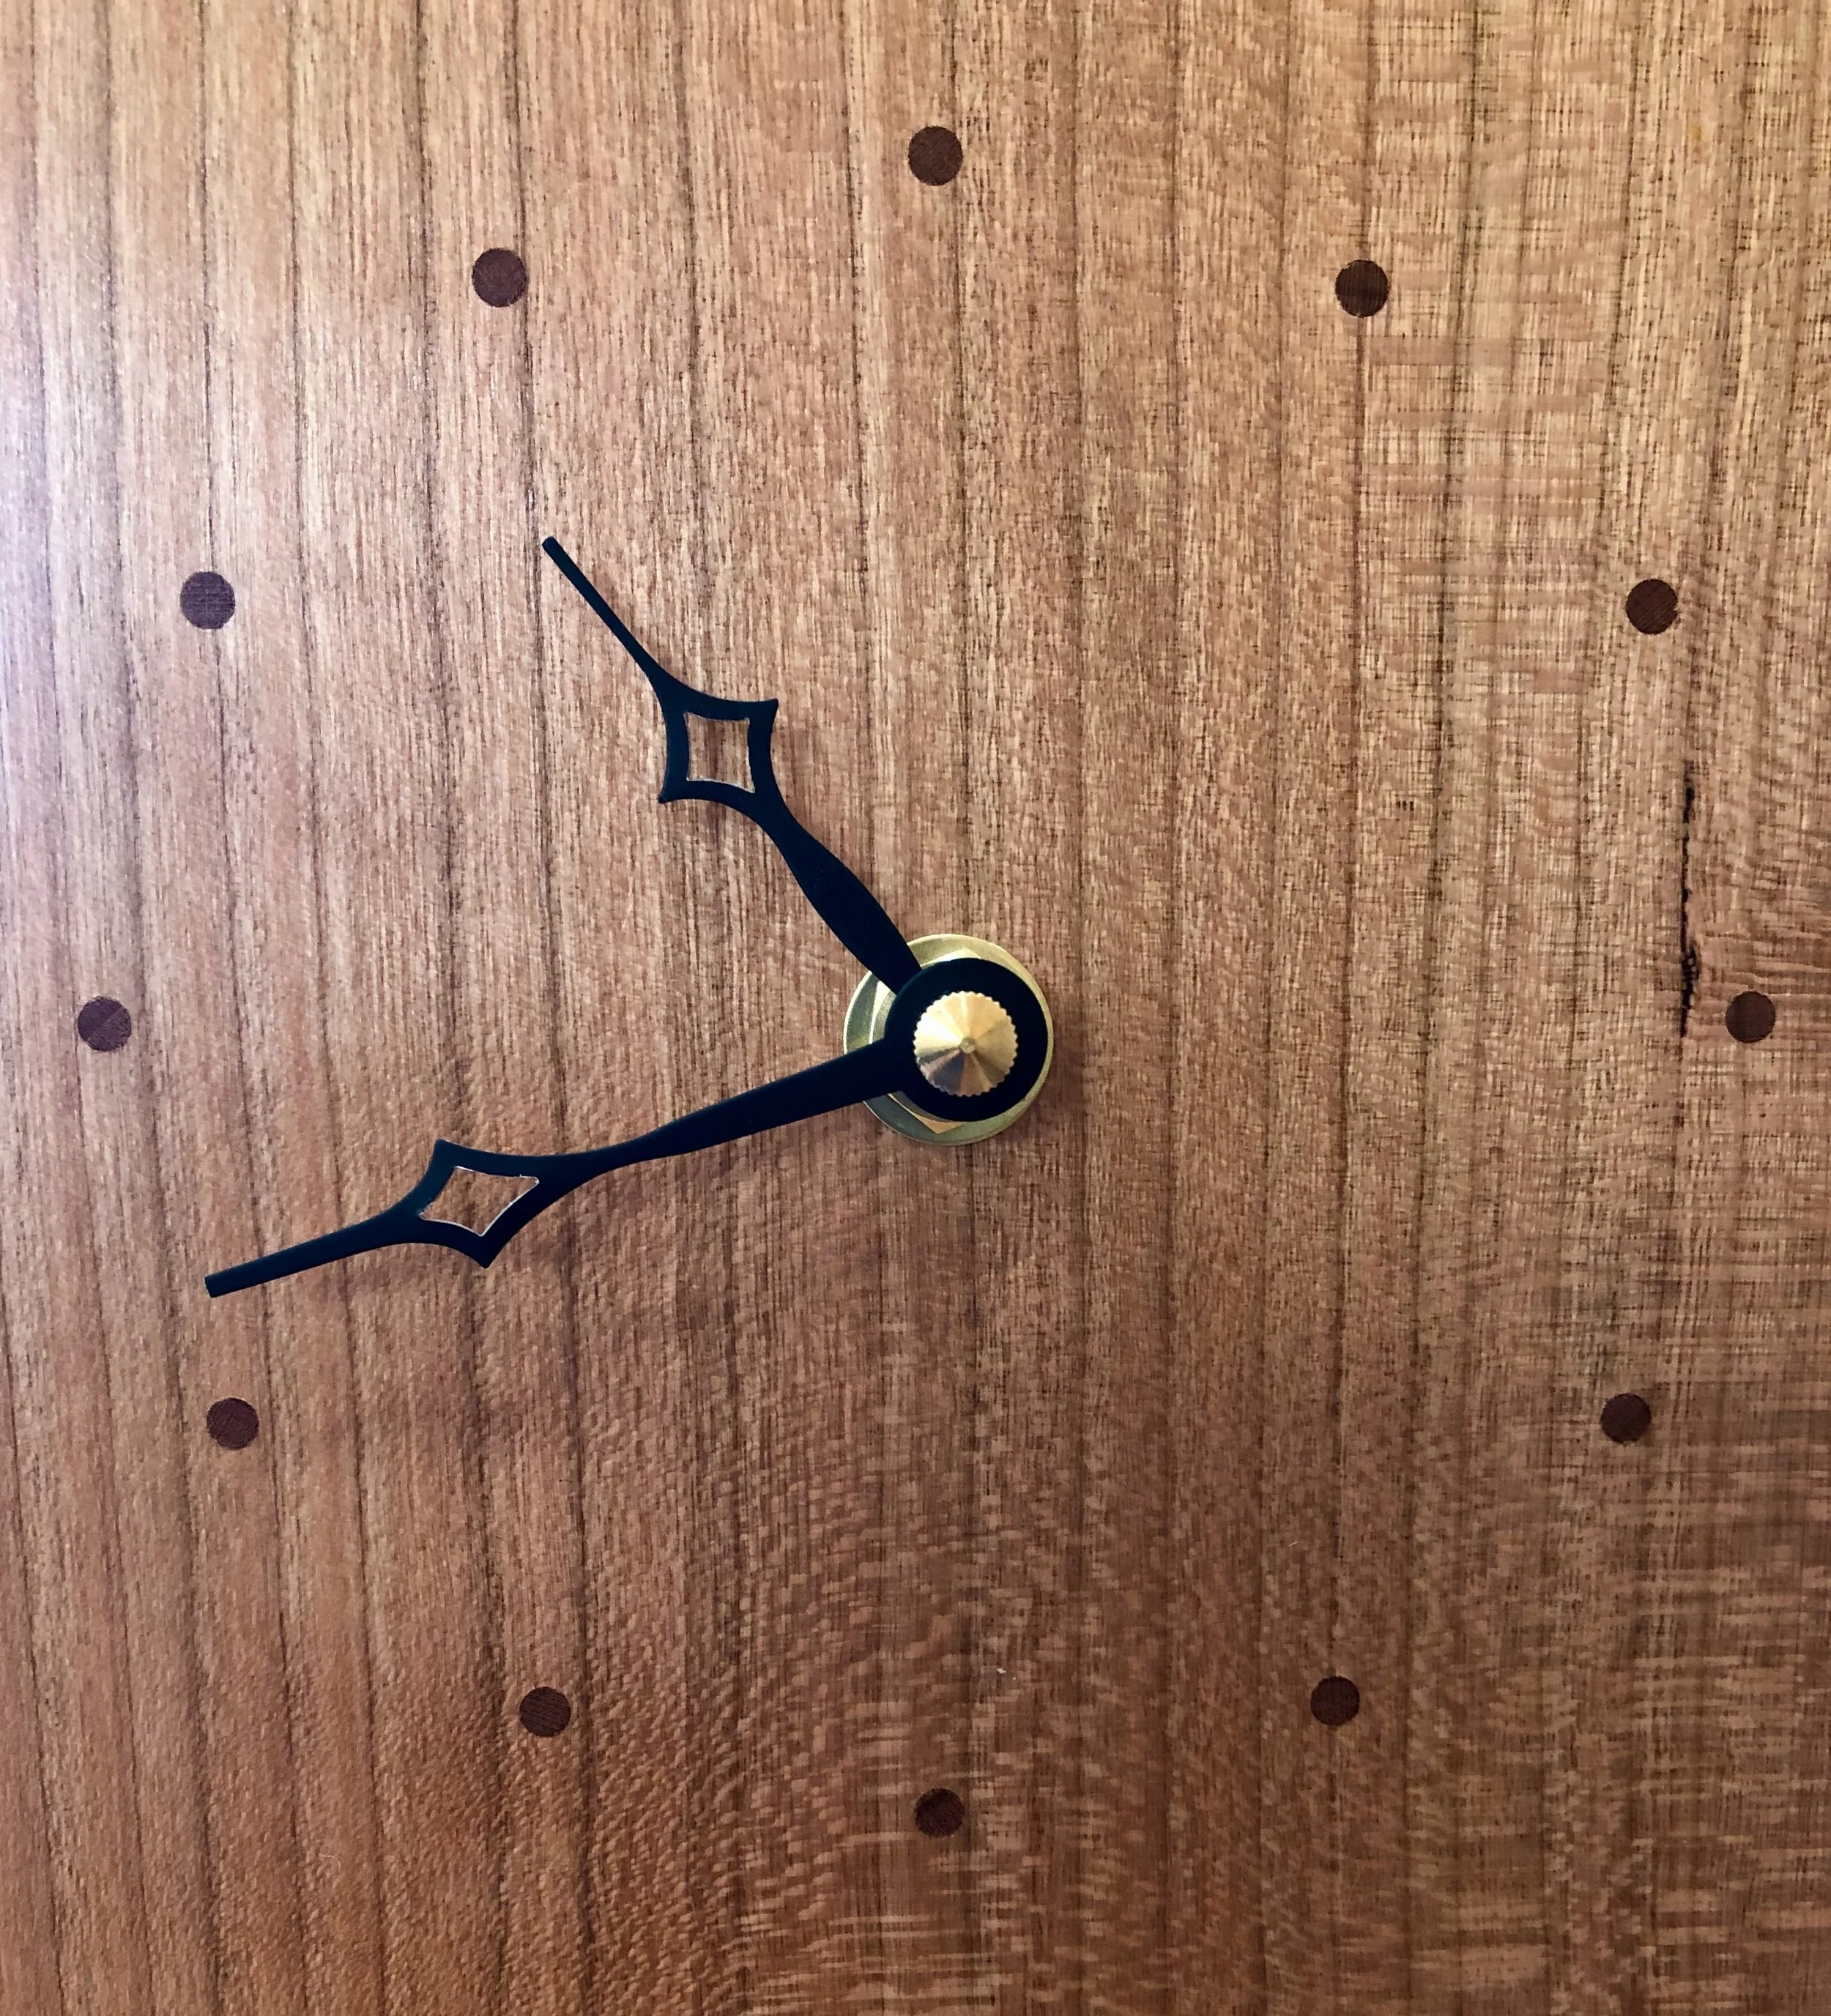
Clock No. 1 face
I like this prototype clock and think it has some staying power. That little nine inch timepiece has a presence. The cherry wood provides intricate grain on a scale that does not overwhelm a small item, although oak would also be nice and I now think mahogany would be a rich material to try, as well. I have some ideas for making the joints appear “cleaner” and to also simplify the door mechanics, too. Lots to explore! - next time.
