

Chisel Chest

Up until recently I had neither a chisel chest, nor a chest for my chisels. I now possess one and may even begin working on the other (ha, right!). Here’s the story.
After completing the Canterbury cabinet I remained interested in exploring Shaker furniture and was also bent on continuing to de-clutter the workshop. There’s much more to do! For example, I have a couple chisels sets that, while not homeless, could use better homes.
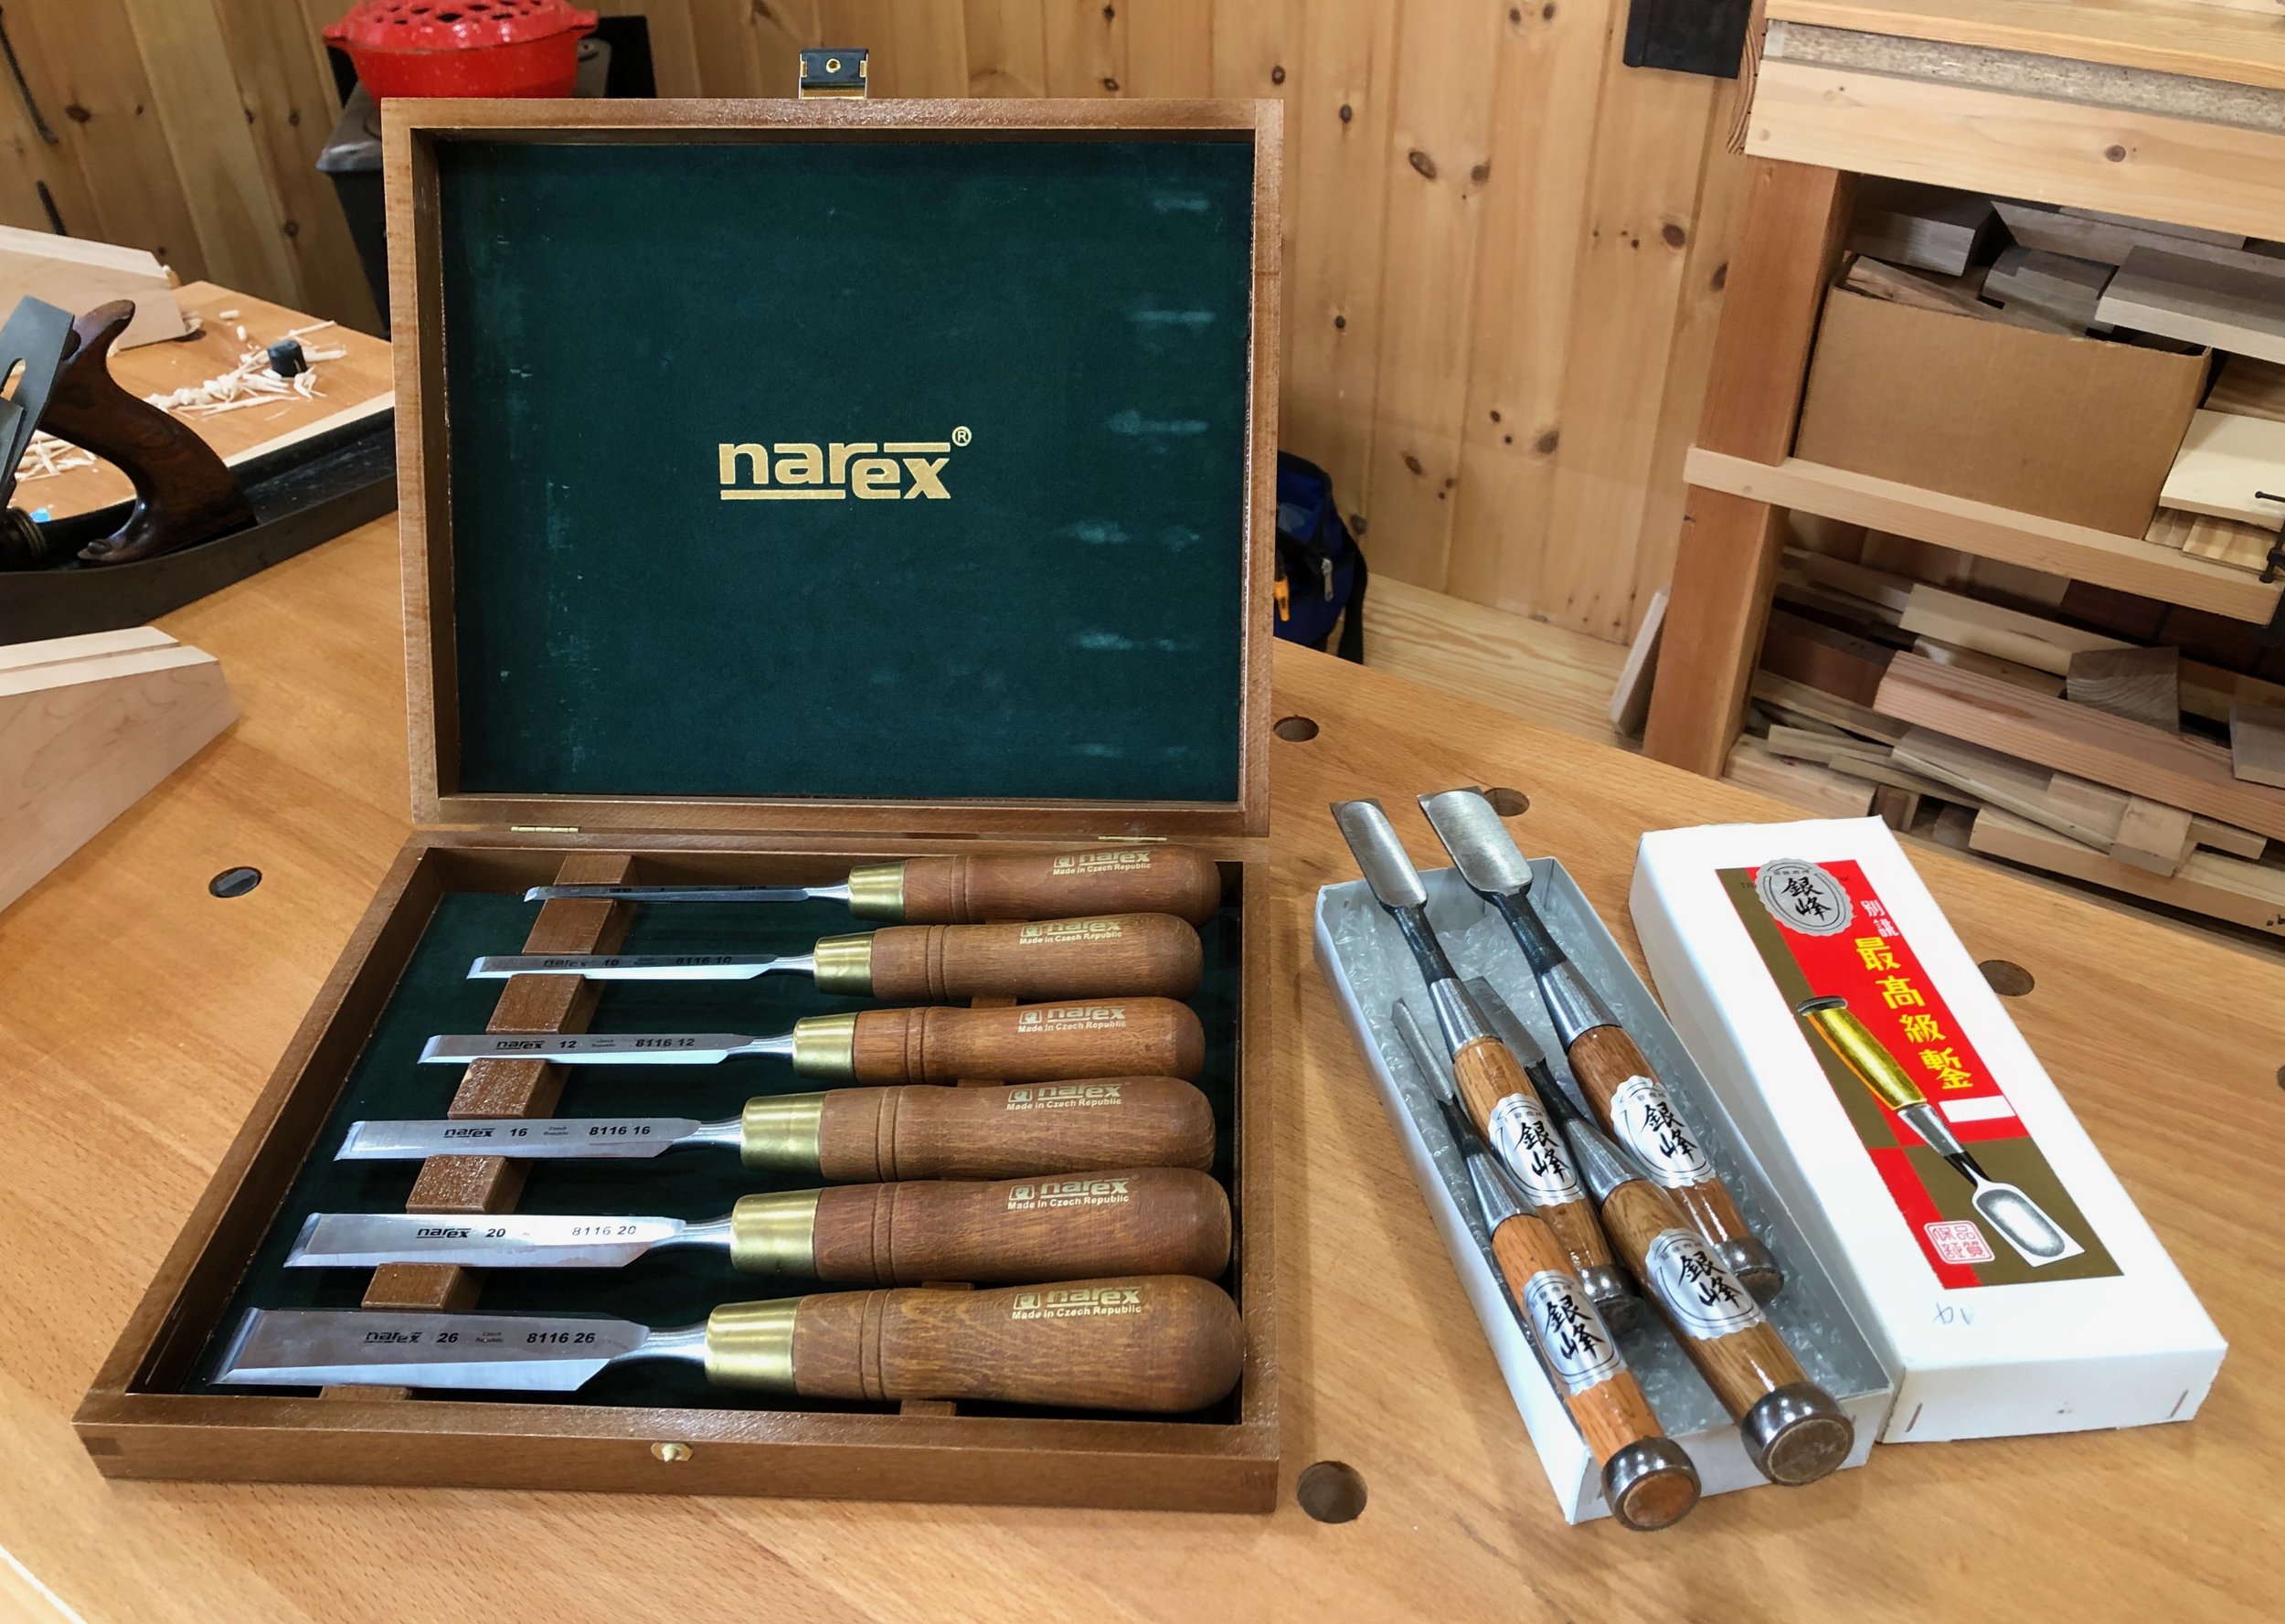
Chisels from East and West
Oh, don’t be fooled by that velvety narex® box. It looks precious, but the heavy polymer finish on the wood attracts every single particle of sawdust in range and I am continually wiping it down. It needed to go, along with that attractive yet flimsy cardboard box from Japan, and so I decided to make a second Shaker-inspired cabinet to house these fine tools.
Design
A simple, 2-drawer stack was the scope here . No fancy ornaments, with dovetail construction for the carcass and drawers. Although I did not have an example to copy, keeping the dimensions slim and symmetric, with authentic knobs for the drawers should pull it all together as Shakeresque. A simple sketch and a few constraining dimension were all that was required by way of a plan.
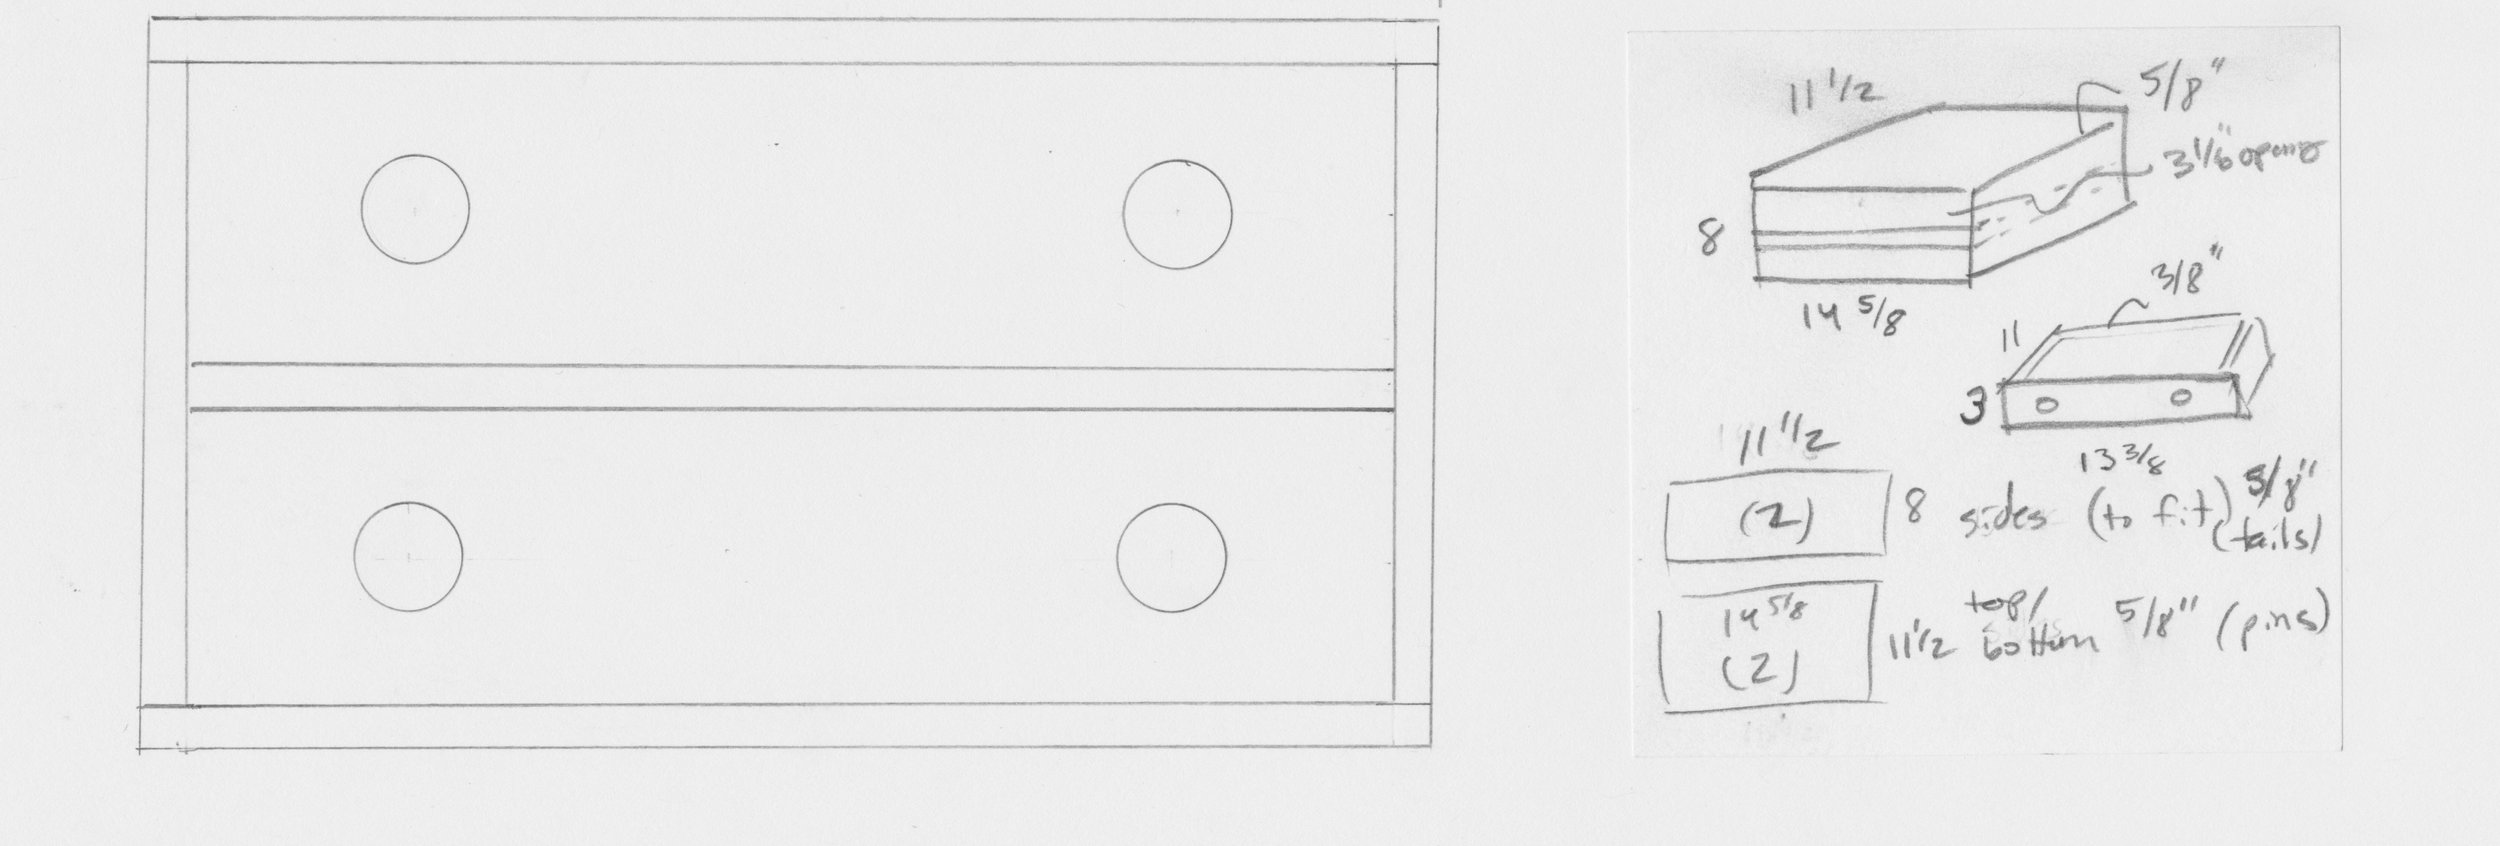
Rough plan
Materials
I had some red pine left over from the last cabinet that would work nicely here for the case and drawer parts. Depending on the look, I might add a finer wood for the fronts of the drawers. For the pulls I obtained some souvenir turned knobs at the gift shop during a recent visit to the Shaker village at Hancock, MA that would be perfect here.

Rough pine boards chopped to a working length
Dimensioning & Assembly
Four sides, a center shelf and a back are required for the carcass. In each case, the individual parts were made by glueing two smaller, previously prepped boards together, smoothing the surface and then cutting to their final dimensions.

Glued-up exterior case boards
After dadoing a groove down the middle of the side boards to hold the shelf I set about making dovetail joints along the ends. Creating “dovetails” is nothing more than a defined series of marking, sawing and chiseling operations that go back centuries. The goal is to join appropriately modified boards together while demonstrating woodworking prowess in the formation of tight seams. I decided on the bulkier, so-called “carpenter” style dovetails for the case, and they came out okay … for me.

Value-added case parts
Because the joints are tight, assembly required only sparing amounts of glue and some hammer head persuasion. Clamps and cauls also help.

Clamping the joints together using homemade cauls
With the four sides joined, the shelf and back board could be slipped into their groove and rabbet, respectively. I tacked the back in place with finishing nails, whereas the shelf was held using a bit of glue. After some hand planing and sanding to make everything pleasantly smooth it was time to tackle the drawers.
Carcass complete
I chose to make inset drawers for this cabinet, which should keep the look nice and clean. And with a few glue-ups to make the bottom parts I had enough pine leftovers around the shop to make it all work. Only quarter sawn scraps were selected, as this cut is the most dimensionally stable. Quarter sawn lumber’s linear grain pattern would also set the drawer fronts off from the rest of the piece (which is what I think I wanted). The joints up front will be half-blind dovetails, with lock corner joints in back.
Sparing the details of board prep and joint-making you will be pleased to know that the two drawers came together nicely in their “plump” dry-fit state. That is, when first fashioned, inset drawers squeezed into their cavities are expected to present a tight fit all around, and these had that.

Dry-fit drawers
Some custom tailoring using a hand plane along the top and sides facilitated the constructs fitting properly within their chambers and it was this state that got the glue.
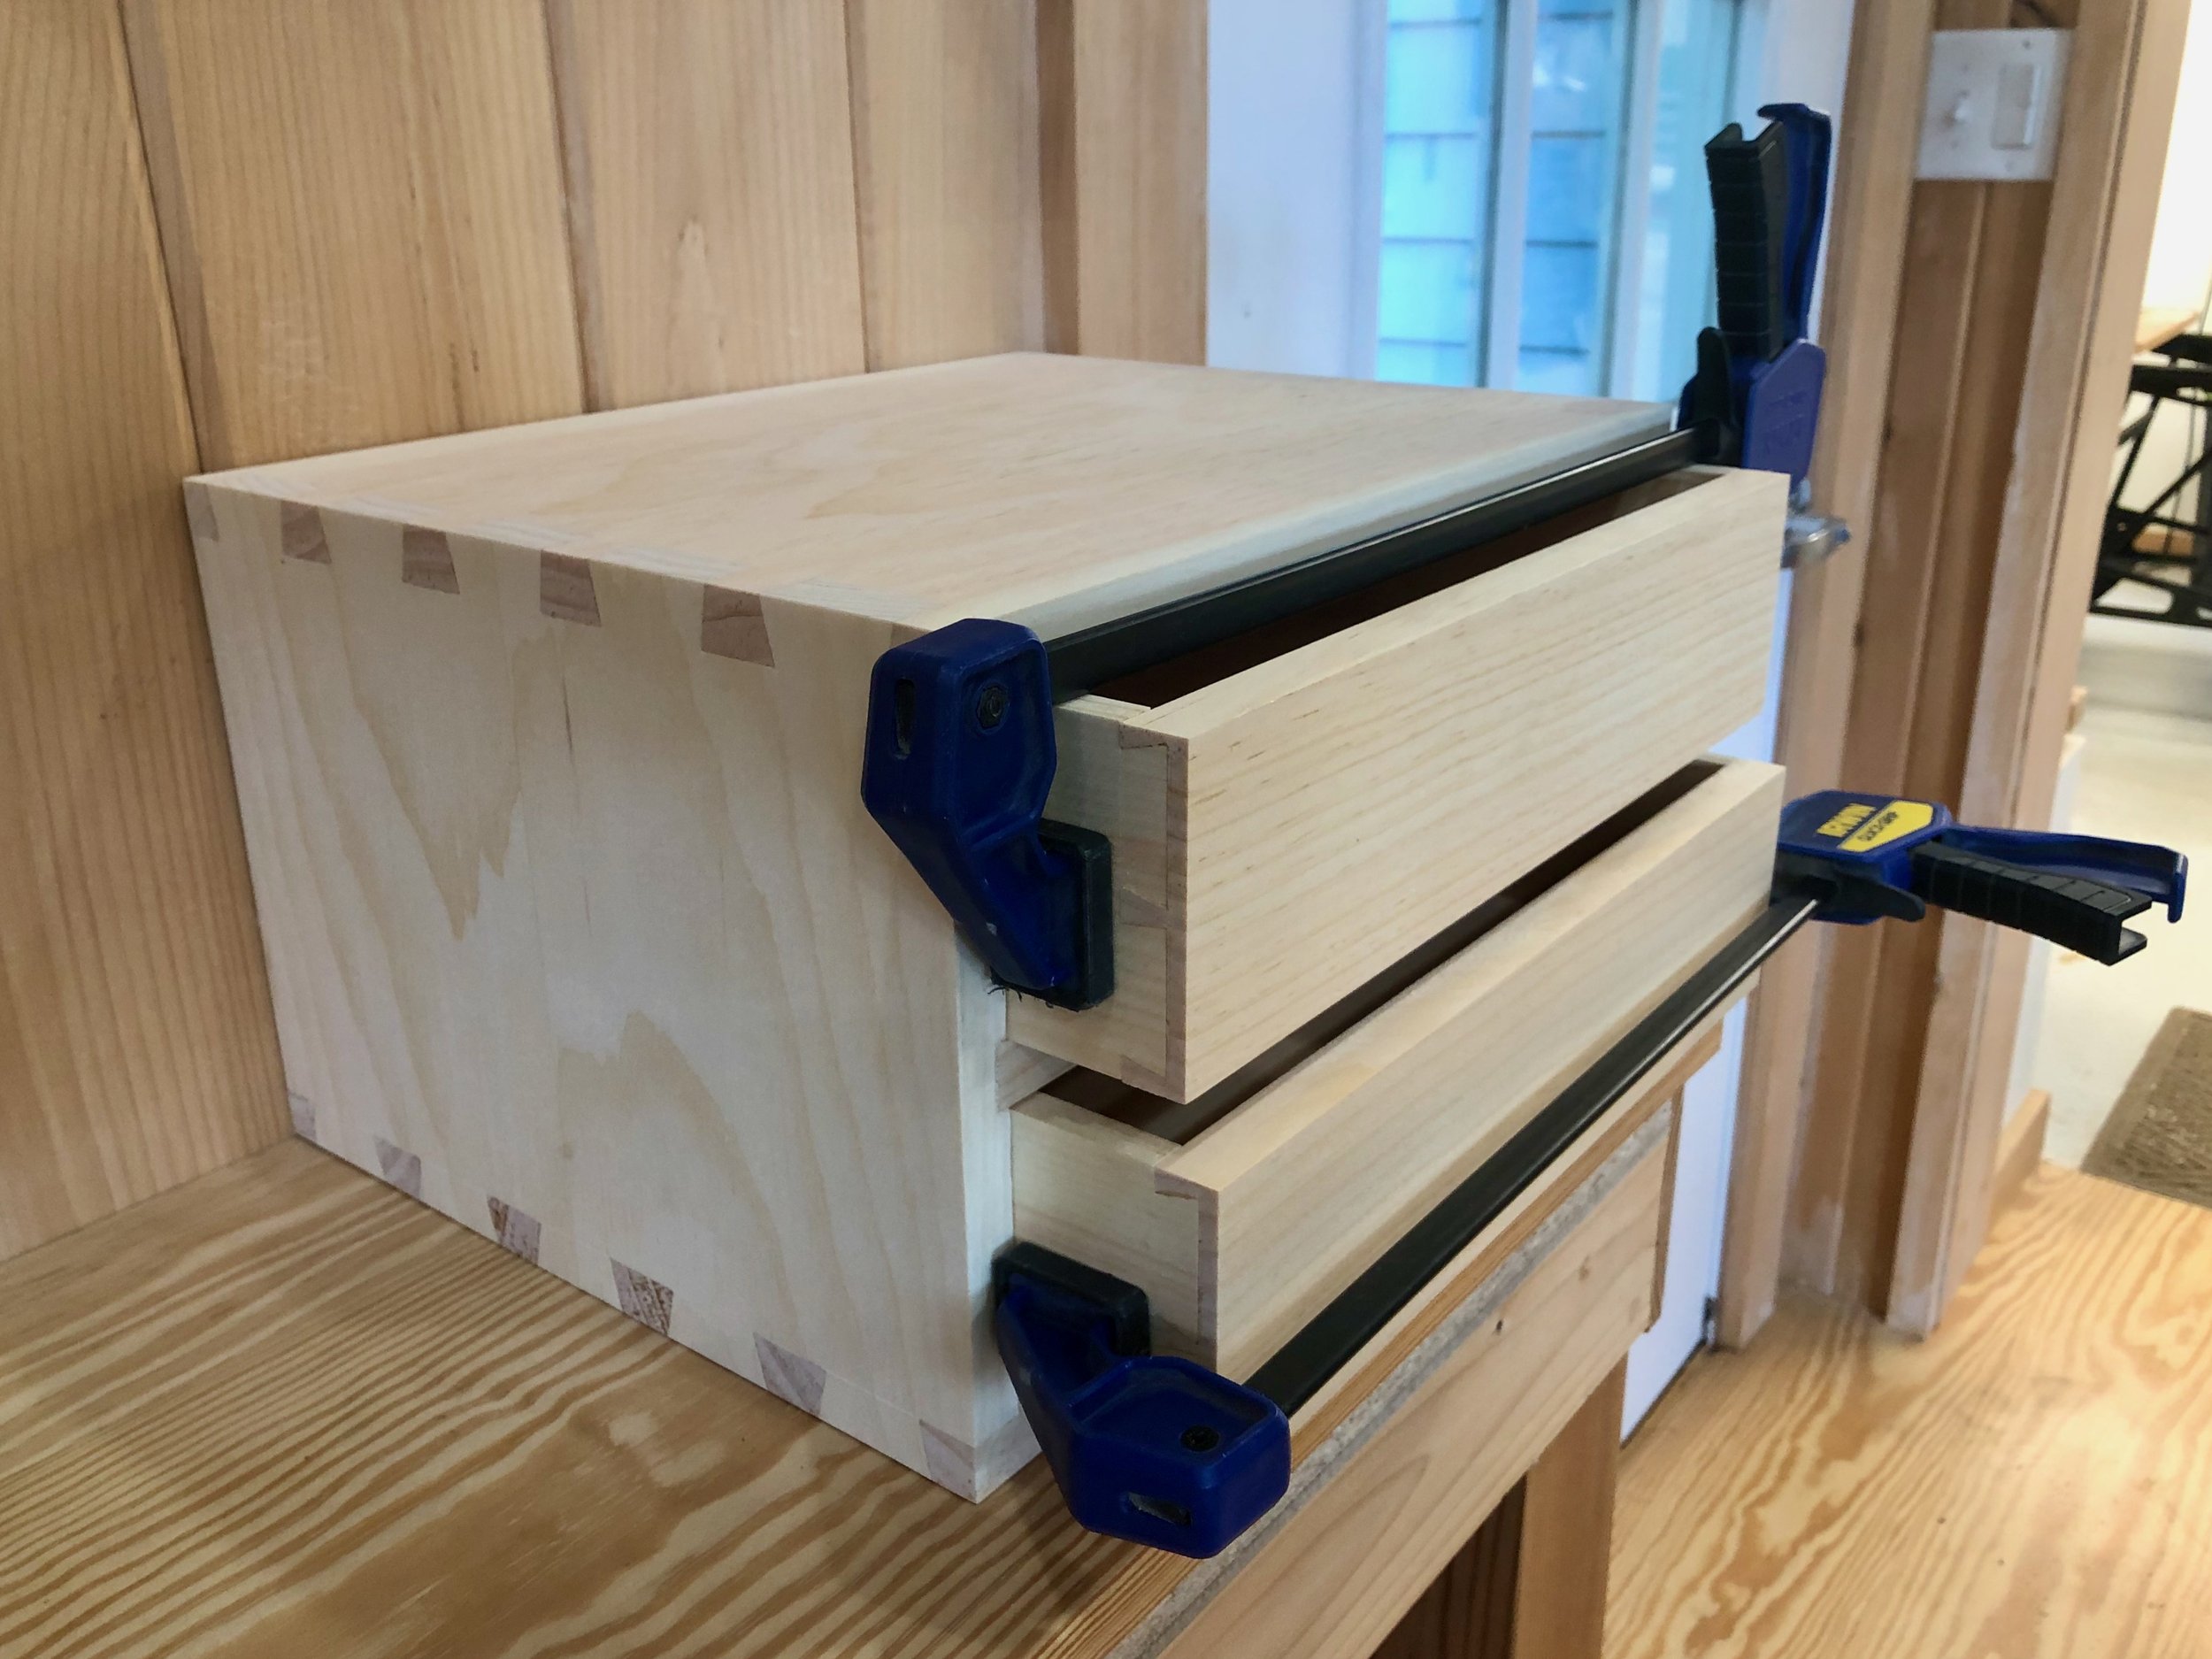
Glueing the drawers
When making inset drawers it is good to mark and drill for the knobs at this stage to avoid a drawer getting irretrievably stuck in its chamber while working the final fit. The Shaker knobs that I am using required a 3/4 inch hole in the drawer fronts, which were marked and then bored using a Forstner bit at the drill press.
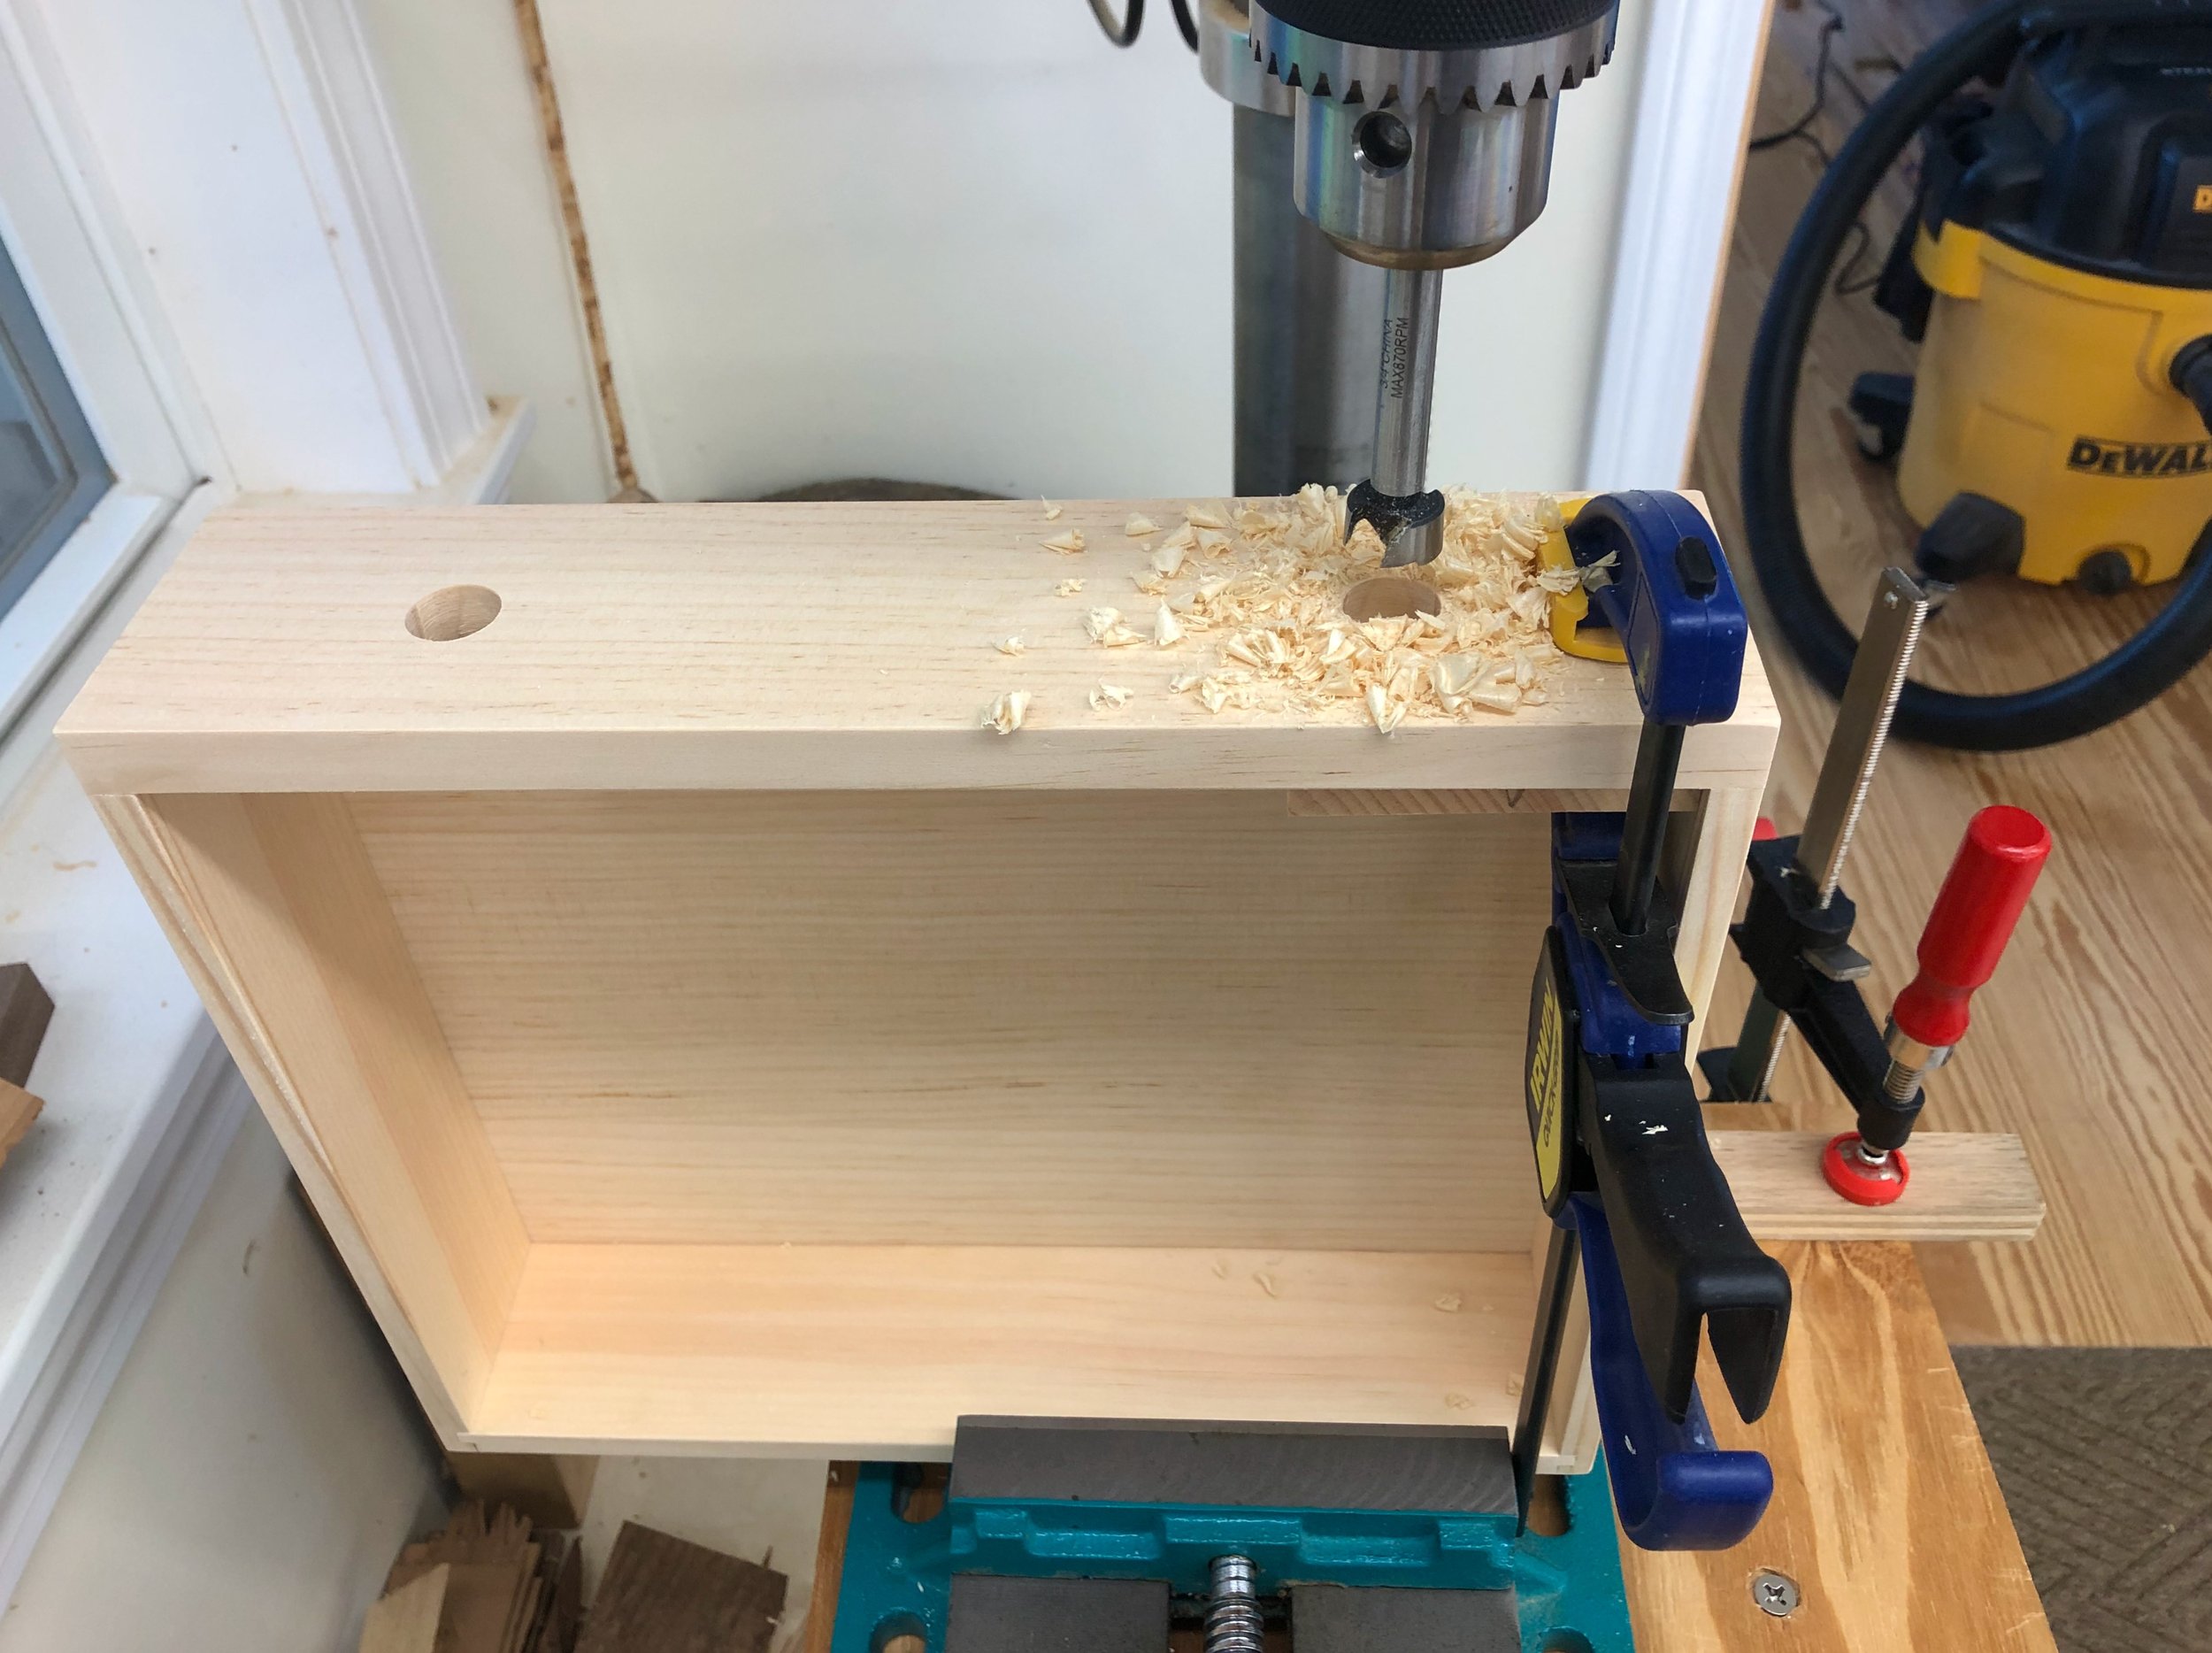
Drilling holes for the drawer knobs
Since I wanted to finish the knobs separately from the chest, all that was left was some final sanding and planing to make the, now permanently assembled, drawers run smooth.
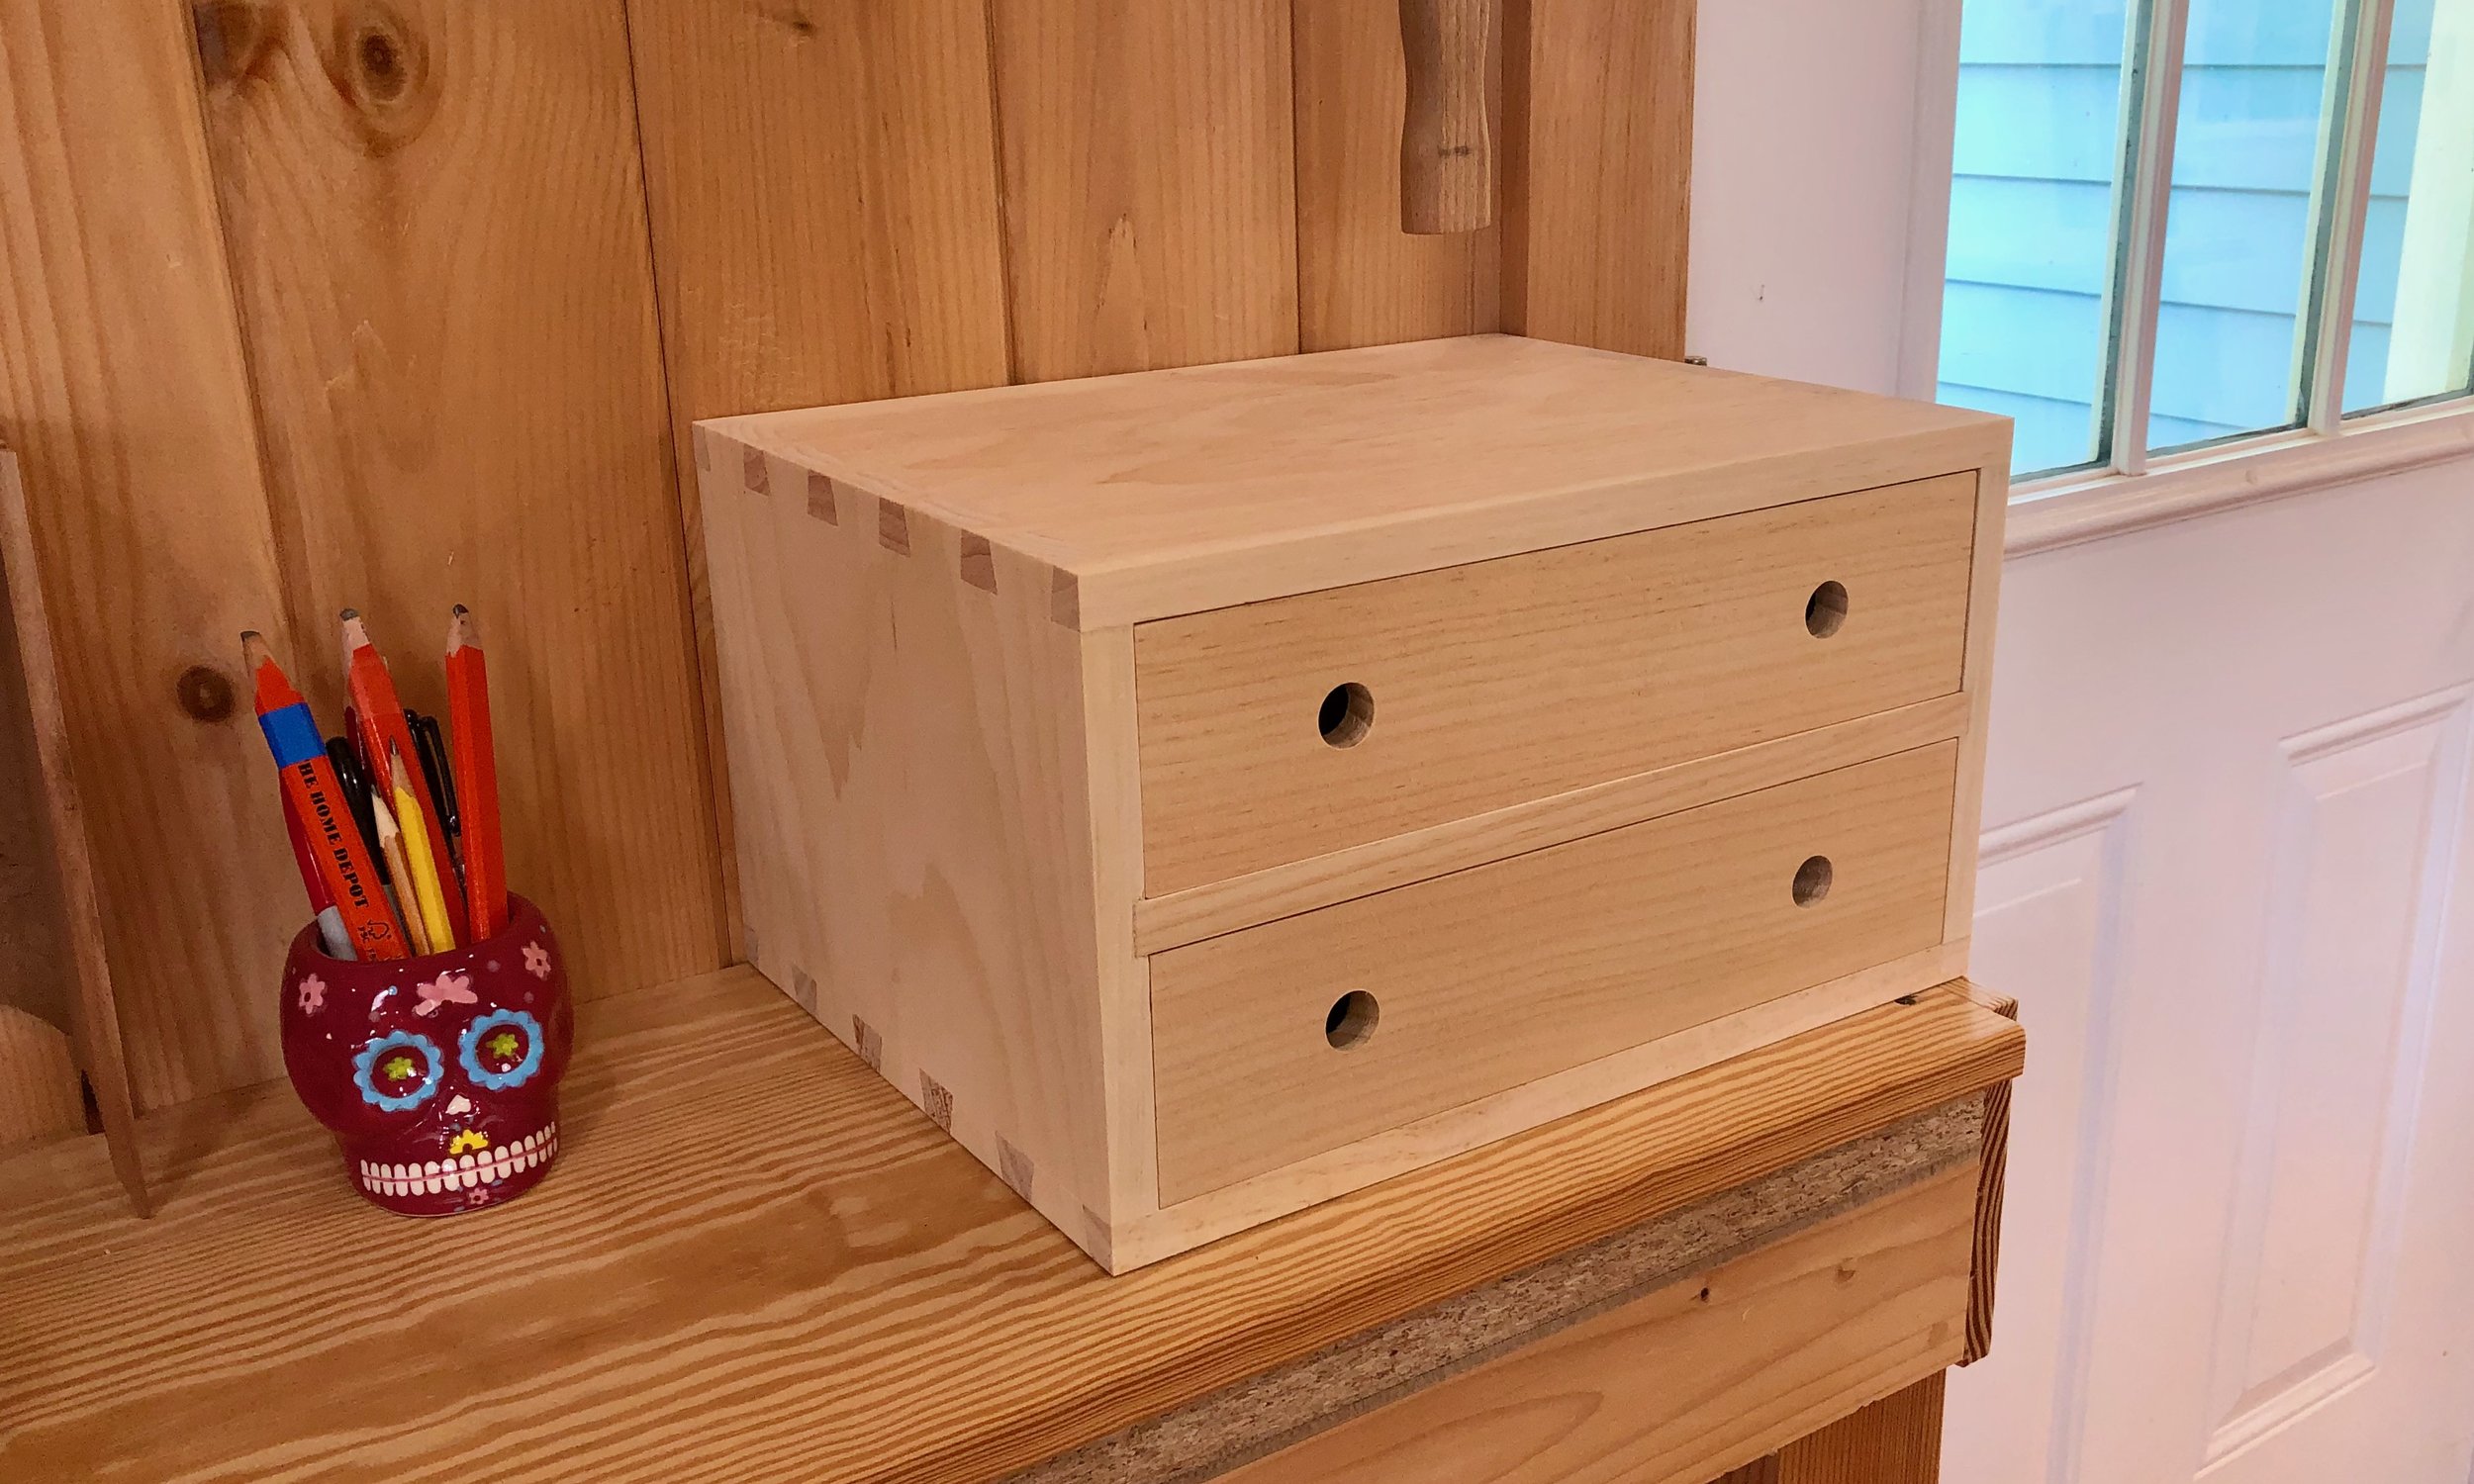
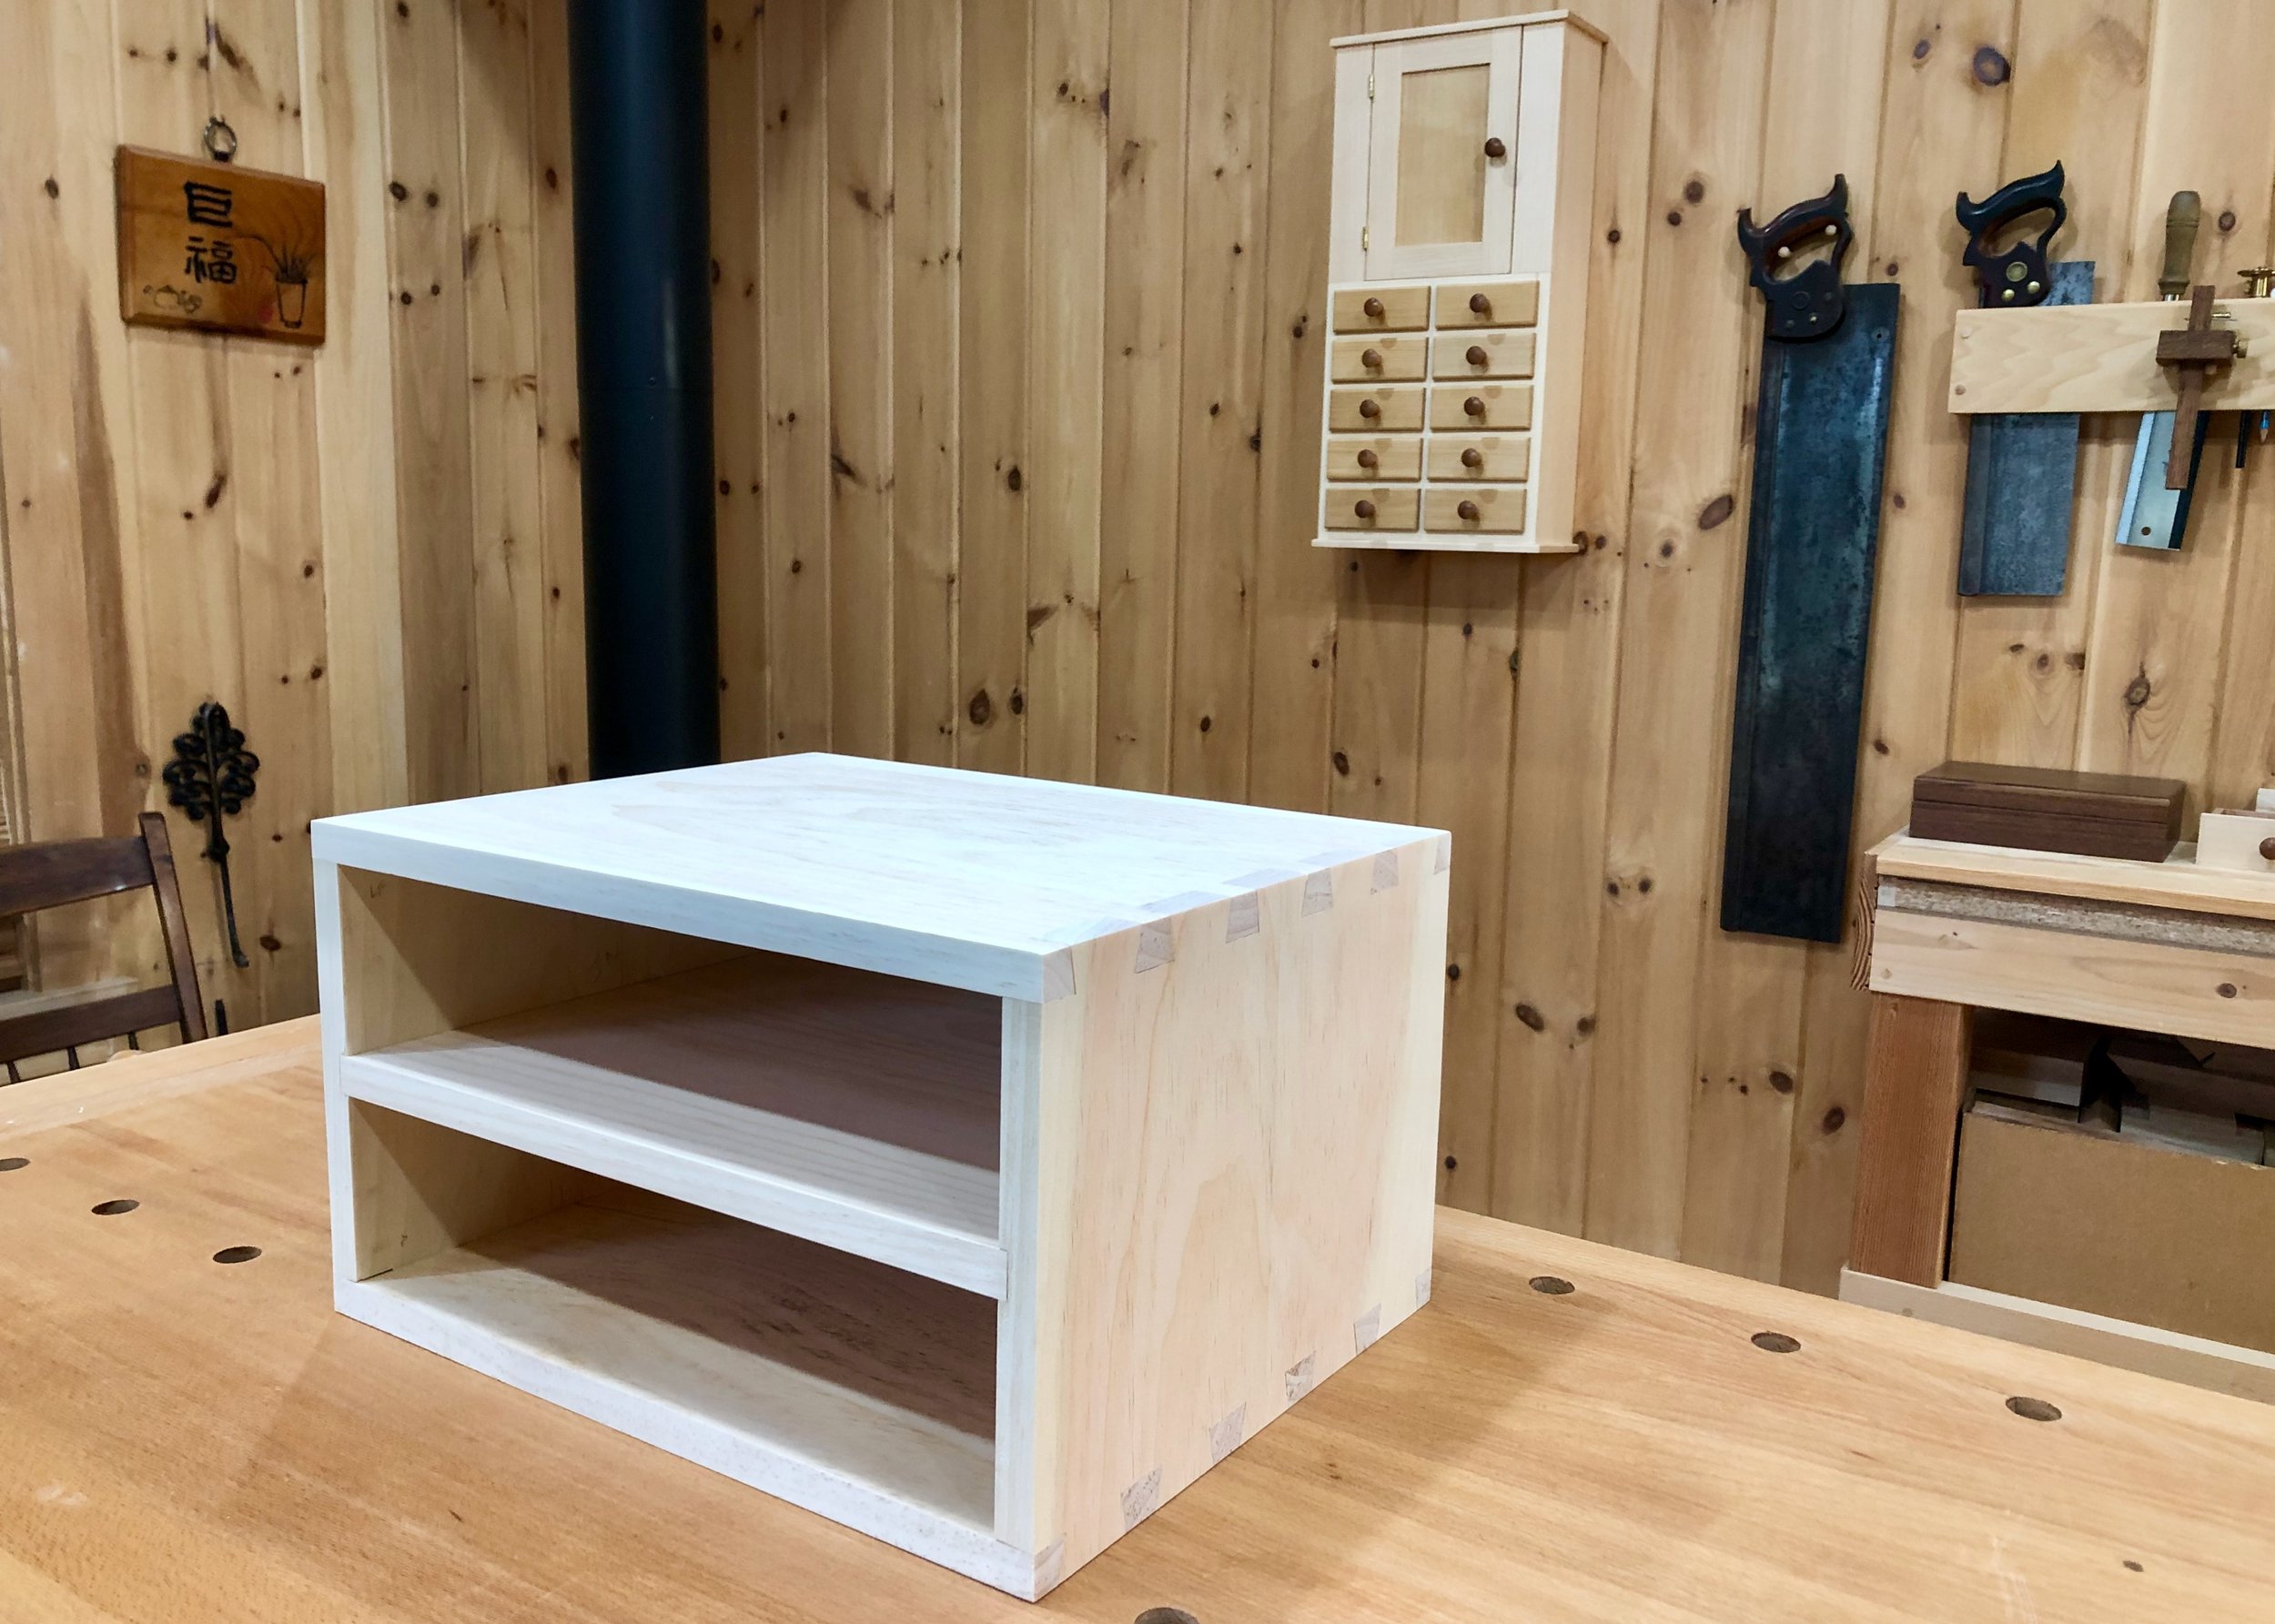
Unfinished chisel chest
Finish
I kept the finish simple on this piece, giving the carcass and drawers a coat of boiled linseed oil to jump start the patination process followed by two coats of clear shellac to prevent resin bleed over time. All parts were then buffed smooth with a gray Scotch-Brite pad. That went well. The knobs were another story …
I do not know the wood species used to make those turned Shaker knobs (birch maybe?) but treating them with mineral spirits to glimpse their final, varnished color revealed that they would look pretty bland and unattractive on a pale pine drawer front. And so I decided to dye them what TransTint® calls “reddish brown” to boost their appeal. That was a bad decision, for I had forgotten about the presence (and porosity) of end grain wood. Not being a woodturner, I failed to appreciate that atop the crown of every lathe-turned knob lurks the end grain of that board. And it happens that end grain wood can soak up as much as 100 times the moisture of edge grain wood, revealing its true function in Nature: liquid transit. Soaking up vastly different amounts of a water based dye can lead to trouble as I discovered upon dipping the first knob into my “reddish brown” bath. The result might look appropriate on one type of “chisel chest” but not this one.
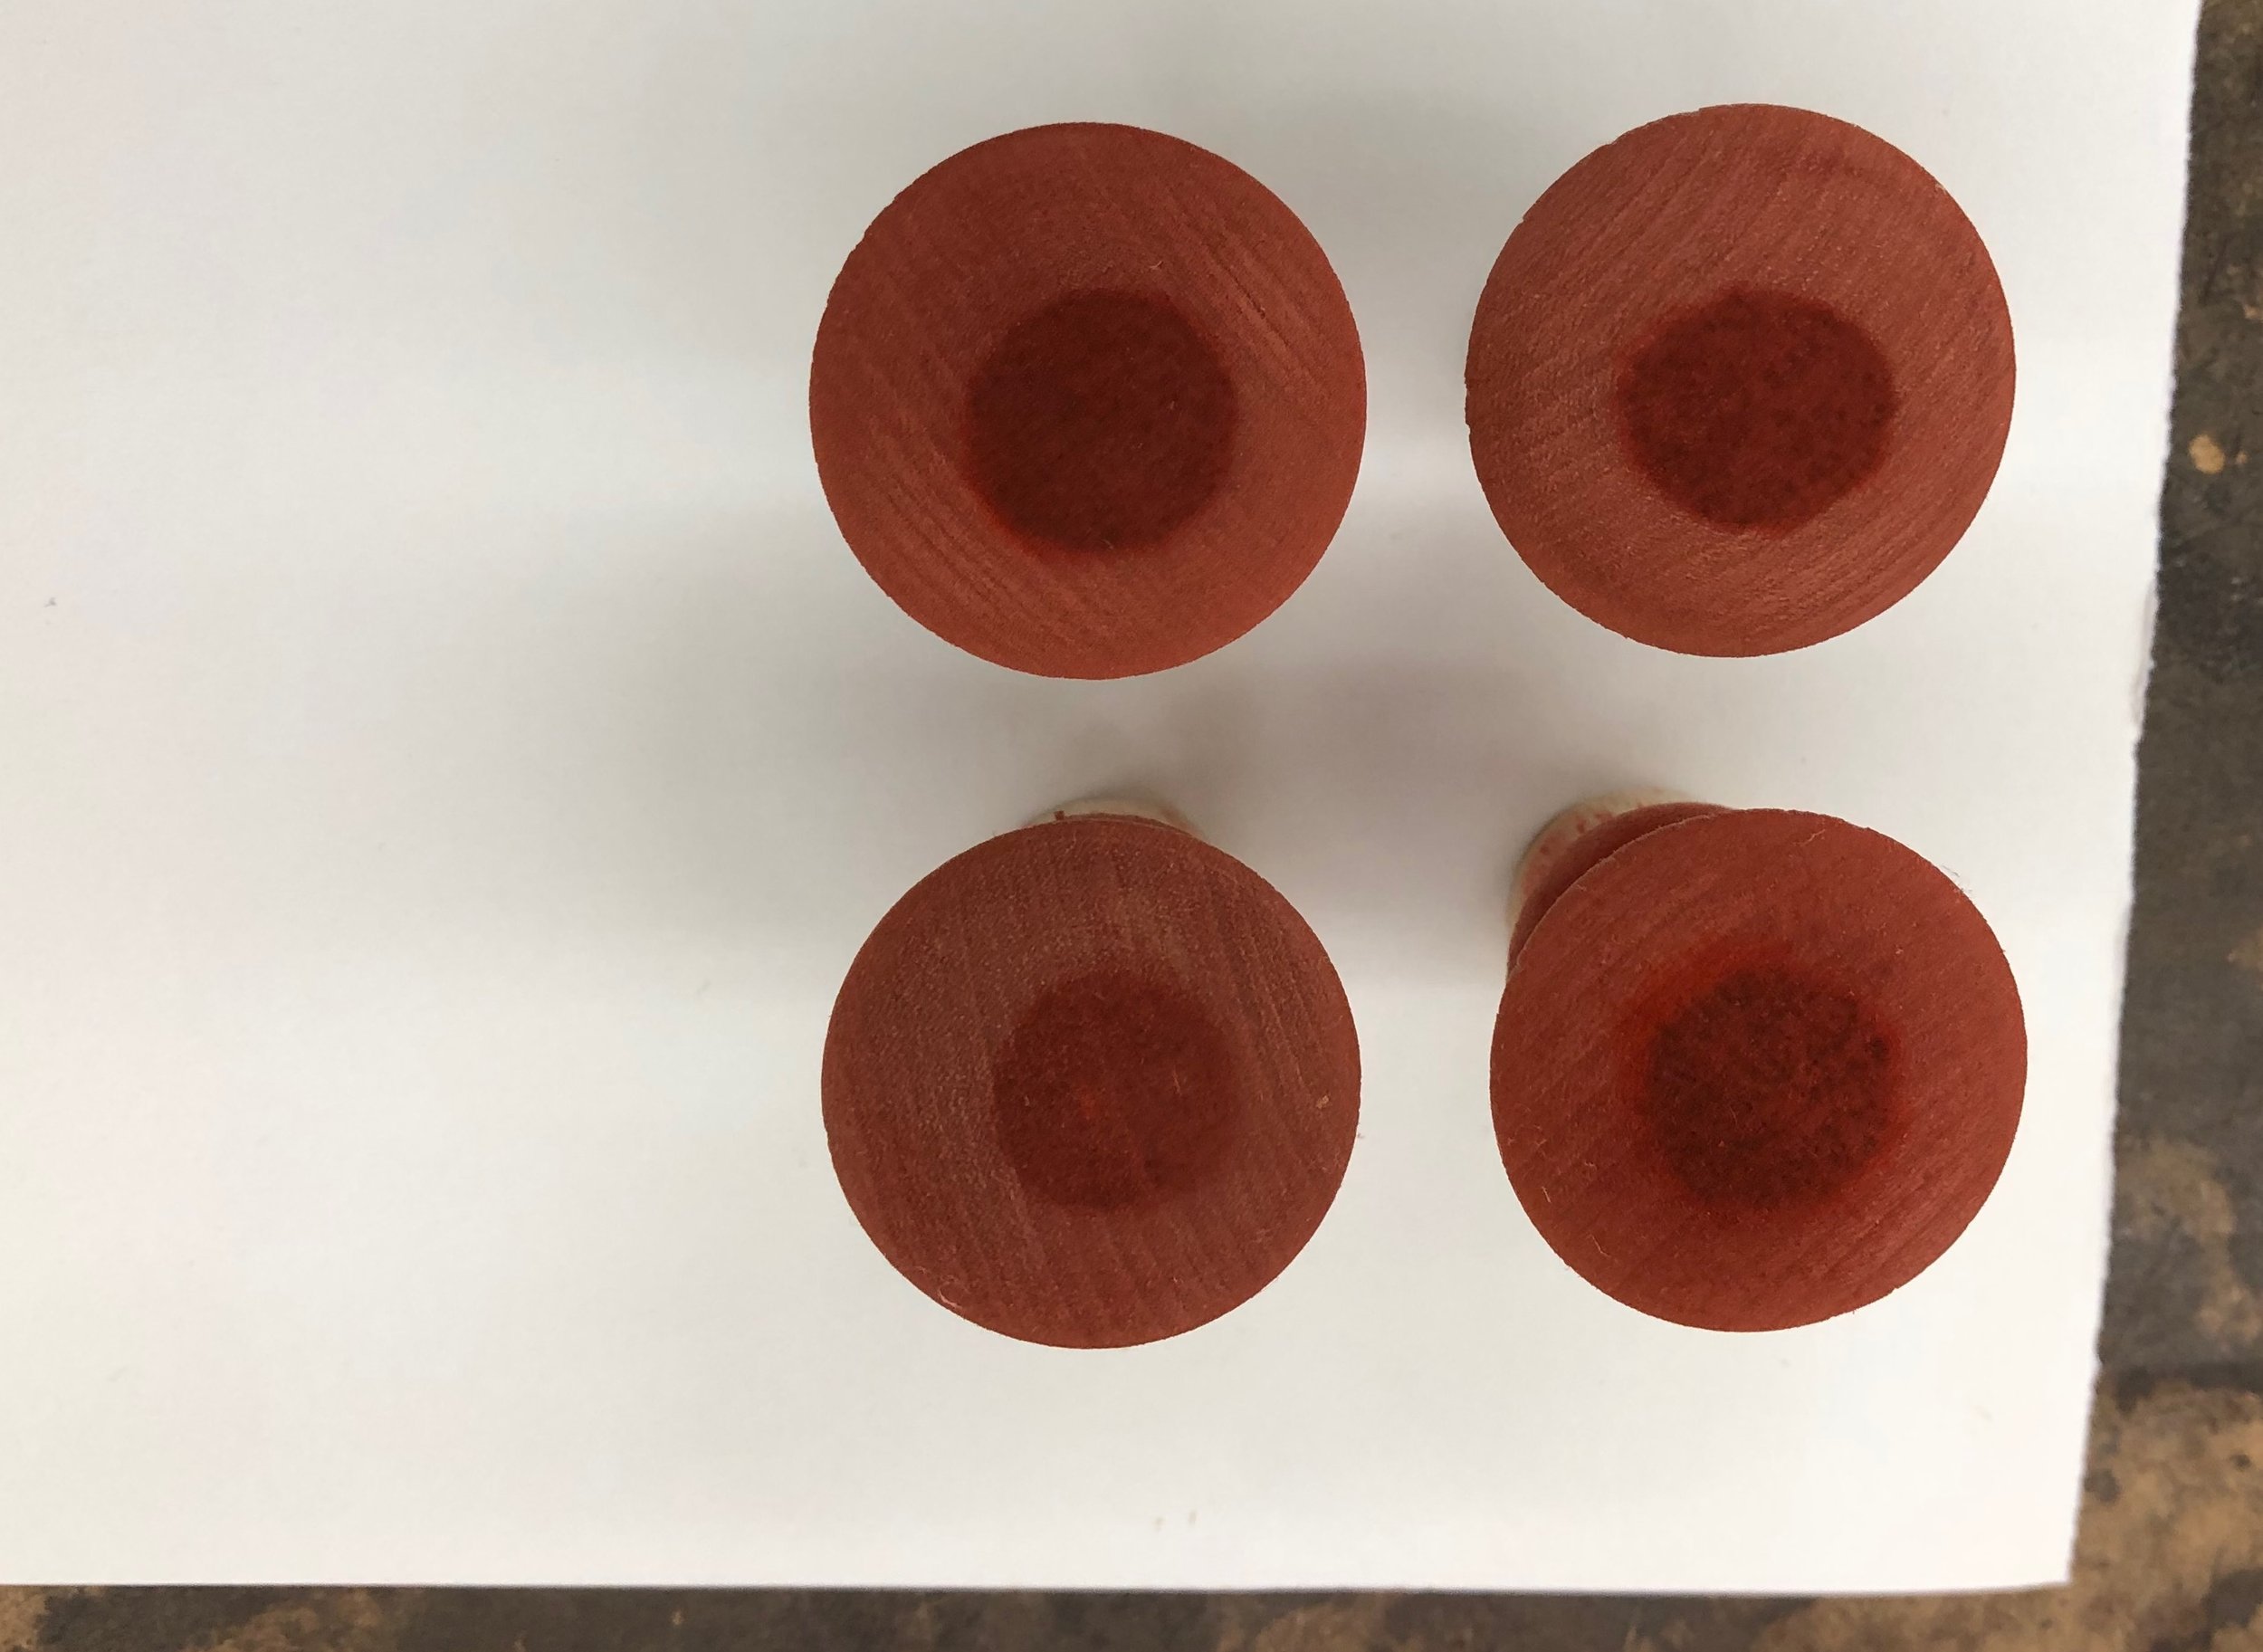
Learning lessons with wood grain
They say that much of woodworking is “correcting mistakes” and I’ll submit this applies to wood finishing, as well. I was no longer on a mission to color wood, but rather, to color-coat. The plan now was to make the lighter colored wood as dark as the central dot, and for this I turned to a “cedar” colored wiping stain. I happened to have a can of this stain lying around and it proved to be a fine color-match for the knobs. I applied one coat of stain to the whole surface, and while that did not completely extinguish the dot it greatly diminished its prominence and I decided to stop there while glimpses of wood grain still remained. Three coats of gel polyurethane were applied to seal it all up with a hint of glisten. The knobs were then glued into their holes to complete the cabinet exterior.
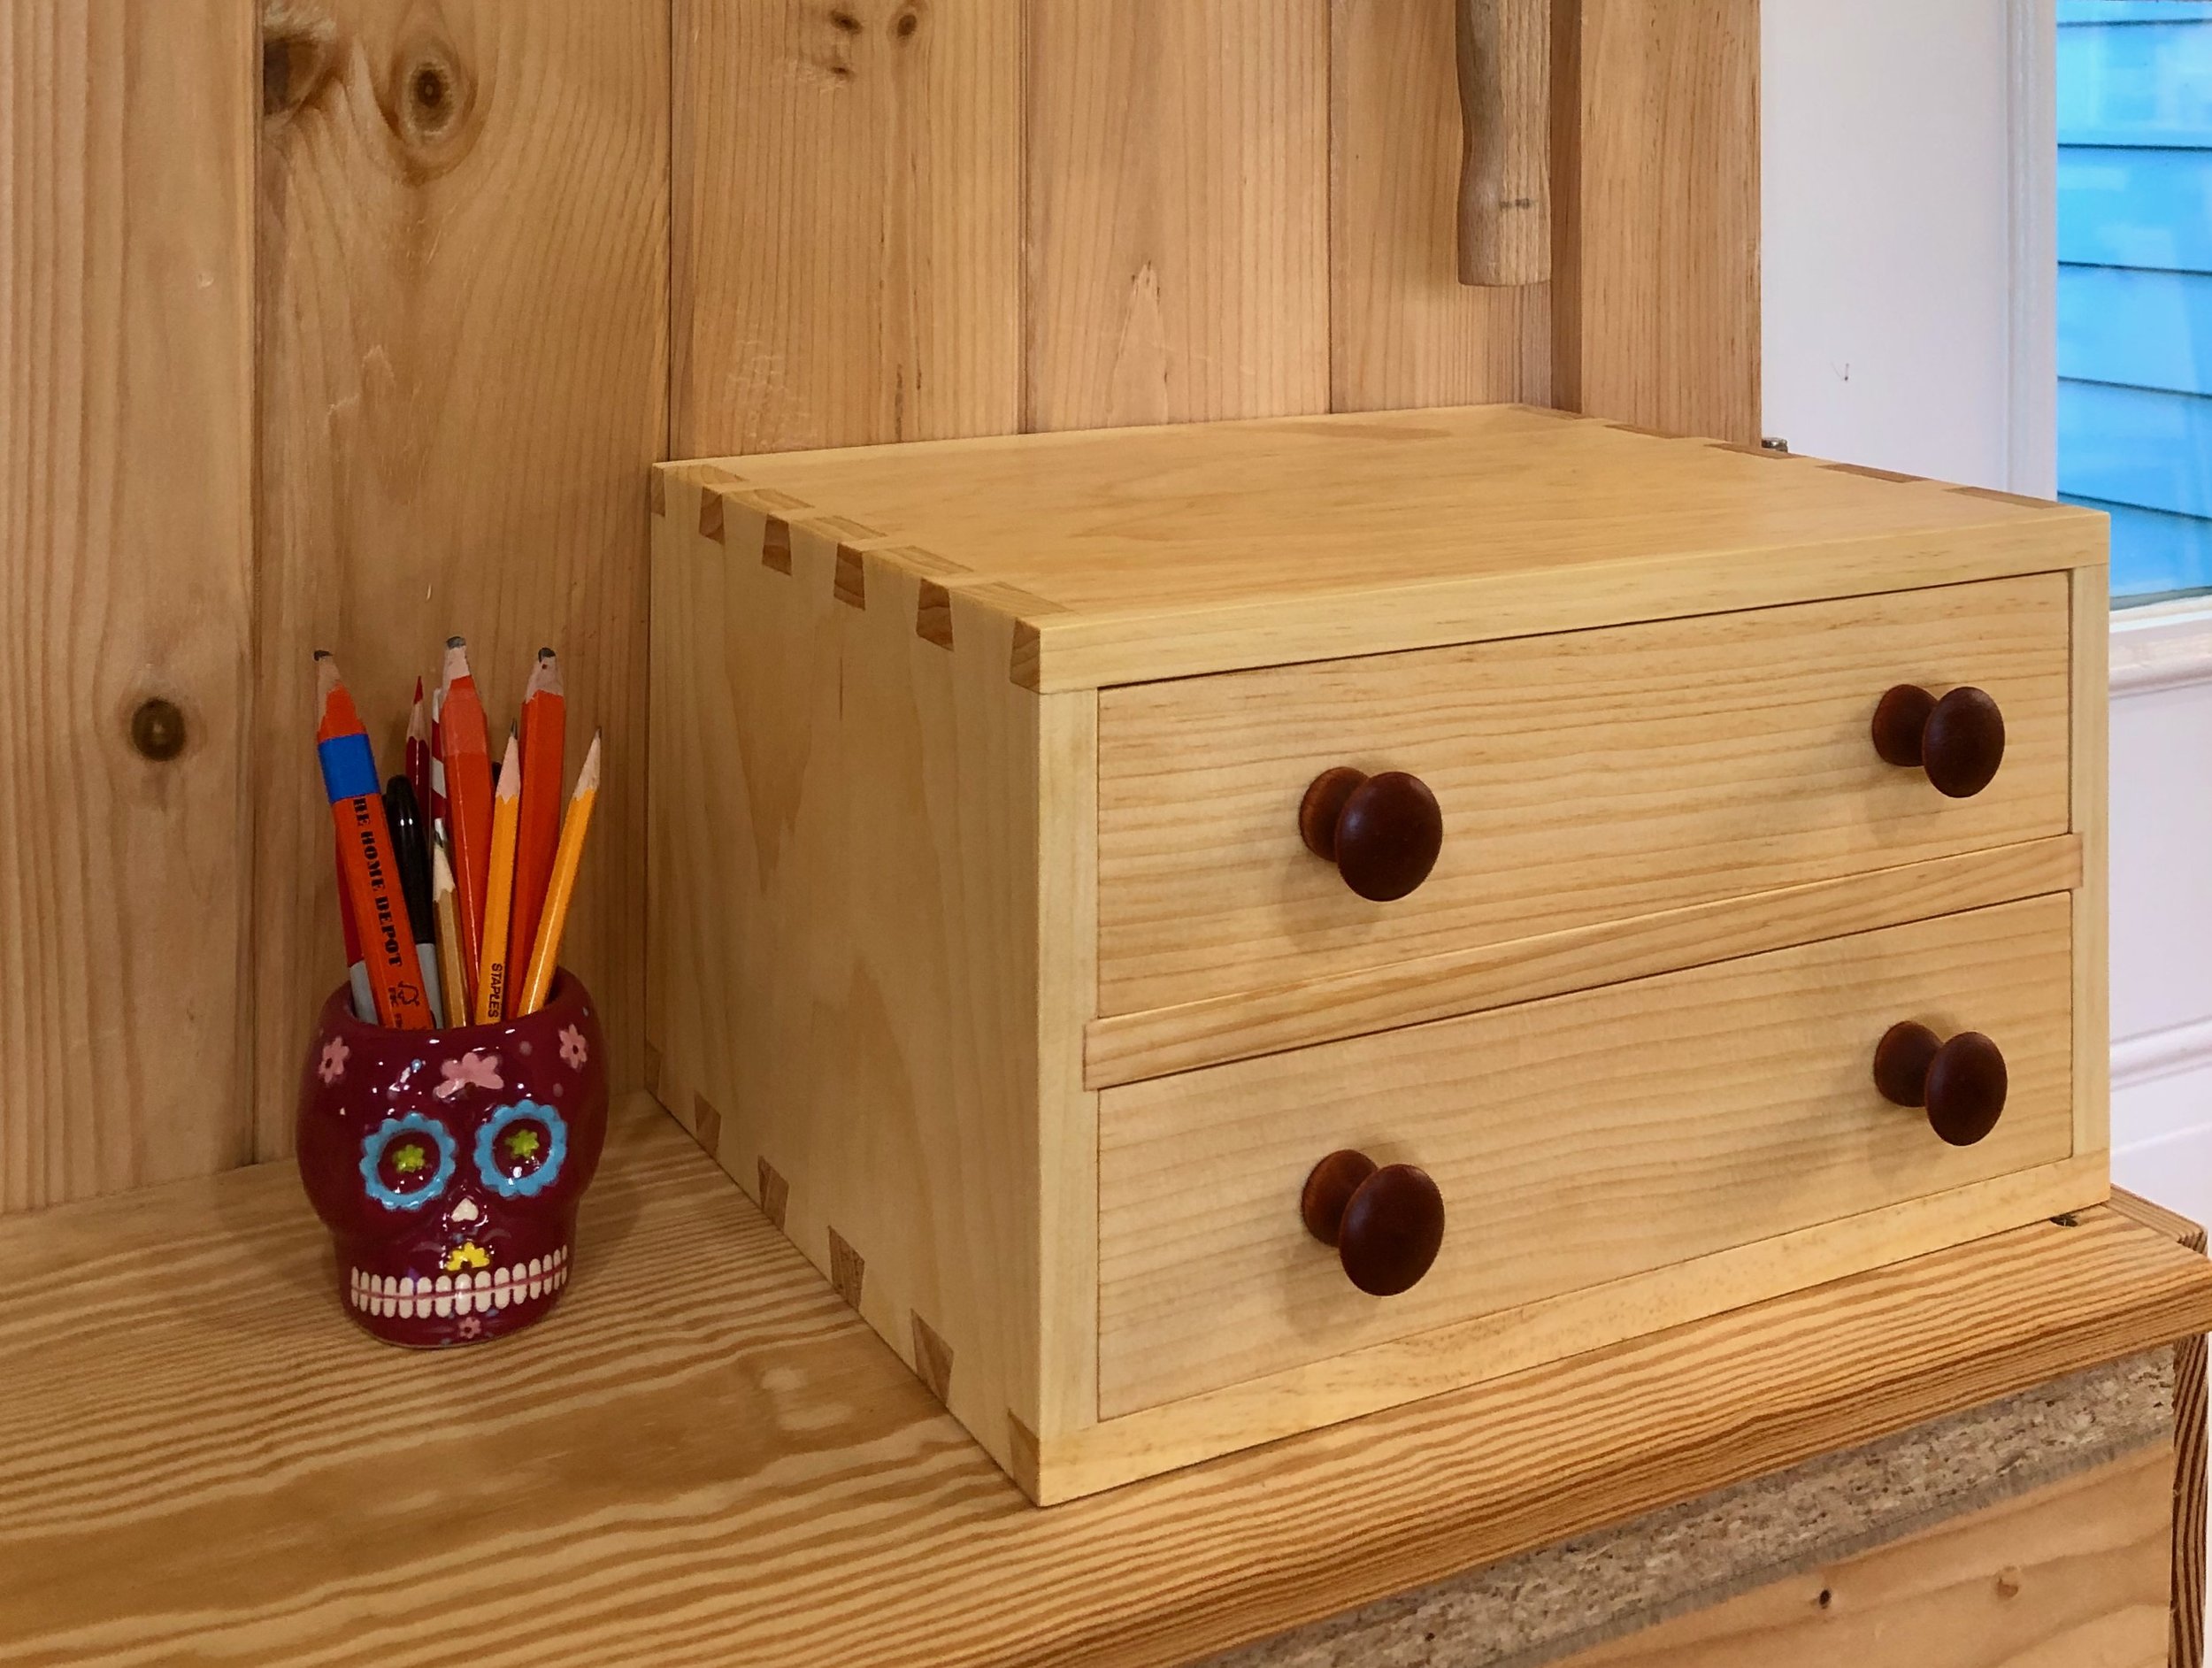
A chisel chest
The final task was to customize the drawer interiors for proper chisel storage. The bottom drawer would house my set of six bevel edge chisels, and to support the chisel handles I needed to create a series of semi-circular cradles. I would again use my Forstners for this, and while I did not own the exact dimension bits required to reproduce the original, they were within 1/8 of an inch and so I made do. In the event, I first fastened two boards together with metal straps and then drilled three 1 1/4 in. and three 1 in. diameter holes centered at the seam. Removing the straps gave me the proper cradle, and a spare.
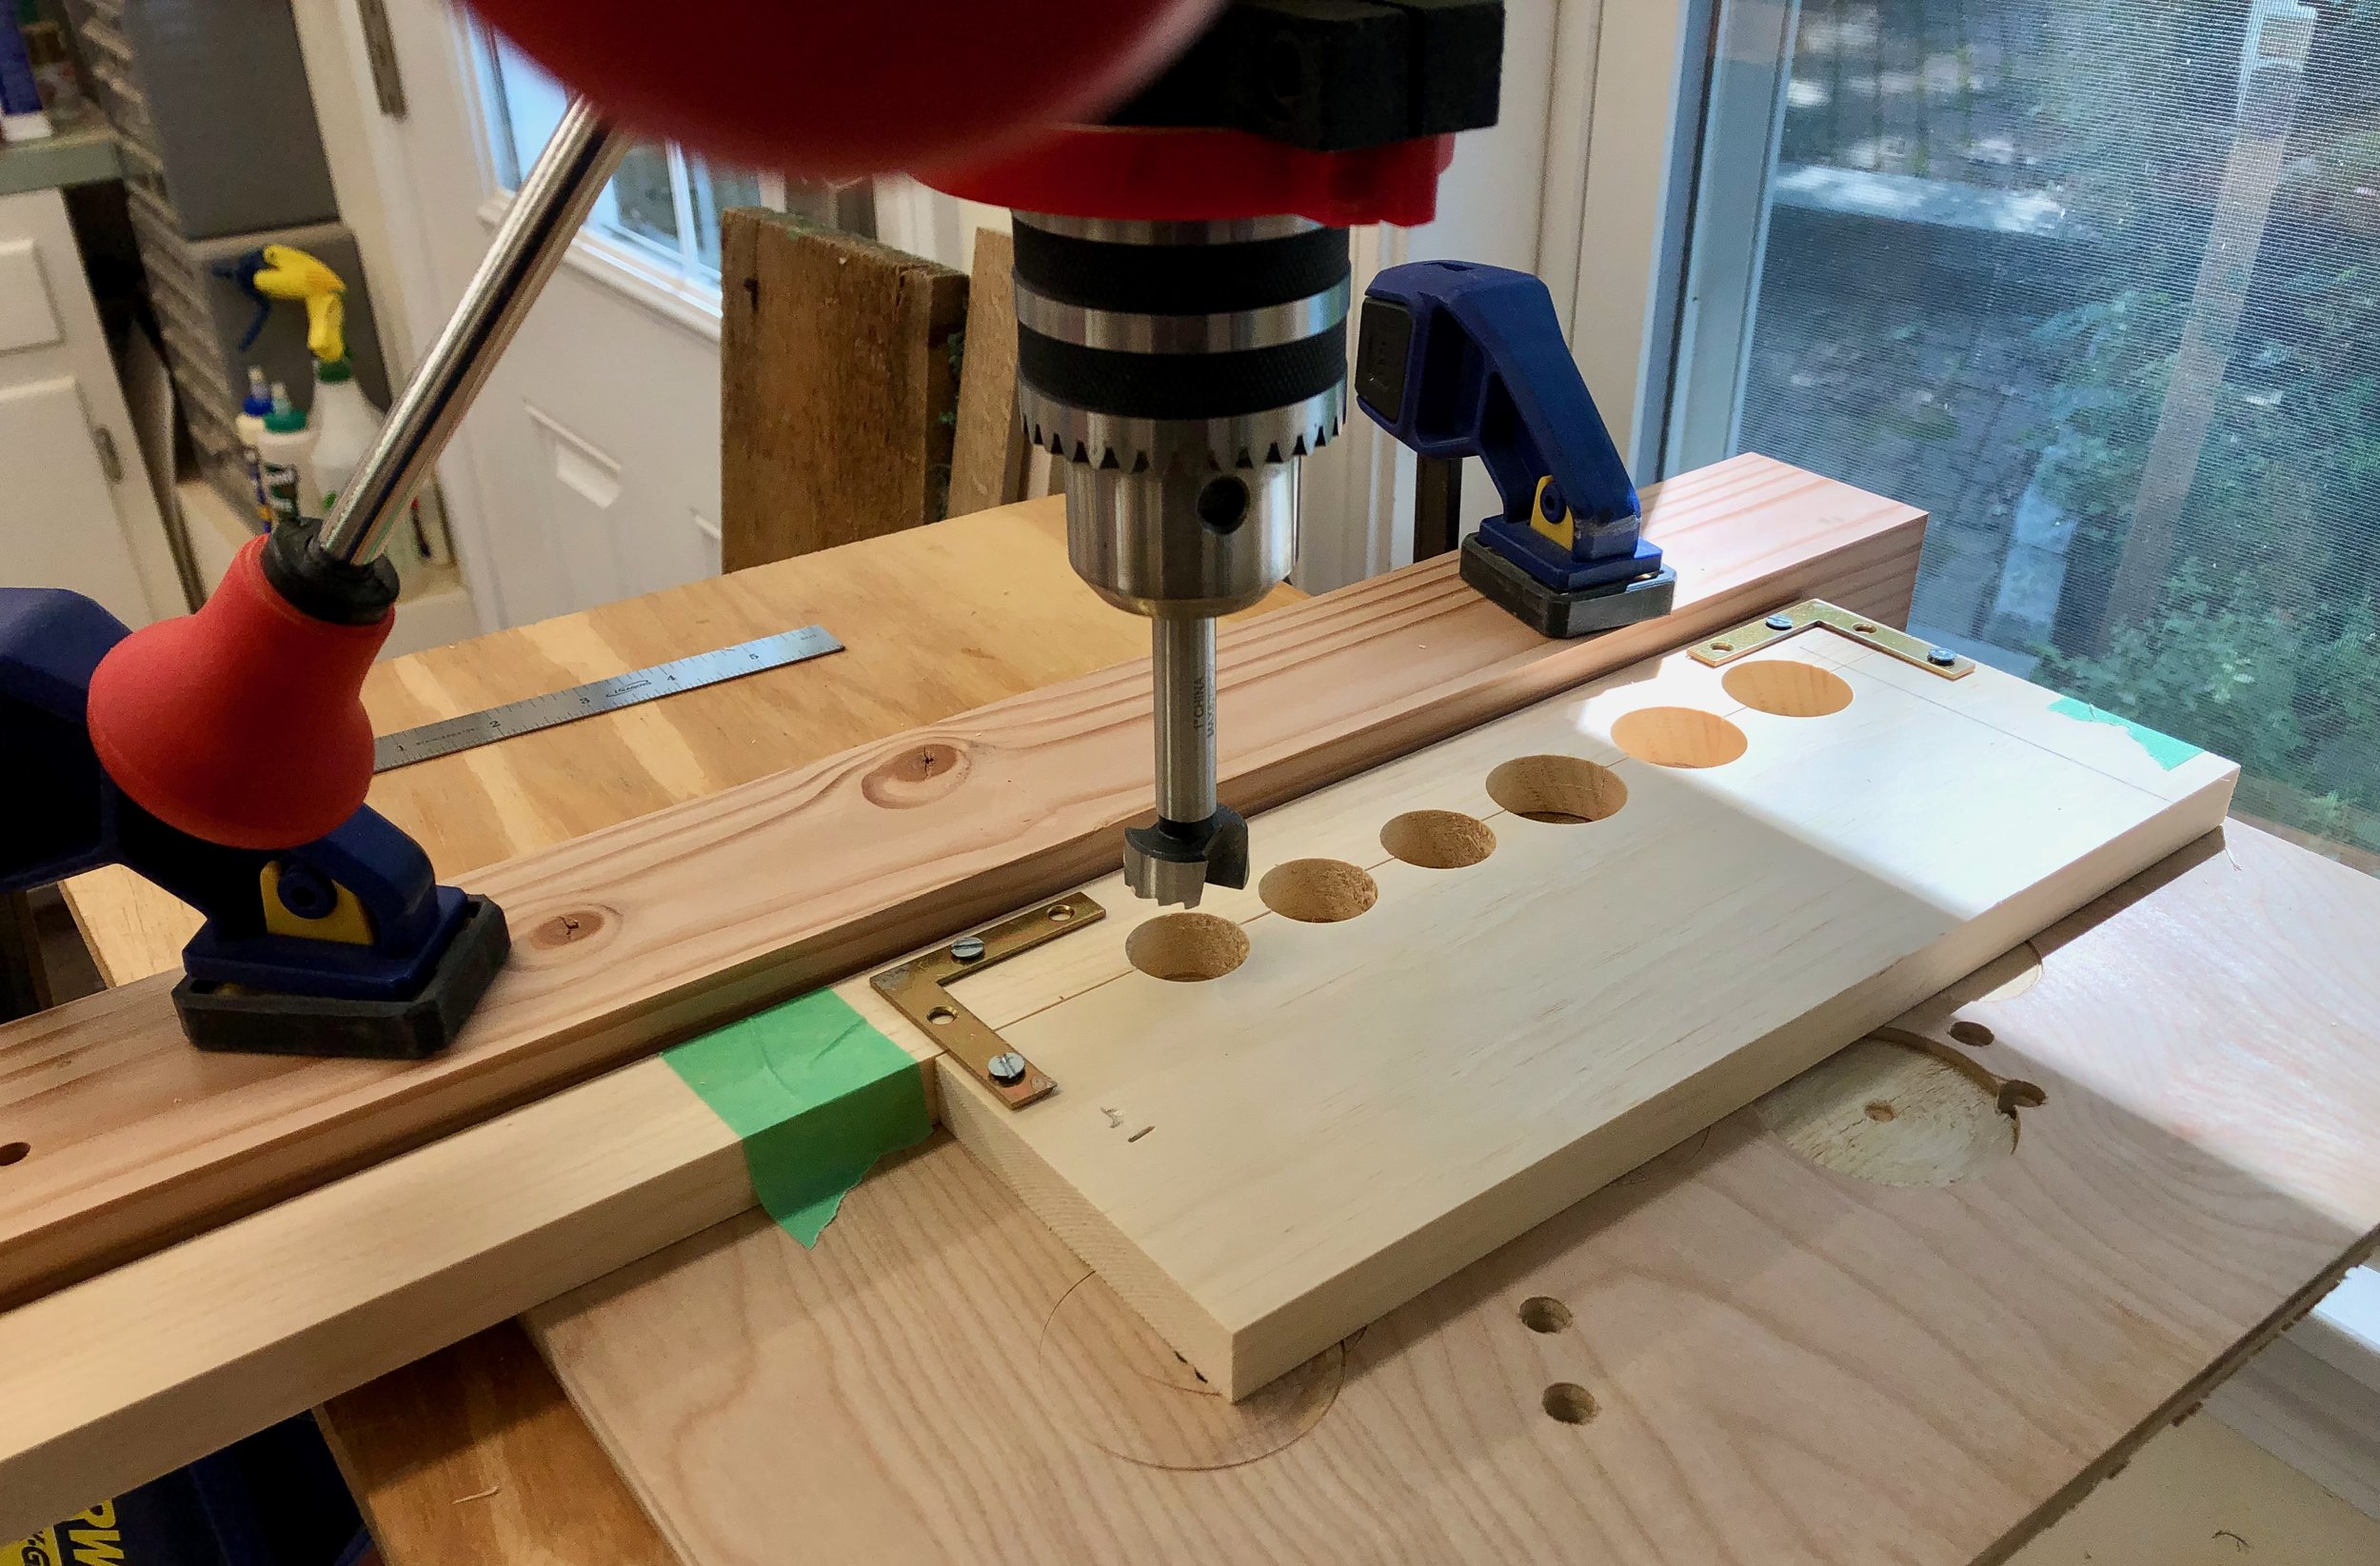
Creating semi-circles at the drill press
The cradle piece was then trimmed to size, finished with polyurethane and mounted to the drawer bottom using screws. To support the chisel blades I attached a resting board to the bottom of the drawer. After placing the chisels into their spots I could then measure and saw the interstitial “plates” that, once glued in place, would serve to define custom nests to fit each blade. This is better described in the picture below.

Bevel edge chisels in place
I decided to leave the top drawer un-customized. Those Japanese chisels are used only on occasion and, in the end, I could not part with their beautiful box. For now, they would be tucked into the top drawer along with other small tools and my shoulder plane. Were I to acquire some more carving gouges or mortising chisels I could create an appropriate crib for them here.
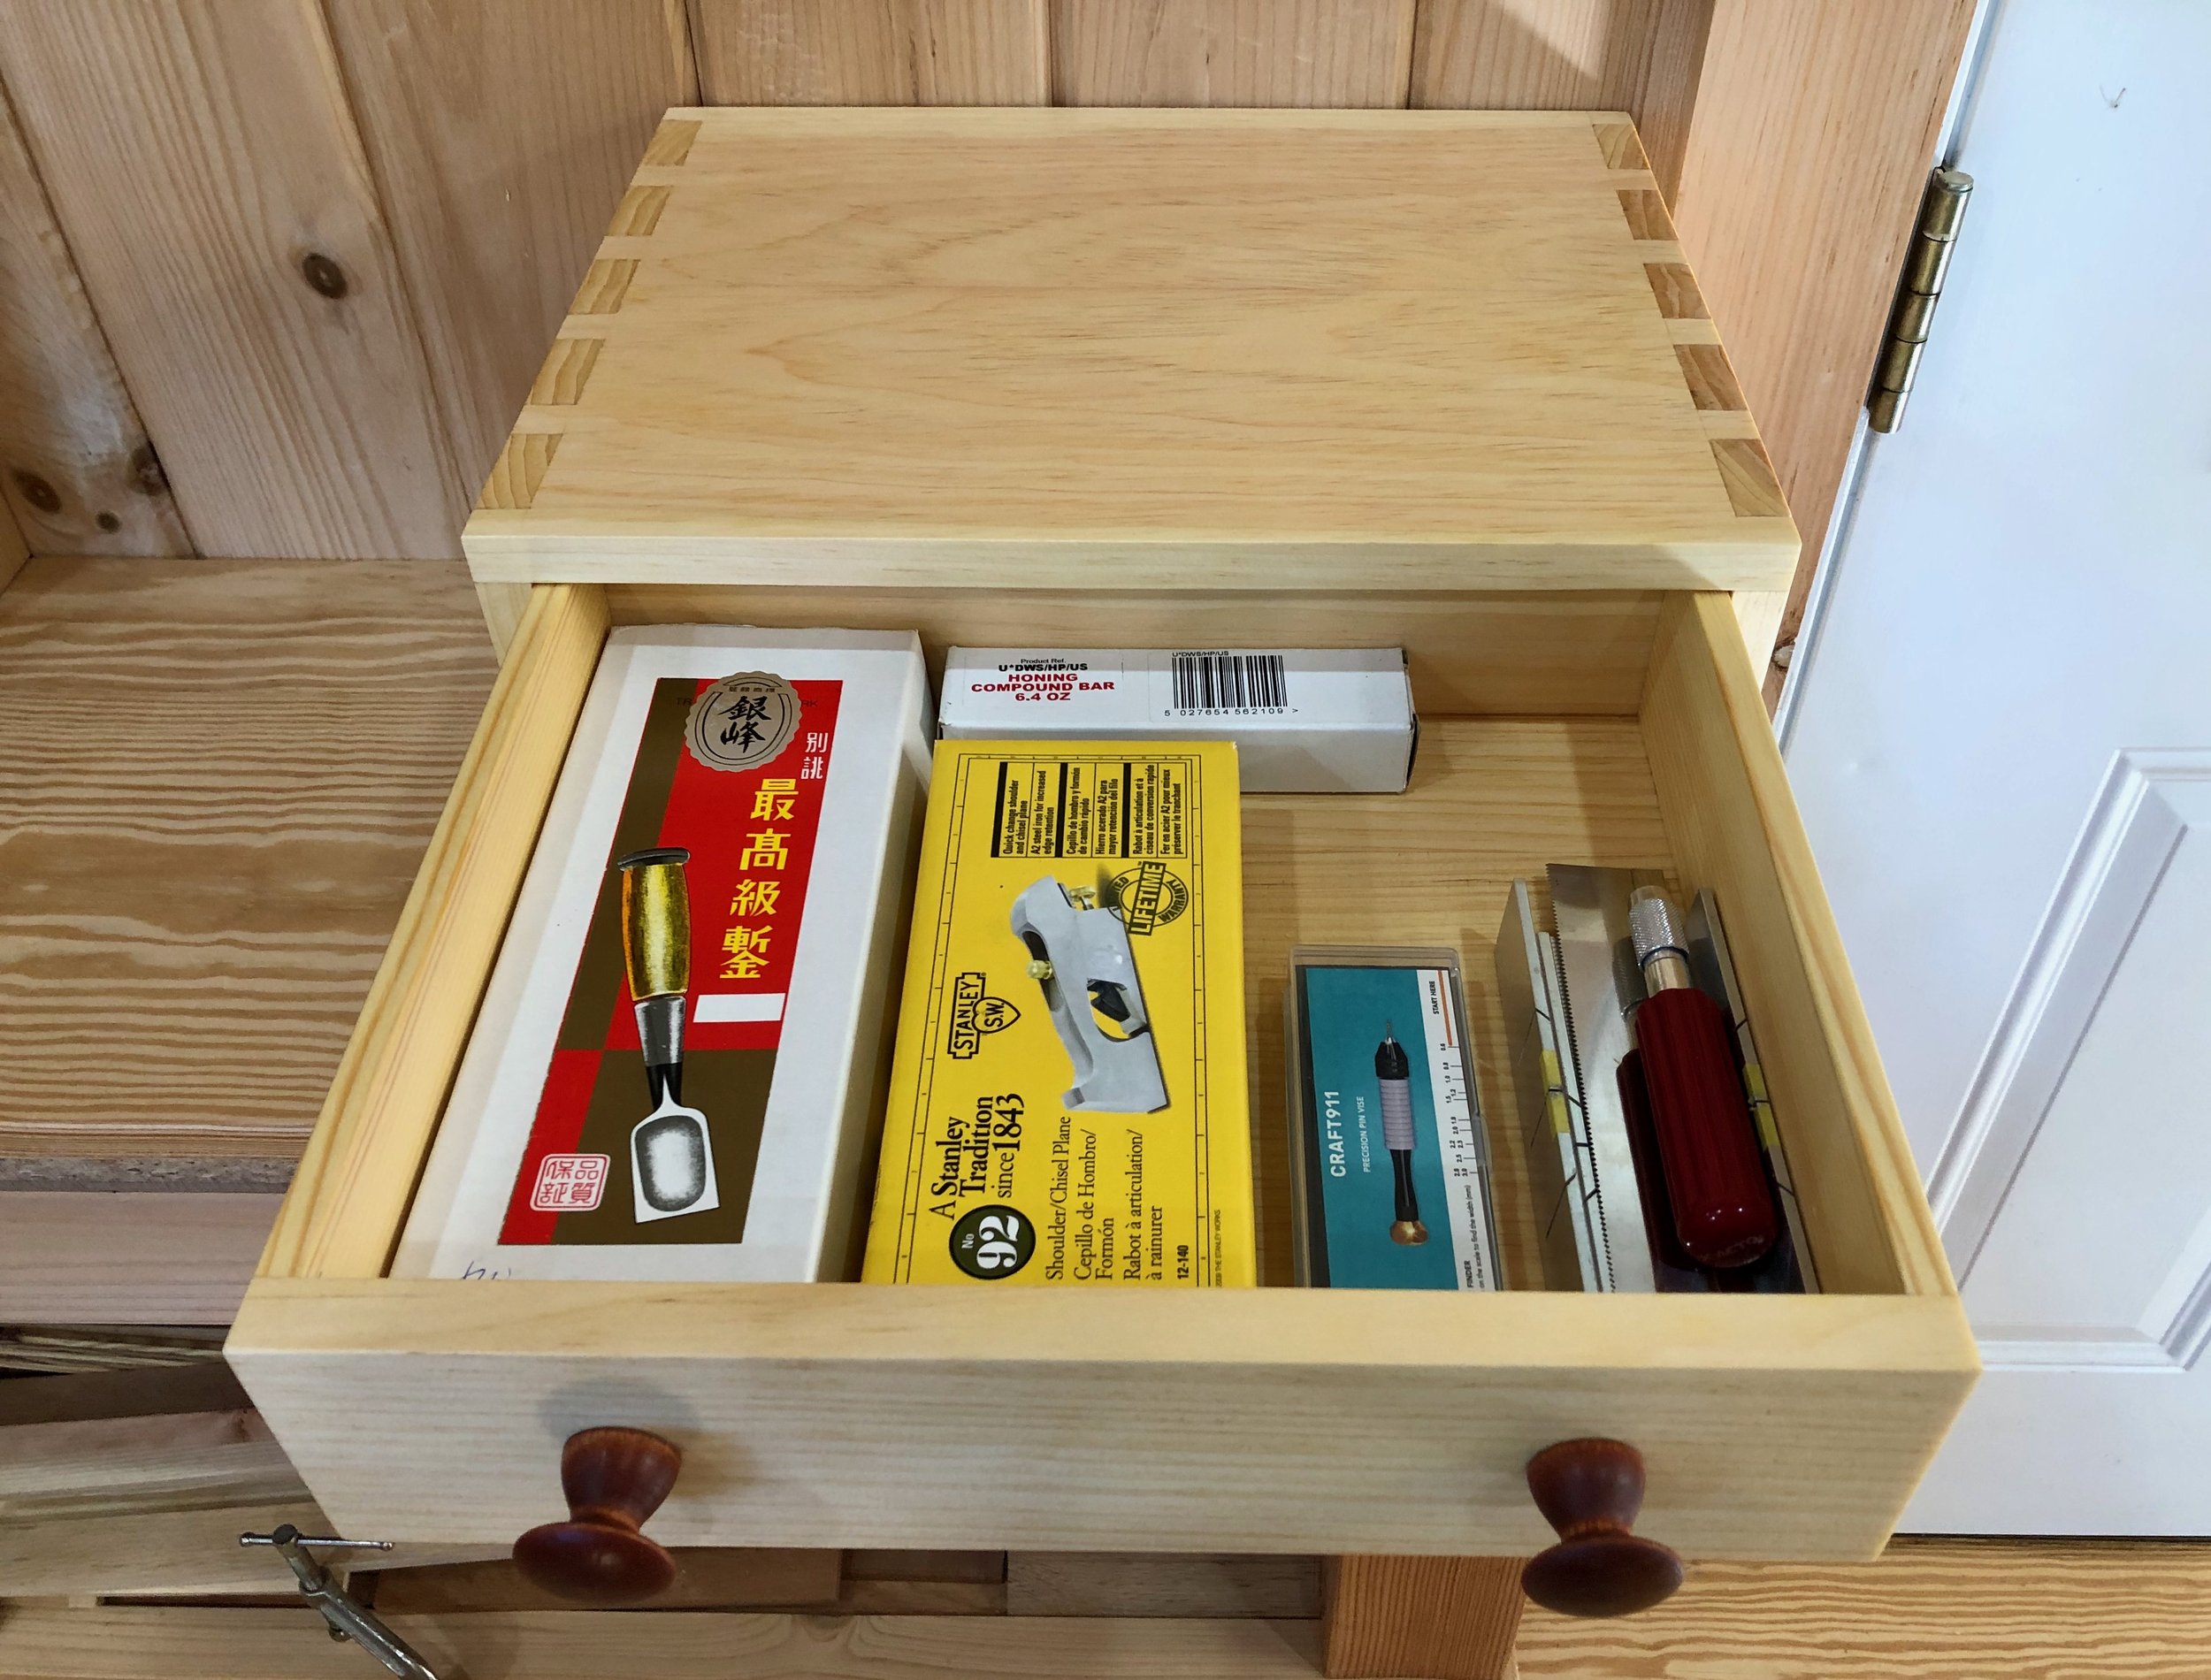
Top drawer tools
And that completes the chisel chest, a sturdy and beautiful addition to the workshop.

Shop scene