

Shaker Cabinet ep.2

In the last episode freshly lumbered red pine and a modern plan were used to reproduce the carcass of a 150 year old cabinet made at the Shaker community of Canterbury, New Hampshire. While the original use for this piece remains unknown, my intention is to organize and store the hardware that has accumulated in my furniture shop. To complete the cabinet, a door and 10 small drawers needed to be fashioned and fit.
Materials
I’ll admit that a door and ten drawers would have seemed a daunting challenge for me a few years ago, but with experience comes confidence. To be sure, there are a lot of cuts to make in fashioning the 65 parts required here, but the cuts are pretty repetitive and the diminutive size helps. The door frame would be made from the same wood as the carcass, with antique “pine” (an undetermined conifer species) used for the panel. I decided to make the drawer fronts from the same antique pine with the drawer’s sides fashioned from quarter sawn cherry and the bottoms from white pine, both sourced from the left over scraps of earlier Projects.
The antique pine is meant to be the star here, its fine grain and darkened patina lending the character appropriate for this classic design. Looking along the end grain of this old board it is apparent that all of the growth rings arc in the same direction, and this means that the plank was derived from one half of the log, never crossing the center. Counting those grain lines revealed that this tree was at least 180 years old when it was harvested. And, given that the salvager told me it came from a structure dating back to around 1800, it is very likely the seed for this tree sprouted about the time the first religious Pilgrims were setting foot on Massachusetts soil. Neat!

Grain lines tally the years since germination
Dimensioning
During use, the exterior of this board had been painted a couple different shades of blue. That paint served to protect the wood from the elements, but it was no longer needed and I had no desire to muck-up my tools with it. Thus, the first job was to shed its skin at the bandsaw. After removing three square cut nails and making a couple rip cuts to remedy warp, I jointed the “bare” sides smooth and was then able to cleanly remove the outer 1/16th of an inch in a re-sawing operation to reveal clean wood. The boards were subsequently thickness planed to their desired depths.
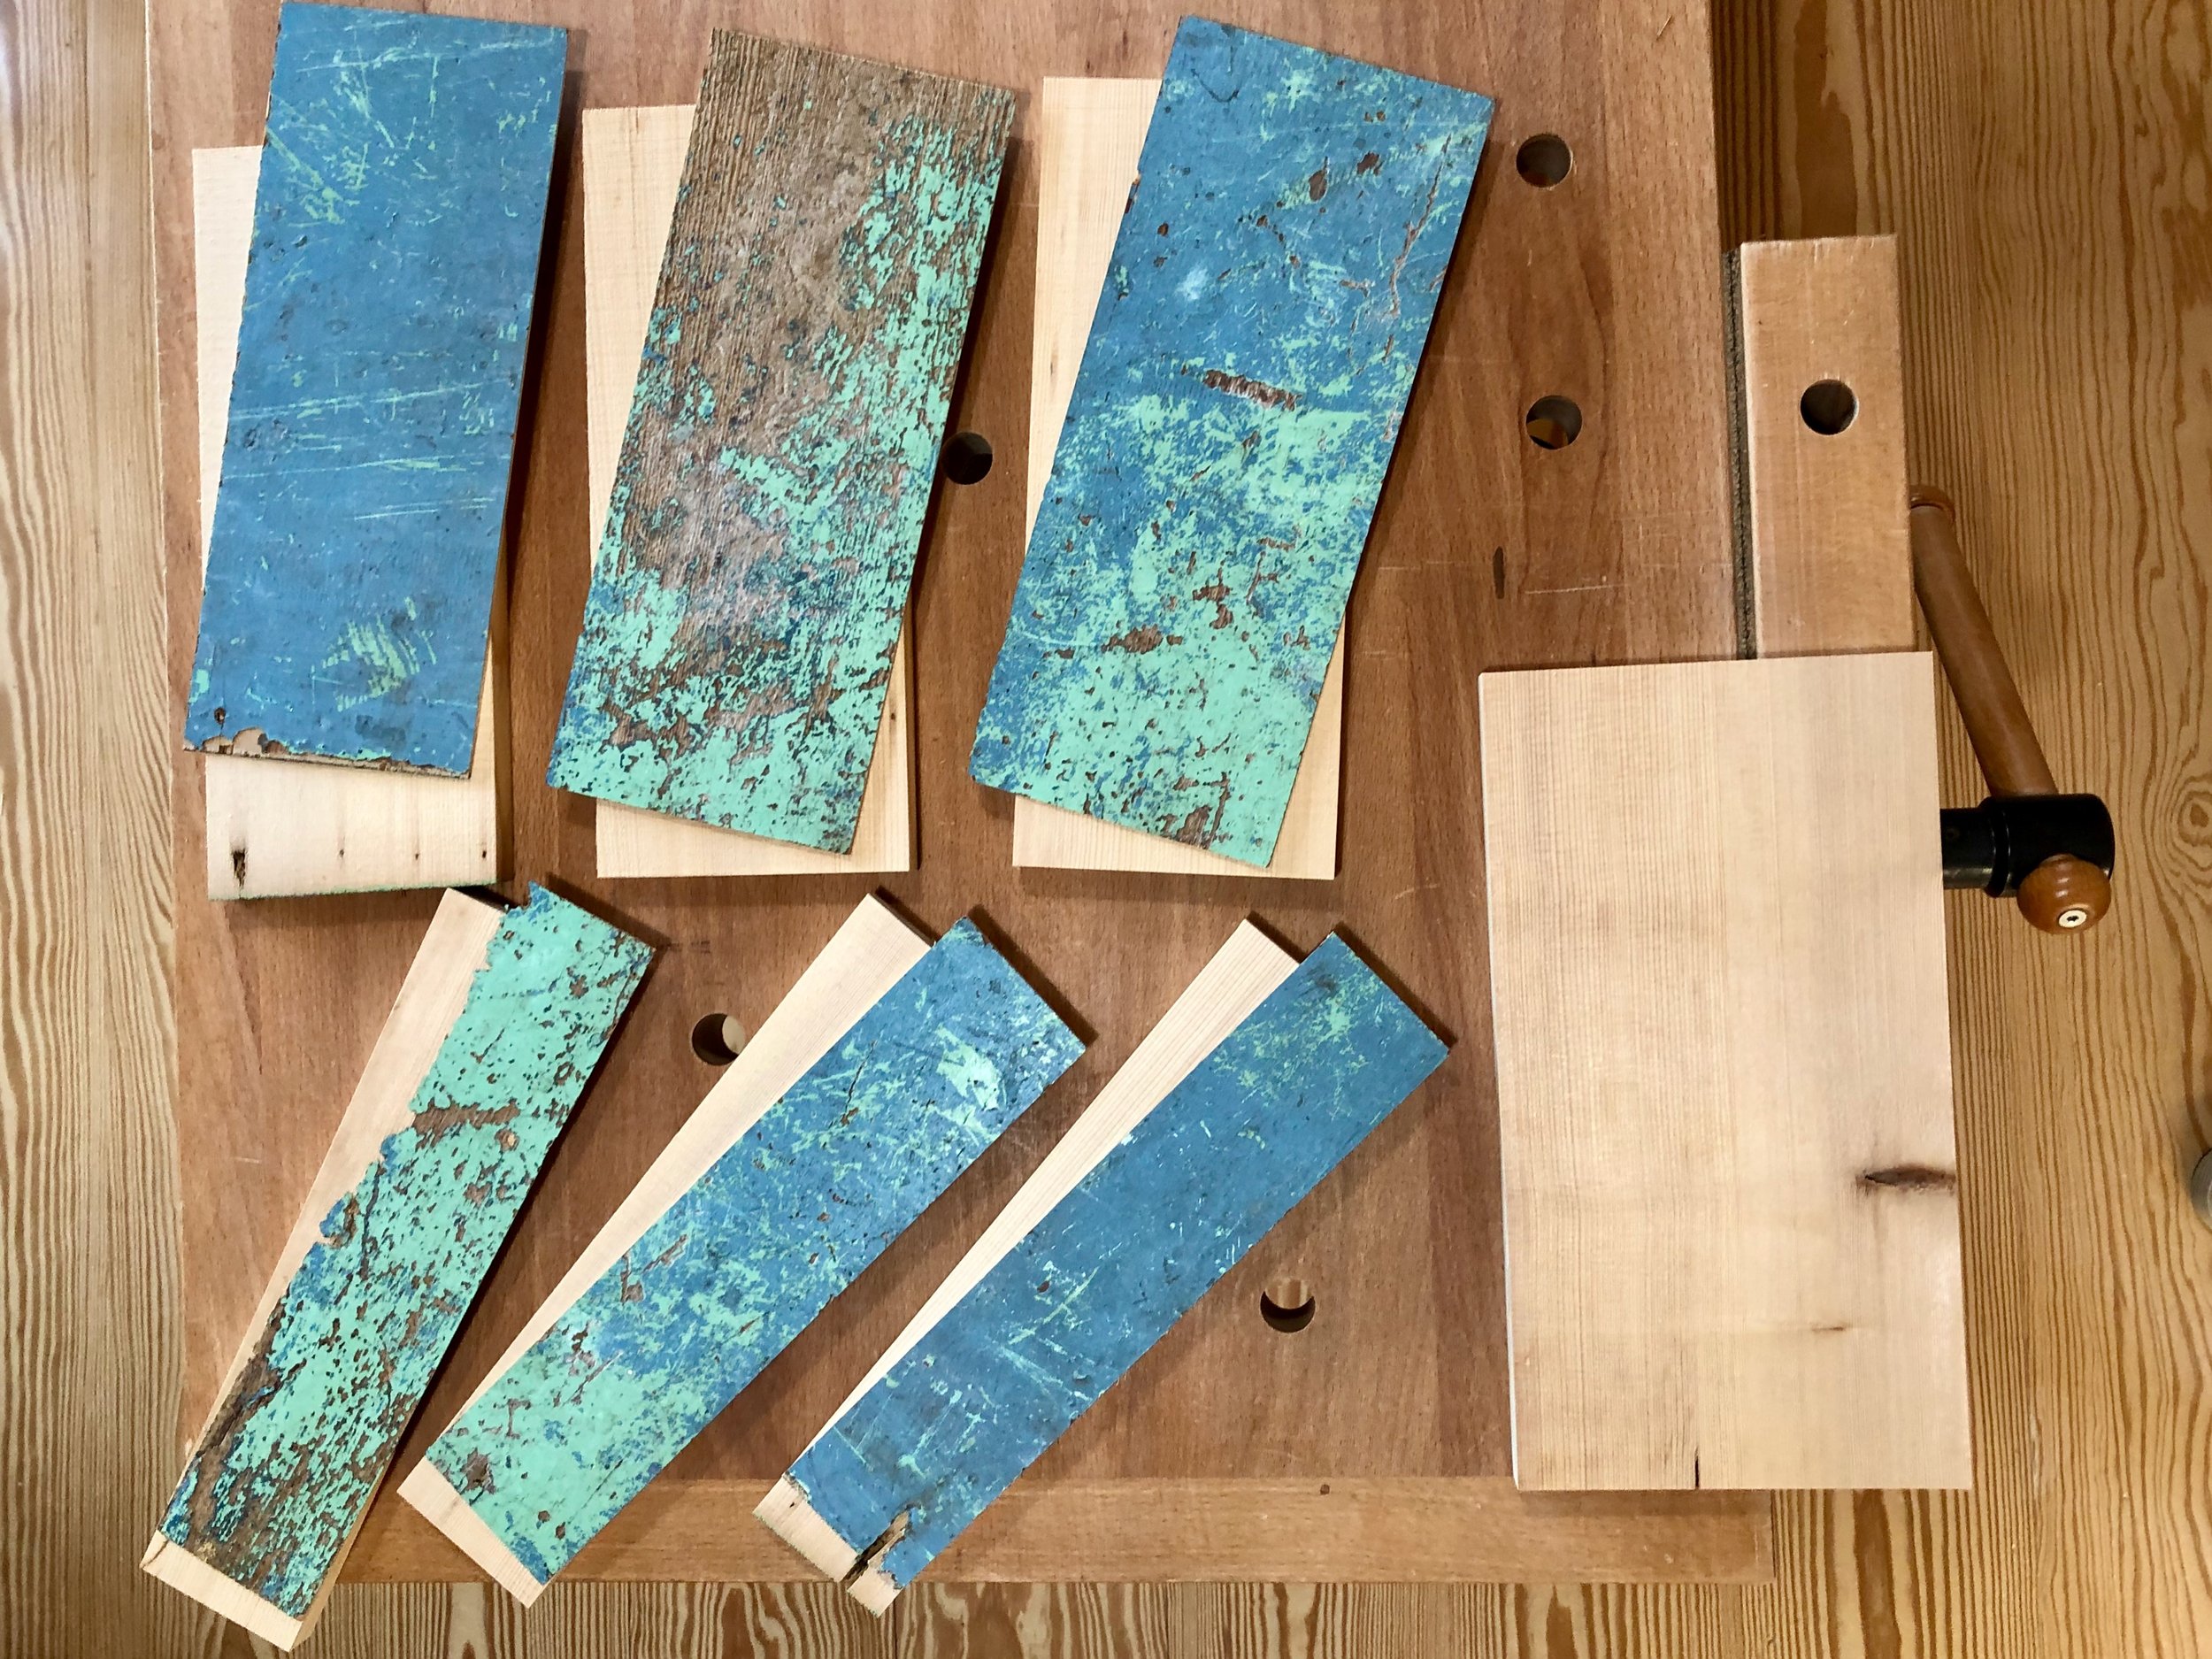
Skinned pine boards
Next, I set to work making the door frame. The plan called for “bridal” joints here and that meant cutting 1 1/2 in. deep slots on the ends of the stiles to mate with similarly sized tenons on the rails. But first all members were cut to length and width and then a 1/4 x 5/16 in. groove was dadoed into the edges to house the door’s panel. To slot the stiles I used a ripping blade on the table saw along with my homemade paneling jig. This jig allowed me to accurately move the upright member into the cut, flip, and re-cut to ensure a perfectly centered opening. The 1/4 in. wide slots were excised nice and square by this method. To make the tenons on the rails I also used the table saw, switching to a dado blade and cross-cut sled to hog-out most of the material. The mating edges were further “trimmed to the line” using a hand chisel to achieve a pretty clean joint.

Paring away to the tenon’s shoulder line

The 5-part door came together nicely
Finally it was on to the drawers. In the Fine Woodworking article*, author Christian Becksvoort uses tiny, 1/8 x 1/8 in. lock corner joints to assemble the drawers. That’s a new method for me, but one that proved simple by following the magnificently detailed diagram drawn by Christopher Mills and reproduced below.
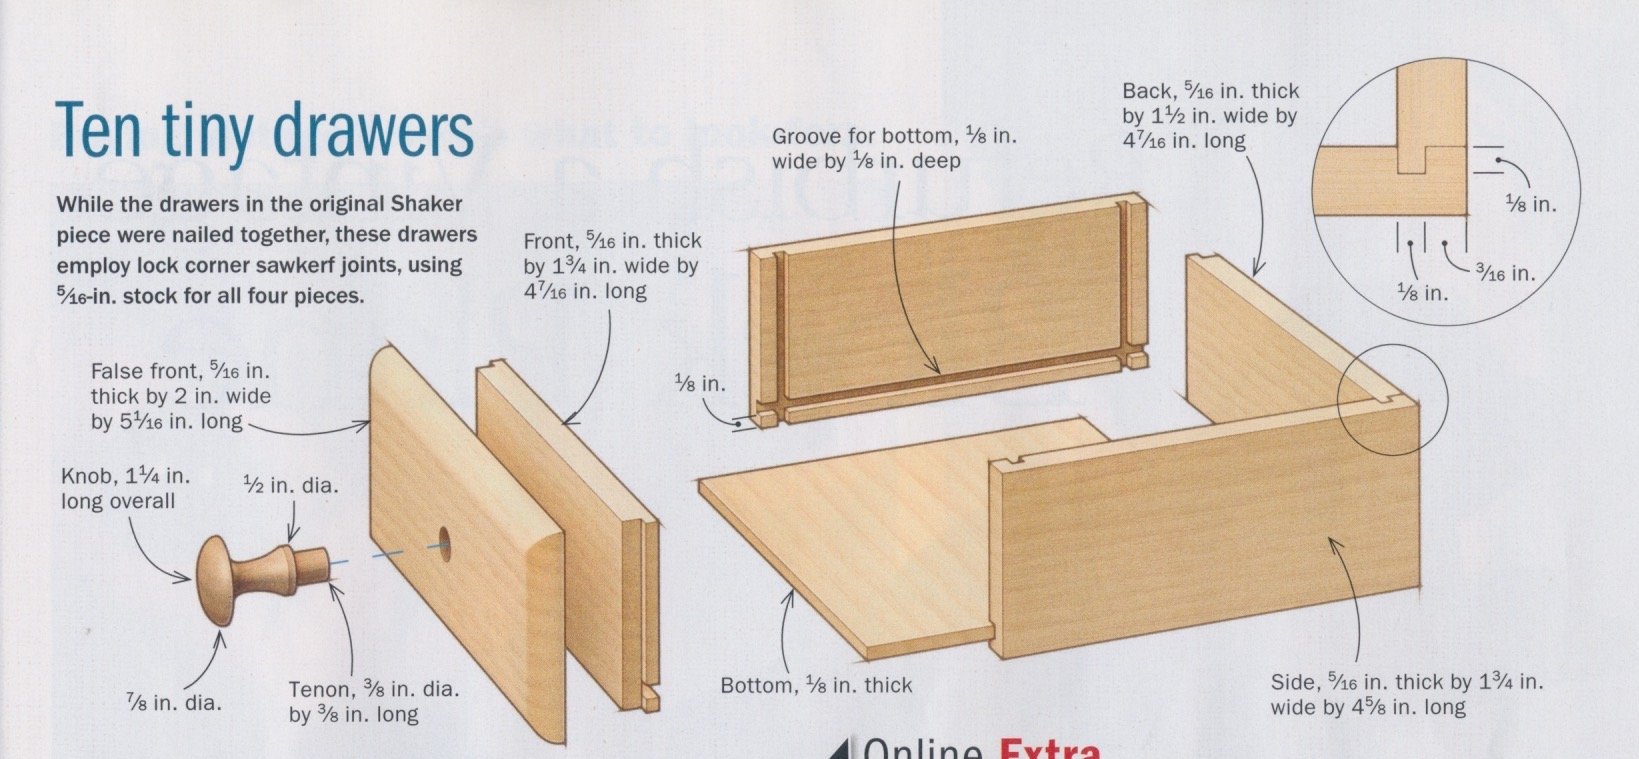
Drawer plan
*Fine Woodworking 2023, 305, p. 38-45.
Slicing up the cherry sides with grooves and rabbets was done on the table saw using a 40 tooth 1/8 inch “combo” blade. My only change to the plan was to use a thicker drawer bottom, which was beveled with a hand plane on three sides to fit the 1/8 in. grooves.
Beveling the drawer bottoms, all parts in-hand
After cutting to dimension, the edges of the antique pine drawer fronts were also shaped with a hand plane and then smoothed using #220 grit sandpaper. When making ten of anything the operations become a production, the result of which is that the last few are quite good when compared to the first. This imparts an overall “handmade” look that is just fine with me.

Rounding-off the drawer fronts: 1 down, 9 to go!
Assembly & Finish
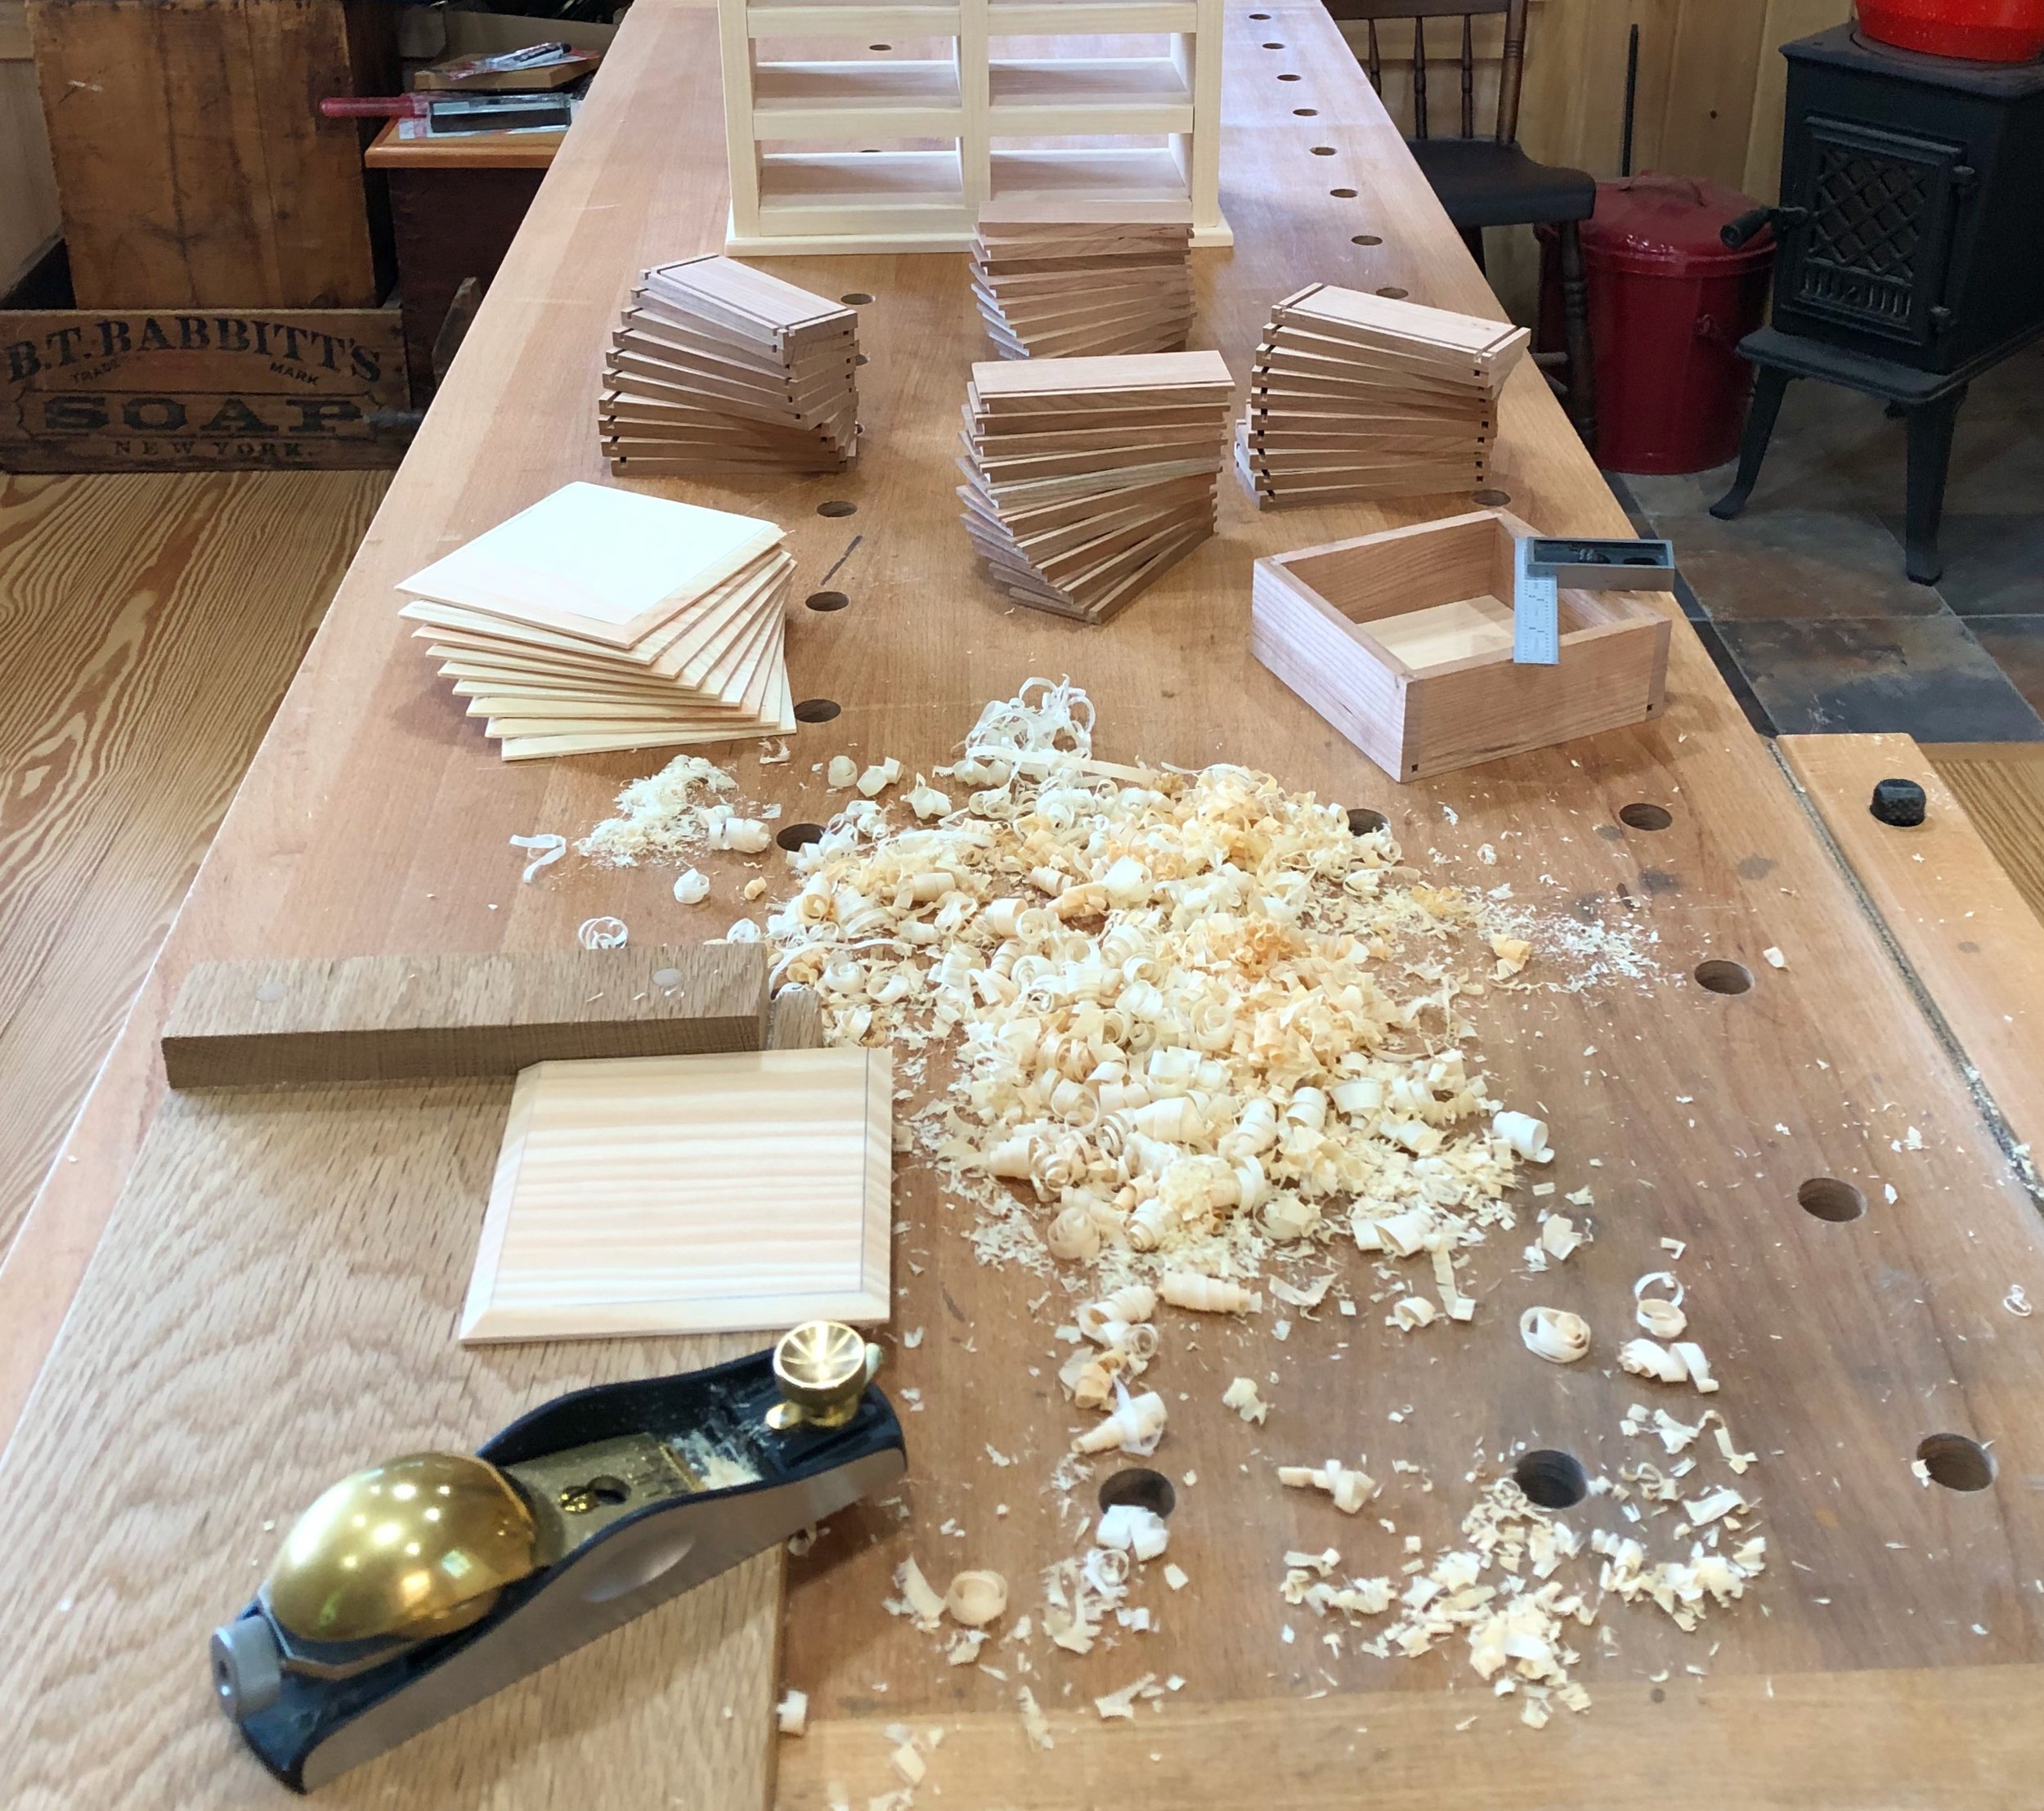
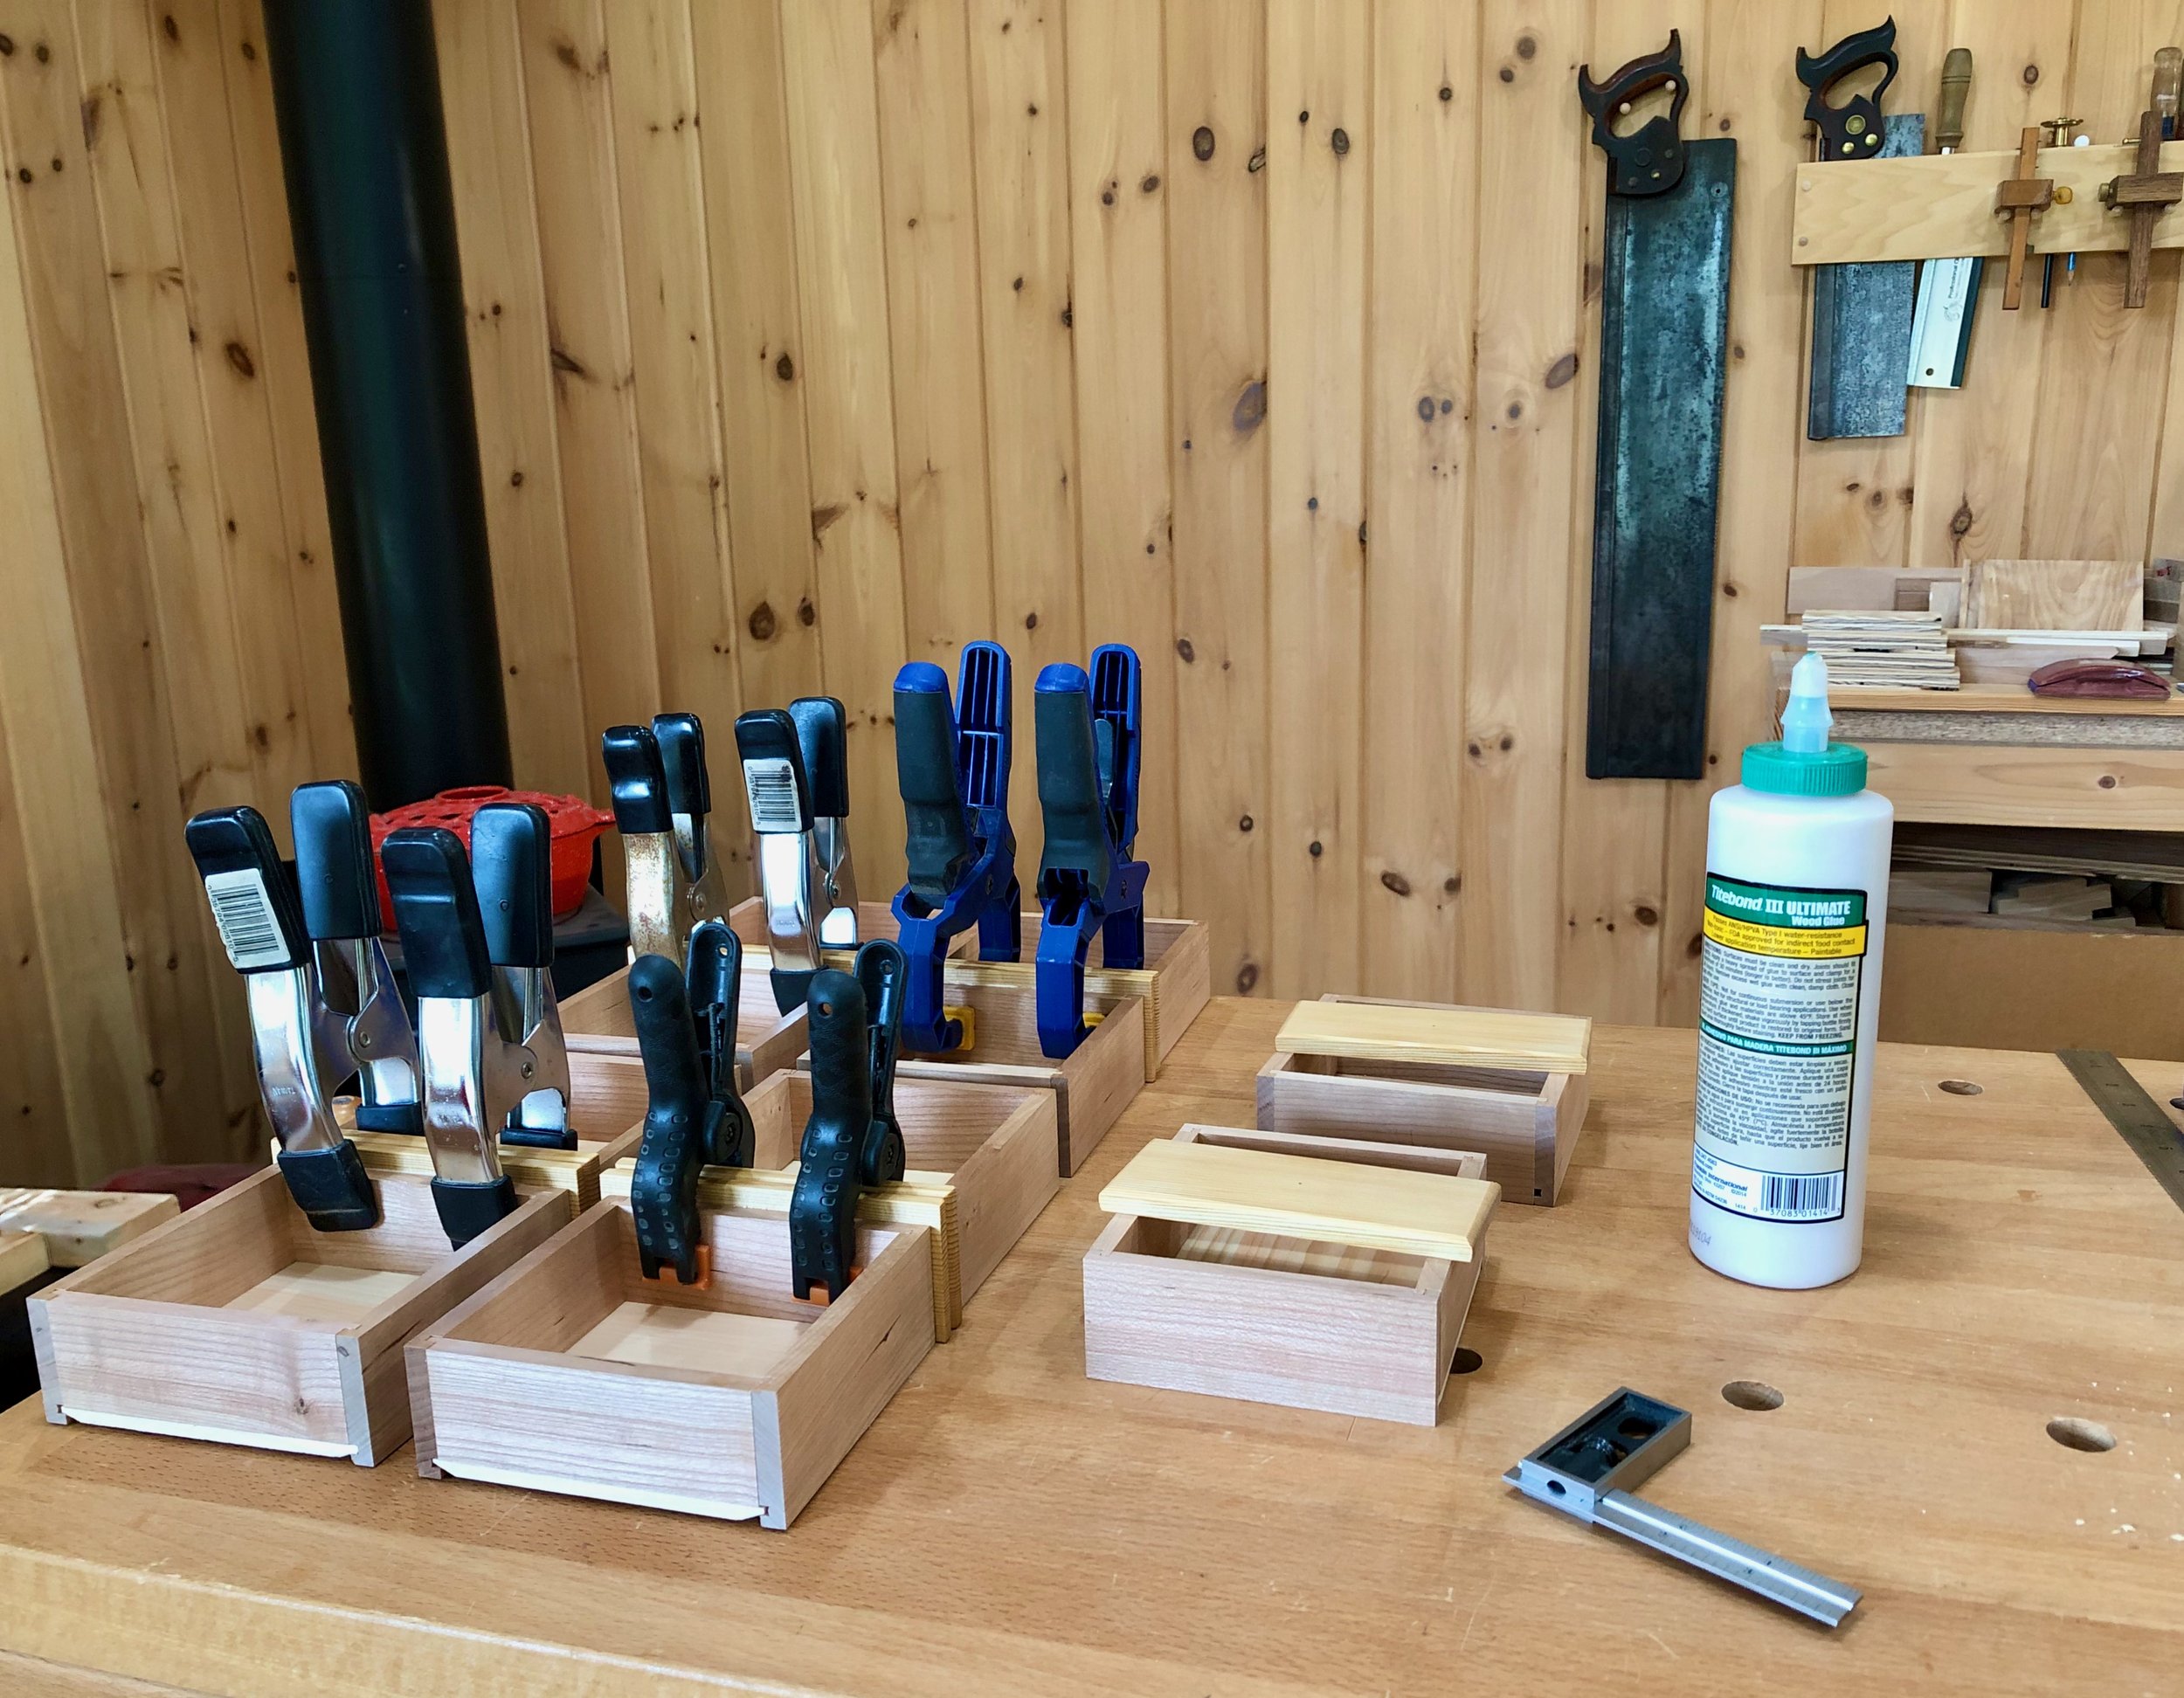
At last, it was time to start putting things together. The 5 drawer parts snapped together nice-and-tight and so just a dab of glue in the cherry grooves was all that was needed to forever bind things together. The drawer boxes were assembled one-by-one and then tucked within their chambers to cure.

Drawers and drawer parts
Before assembling the door I wanted to finish the panel board, and while I was at it, the drawer fronts too. I would be using shellac on the carcass, a film finish that would stop any resin from bleeding through as the eponymous Pinus resinosa aged. The antique pine panel and fronts would also be shellacked as a final coat but I felt they could use some “freshening” first and so I gave them a dose of boiled linseed oil, thinned 50% with mineral spirits to promote penetration. I also obtained some cherry knobs turned in a Shaker style from an online store called nice knobs!. These were treated with boiled linseed oil to darken, followed by Arm-R-Seal wiping varnish for a sturdy satin finish.
To complete the door, the stiles and rails were glued together, allowing the panel to float free within. The door edge and face frame were then mortised with a chisel to receive the hinges. A test-mount of the hinged door revealed the small amount of wood requiring removal from the non-hinged edge to achieve a nice fit. After disassembly, this was accomplished using both care and a hand plane. I used a homemade magnet catch to keep the door shut. I may get an authentic door latch, one day, but this works for now and keeps things “clean”.
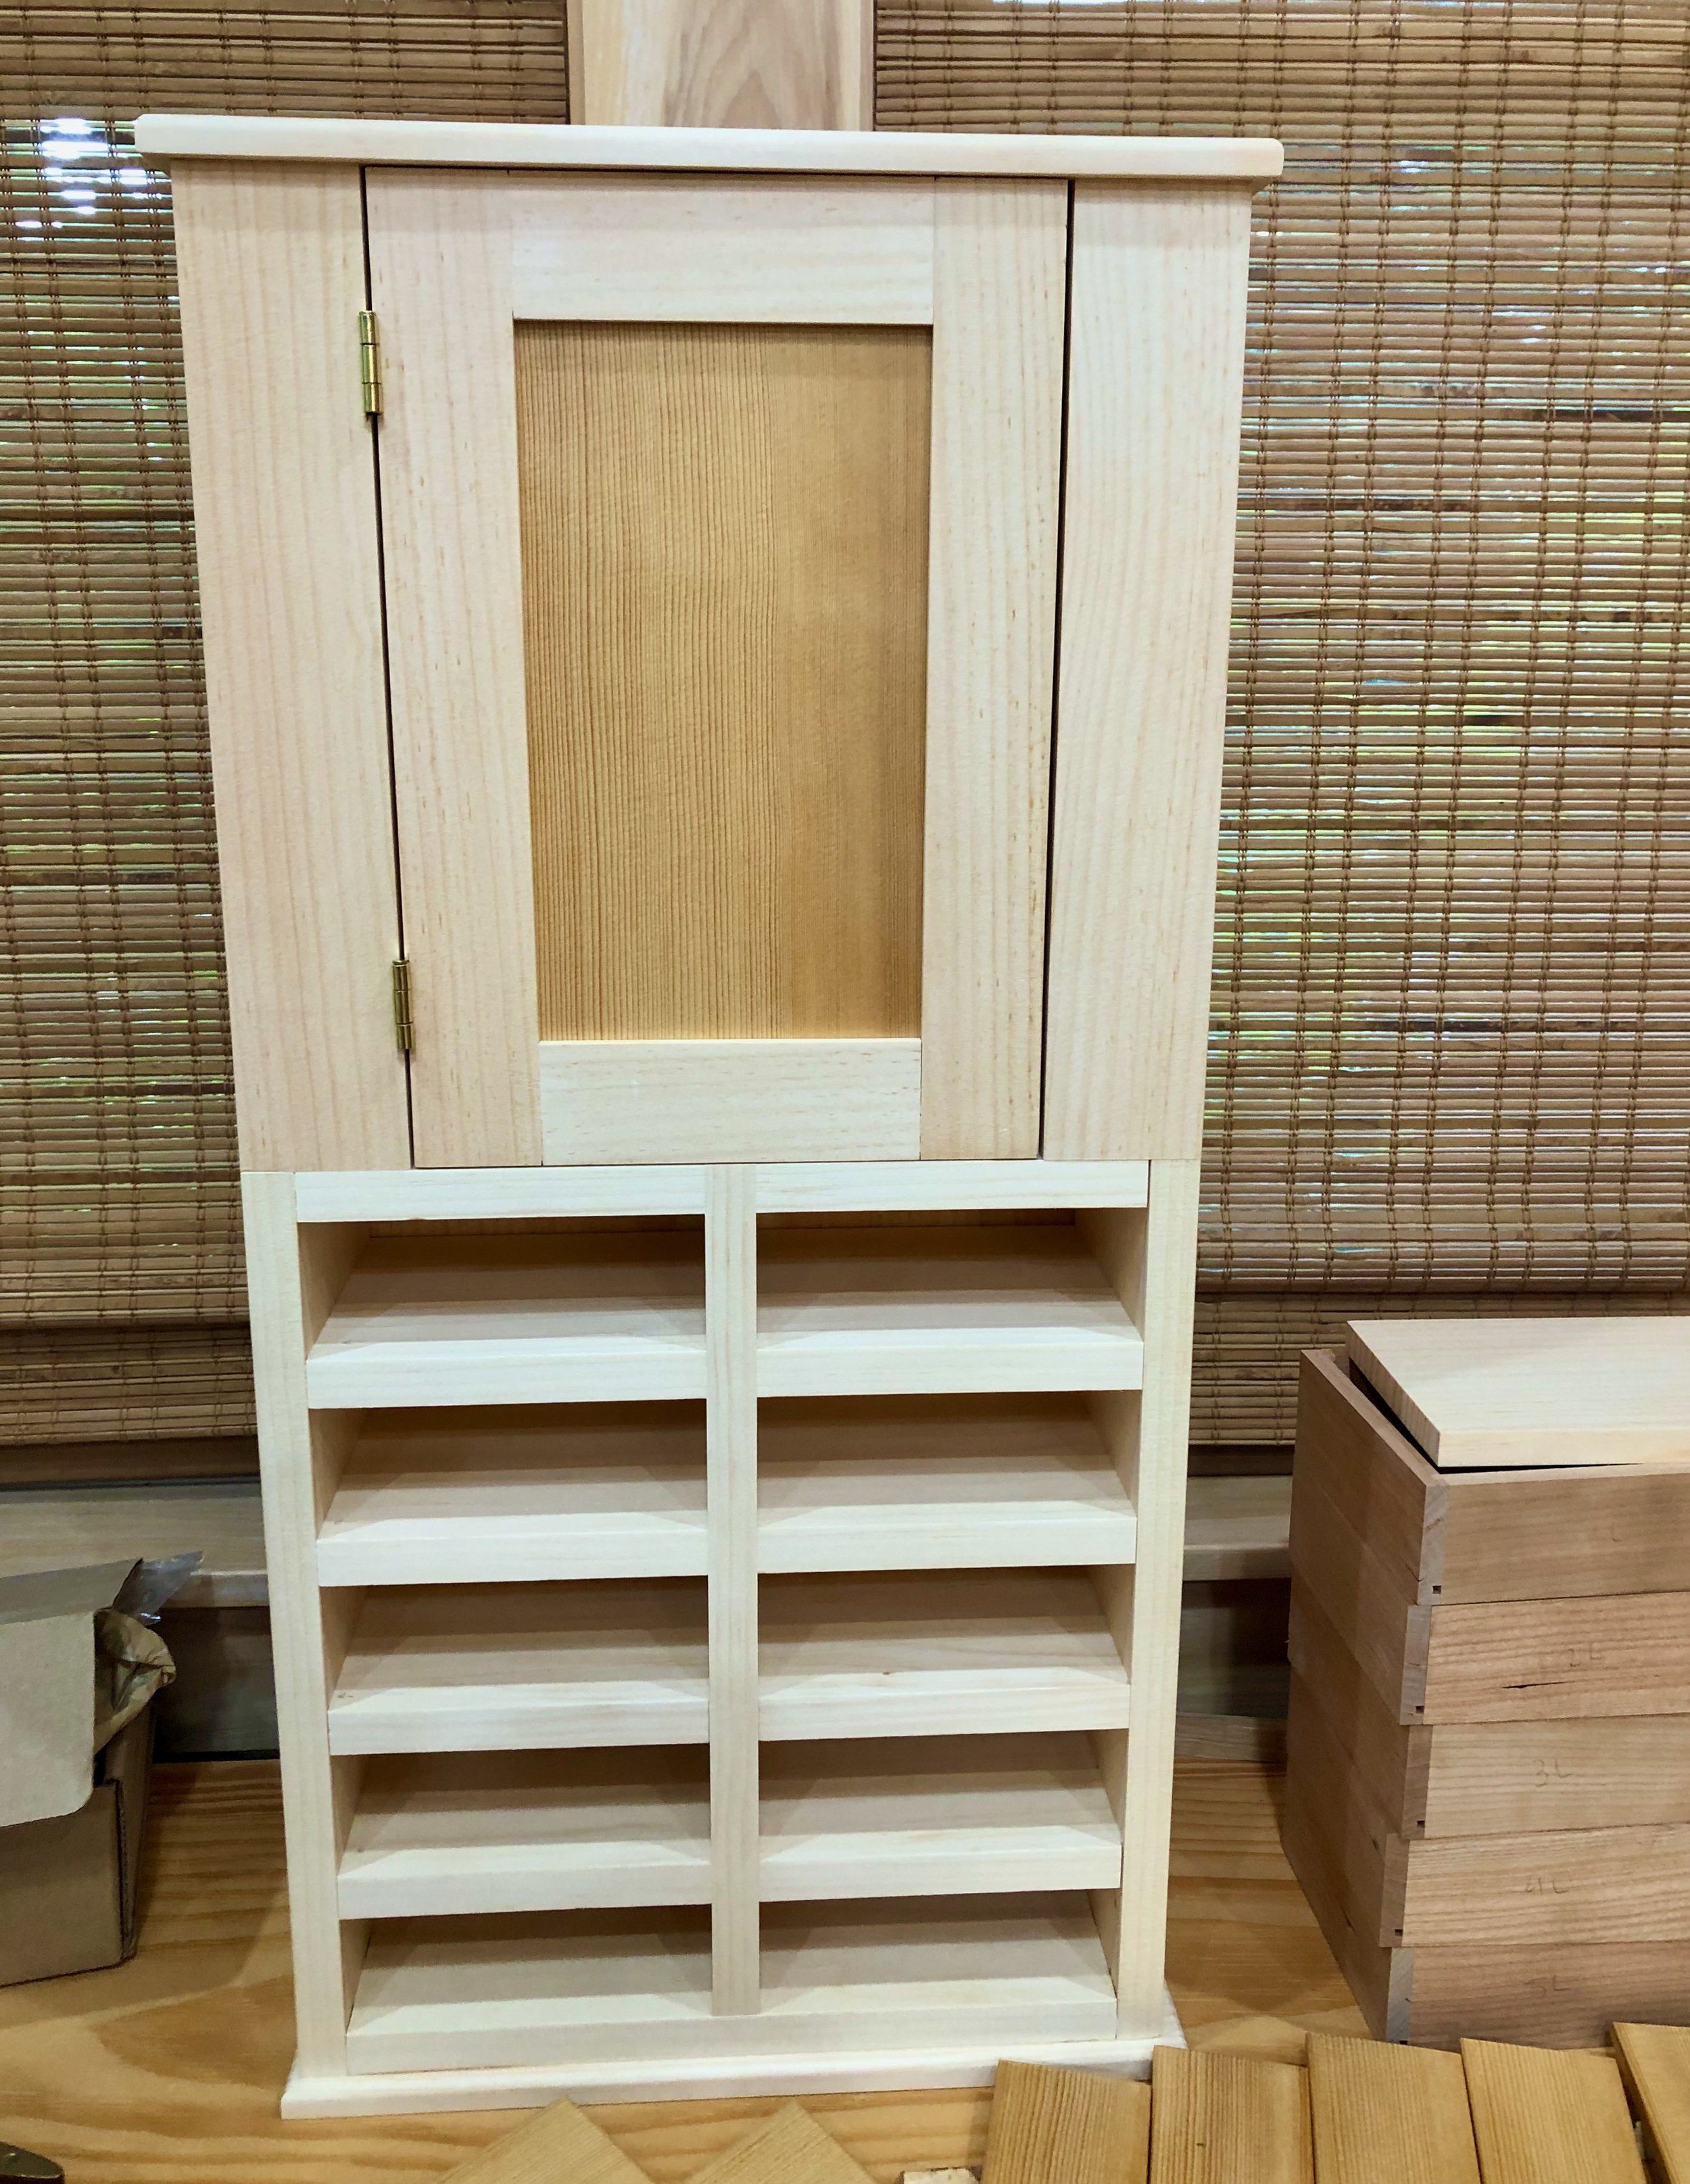
Door in place
Next, the door was removed and all of the pine parts were finished using clear shellac diluted by 25% with ethanol. That fresh pine readily soaked up the coating and so a second layer was applied to give an even, but still non-gloss, sheen. Once dry, the drawer fronts were glued to their boxes, which will remain otherwise bare (unfinished).
Adding fronts to the drawers, pairwise
Final assembly proceeded with ease. First, the back of the cabinet was affixed using screws, and then the hinges were re-mounted to the frame. A Shaker knob was added to the door, which was then attached to the hinges. The final step was to put knobs onto all of the drawer fronts. Before shaping their edges I had marked the geometric center of every drawer front with a punch. Drilling a hole at this position and then screwing a knob on from behind (x10) completed the drawer assembly. The interior shelf was then set in place to finish the piece.
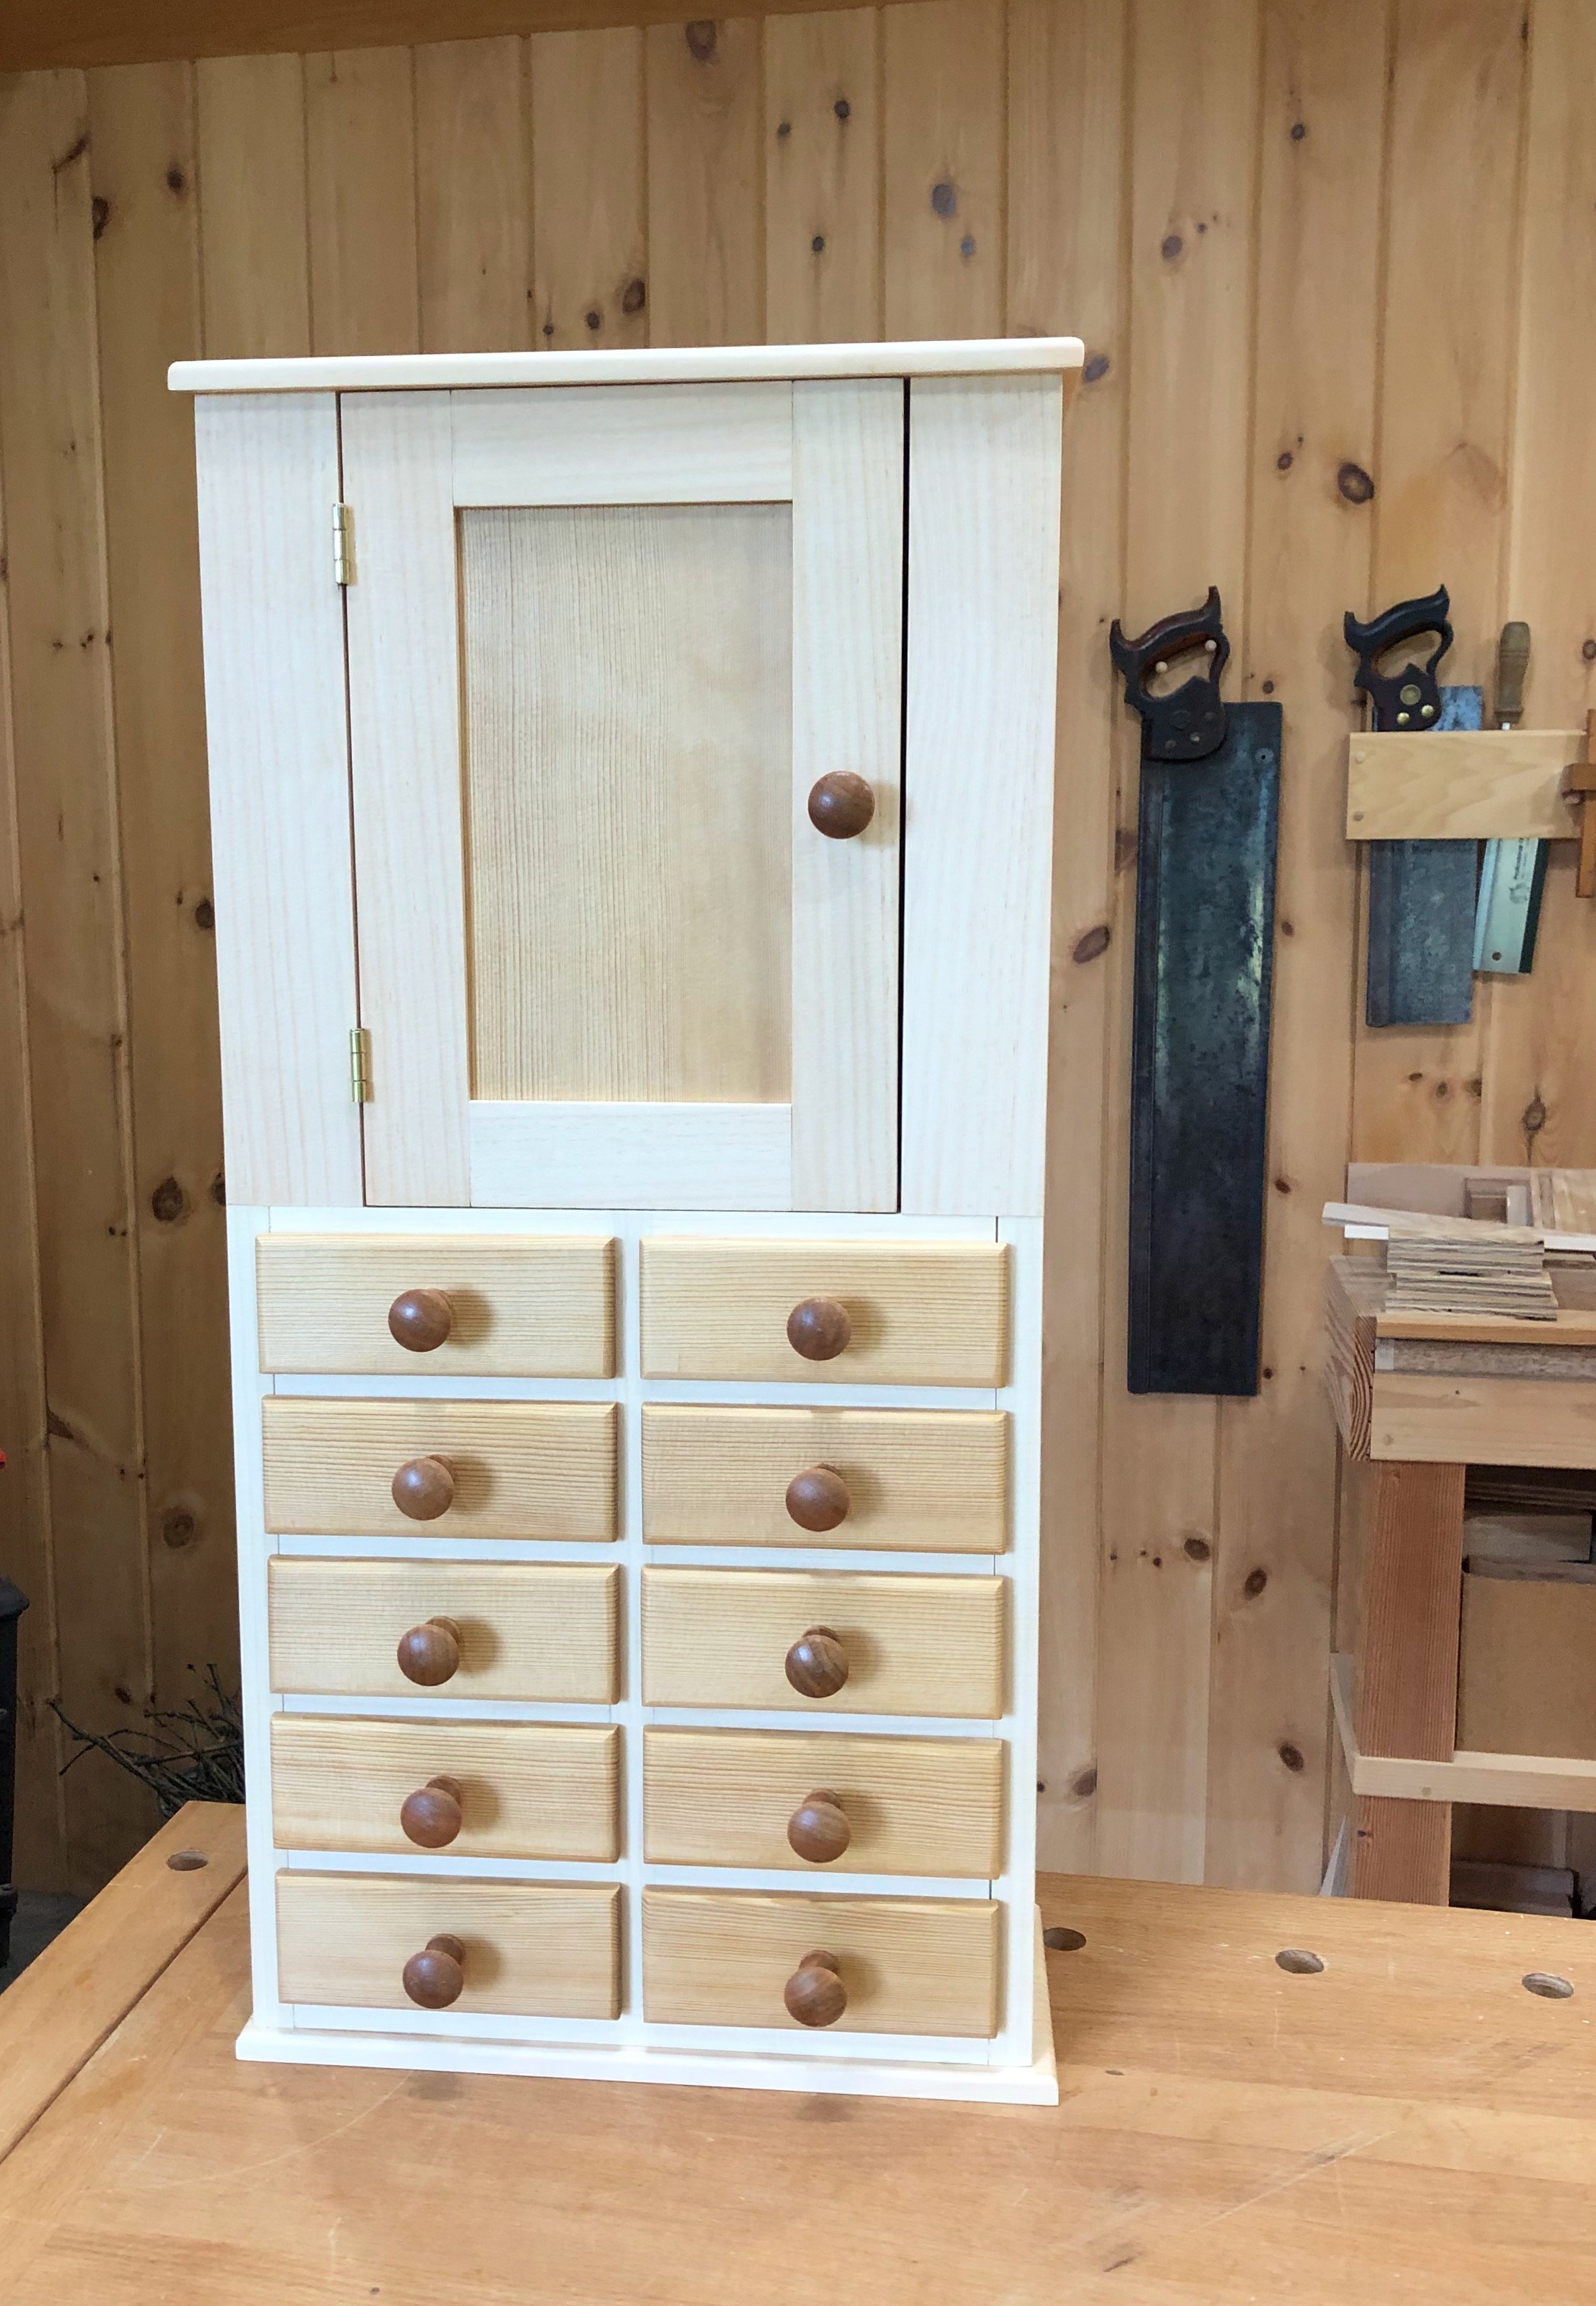
Cabinet complete
This Shaker Cabinet was a very enjoyable build for me. The various woodworking operations, carefully marked or measured and then performed repetitively, surely improved my technique. And while not a flawless product, I am happy with the result. Plus, it holds a lot of hardware! I’m certain that seeing this utilitarian “art installation” hanging in my workplace every day will inspire me no matter what the current Project. Thanks for helping me get it on the wall, Christian.
