

The Karabitsu
Here’s an interesting item that’s been on my build list for a few years. It’s a modest sized chest from Japan that I will use for storing firewood next to the hearth. Like most Projects, a little background research is rewarded with new appreciation for the enduring influence of former times. The story follows.
Karabitsu (or kara-bitsu) is a Japanese term that reportedly translates to '“foreign coffer”. I’ve also seen it expressed as “Chinese coffer” or “Chinese chest”, and some believe that kara may even come from kan which, for a time, was a word used to refer to the Korean peninsula. I don’t think we need to propagate confusion here, though. According to the book, Tansu: Traditional Japanese Cabinetry, the karabitsu has existed as a recognized form in Japan since the Nara Period (645-794) and I would imagine that “foreign” in eighth century Japan pretty much meant “Asia”, anyway. Still, it is curious that no non-Japanese examples of the “foreign” coffer pre-dating the Nara era have been found. The term wa-bitsu (Japanese coffer) dates back to the year 1050 and describes a legless form of the karabitsu. Even alongside the “native” wa-bitsu, and the wealth of tansu forms that followed, the karabitsu remained popular in Japan for centuries, serving as storage chests for special objects, often highly decorated with inlays or painted lacquer. I discovered this form while perusing the wonderful reference book: Traditional Japanese Furniture, A Definitive Guide, and there are many fine karabitsu examples to be found on the internet. Some versions sat on tall legs, often six in number, which grew stouter as the form became more ornate. It is a striking chest.

Karabitsu example reproduced from: Koizumi K. Traditional Japanese Furniture, A Definitive Guide, K. Koizumi, Kodansha International: Tokyo, 1986.
Design
My karabitsu would sit on four legs and be unpainted. That makes it closer to the eighth century original in form, and, as fortune would have it, an example from that time still exists. It seems an imperial warehouse on the grounds of the Todai-ji temple in Nara, dating from that eponymous period, was discovered to contain four intact furniture pieces, and included in these was a karabitsu from which the construction techniques could be gleaned. Quite a find! I show a photo of that piece along with an exploded-view diagram below (reproduced from Tansu: Traditional Japanese Cabinetry).

Earliest known karabitsu?
Anatomy of an early karabitsu
I’ll use this plan as a starting point. The corner joinery was my biggest question and it appears they used simple “box joints” here. I’ll do the same. Iron nails were used to attach the leg pieces to the sides and a brace ran between these legs to support the floor board. The legs of the original also contained cut-outs through which rope could be threaded, allowing the chest to be carried by two people using a cross pole. Instead, I’ll opt for the decorative metal handles used on later examples and lengthen those legs a bit for height. Likewise, I will hinge the top for ease of access, as was the practice in subsequent centuries, and mine will also have a floor board housed within a dadoed groove for strength. In the end, the design will have a few changes brought about by what has become possible with new tools and materials over the millennia, but not wholly different from ancient times.

Karabitsu firewood box, rough plan
Materials
The thirteen hundred year-old karabitsu used zelkova (a member of the elm family) for the legs and cryptomeria (Japanese cedar) for the box parts. These are common woods in Asia, used extensively for tansu and other furniture pieces. However, they are not common in North America and so I would need to find substitutes. I wanted to use special wood for this chest; something that would look nice with a simple oil finish and that would be resistant to insect damage. I decided to try Spanish cedar for the legs and Southern cypress for the box. Not common boards, but ones carried by my favorite yard for unusual lumber, Goose Bay Sawmill and Lumber, Inc. For the handles I would use some authentic hardware picked-up on my last trip to Korea, and I would source the hinges from an Etsy-based craftsman.
Spanish cedar and Southern cypress boards (in lock-down)
Dimensioning
Construction on this Project divides itself neatly into three jobs: the box; the lid; and the cradle (for lack of a better descriptor). They should be made in this order, too, for the dimensions of the box dictate those of the subsequent elements.
the Box
To make the box I first prepped cypress boards to be 5 in. wide, 5/8 in. thick and “square” all around. Before cutting to final length, though, I needed to make a decision on where each board would be placed. I wanted to show off the wonderful grain, of course, but do so in a way that would alternate the orientation of the growth rings to reduce the effects of warp. Once the position puzzle was solved each board was labelled with tape.

Cypress boards positioned and labelled
In order to form the box joints, the top and bottom boards from the front and back faces and middle board from each side face were cut to their exact lengths, 24 and 15 in., respectively. These define the length and depth dimensions of the box. Using a dado blade at the table saw I then created a 5/16 x 5/16 in. rabbet on the backside of both ends of the boards. When mated at the corners, these would form a double rabbet joint, a bit stronger and better looking than the butt joint connection found in a typical box-jointed case. With the “long” boards rabbeted I could make an exact measure of their interior spans, which would define the lengths of the “shorter” boards. Weaving together side boards of alternating length serves the function of a box joint, mating edge grain with edge grain, to form a stronger glue bond. The shorter boards were cross-cut to size and then dadoed to form the same rabbets on their ends. One final cut to house the plywood floor board was needed prior to assembly. For this, I used a dado blade at the table saw to create a 1/2 in. wide x 5/16 in. deep groove near the bottom of the four lowest boards. A piece of 1/2 in. furniture grade birch plywood was then cut to fit the final dimensions. Lastly, I added biscuit slots along the board edges to assist in the assembly.
Box parts cut to final dimension
Assembly of the box proceeded in layers, beginning at the bottom. There are no box joints nor biscuits in this layer and so the floor board is the primary reference for squareness. It was sequentially snugged into the glue-filled groove on each side board and this construct was then squared-up by adjusting the diagonal dimensions across the top. Once all was good, clamps were employed to hold everything tight during the cure. Getting the first layer “right” is key.

Glueing and clamping layer One
The second and third layers stacked on easily with the biscuits to keep everything aligned. After all of the glueing was finished, the sides were hand planed a bit to level everything off and then 3 cherry pegs were inserted on the ends of every long board, in keeping with the Japanese method. The whole body was then sanded to 220 grit.

Completed box
the Lid
The lid for this box will consist of a platform top surrounded by trim around the edges. The original karabitsu appears to have had the top resting atop the “trim”, which acted as a surround for the box. But, since I would be using hinges to keep the top in position I did not require the surround feature and so I decided to use the trim to hide the end grain of the top boards and overlap just a bit with the box when closed. I also decided to make the trim from Spanish cedar to provide a bit of color contrast there.
Construction of this element was simple. I first prepped four cypress boards to be 4 in. wide, by 5/8 in. thick, by 25 in. long. The boards were then positioned to get the desired grain orientations and biscuit slots were cut to assist during assembly. Following glue-up, the ends were trimmed to 24 1/4 in. using a track saw. I prefer this tool to the table saw for cross cuts on large boards such as these, given that I do not have an extension on my saw’s table, however, the rip cut to fix the top’s width at 15 1/4 in. was performed there. Once cut to the final size the platform was sanded to 220 grit.
Platform complete
There are many ways to hinge a lid of this type. My desire was to not show hardware on the exterior of the chest, and so I opted for full inside mount strap style hinges, procured from the Lock and Box Shoppe, a small business found on Etsy.
To attach the hinges I first knife-marked their ideal location along the top edge of the back side and then scribed a 1/8 inch depth mark at this location. The knife marks were sawn down to the scribe line and the interior portion removed with a chisel to create mortises. The result of this operation is to allow the top to sit level when closed. The hinges were then inserted and the screw holes drilled into the back of the box. Next, double-stick tape was applied to the strap portion of each hinge and the lid was laid down carefully into position. With the hinge now taped to the interior of the lid it was lifted free of the box and screw holes were drilled into the lid. The hinges were then temporarily affixed to the lid with a couple of steel screws and this was placed back on top of the box. With my wife, Joung, supporting the open lid I was able to temporarily mount the interior hinge straps with a couple more screws. Everything worked as it should.

Hinged lid in place
Lastly, it was time to fashion the trim. For this I sliced a 1 3/4 in. slab from the side of a 5 ft. long, 2 in. thick Spanish cedar plank. This was re-sawn at the band saw into four ~1/2 in. thick boards which were subsequently thickness planed to a 3/8 in. depth and then ripped to a final 1 1/2 in. width at the table saw. For the joinery, I decided to hide the two front corner seams with miters. Assembly started by cutting the front strip to length on a 45° bias and then fastening it to the top board using finishing nails and a bit of glue. Next the two sides were cut to length and added. The back, ripped at a narrower, 5/8 in. depth to accommodate the hinges, was applied last. Once everything was put together, the top edge was rounded-off and the other edges broken to feel smooth while looking sharp. This completed the lid.
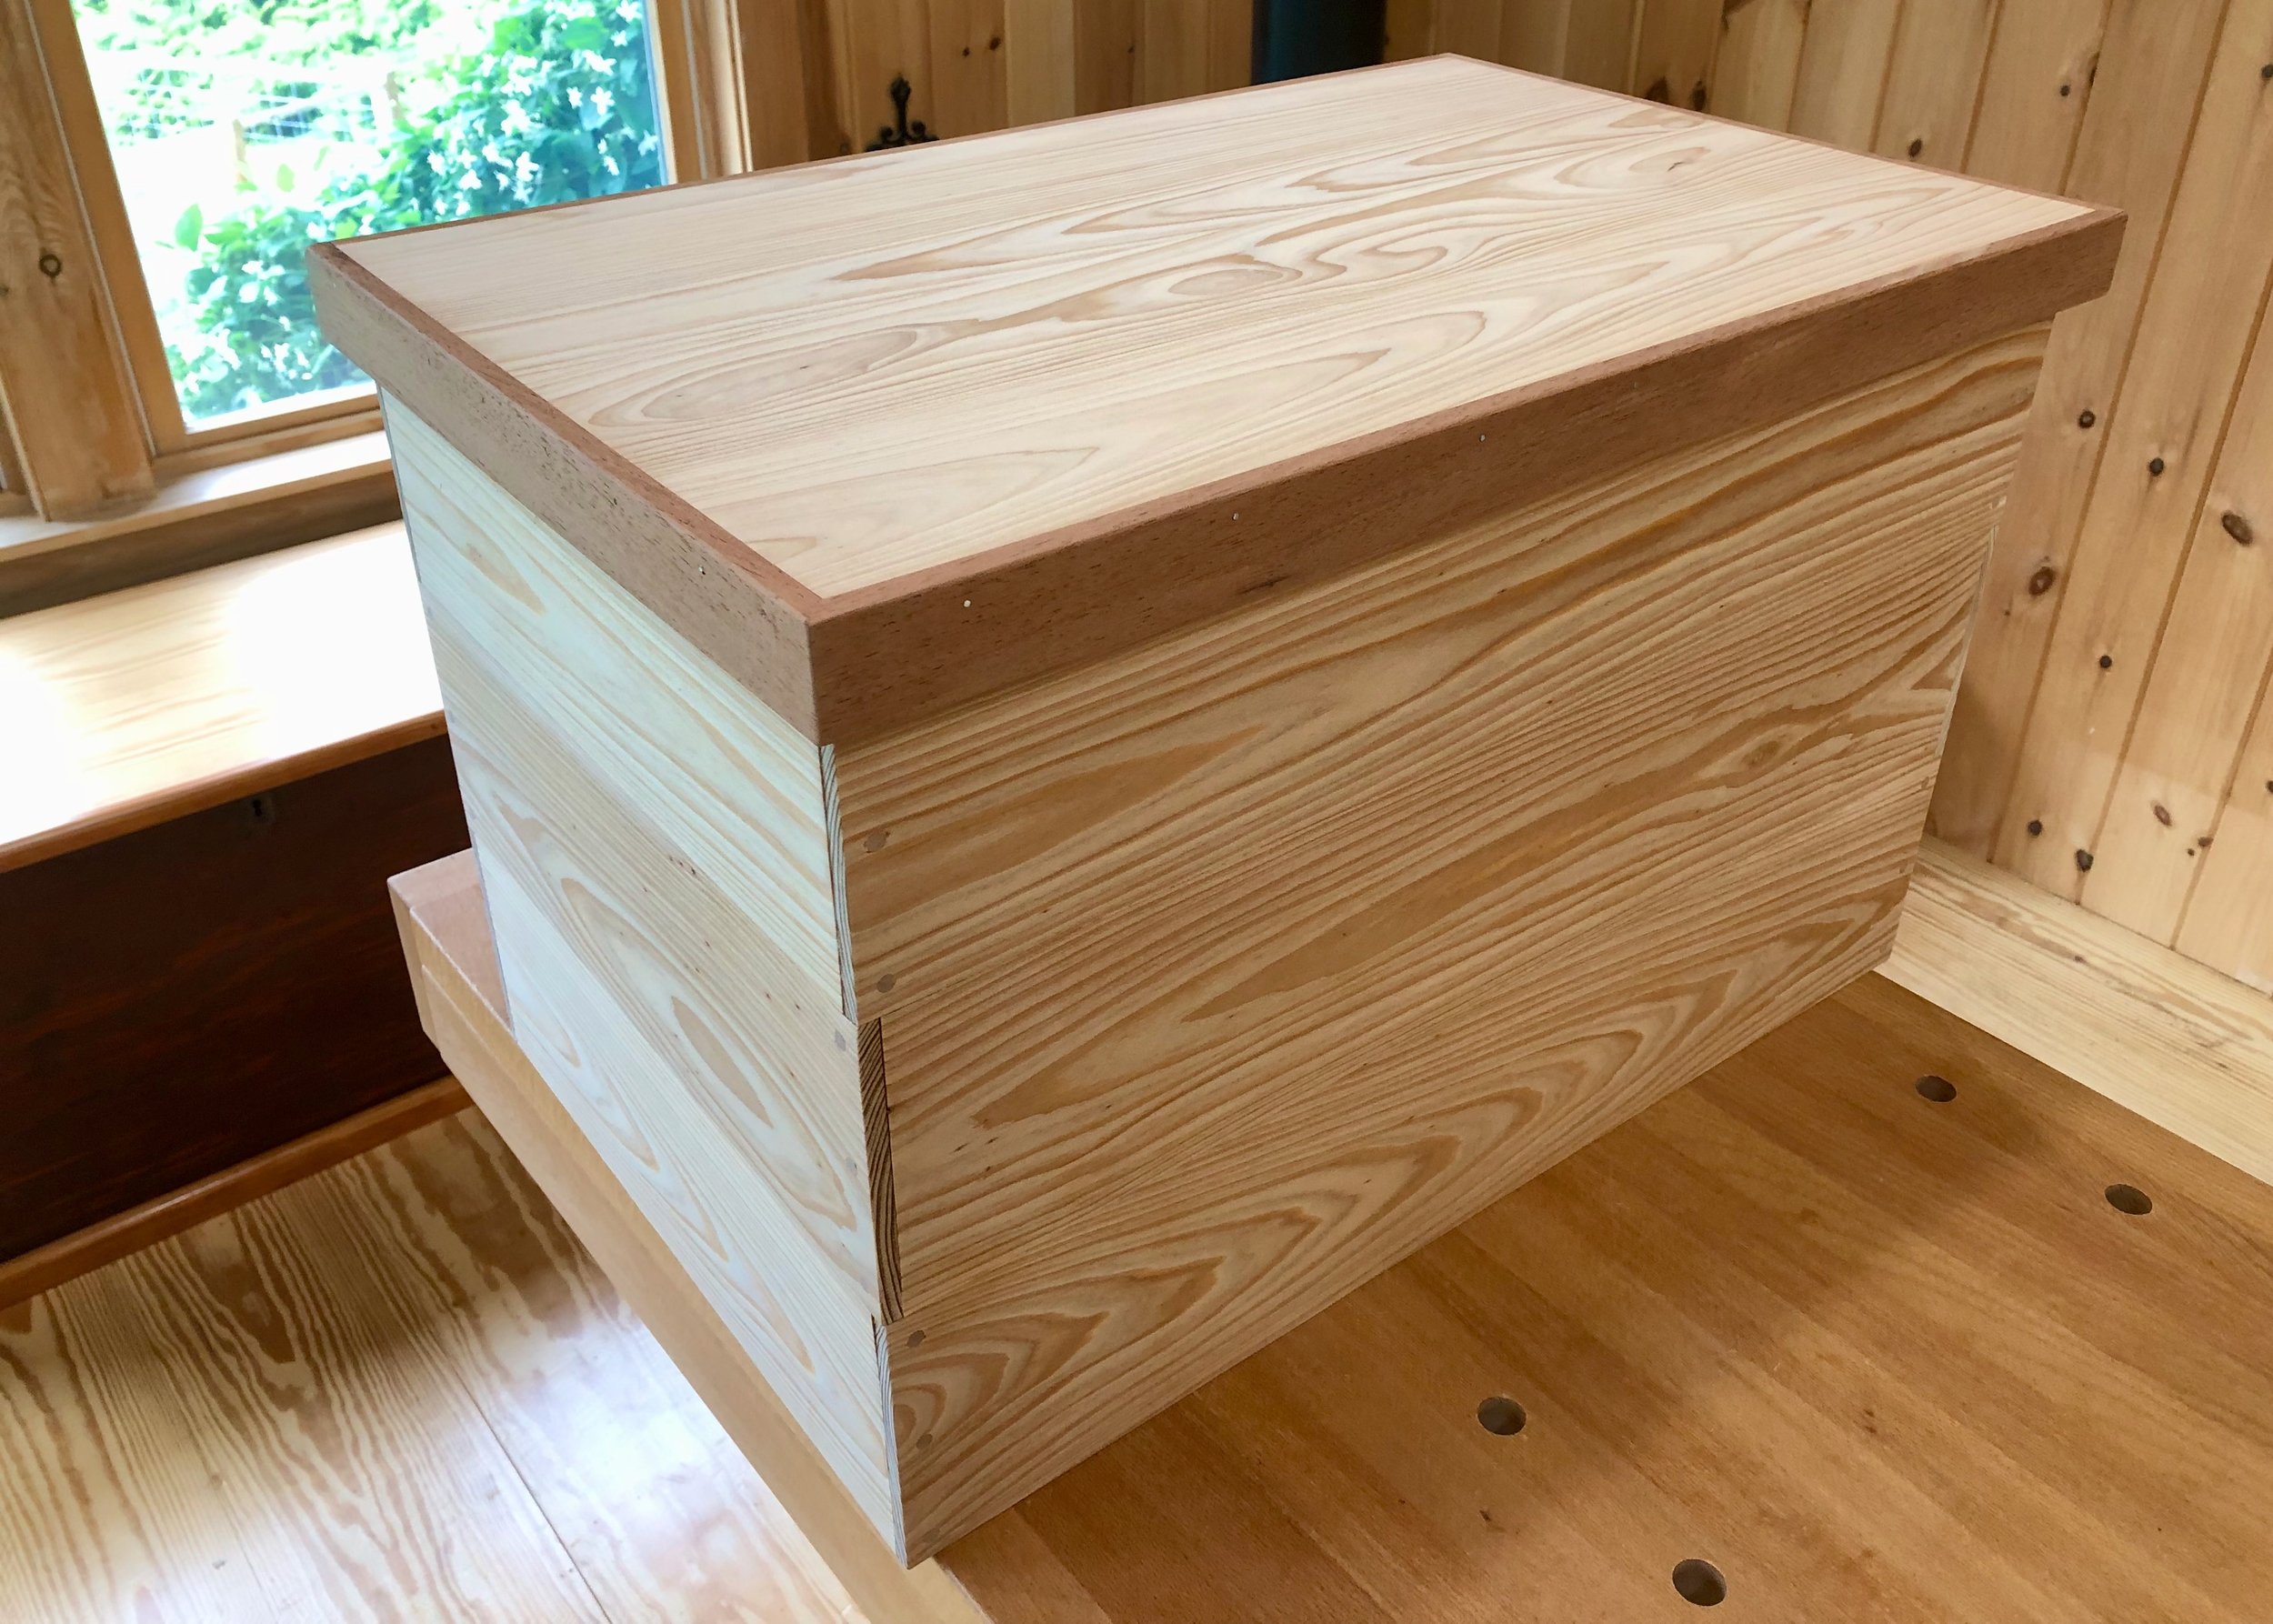
Box and lid
the Cradle
The cradle is my name for the four legs and “chassis” that supports the box. The legs are the stars here so I decided to fashion those first and then figure out the rest of the joinery afterwards. Karabitsu legs act as “stilts”, whose function, I presume, was to lift the box off of a damp, stone Chinese floor. I wanted them to add character to the piece, but nothing overwhelming. After some doodling, I came up with a tapered flare that looked appealing (see rough sketch). This shape was drawn on a piece of 1/2 in. mdf and then cut-out at the band saw and smoothed with a drum sanding bit at the drill press to provide a template. The leg material came from a Spanish cedar board, prepped to 1 1/2 in. thickness. Tracing the template four times onto the cedar and then cutting out these shapes at the bandsaw gave the rough members in a very simple and satisfying operation.
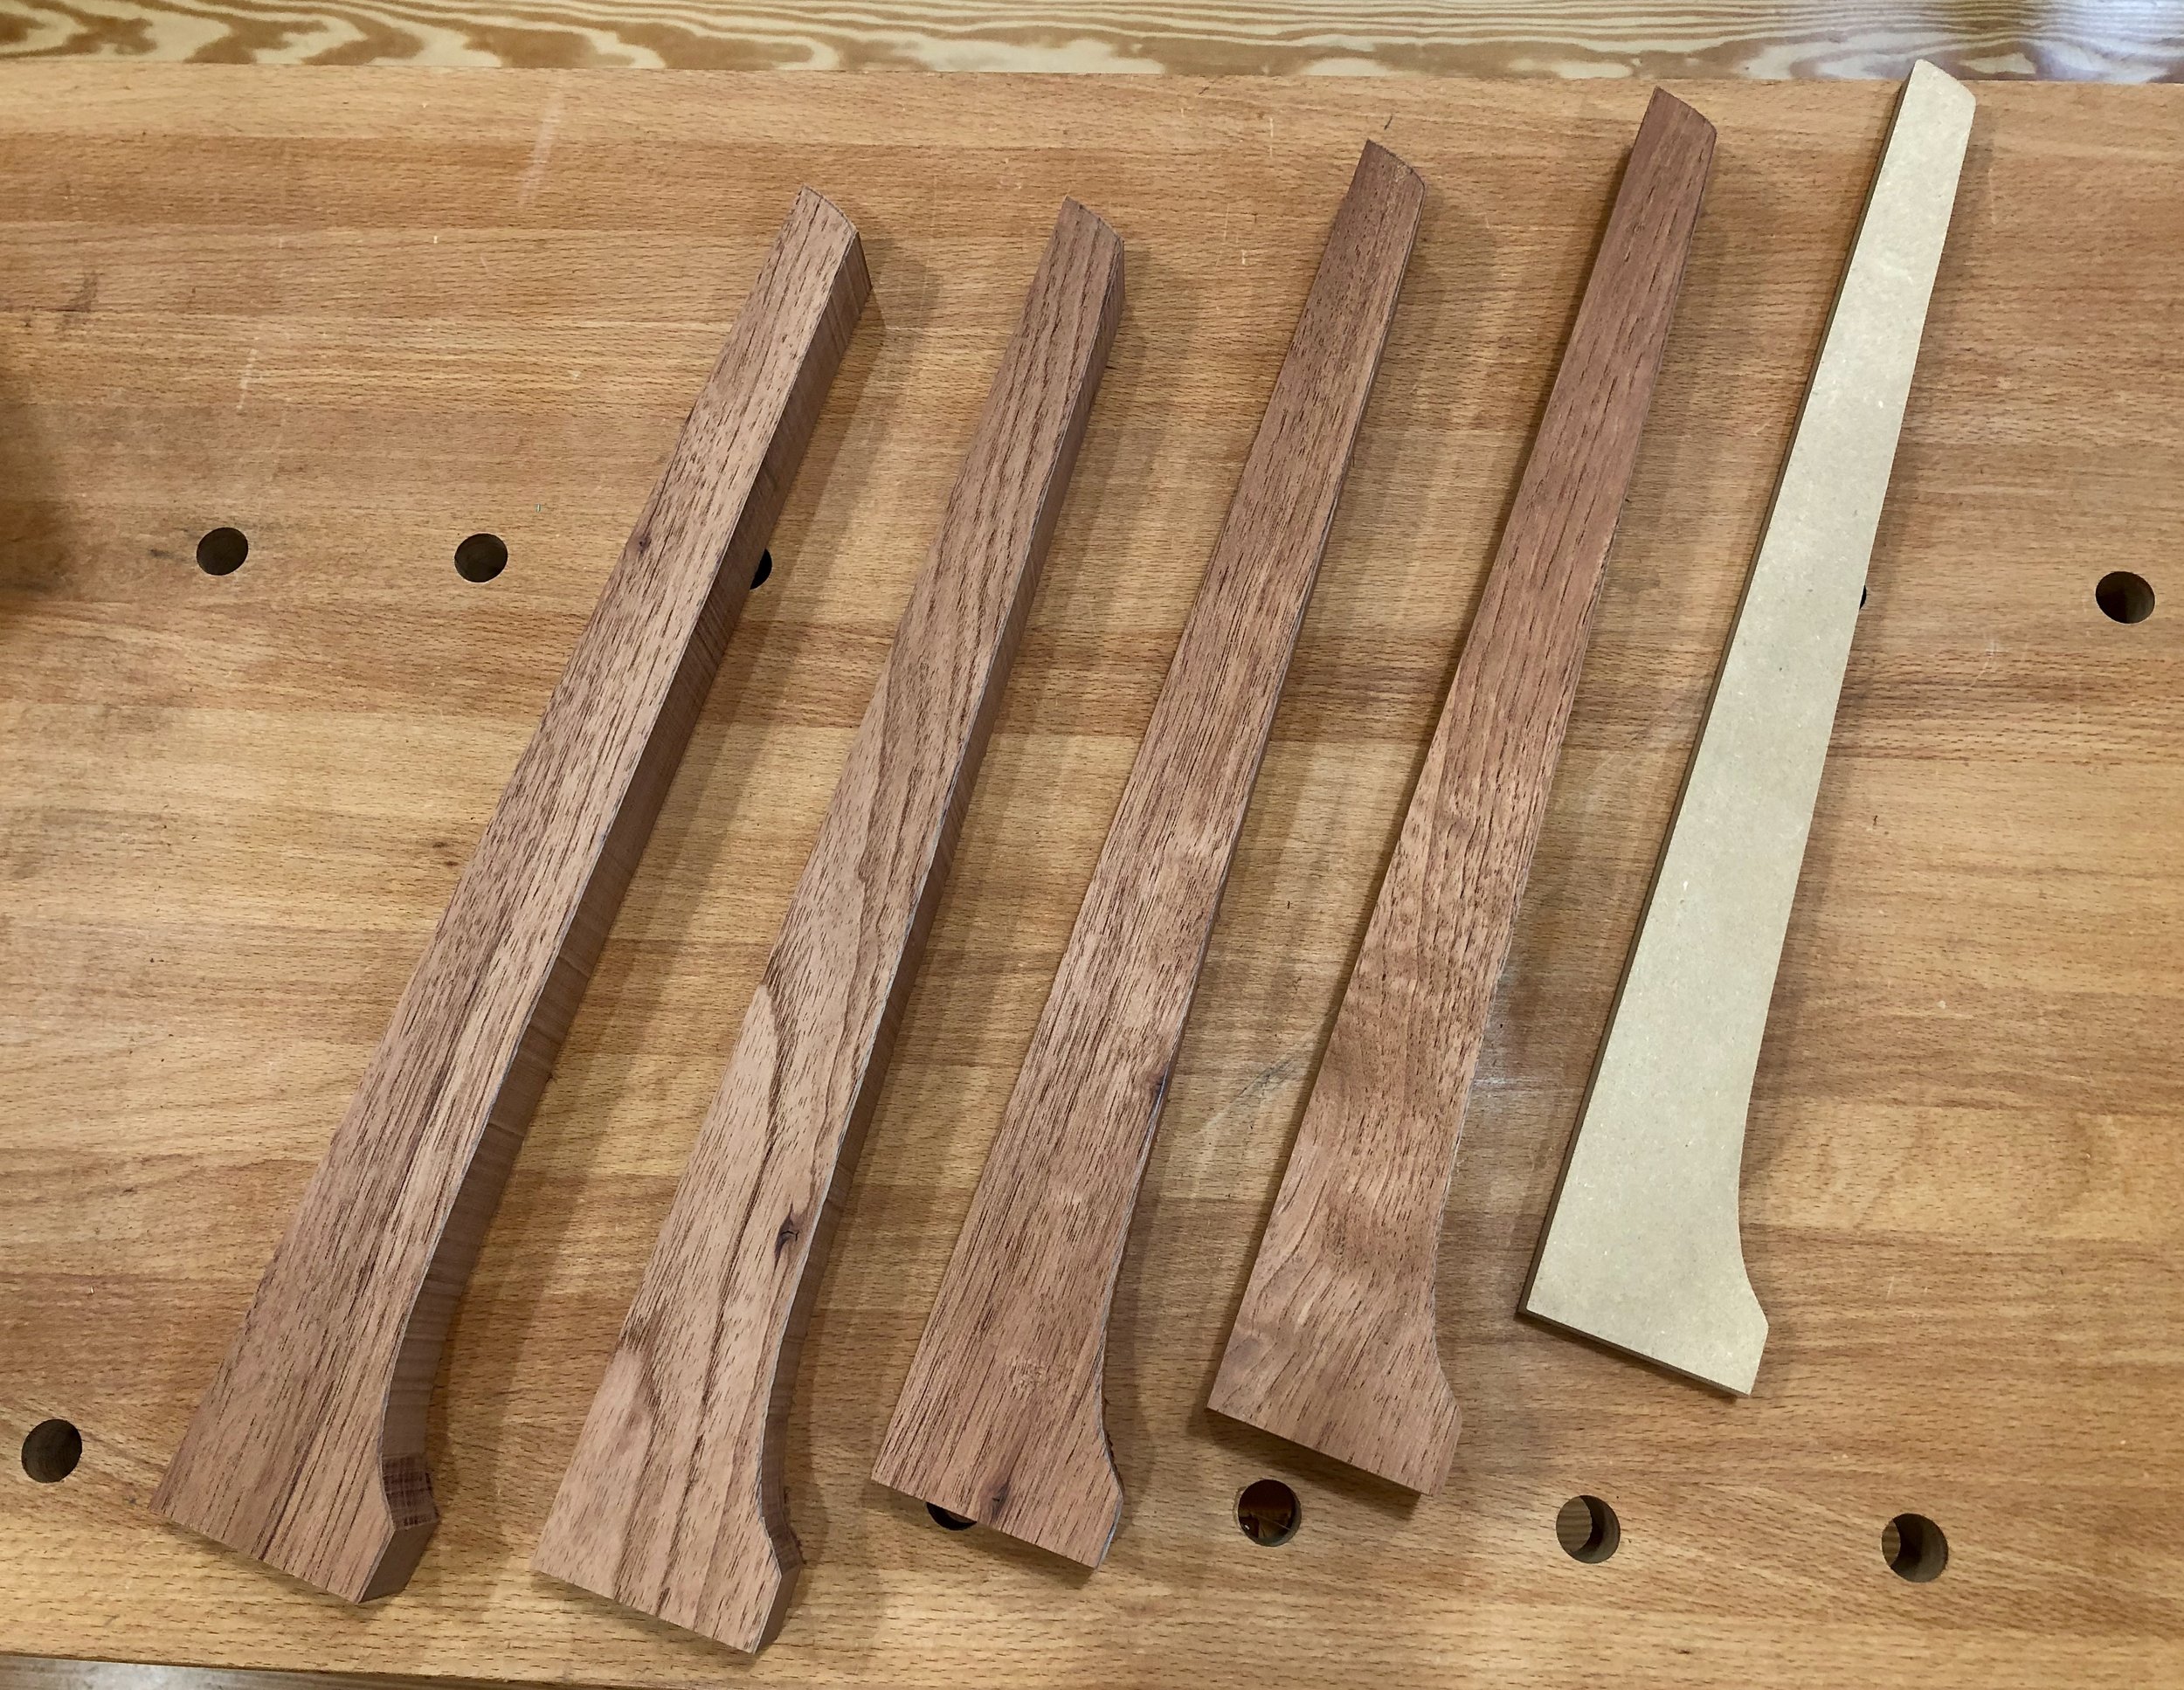
Rough cut legs and template
Next, I glued sides onto the flat edges of the mdf template to convert it into a pattern which could be employed at the router table to convert the rough cuts to a uniform and smooth shape using a flush-trim bit. The edges were then further refined with a card scraper and sandpaper.
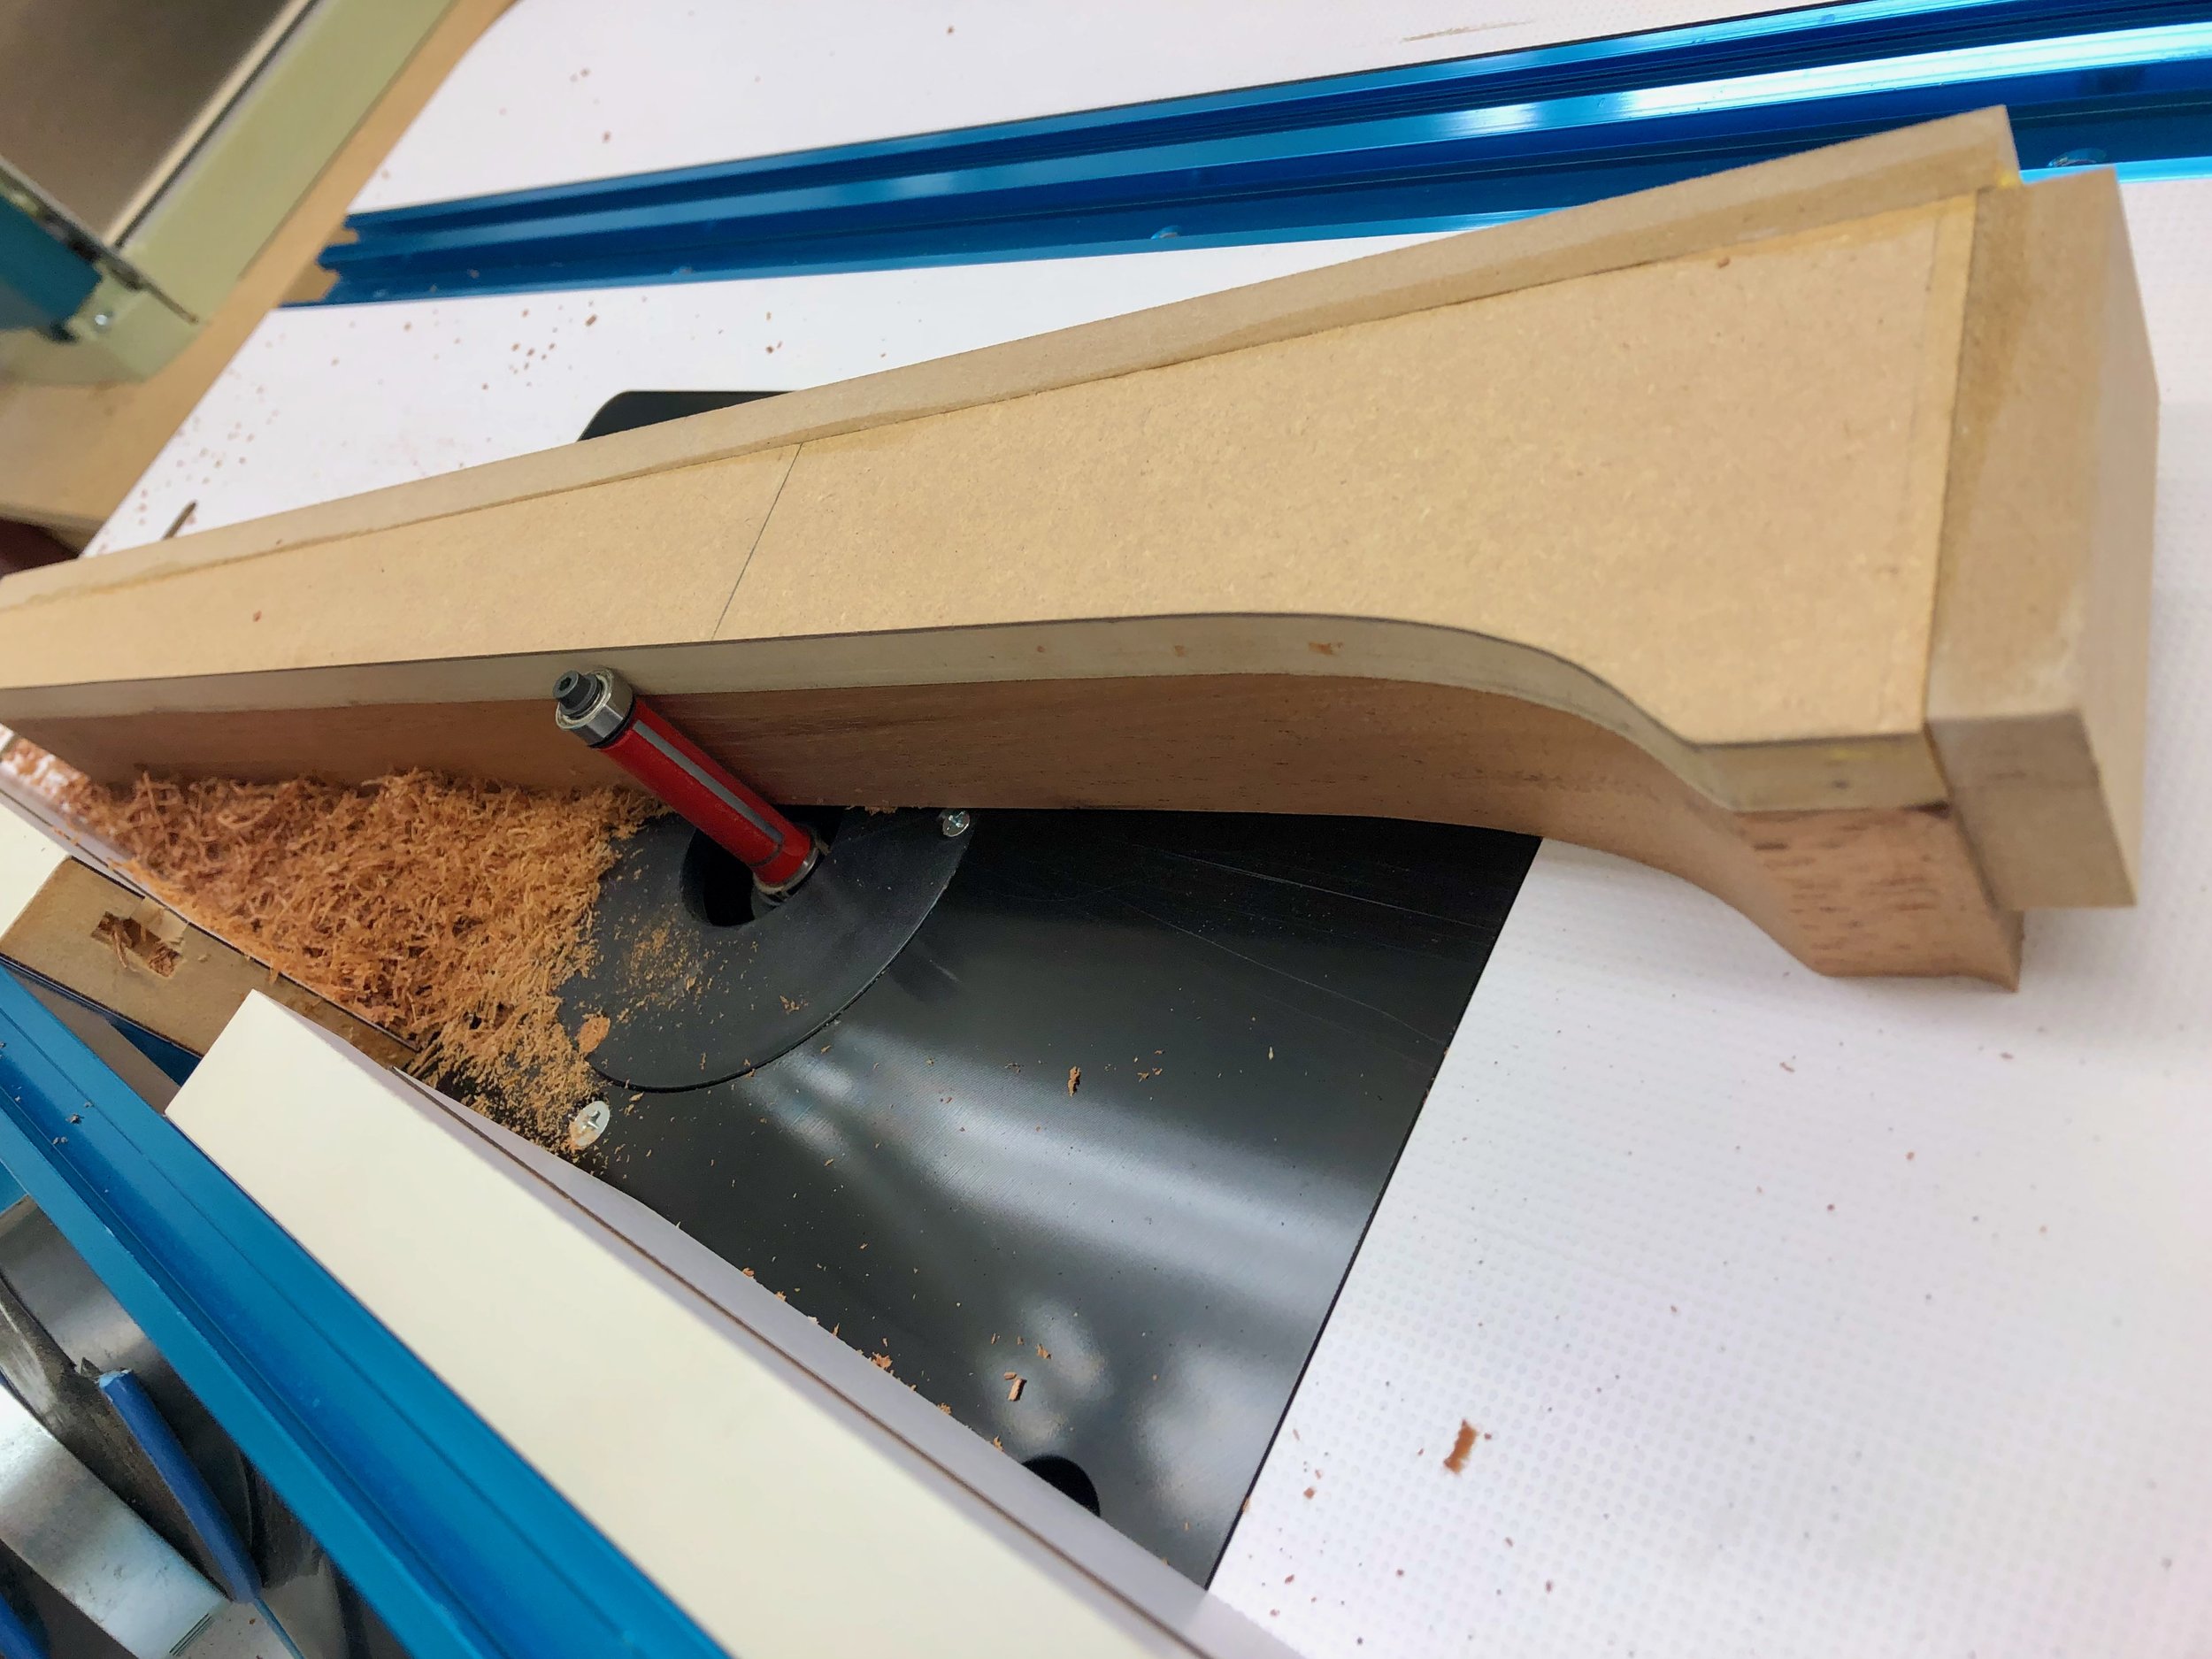
Smoothing the bandsaw cut at the router table
The legs would be connected to one another by stretchers made of Spanish cedar. Here I opted for mortise and tenon joinery to keep everything solid and square. It would be tricky to cut the mortises on the curved leg pieces and so I brought out the pattern once again. After attaching an additional mdf leg this could now be used as a jig to hold the karabitsu legs level during the mortising operation. One by one, the cedar leg pieces were screw-mounted to the jig and then a 1/2 x 1/2 x 1/2 in. mortise was cut at the desired position. Easy!

Cutting the mortise with assistance from a jig
For the stretchers I prepped some Spanish cedar to 1 1/2 in. x 1 3/8 in. and then cut two parts to 16 in. length. The tenons were fashioned using a dado blade at the table saw, with the top face of the stretcher cut back further to also accommodate the box edge. For added strength I decided to connect the stretchers with two 1 1/2 in. x 1/2 in. cedar supports. These would keep the cradle structure “square” in the absence of the box and prevent sag of the bottom board. Half-lap joints were used to attach them to the stretchers.

Dry-fit cradle with box in background
Lastly, the design called for visible pegs along the legs. The legs of the original karabitsu were affixed to the box with iron nails, and as the piece was coming together I had decided to use screws here, instead. Screws applied from the outside of the box could have their heads covered with a short dowel cap to achieve the design intent, but I felt that a screw mounted from the inside was the better approach for securing a board to a post. Thus, the pegs would be purely decorative and maybe just one up near the top of each leg would provide the best look. To accomplish this I pounded out a few 1/2 in. diameter Spanish cedar dowels with a dowel plate and used a homemade jig to reproducibly drill a shallow hole into each leg part. The dowels were then glued into place, sawn flush and hand planed smooth.
Final Assembly & Finish
To begin assembly, the half-lap joints of the stretchers and supports were glued together while sitting on the overturned box. This ensured that they would eventually fit, again, during the final assembly. I then decided to finish all components at this stage to better seal the overlapping wooden parts. The plan was to use some sort of colorless product for this but that hardly narrows down the field of contenders. There are a host of appropriate oils, varnishes and oil/varnish blends available these days and so some research was in order. Never having worked with either wood I first queried online and discovered that both are “well-behaved” and easily preserved in a manner that enhances their look. Great! And while that narrows nothing, it also makes it hard to go wrong. On scrap Spanish cedar I tried some boiled linseed oil (BLO) and a product advertised to be a tung oil finish, which is actually an oil/varnish blend that, for all I know, may even contain tung oil. It’s not like they list the ingredients or anything, and I’ve read that snake oil sharps now thrive in the paint aisle. Anyway, this product sold by Minwax gave a nice, subtle luster, less orange coloration compared with BLO and it did well on cypress scraps, too. I liked the look and so I removed the hinges and got to work.
The underside of the box and the cradle chassis were finished first. Once dried, the chassis was aligned and mounted to the box using 4 stainless steel screws through the bottom board. After masking the tenons with tape, I then gave all the remaining parts three coats of the “tung oil” finish over the course of three days.

Finishing the parts
Final assembly proceeded in this order. With the box flipped upside-down, the four legs were glued to the chassis at the mortise and tenon joint. They were then each aligned to be perfectly upright and held in that position by means of a band clamp. I also used this opportunity to drill two 1/2 in. “air holes” in the back, near the bottom, to guard against any hide-and-seek mishaps.
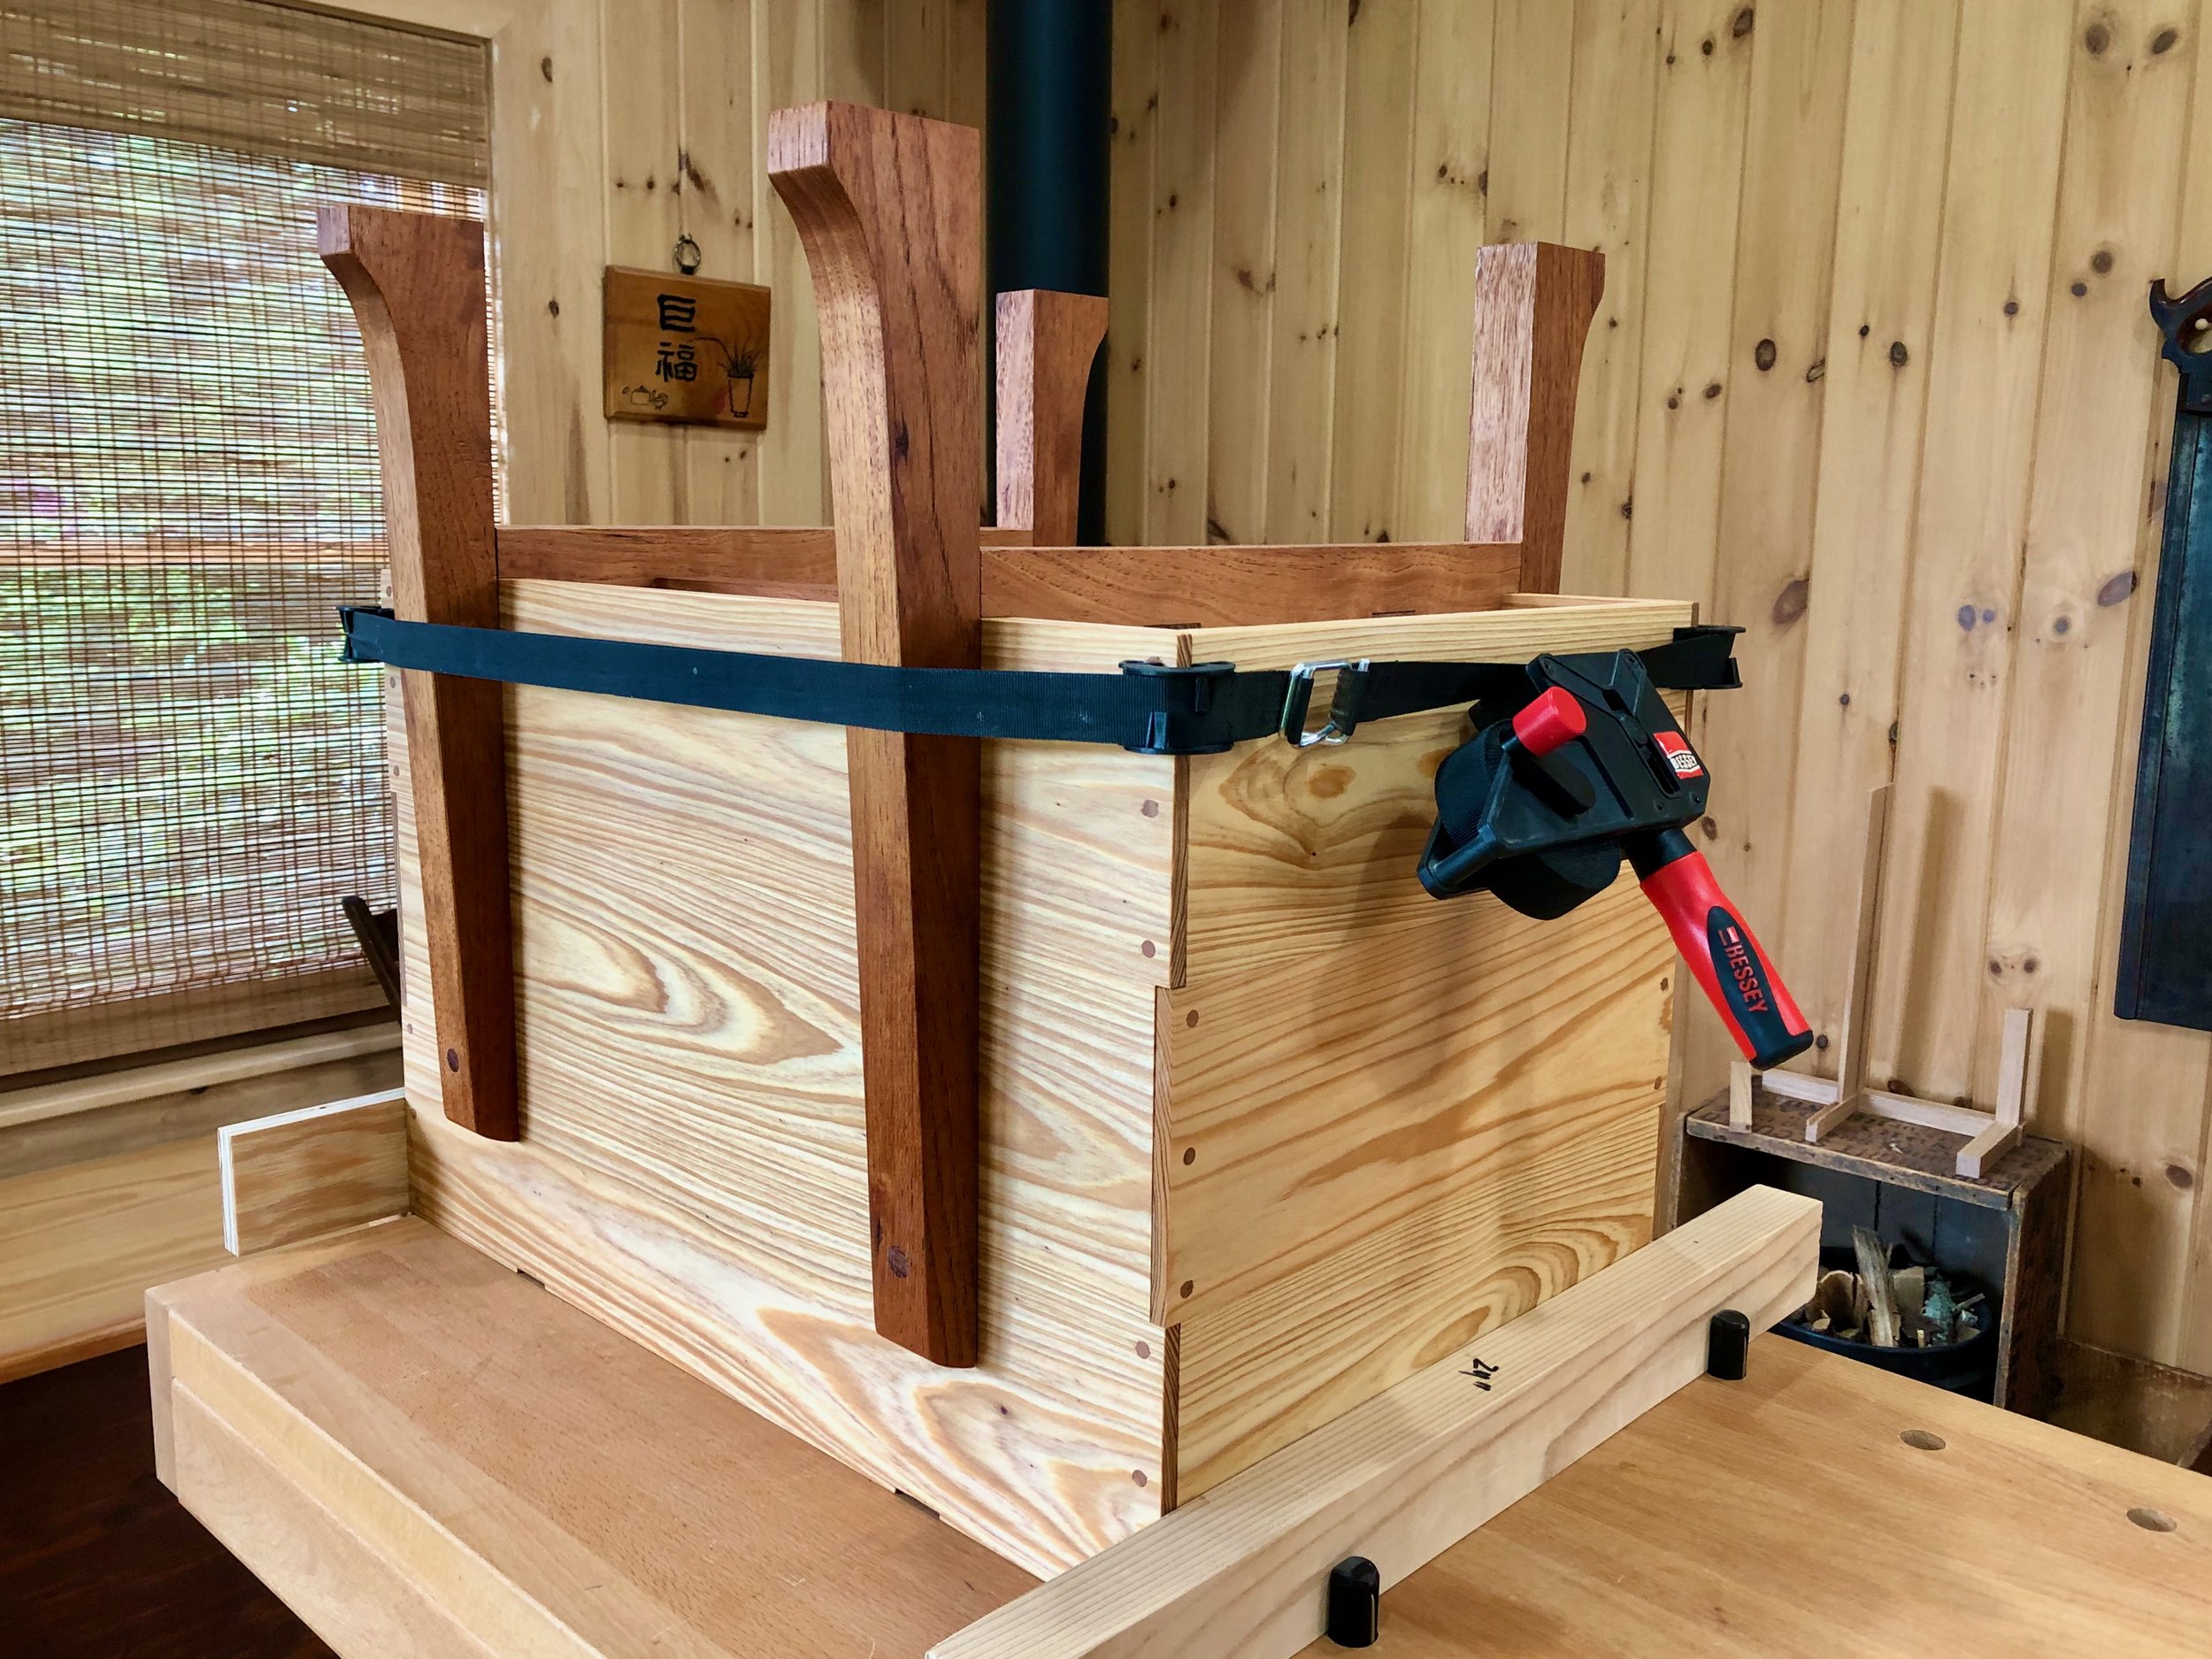
Scene during glue-up
Before the glue cured, I tipped the piece upright and fixed the legs to the cypress box with one screw, each, applied from within. Next, the hinges and lid were attached as before, using the proper screws this time. Finally, reproductions of a classic Korean handle pattern were added to the sides to complete the karabitsu.

This American version of the “foreign” coffer exudes a new pride of heritage, posted by the fireplace to serve today’s special storage needs.

Fireside friend