

Mission Line Mirror

Let’s reflect for a moment on moving house. Mathematically speaking, moving is a binary equation. One night you are sleeping at your old address, and the next you and your belongings are someplace new. Moving-in is more of an asymptotic function; at least it always has been for us. Prior to occupying our mid-century ranch in late 2019 we took the opportunity to repaint all of the walls and give a fresh start to the decor. The “moving-in” proceeded along its usual course: put the essentials in place and install the remainders g r a d u a l l y over time. It has been our experience that the last things to move-in are always the wall hangings. This time, low ceilings and plenty of windows served to minimize the available wall space, which in some ways made it easier to live without, but also heightened the impact of every hanging decision. That sets the scene for the latest Project, a new dining room mirror.
Like many households, we have always had a mirror in our dining room. I think its purpose is to make the space appear larger, but it also adds vitality to the setting and comes in handy for that occasional self-check. A previous renovation had opened up our current dining “room”, yet the space still called for a mirror. However, real estate on the lone remaining wall was too limiting for anything we had in stock and so this potential hanging took its place with the others along that asymptote to infinity. And then I noticed an example of a Craftsman style mirror while reading a book on the Stickley’s. This L. & J.G. Stickley mirror had exactly what was needed: substantial width and narrow height. It also appeared alluringly proper. At the time (1905), Leopold and John George declared that their “furniture was neither Arts & Crafts nor Mission, but ‘simple furniture on mission lines’.”* While clumsy, that expression, likely an attempt to re-characterize the Craftsman™ designs they had blatantly copied from their older brother Gustav’s catalog, still resonated with me.
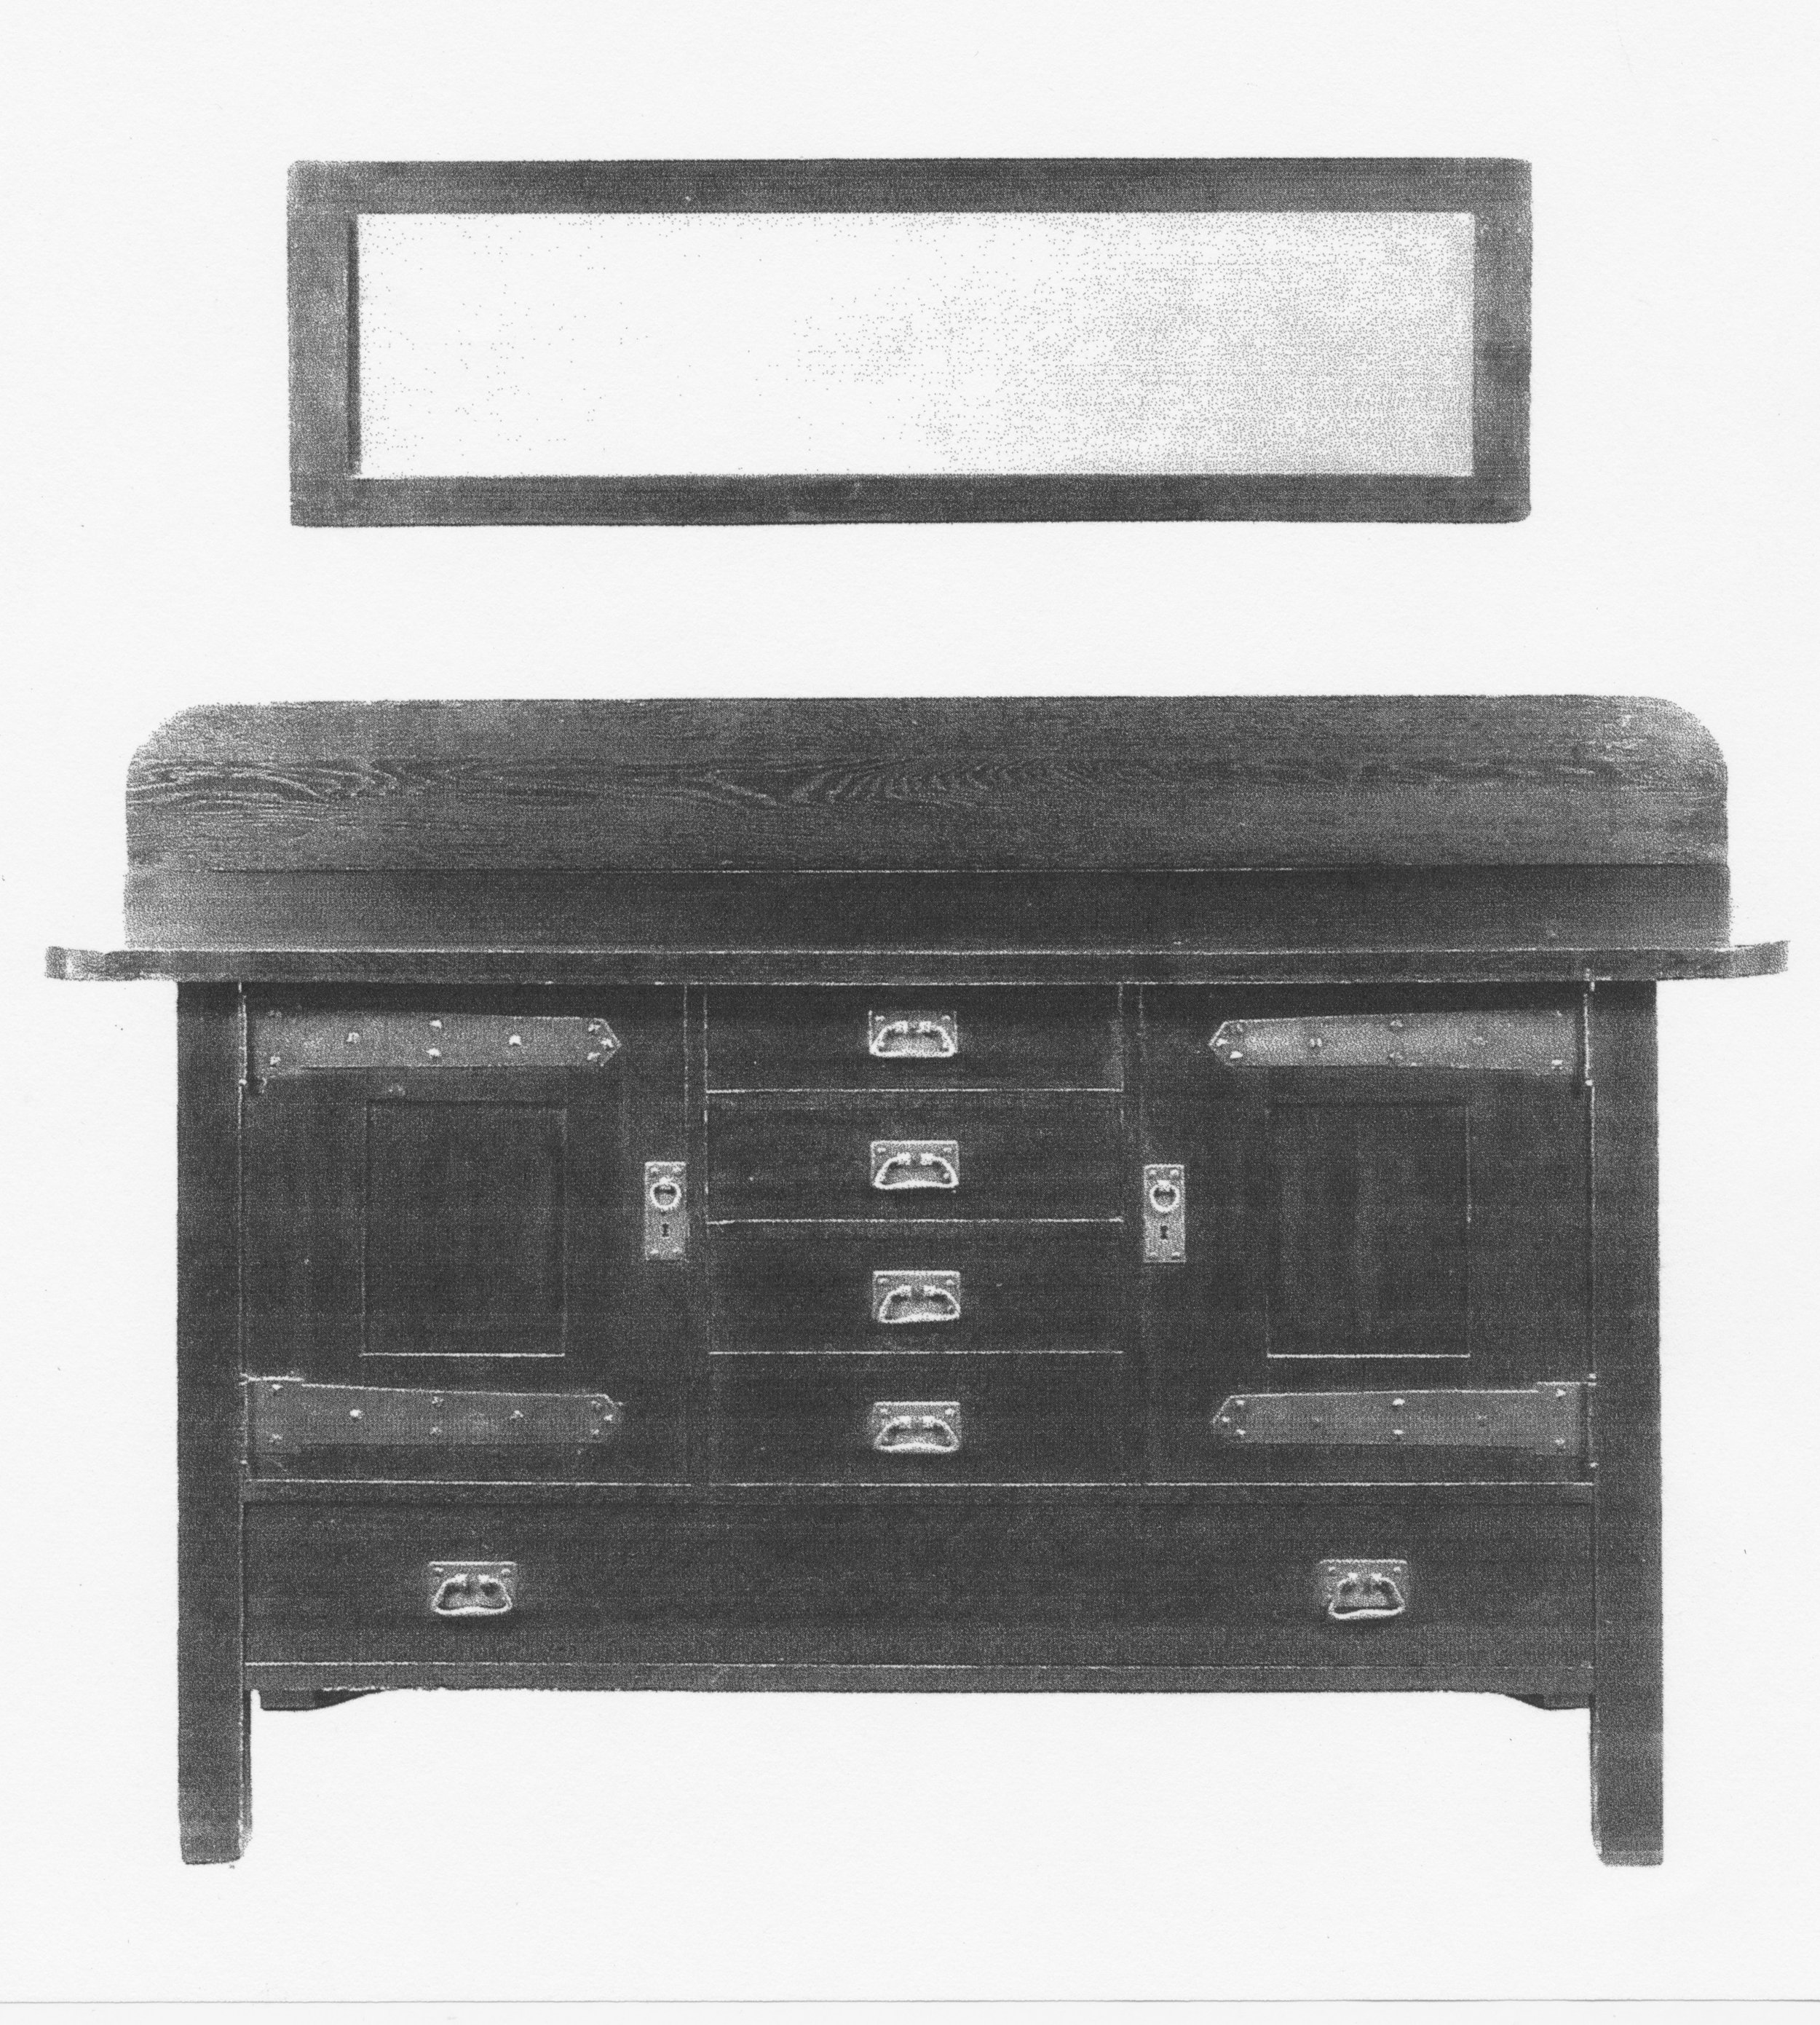
simple, “mission line” mirror
reproduced from: * Clark, M.; Thomas-Clark, J. The Stickley Brothers; Gibbs Smith: Utah, 2002; p. 135.
Design & Materials
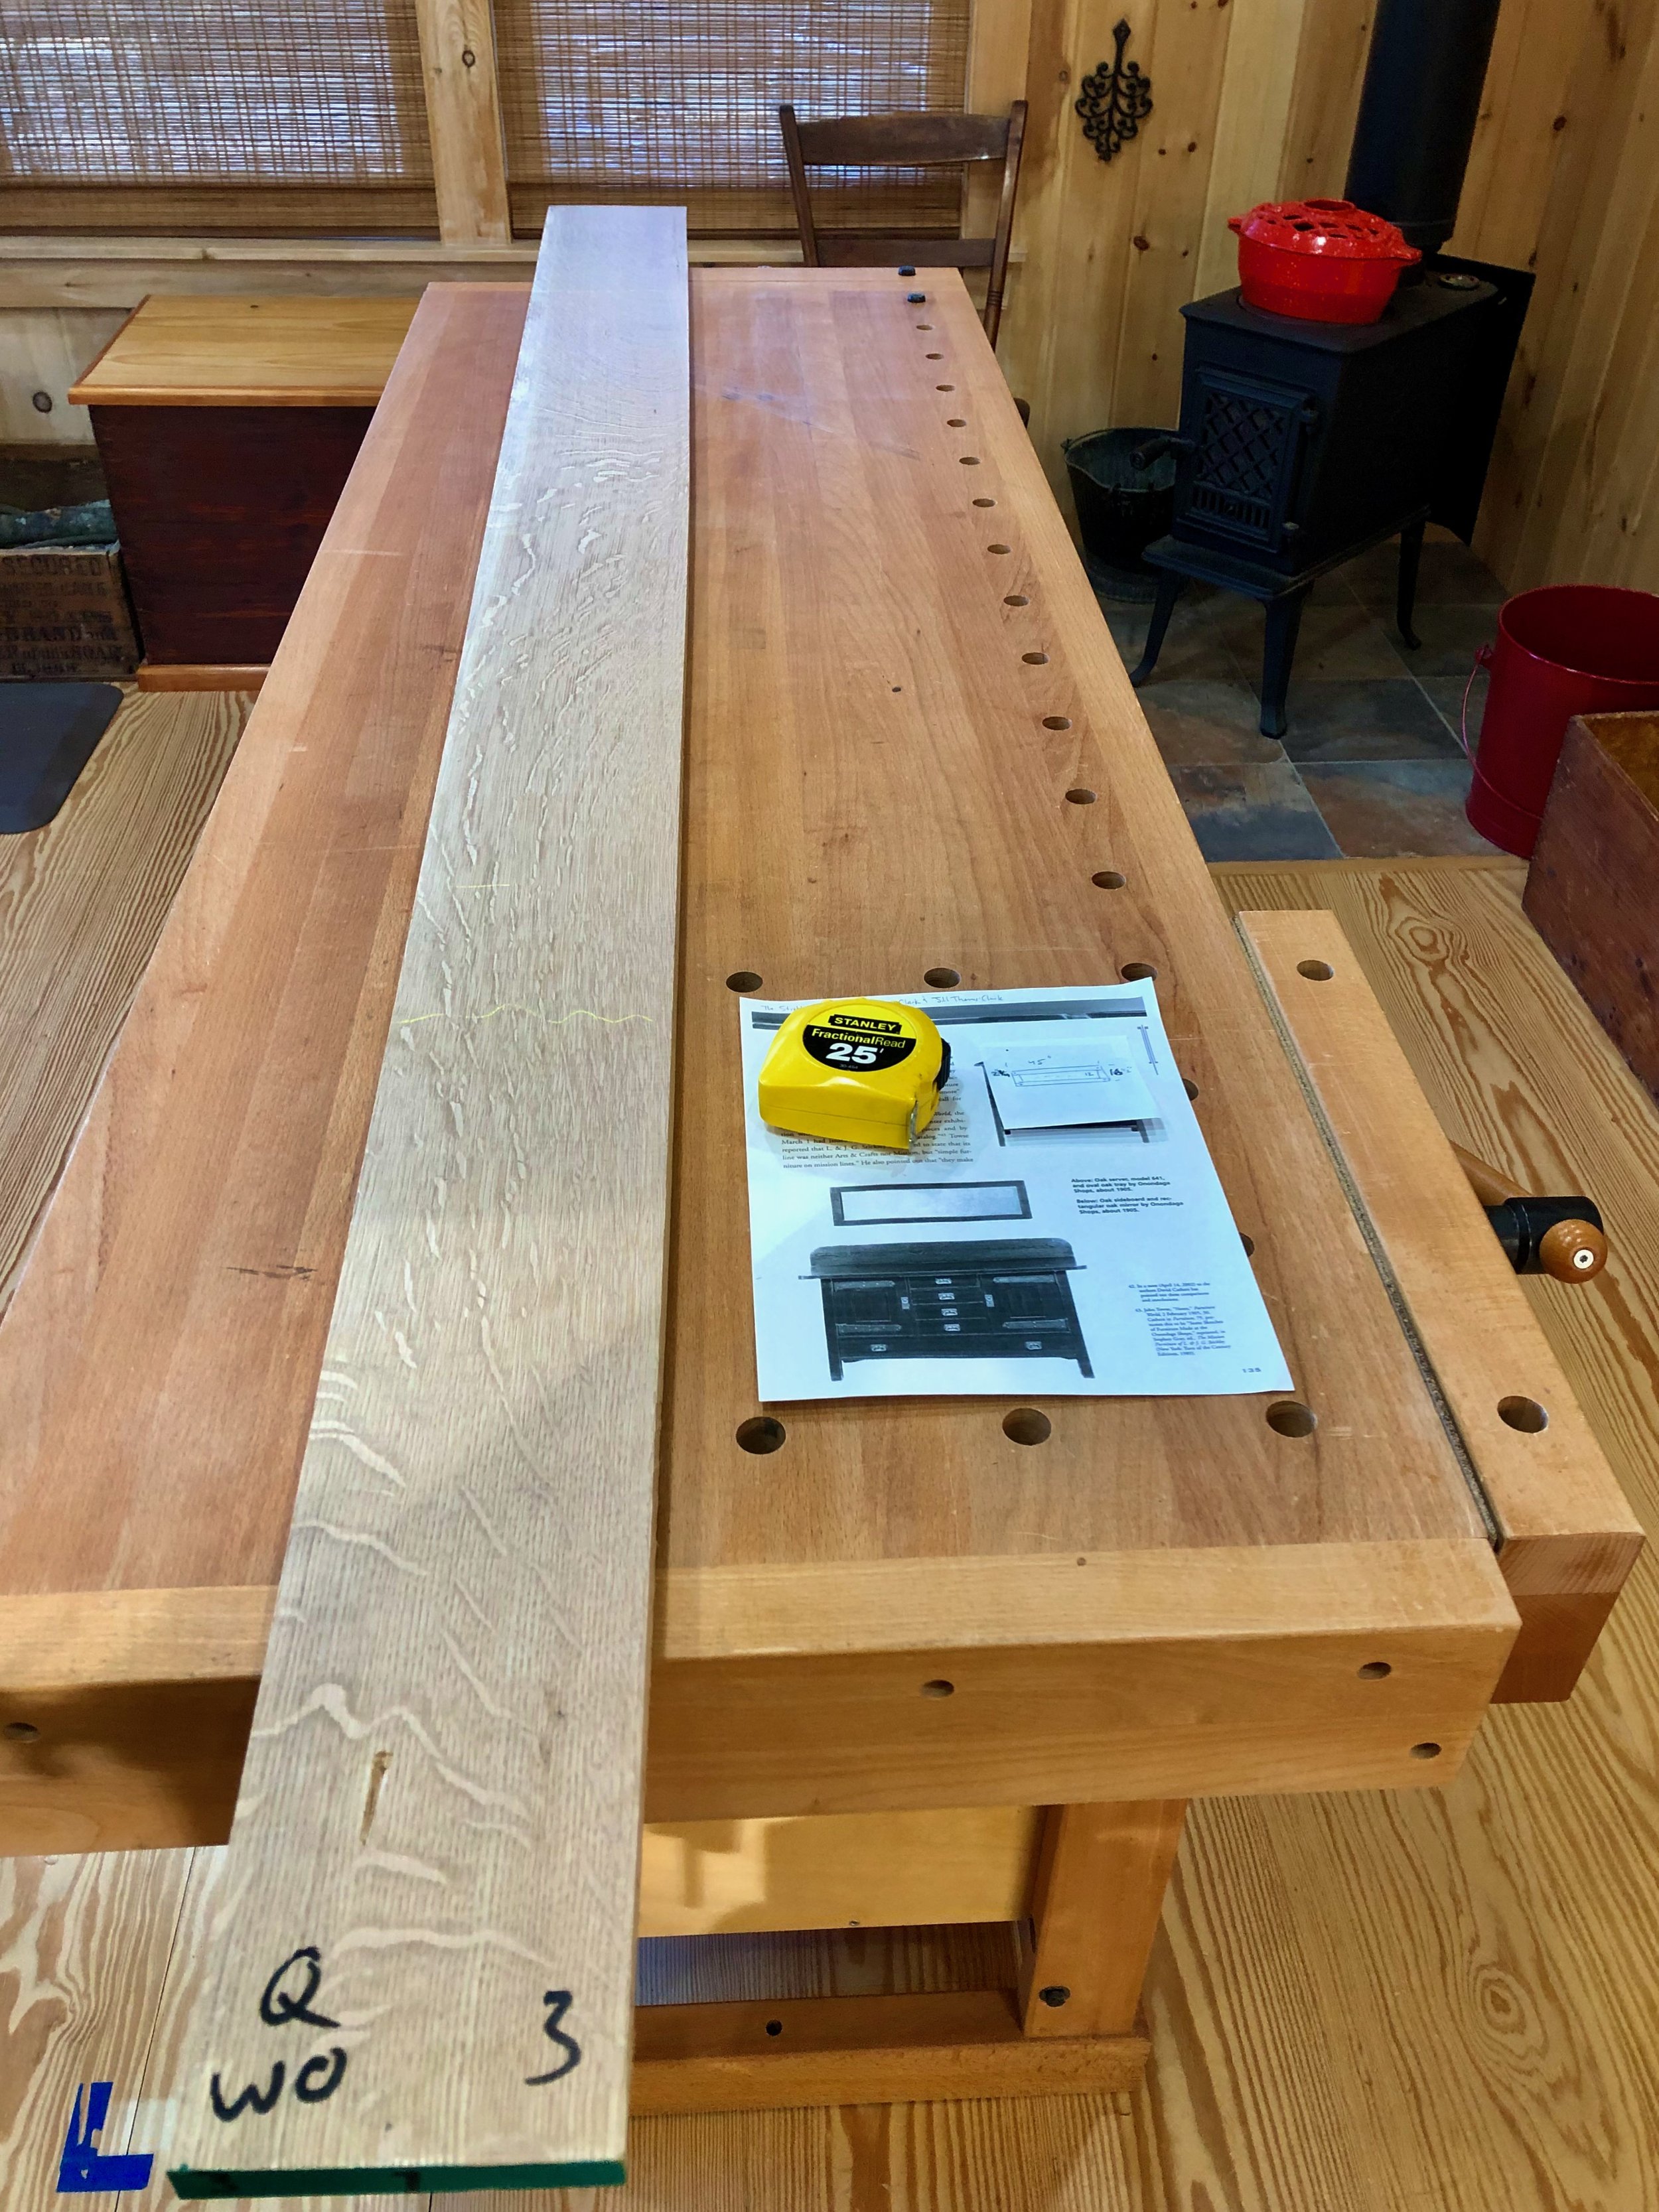
There is nothing special about the design of this mirror, except that prior to discovering it I don’t think I would ever have thought to make one so long and narrow, which I guess does make it courageous in a way. I could not find any measurements for the original but did my best to keep the proportions of frame to mirror (calipered from the photograph) while accommodating the wall’s constraints: approximately 45 in. long and 16 3/4 in. high. The frame would be 2 3/8 in. wide on all sides. As to construction, the joints of the original were most likely mortice and tenoned, but a half lap joint would also work and that’s how I decided to put the 4 frame members together. That’s everything. With the dimensions and joint type settled there was no need for a paper plan. Three board feet of 4/4 quarter sawn white oak, some picture hanging hardware and, of course, the mirror glass were all of the materials required. Simple.
Mirror material
Dimensioning & Assembly
The dimensioning step was pretty simple, too. First, the board was cut crosswise into three sections from which the 2 3/8 in. wide frame pieces were ripped at the table saw. These were then jointed square and thickness planed to uniformity. The four pieces were then chopped to the final lengths and half laps cut on all ends using a dado blade and cross-cut sled. A rabbet for holding the mirror glass was ripped along an interior side of both of the long members and, finally, a couple 1/2 in. diameter oak dowels were prepared by hammering scraps through a dowel plate. These would be used to eventually peg the joints.

Mirror parts
All surfaces were card scraped to remove mill marks and then assigned their positions. Glue-up was easy; simply a matter of clamping all the seams together and double-checking that everything remained square.
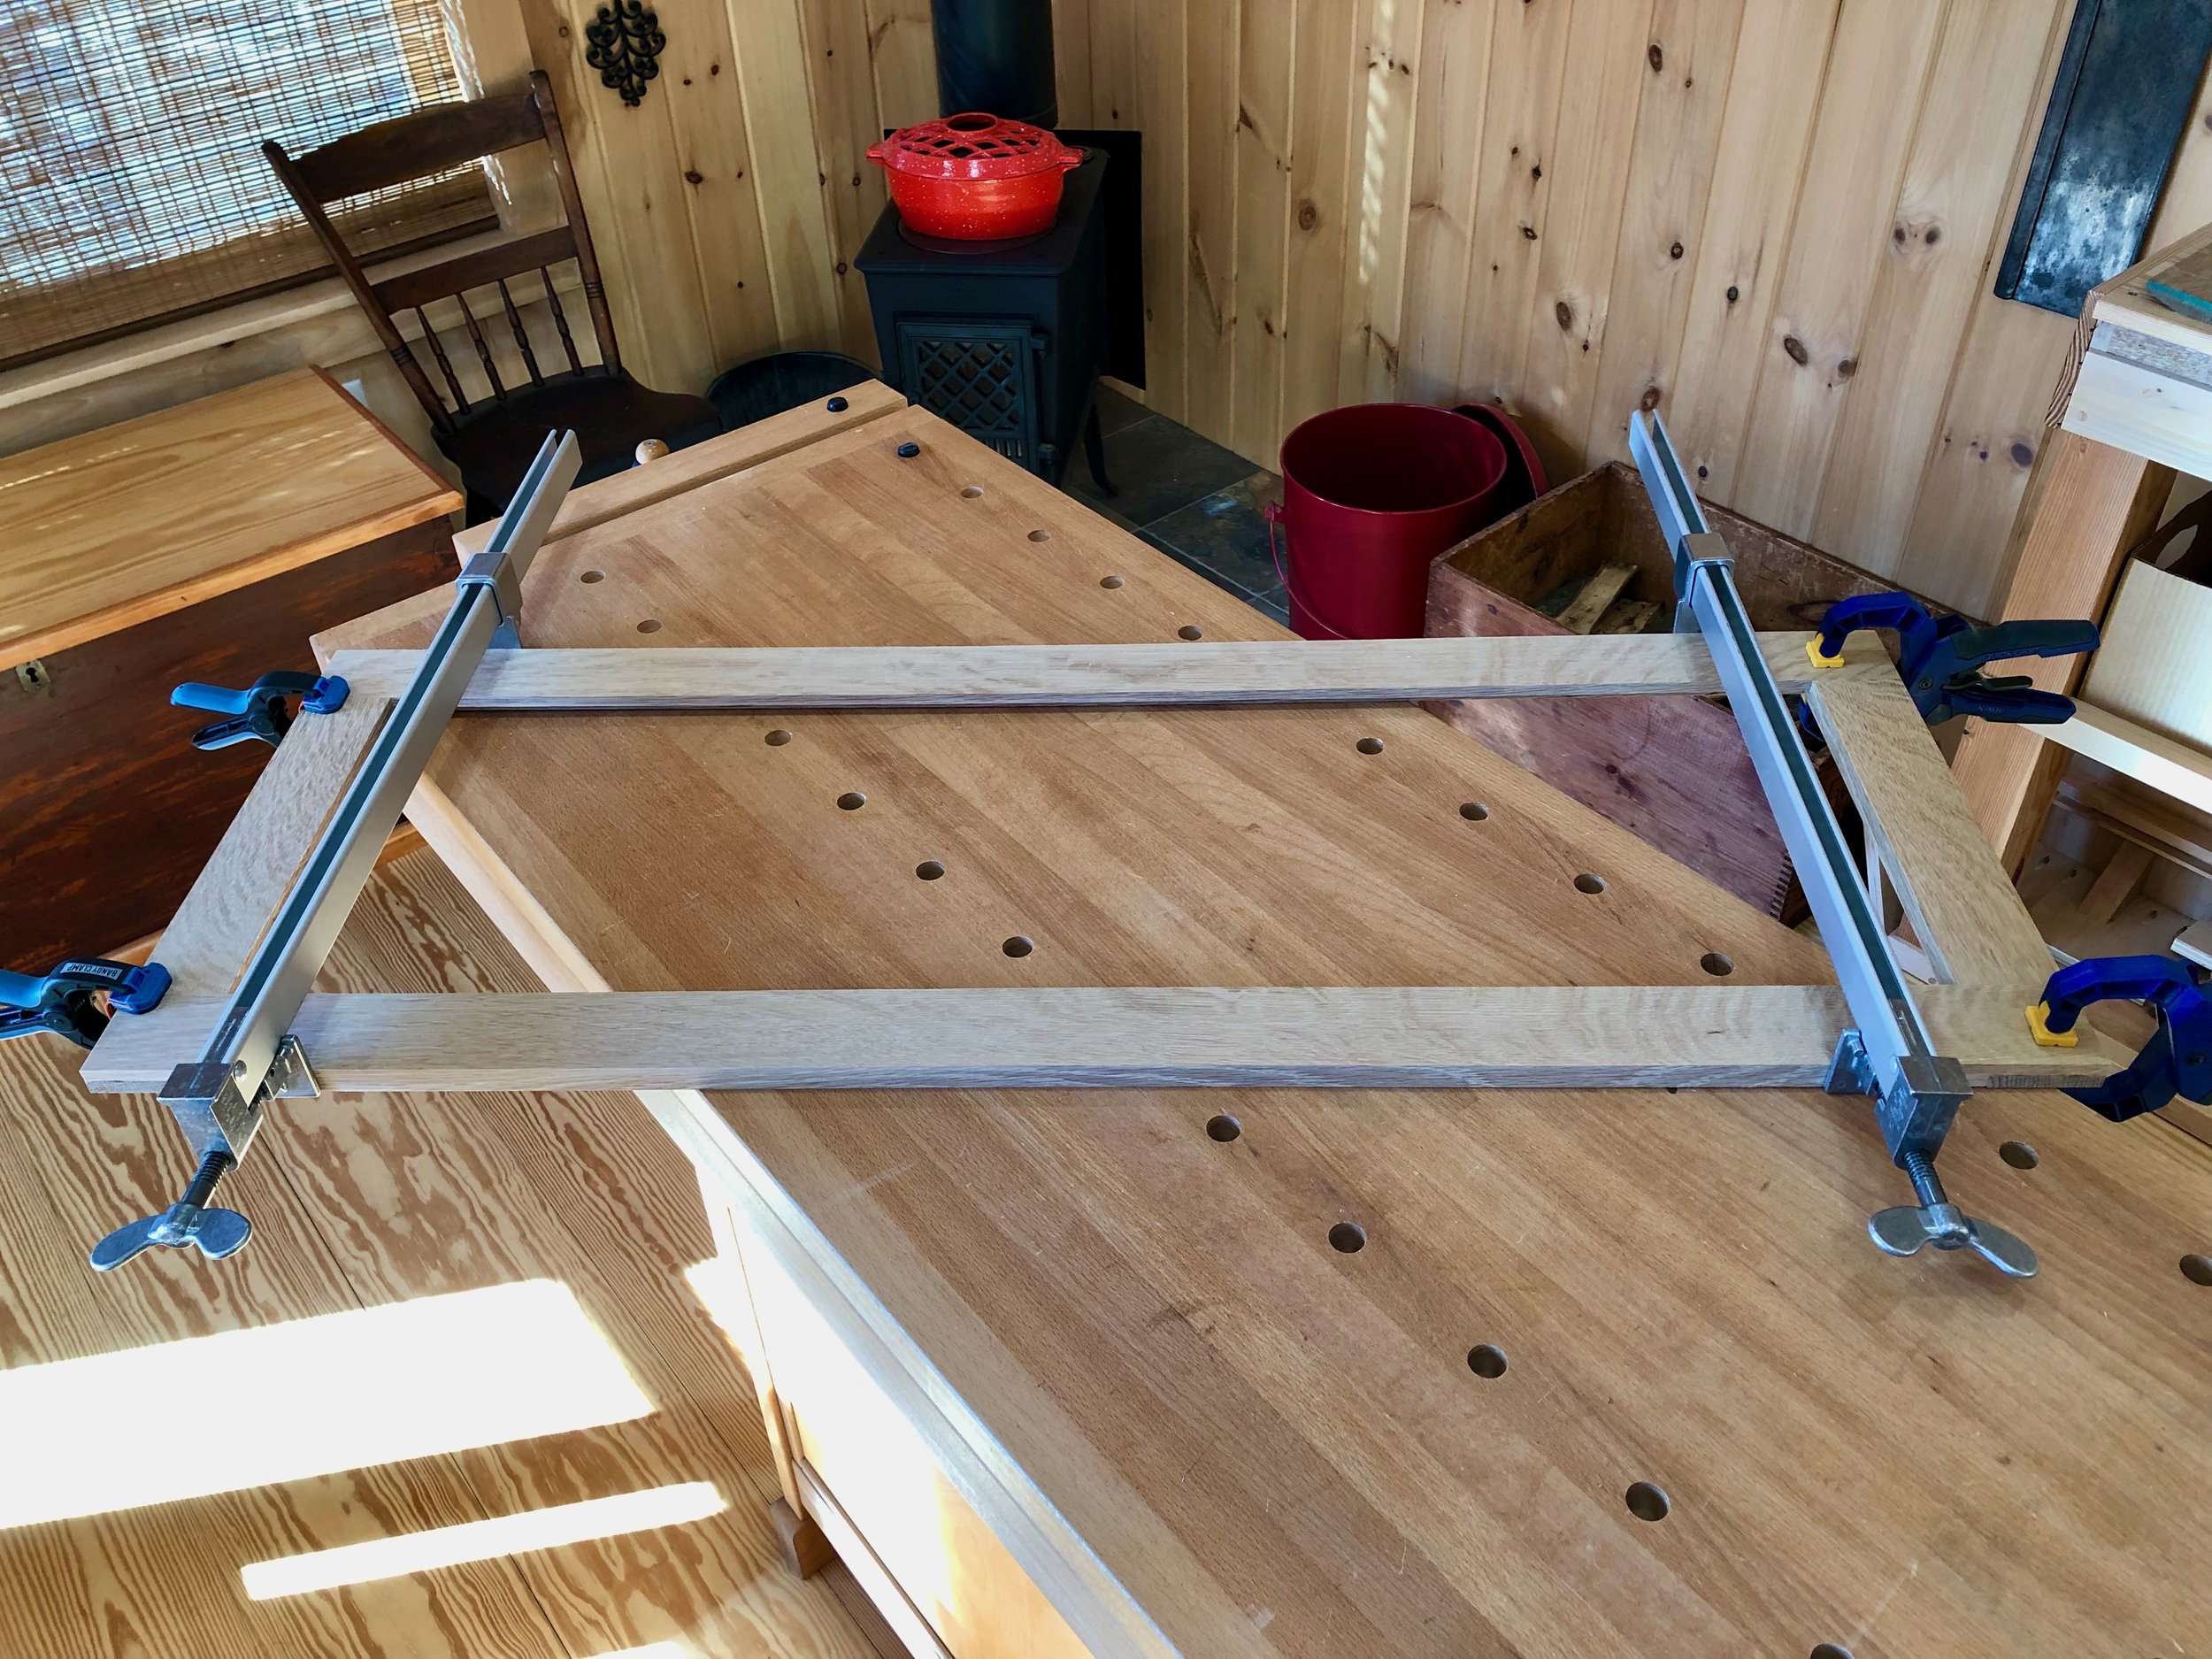
Mirror frame assembled.
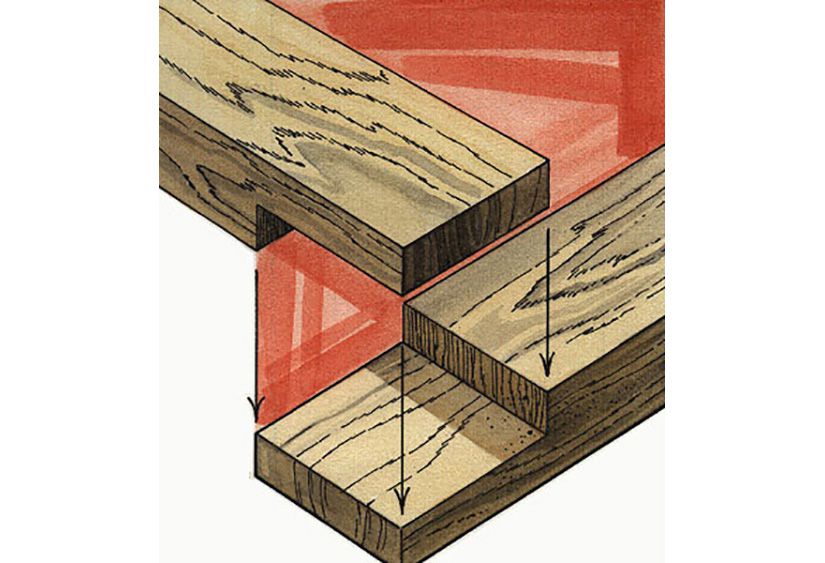
Just a few steps to go. I wanted to peg the half lap joints squarely in their center and so a simple jig was constructed from scrap wood to reproducibly mark that spot at all four corners. Once drilled, gluey dowels were tapped into the holes and then sawn flush upon drying. The dowel end-grain was further shaved level with a block plane and then the entire frame was sanded smooth using an orbital sander.
The end grain portion of the half lap joints protruded slightly at all corners and so these were shaved flat with a block plane. To give the frame an inviting look, all of the sharp edges were then “knocked-down” using a spokeshave and sandpaper while the corners rounded slightly with a rasp. Then the entire piece was hand sanded using 180 SandNet.
Finally, I needed to make two short rabbets along the backside of the vertical members to complete the housing for the mirror glass. This was done carefully with a router and chisel so as not to ruin the nearly completed piece. I also chose to install the mounting hardware at this stage and then “test hang” the empty, unfinished frame on the wall. This allowed me to get everything straight without having to handle a heavy mirror in the process.
Finish
To fit with the existing furnishings I wanted the oak frame to be darker than the typical, ammonia fumed Craftsman finish. Indeed, all of the Stickley companies employed a range of finishes that they would use to suit the individual buyer or decorating trends of the time. I was aiming for something akin to their “Centennial” finish and followed the 4-step Jewitt process: dye (dark mission brown)/seal/glaze with gel stain (Java)/varnish.
With my part complete, I sought the services of a local glass shop, Northeast Glass Works, to supply and mount the mirror glass into the frame. They did a great job and we now have a mission line mirror to complete our wall.

Mirror on the wall