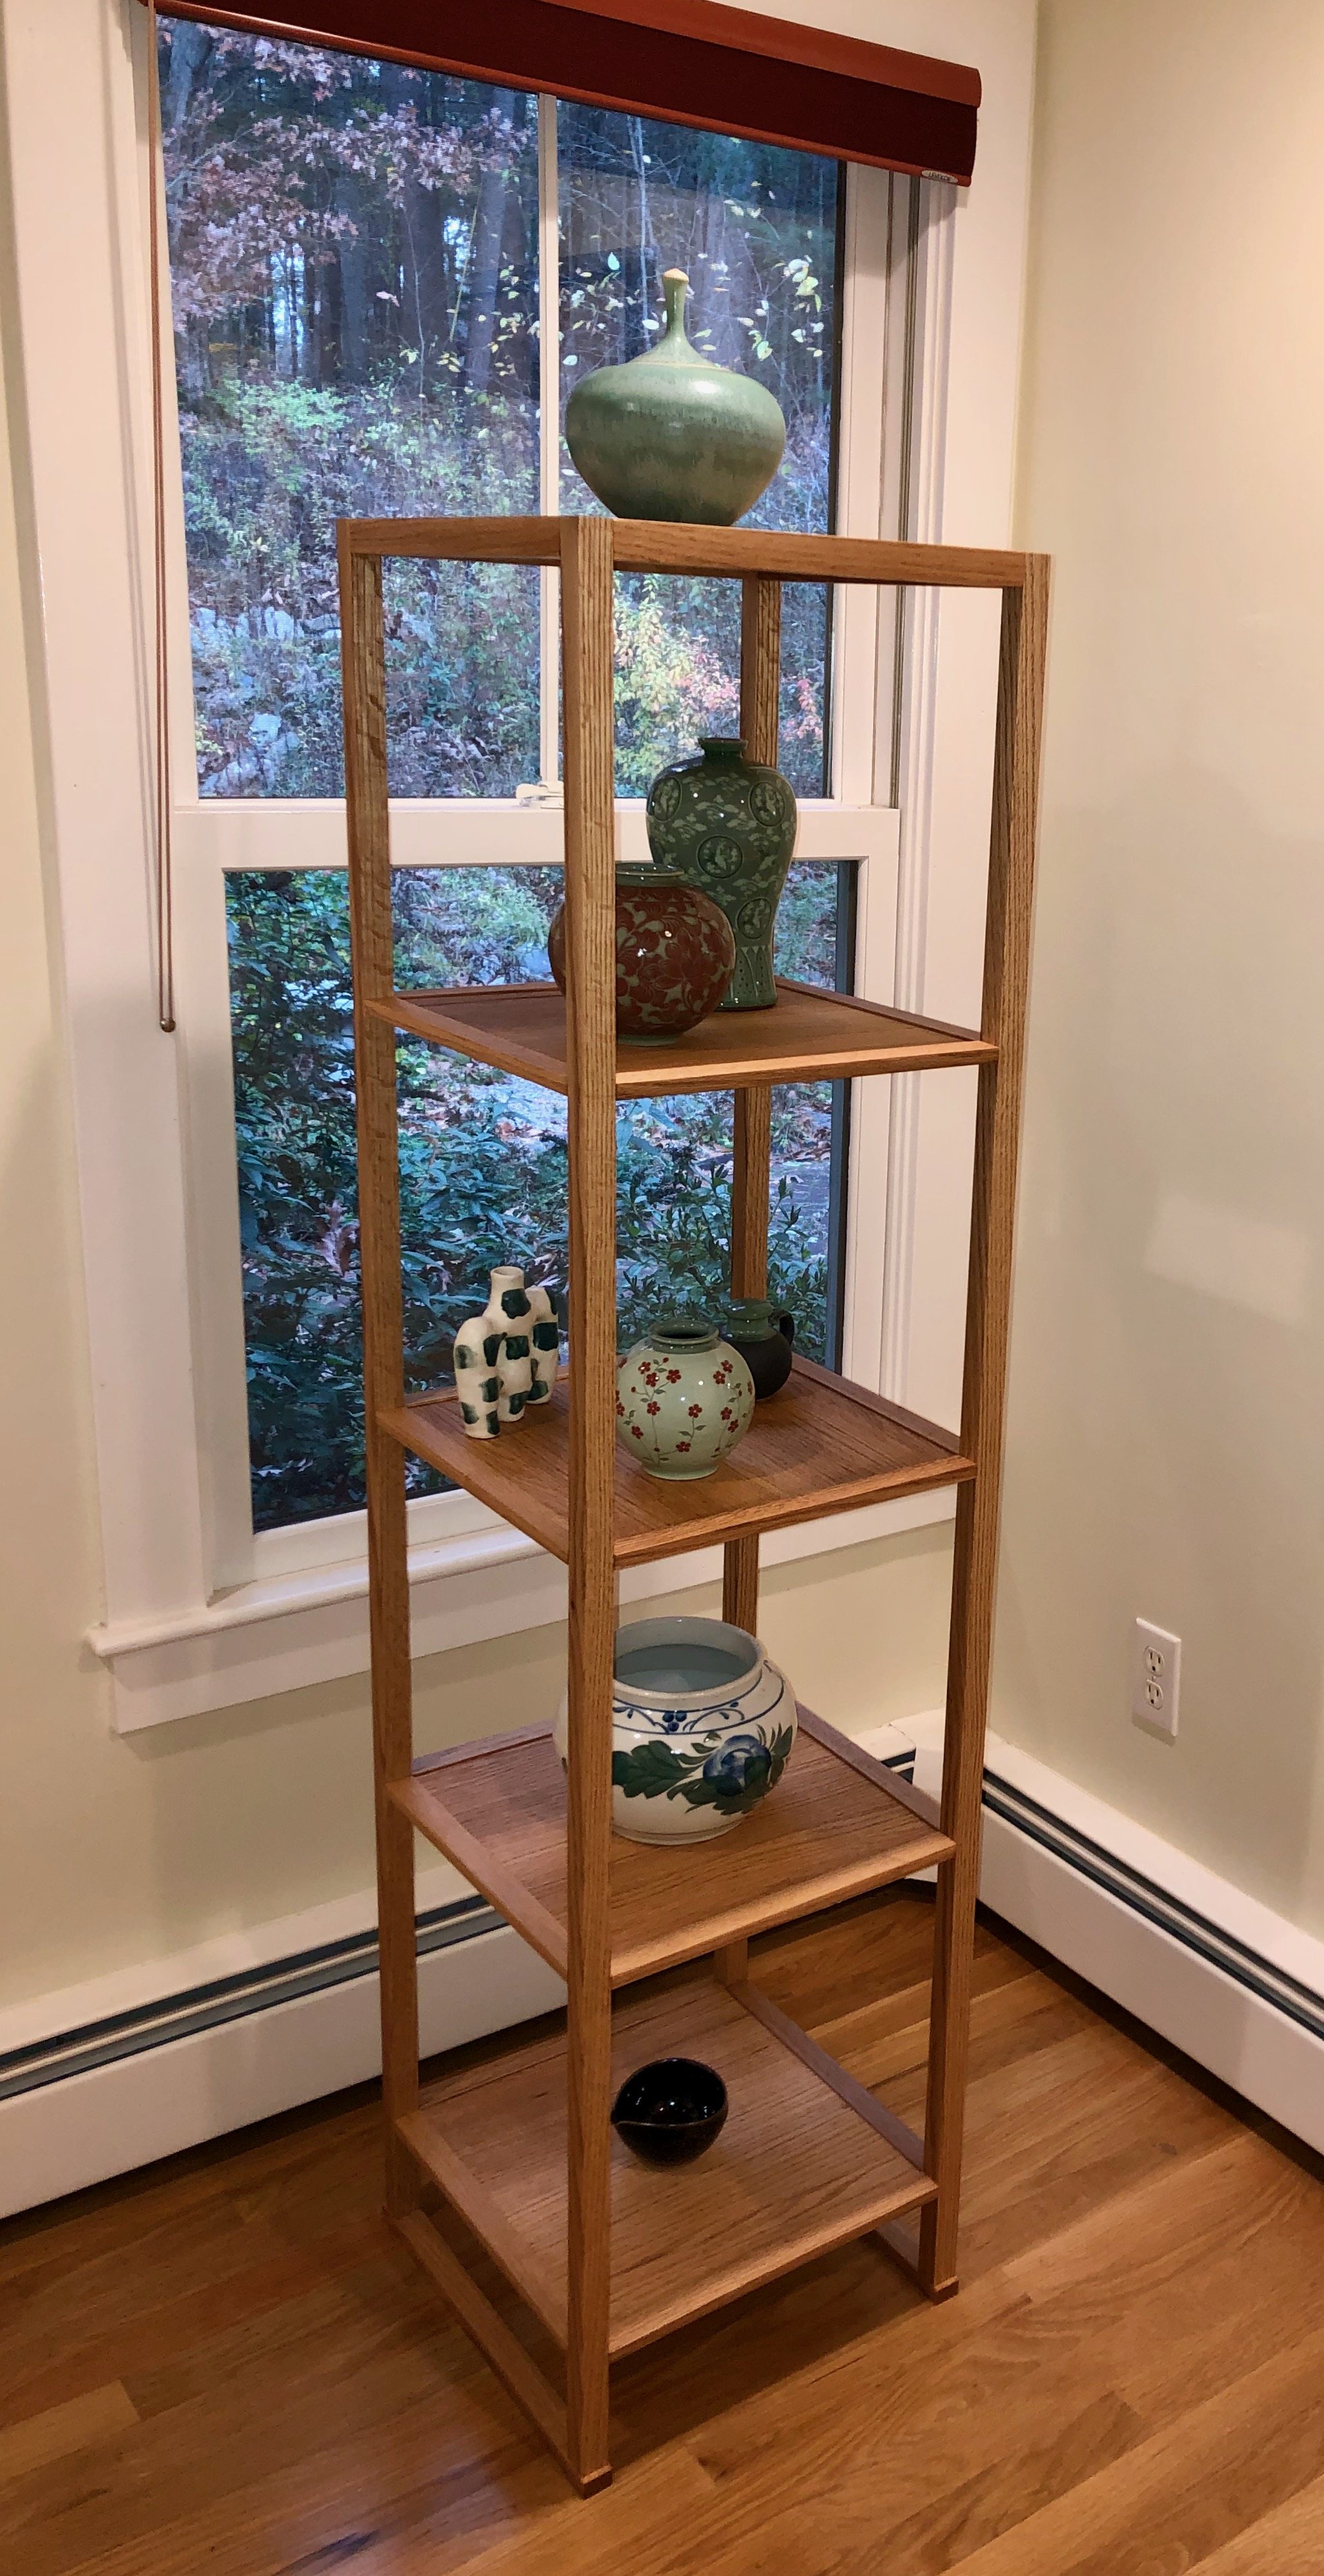
Korean Stand
Korean furniture has but a few characteristic forms and these have served their storage, writing and dining needs for millennia. Distinct from other East Asian designs, Korean pieces tend to be stouter, less decorative, and more “earthy” than the island or mainland counterparts from Japan and China. And in my view, no form is more unique to that peninsular nation than the book storage and display stand, the so-called sabang t’akja. These stands, about 16 inches wide and no more than 6 feet tall, have several layers of shelves and can exist free of cabinetry, but often they will be anchored by a doored compartment for stacking books. The more utilitarian versions include small drawers, as well.
Korean book storage and display stand archetype (sabang t’akja)
reproduced from: Wright, E.R., Pai, M.S. Traditional Korean Furniture, Kodansha: Tokyo, 2000.
For lovers of East Asian design, sabang t’akja are downright charming. I think it is the combination of a sturdy base supporting the thin, beautifully proportioned shelf framework that gives this iconic furniture its appeal. Of course, the wooden material, joints and hardware all do their part, too. One of my earliest Projects in the workshop was to excise the shelving and just build that bottom compartment; this time I’m making the shelves.
My motive for this Project was to make a display stand so that we could unpack and put out some of our “precious” pottery, and for a moment I seriously considered using all authentic joinery in the process. Sabang t’akja are generally constructed using the so-called “swallow beak” joint. Traditional Korean furniture relied heavily on this method, adapted from the construction trade, for fastening parts. Structurally, it is a modified mortise and tenon joint that creates a solid corner. The “beak” portion serves as a second registry element that, along with the internal tenon, securely mates a pole and a rail, in olden days, without the need for glue or fasteners. It also serves to convert a simple seam into an interesting design element. If you’ve never noticed these on Asian furniture before, you will now.
Example swallow beak joint (not mine)
Alas, that consideration did not last long. I taught myself the rudiments of this joint from a book on Korean furniture making, and my practice joints were “okay” but not good enough for living room furniture. More practice would undoubtedly improve things but I found no joy for me there and I began to dread the thought of sawing/chiseling dozens of these joints to finish the Project. I also happened upon a few pictures of sabang t’akja made with traditional mortise and tenon joinery and that sold me on the path to take here. I’ll master the swallow beak joint one day on a smaller piece.
Design
The display stand, itself, will be a replica of another example found in the book, Traditional Korean Furniture, referenced above. Dating from the mid-nineteenth century and now part of the National Museum of Korea collection, this example stands 59 inches tall and has no cabinet. It is symmetrical, delicate and beautiful to my eye. The dimensions of the poles and shelves were calculated from the photo, below. Replacing the original swallow beak joints (n = 40) with mortise and tenons is simply an elimination of the beak work.
Korean display stand exemplar
Materials
The original display stand was crafted using pine wood for the frame and paulownia for the shelving. These softwoods were employed extensively in traditional Korean furniture making, but I wanted to use hardwood for my version and so I decided to use red oak (Quercus rubra), quarter sawn at the lumber yard.
Red oak stock
Dimensioning
There are only five part “types” in this piece, and that simplicity of structure accounts for its beauty. They are by my nomenclature:
poles (4)
top rails (4)
rails (16)
shelves (5)
tatami-zuri boards (2)
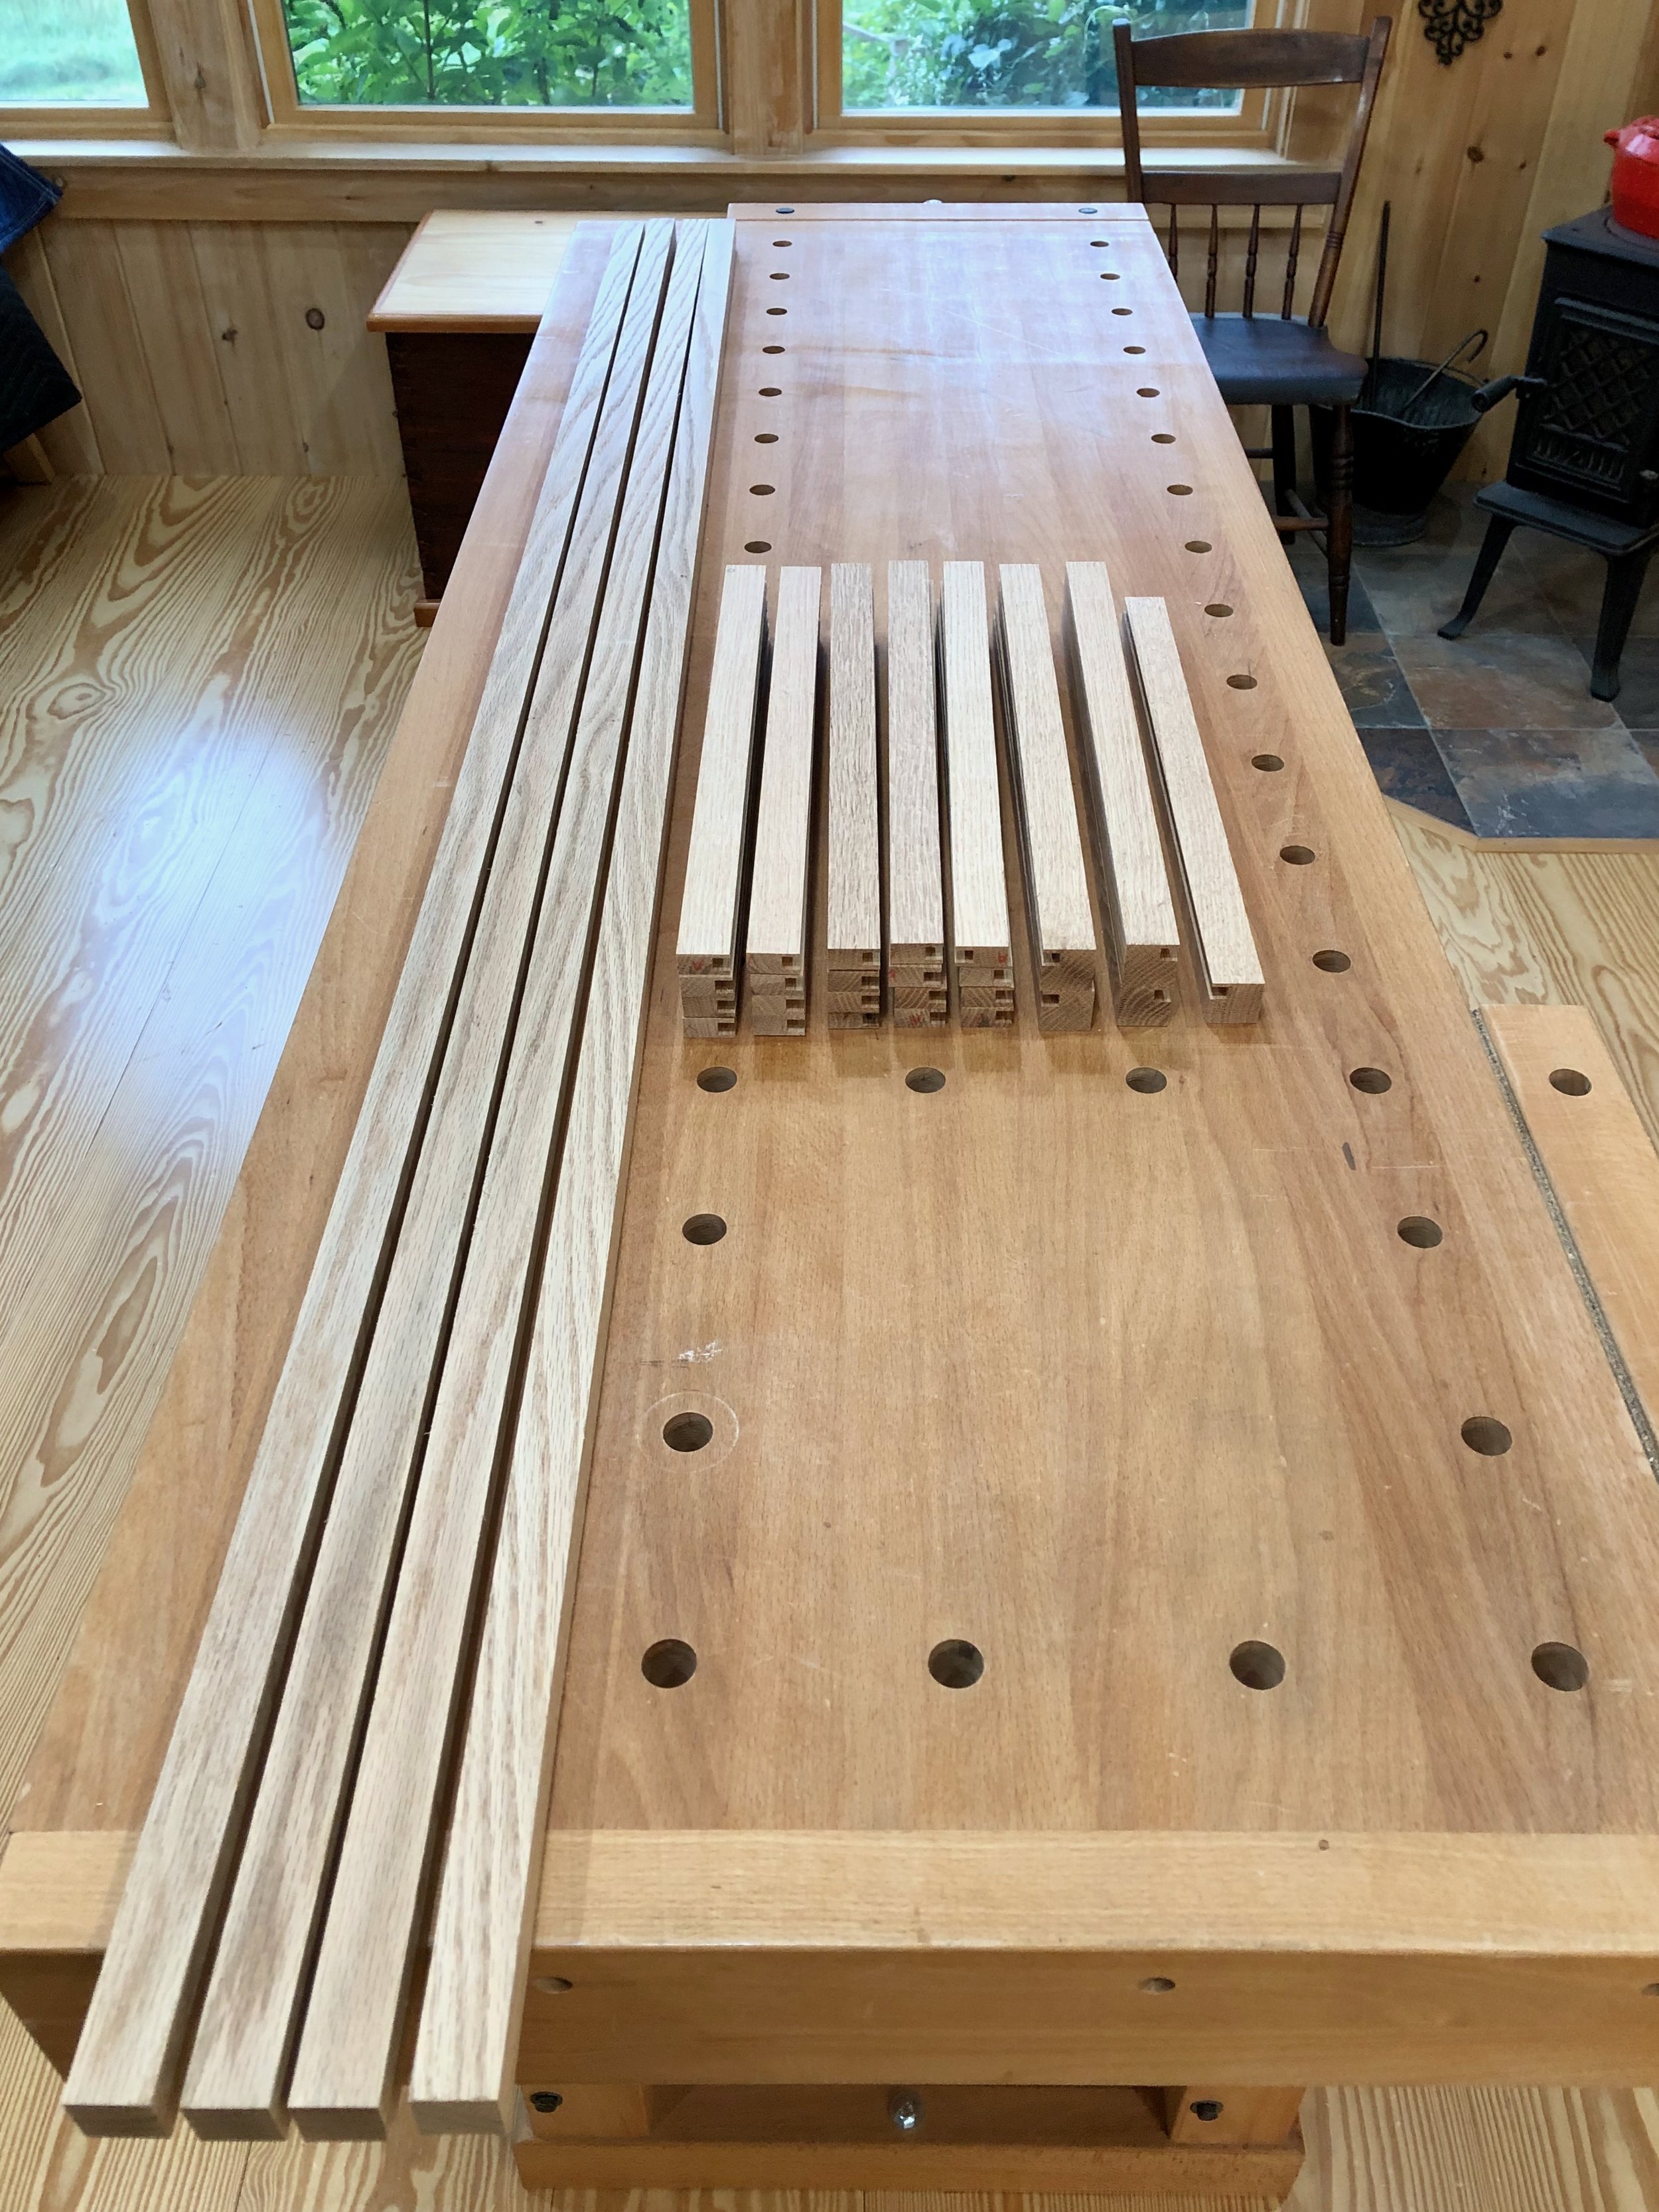
The poles and rails come first and, with these, there is a specific sequence required for joint creation: mortises before tenons; grooves before shelves. To begin, the oak was prepped at the jointer and thickness planer, and then the poles, top rails and rails cut at the table saw to their final width dimensions (1 in.) but left long. The depth of these parts were set last: the poles and top rails at the thickness planer (1 in.); whereas, the rails were first resawn at the bandsaw and then thickness planed to 1/2 in. To eventually accommodate the shelf boards, a 1/4 in. wide x 5/16 in. deep groove was made in the rail parts using a dado blade at the table saw. All edges were then smoothed a bit with a card scraper to remove mill marks. Things will get finish sanded near the end of Project.
Poles and rails cut to their working dimensions
The joinery starts with the poles and before any of that work is done they first need to be cut to final length and marked. To define the height dimension, I measured down 60 inches from the top of each pole and sliced a 1/4 in. deep groove here on all four sides using the sliding miter saw. The grooves define a 1/2 in. square “core” which will be converted into a tenon to hold the tatami-zuri boards later in the build, but for now I will leave a stub the same dimension as the pole to make the next few operations easier. The poles were then chopped 3/4 inches beyond the groove to give parts of uniform length.
The poles were labelled for their position (e.g., left/front, etc) and then the position of the top mortises were pencil-marked using a ruler and square. These were cut at the mortiser and, since the top rails are thicker than the “inner” rails, they merited a thicker, 3/8 x 1/4 x 1/2 in. mortise, too.
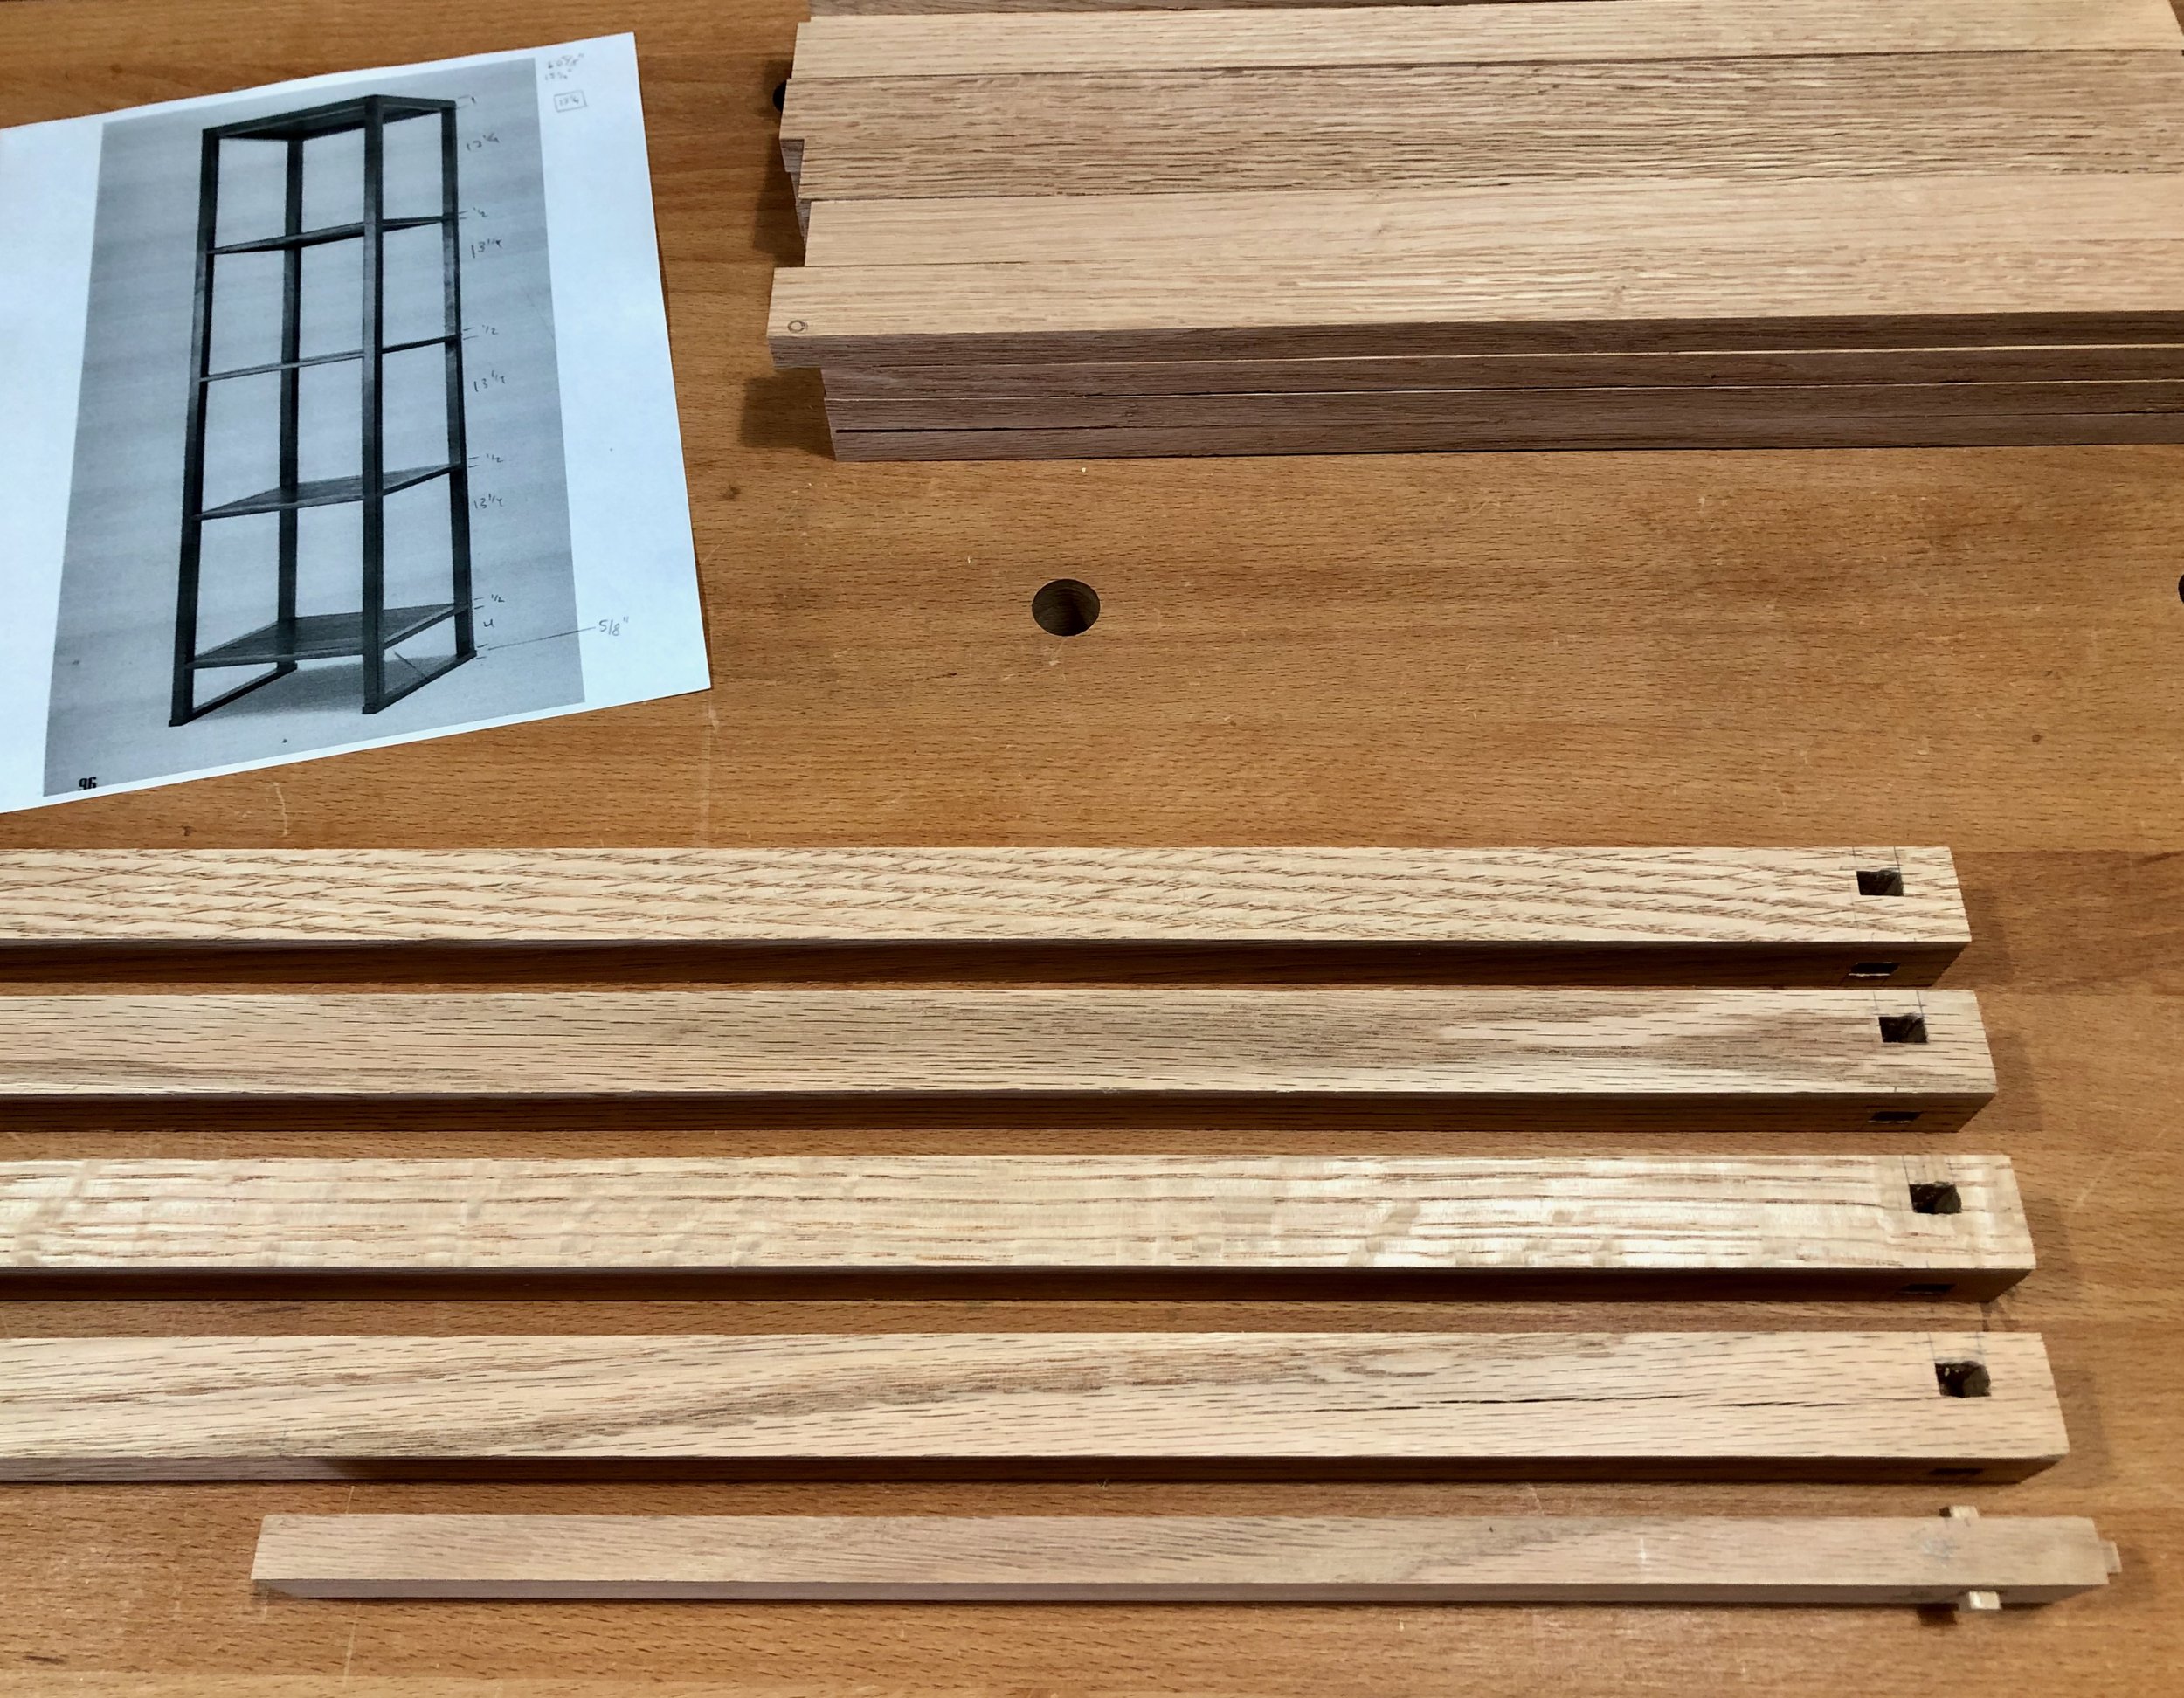
Next, I needed to somehow cut the 32 remaining mortises, all 1/4 x 1/4 x 5/16 in., at regular positions along each rail. Instead of properly marking all of these positions and then accurately hitting the marks with the plunging mortiser bit I decided to try using a spacer jig. This little invention consists of a 1 in. wide oak board with a 1/4 x 1/4 in. mortise cut through it. A 1/4 x 1/4 in. square cherry dowel was then tapped through this glued opening and cut to a 3/16 in. protrusion on either side. Finally, cutting this board to length, 13 1/2 inches below the dowel, gave me my working jig.
Shop-made spacer jig alongside poles
In use, the jig was inserted into the topmost mortise on the pole, which was subsequently seated on the mortiser bed such that the end of the jig abuts the mortising bit. Plunging at this position, then reproducibly delivers a mortise at the appropriate position below the prior one. This 3-step operation (insert jig, chop, slide to next position) is repeated until you run out of pole. It worked well.
Spacer jig “in use” at the mortiser
Next, it was time to fashion the top rails. I cut the previously prepped & grooved stock to a length of 14 1/8 in., giving me the desired span plus room for a 7/16 in. tenon on both ends. The tenons were cut in a two-step procedure. First, a finishing blade at the table saw was used to cleanly define the shoulders on all four sides.
Top rail lengths defined
From here, a dado blade and cross-cut sled were used to form the tenon cheeks at the table saw. Coming off the saw they were still a bit too thick, but could be easily chiseled down to size during a fitting operation with the poles.
Top rails tenoned
It was now time to make the tenons on the rest of the rails. The pole mortises were cut to a depth of 5/16 in. and so the tenons on both ends should be just shy of this length. With the same span as the top rails, this meant that the rails would need to measure ~ 13 7/8 inches in total. All 16 rails (plus a couple extras) were chopped to this length at the sliding miter saw. The tenons were formed in a manner similar to that described above and then chiseled for exact fit with their assigned pole. Dry-fitting the structure confirmed that everything was square and correct.
Dry-fit poles and rails
The shelves were next, all five prepared in an identical manner. First, a 7+ inch wide, 5/4 oak board was cut into four, 18 in. long sections and one edge of these made flat at the jointer. Each board was then re-sawn at the band saw into three, ~3/8 in. wide panels, giving twelve in total. The panels were then made uniform to a 1/4 in. depth at the thickness planer, and the ten best were taken on to the next steps.
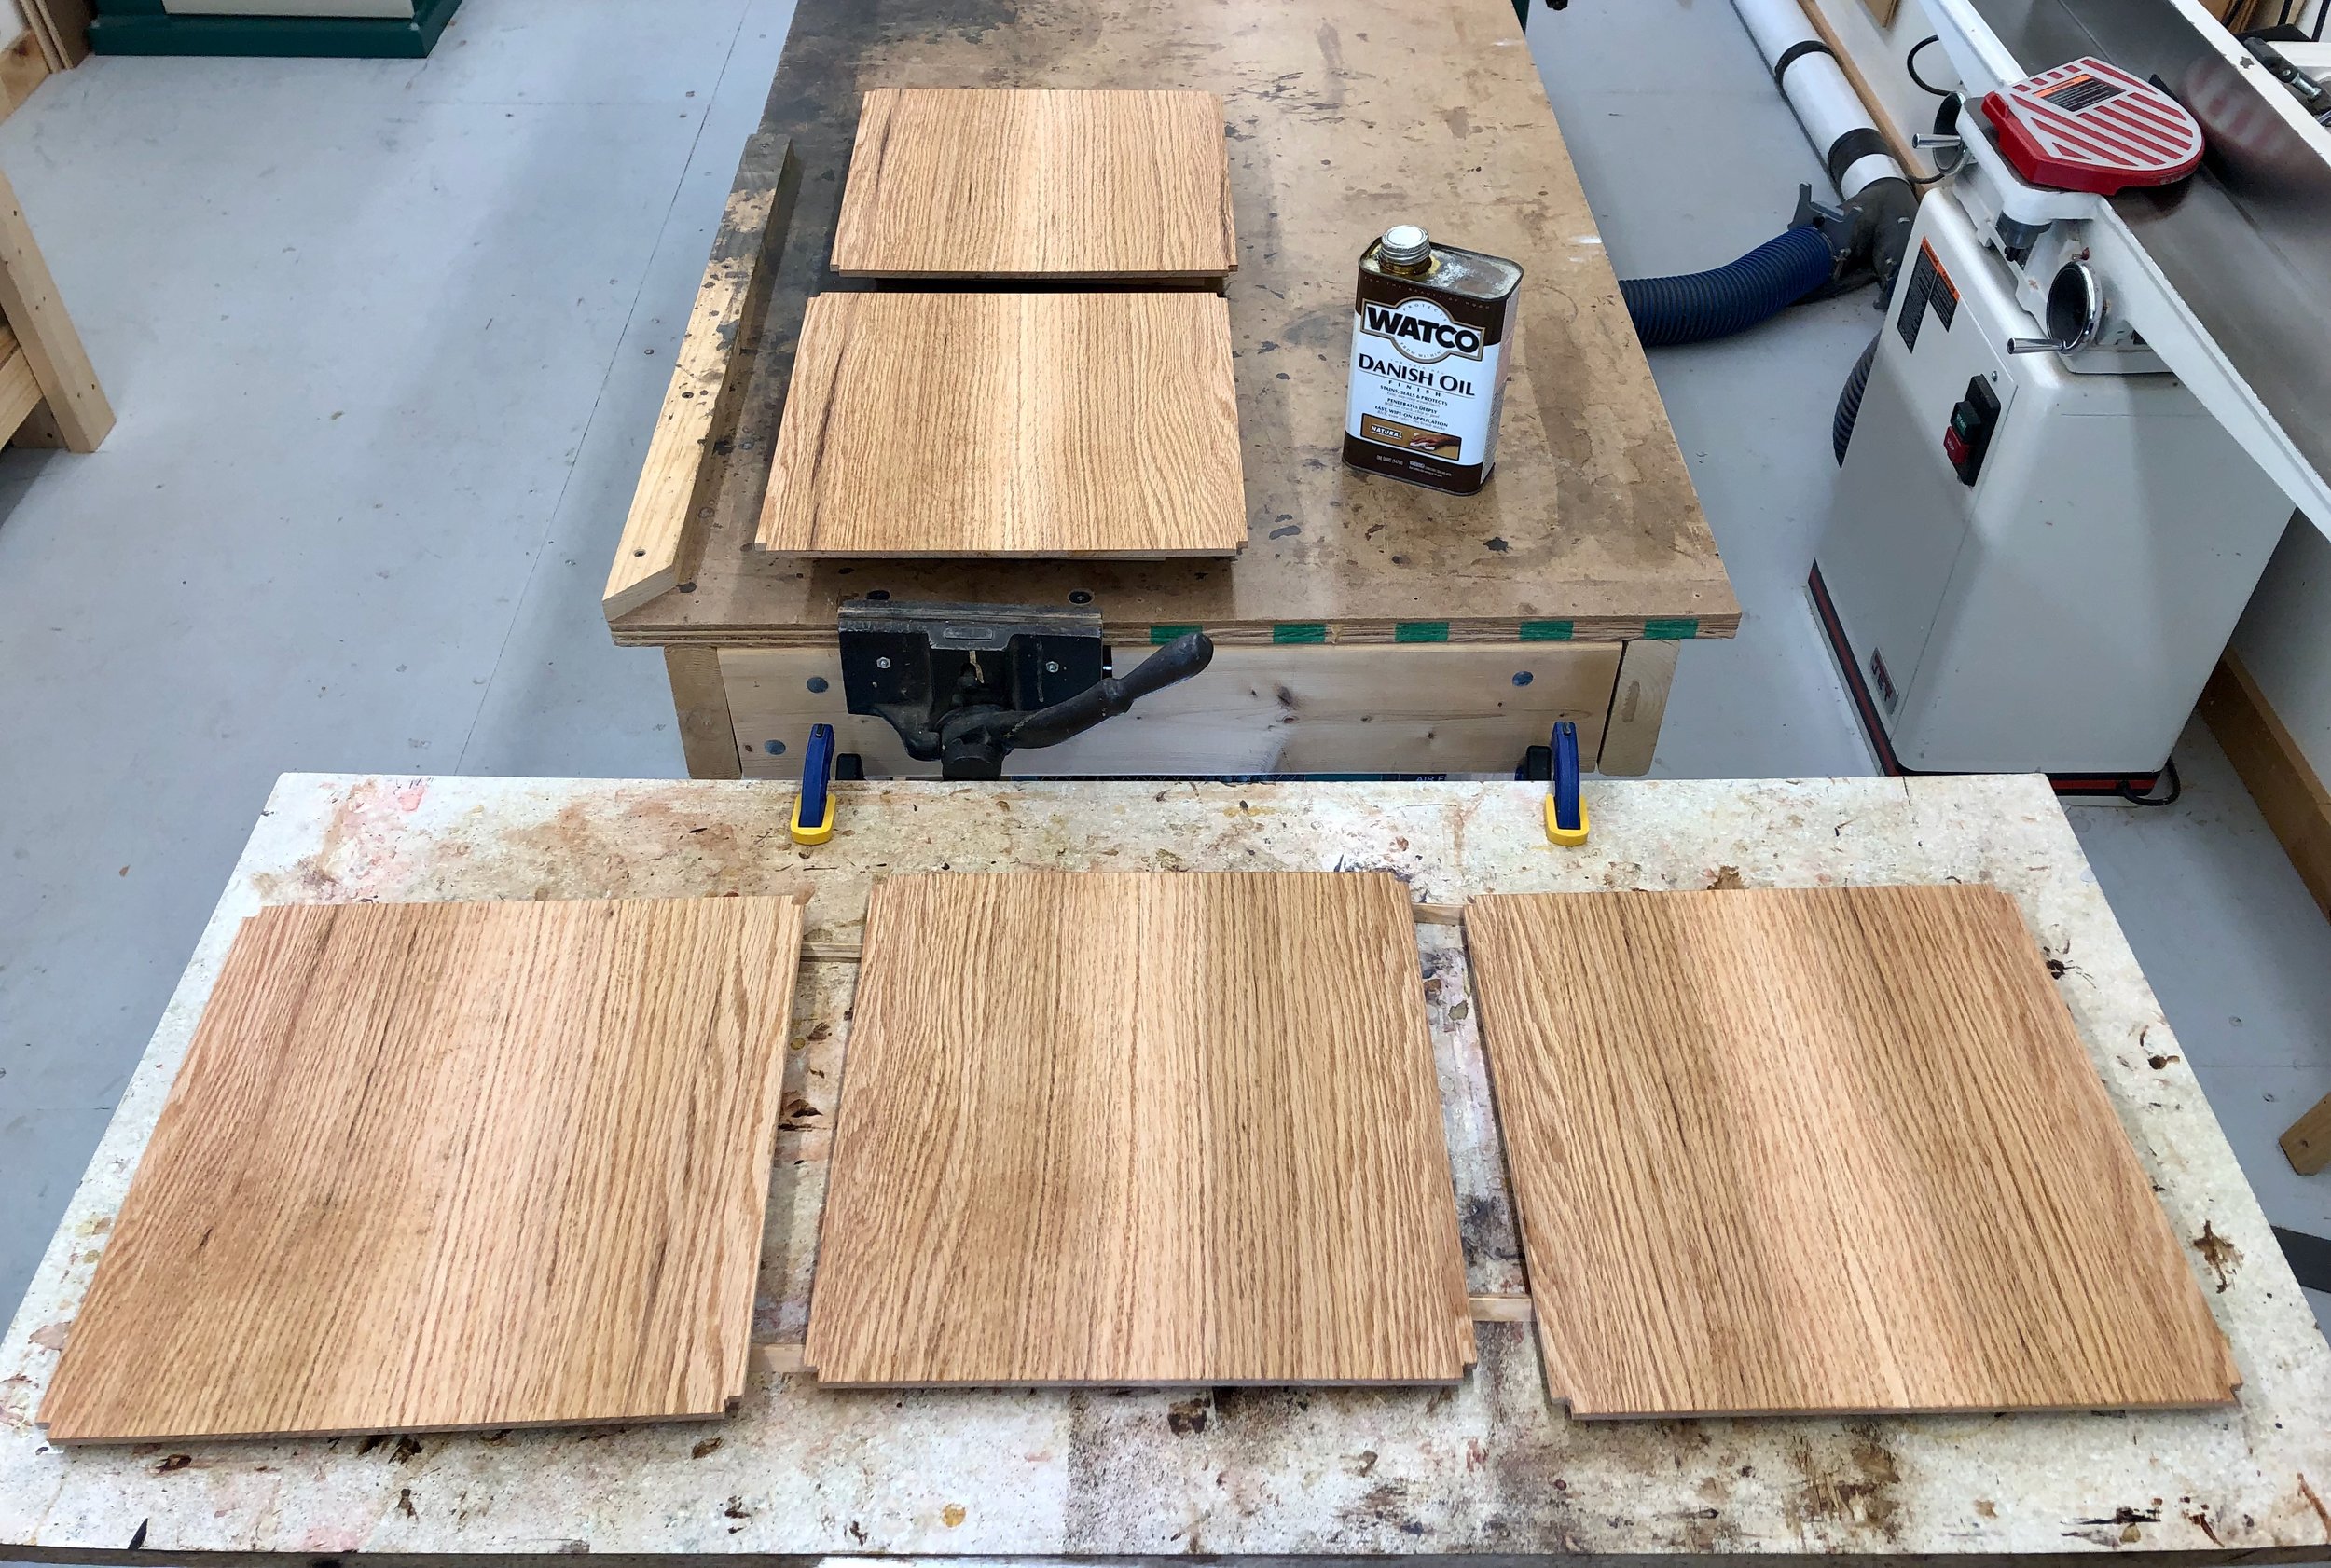
To complete the shelves, the half-panels were first paired-up and the interior edges of each were made uniformly square at the jointer. The boards were then individually chopped at the sliding miter saw to uniform lengths and ripped at the table saw to uniform widths before the pairs were reunited again, this time with glue (and clamps). Next the surfaces were smoothed with a card scraper and sandpaper, each panel was then cross-cut and ripped to a 13 7/8 in. square using the combination of track saw and table saw, and the corners notched-out at the band saw to accommodate the poles. I applied one coat of the Danish oil finish to the selves at this stage. Now, should any shrinkage of the shelves occur after the final finish, it would not expose bare wood.
Shelves complete
That leaves the tatami-zuri boards. These 1 x 5/8 in. boards run between the front and back legs and serve two purposes: they contribute to structural fitness; and also act to spread the load, saving wear and tear on the tatami, that rush floor coverings found in East Asian homes. For these it made sense to reverse the proper order and complete the pole tenons before cutting their mortises. Excess material below the previously sawn grooves was eliminated with a dado blade at the table saw to yield a 1/2 in. square tenon at the bottom of each pole. After marking their positions, through-mortises of this dimension were then cut from prepped boards. In this operation it is best to leave the tatami-zuri boards longer than the final dimension, as cutting a mortise too close to the ends can result in catastrophic tear-out of the wood. (This is a fact!) Following a dry-fit, these boards were marked and cut to their final length.
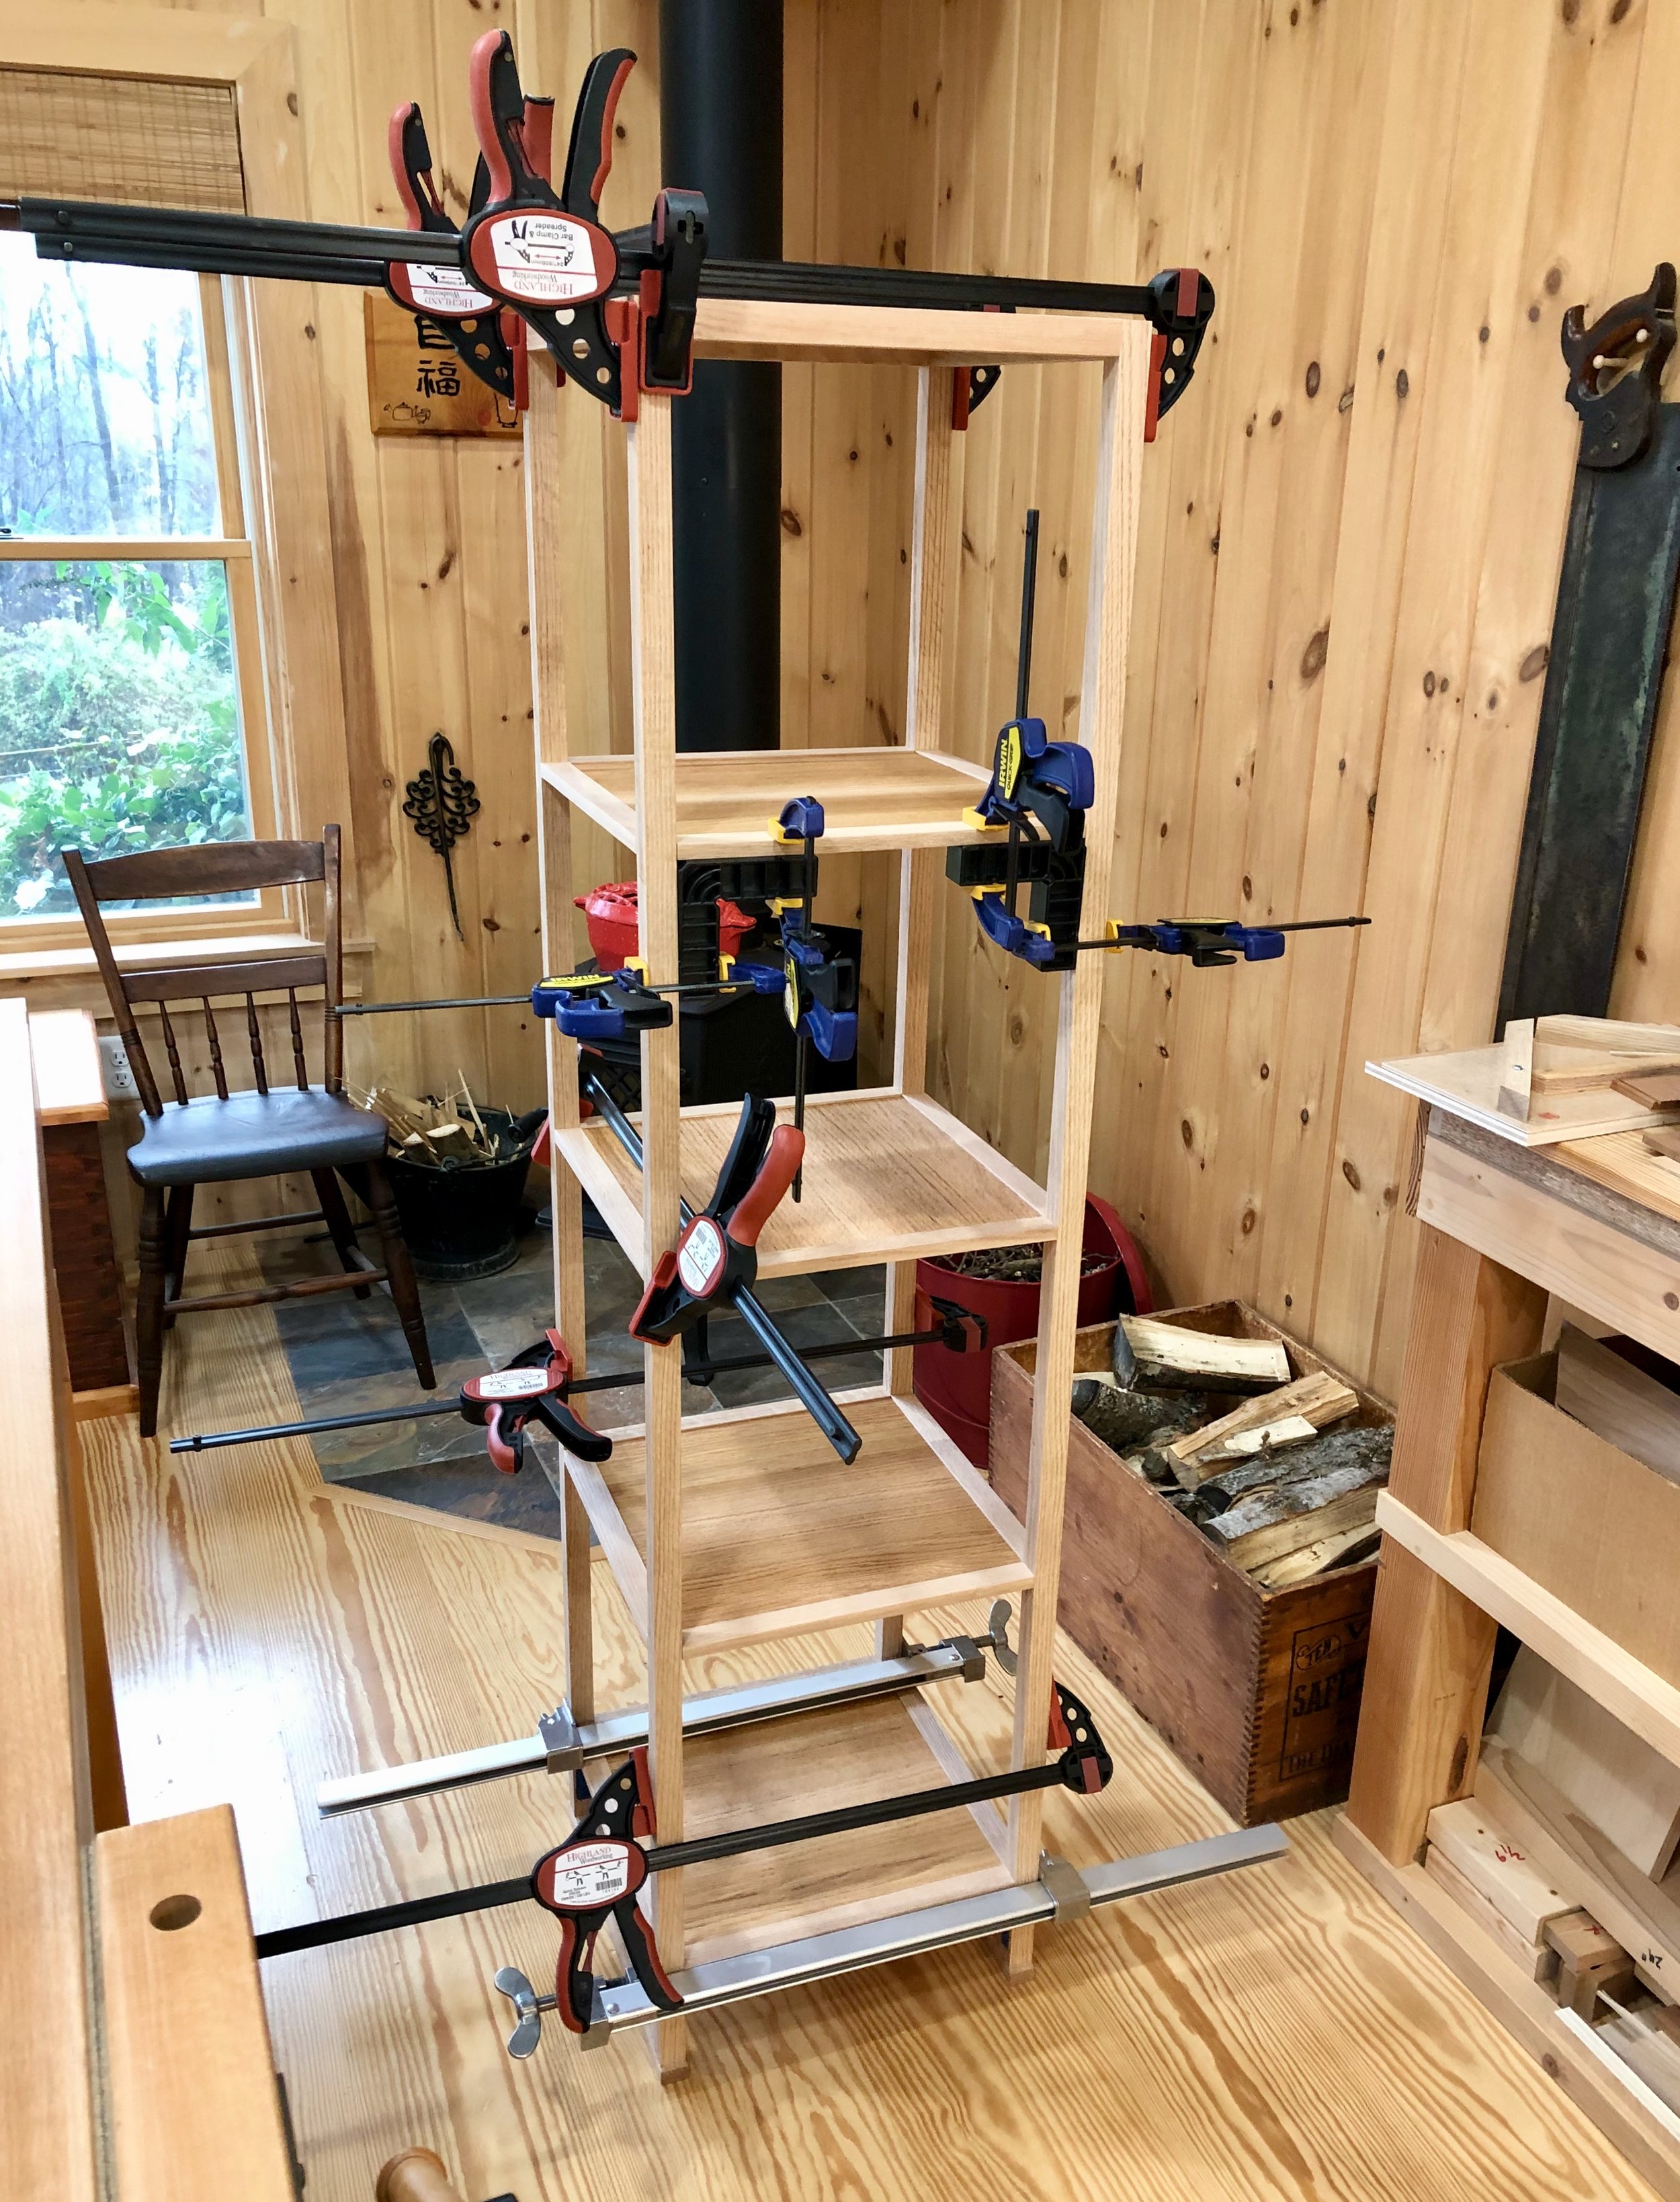
After one last rehearsal of the assembly process the rails were hand planed to be smooth with their adjoining poles and then disassembled so that all surfaces could get their final sanding. Glue-up proceeded in a swift and methodical manner. I wanted to get all 31 parts put together with glue in the joints while the piece laid prone on the bench, and then flip the construct upright for a final square-up before applying clamps. This required that the glue remained fluid “enough” during the 20 minute procedure, and then harden after clamping. Employing spousal assistance it went pretty well.
Clamped-up stand
Once dried I lightly sanded the structure to erase all clamp marks. To finish the piece I gave it a thorough rub-down with “natural” color Watco Danish Oil. I like how this product livens the grain of red oak while leaving a soft touch and no sheen. Two coats, applied over two days was all it took to complete this satisfying build.
Korean Display Stand reproduced in oak
And our pottery collection now has room to breathe, again.
On display
Thank you Dad and all Korean War era veterans for your selfless sacrifice on our behalf.


