

Hallway Hutch

Ever have an idea for a piece of furniture and then do the research to locate authentic examples only to find that there aren’t any? That happened to me on the bookshelf bench and it seemed to be occurring, again. Since I am not that creative there must be a lot of unspoiled furniture design territory out there to explore. Are you ready?
I was recently struck by the amount of time spent looking online and in books for examples of a hutch suitable for an entryway setting - what I have since coined a “hallway hutch”. I found none. Of course, there are hundreds of hutch variants out there, but what I came to appreciate was that these pieces were designed to do work and, as such, they tended to be hefty and practical. I was looking for petite and pretty. You see, my customers had recently downsized to a charming townhouse, and were in the market to replace some of their full-scale furniture with more suitably-sized heirlooms. They had a wall in their entryway where they wanted a piece that would allow them to store a few things and also display some meaningful objects. They needed a hutch (def., a cupboard usually surmounted by open shelves) for the hallway.

Example of a custom-built hutch available online. (Nice, but a bit rustic and 3 times too large!)
Design
After firing a slew of authentic hutch and bookcase examples at my patron friends, - ones that could be imagined appropriate at 2/3 scale - it was decided that Shaker was the style and cherry was the material. They then left it to me to sketch something suitable for final approval.
The more I research Shaker furniture, the more I am attracted to that simple form. Of course, I found no authentic Shaker examples that would work as reproductions. Made for the kitchen, their hard working hutches (called cupboards) were too “boxy” for hallway duty. And since the Shaker devotion to austerity meant there were no objets d'art for them to display anyway, their cupboards did not include open shelving.
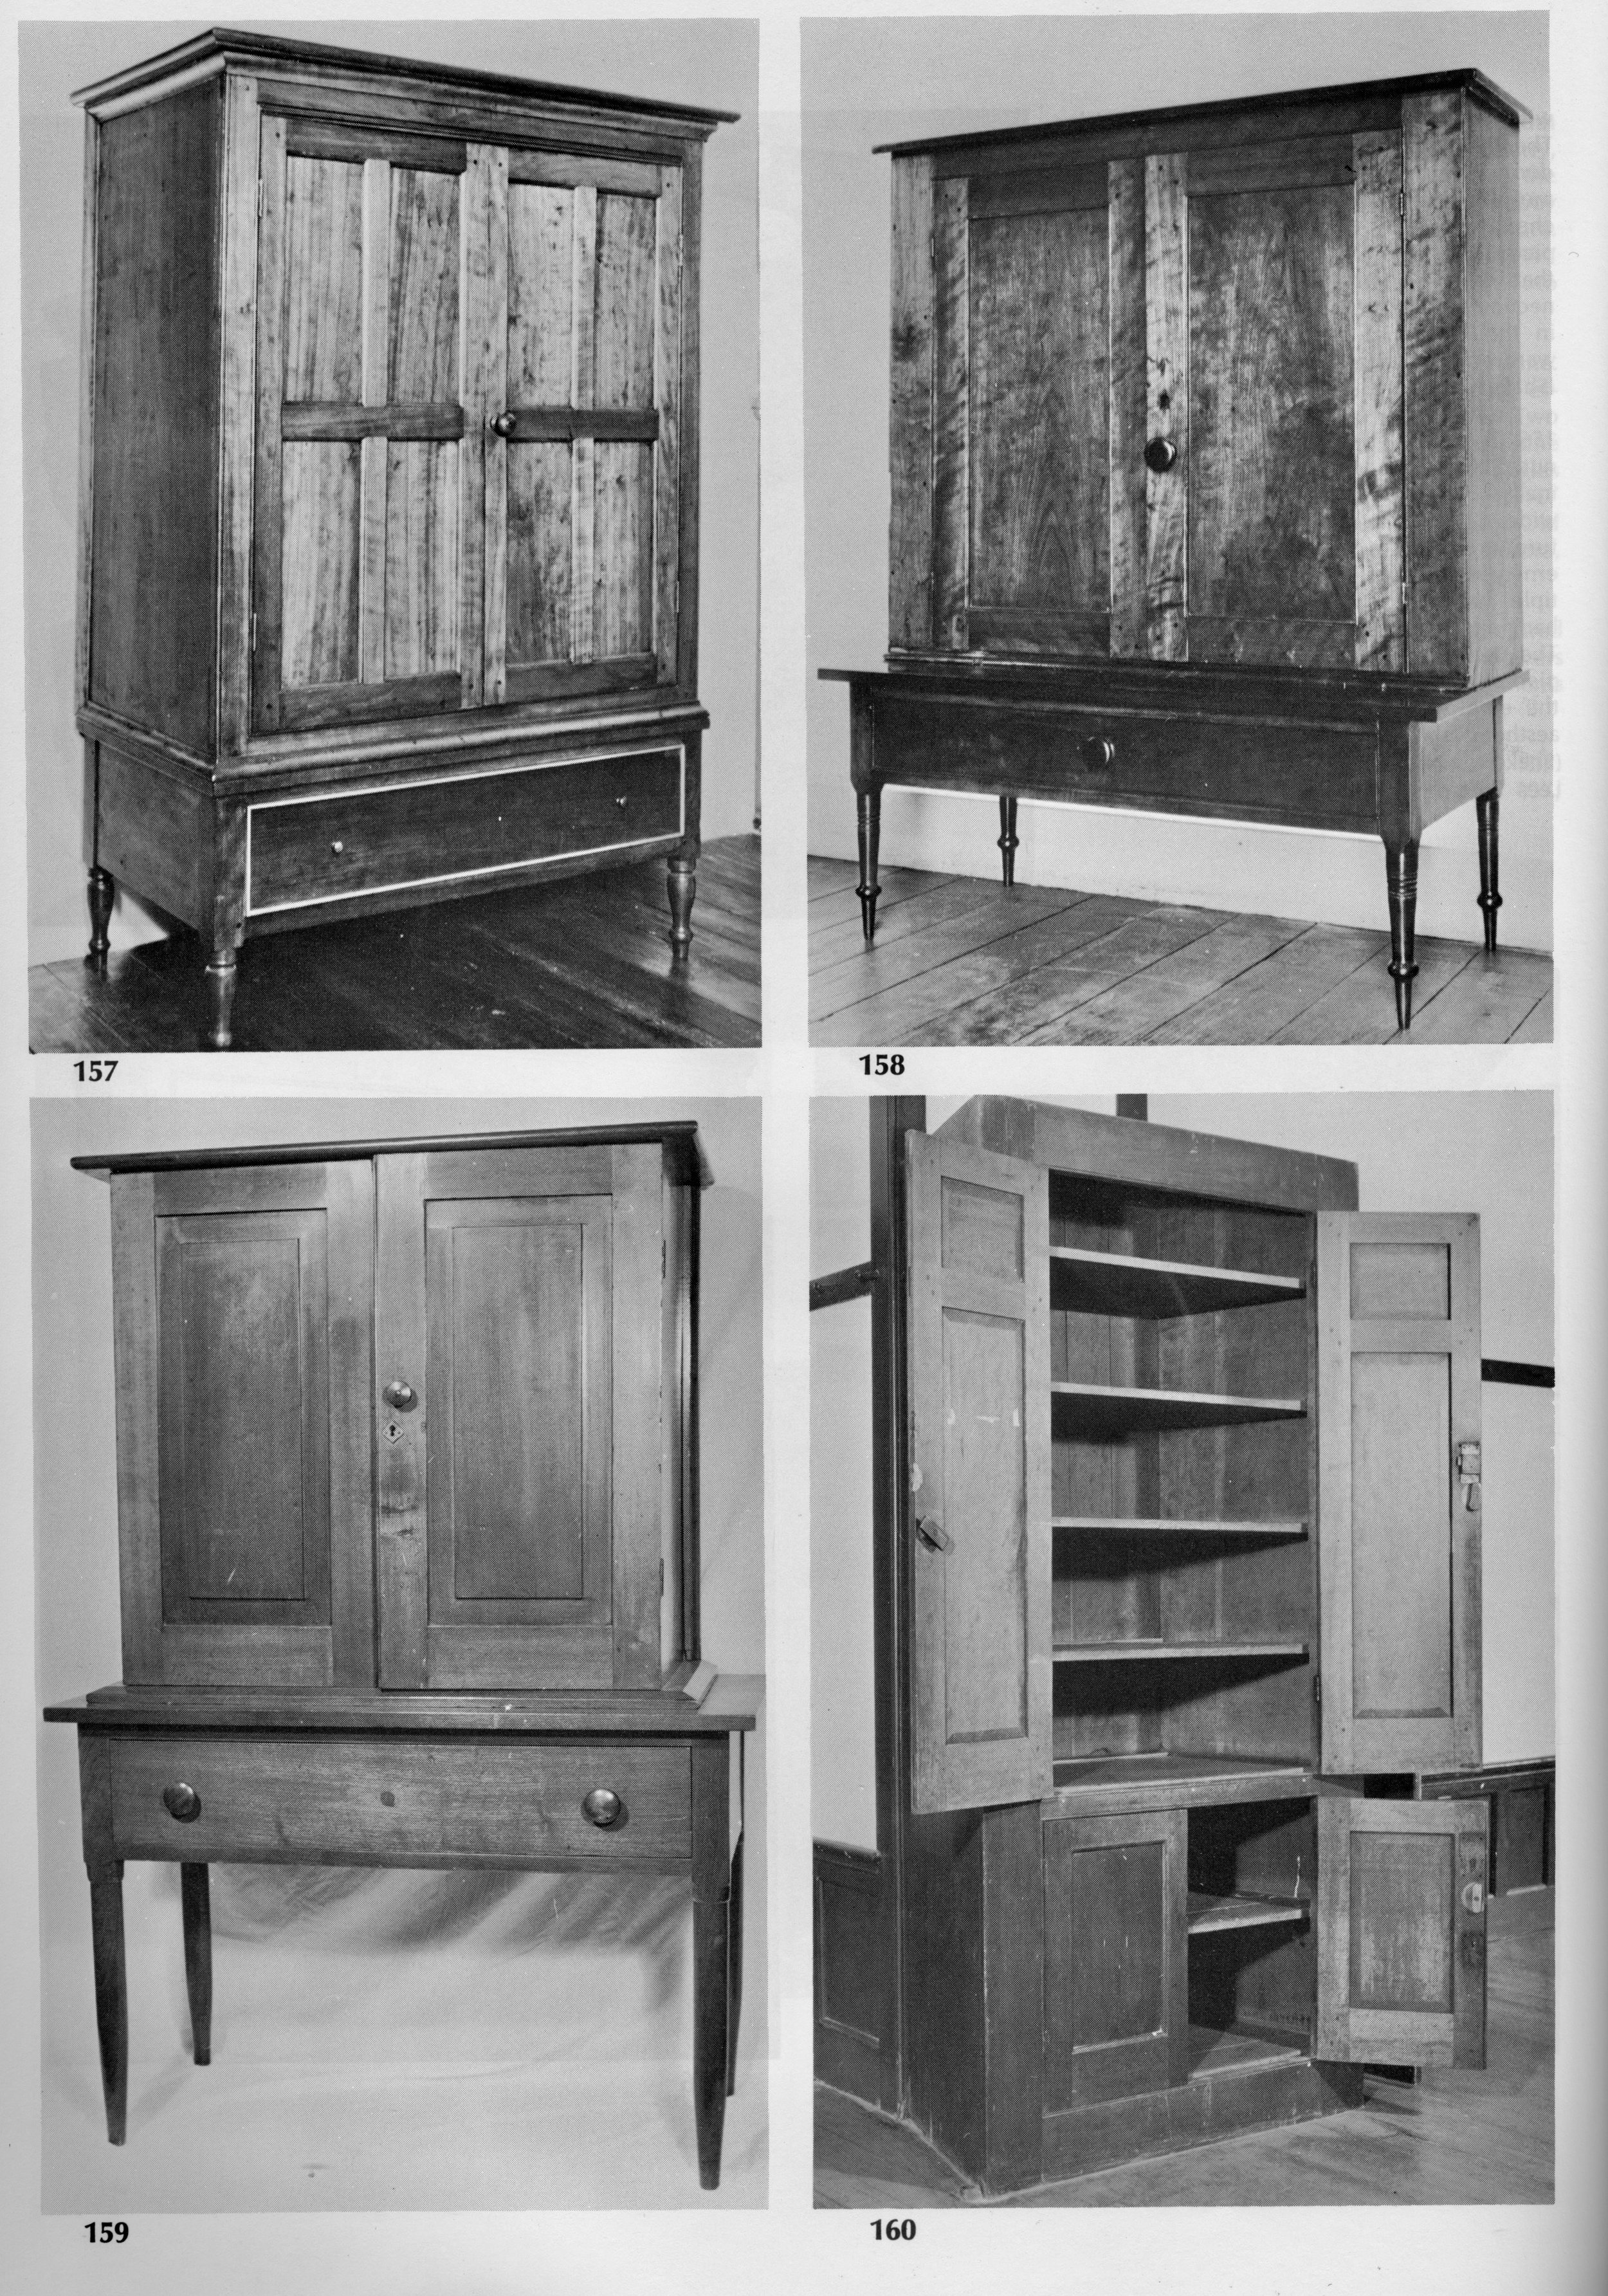
Examples of freestanding Shaker cupboards
from: Meander, R.F.W. Illustrated Guide to Shaker Furniture; Dover: New York, 1972.
Still, Shaker furnishings do have that special “look”, and I was determined to capture it within a conventional cabinet and shelf piece. Two rules were followed during design: 1. since no work was to be done here, the cabinet top should not invite activity; and 2. the construction needed to be more visually interesting than just flat boards. After some additional reading and doodling it all came together with inspiration from a couple Shaker items not called “cupboards”.
To keep the cabinet functional for storage but not as a work surface, I decided to drop it a full 10 inches below the typical counter height. With a tall shelving unit atop this low cabinet it would evoke the classic Shaker stove form.
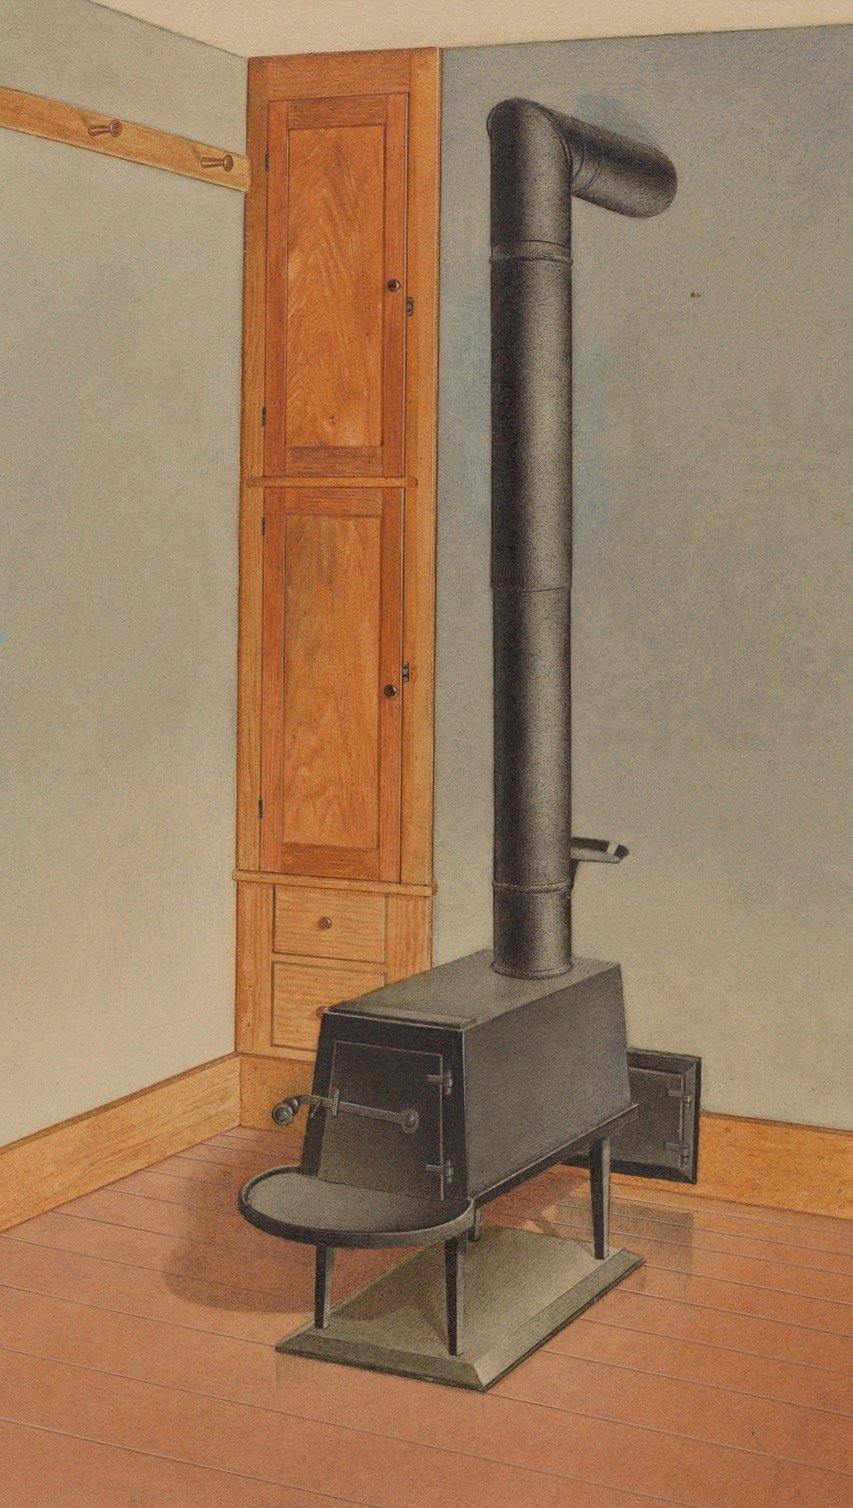
Shaker Stove by John W. Kelleher, reproduced from the Index of American Design collection
And instead of plain boards, a framed panel construction would be used. This is not typical of Shaker case pieces, but it can be found on special items such as this pair of sewing desks from the Canterbury, New Hampshire community.
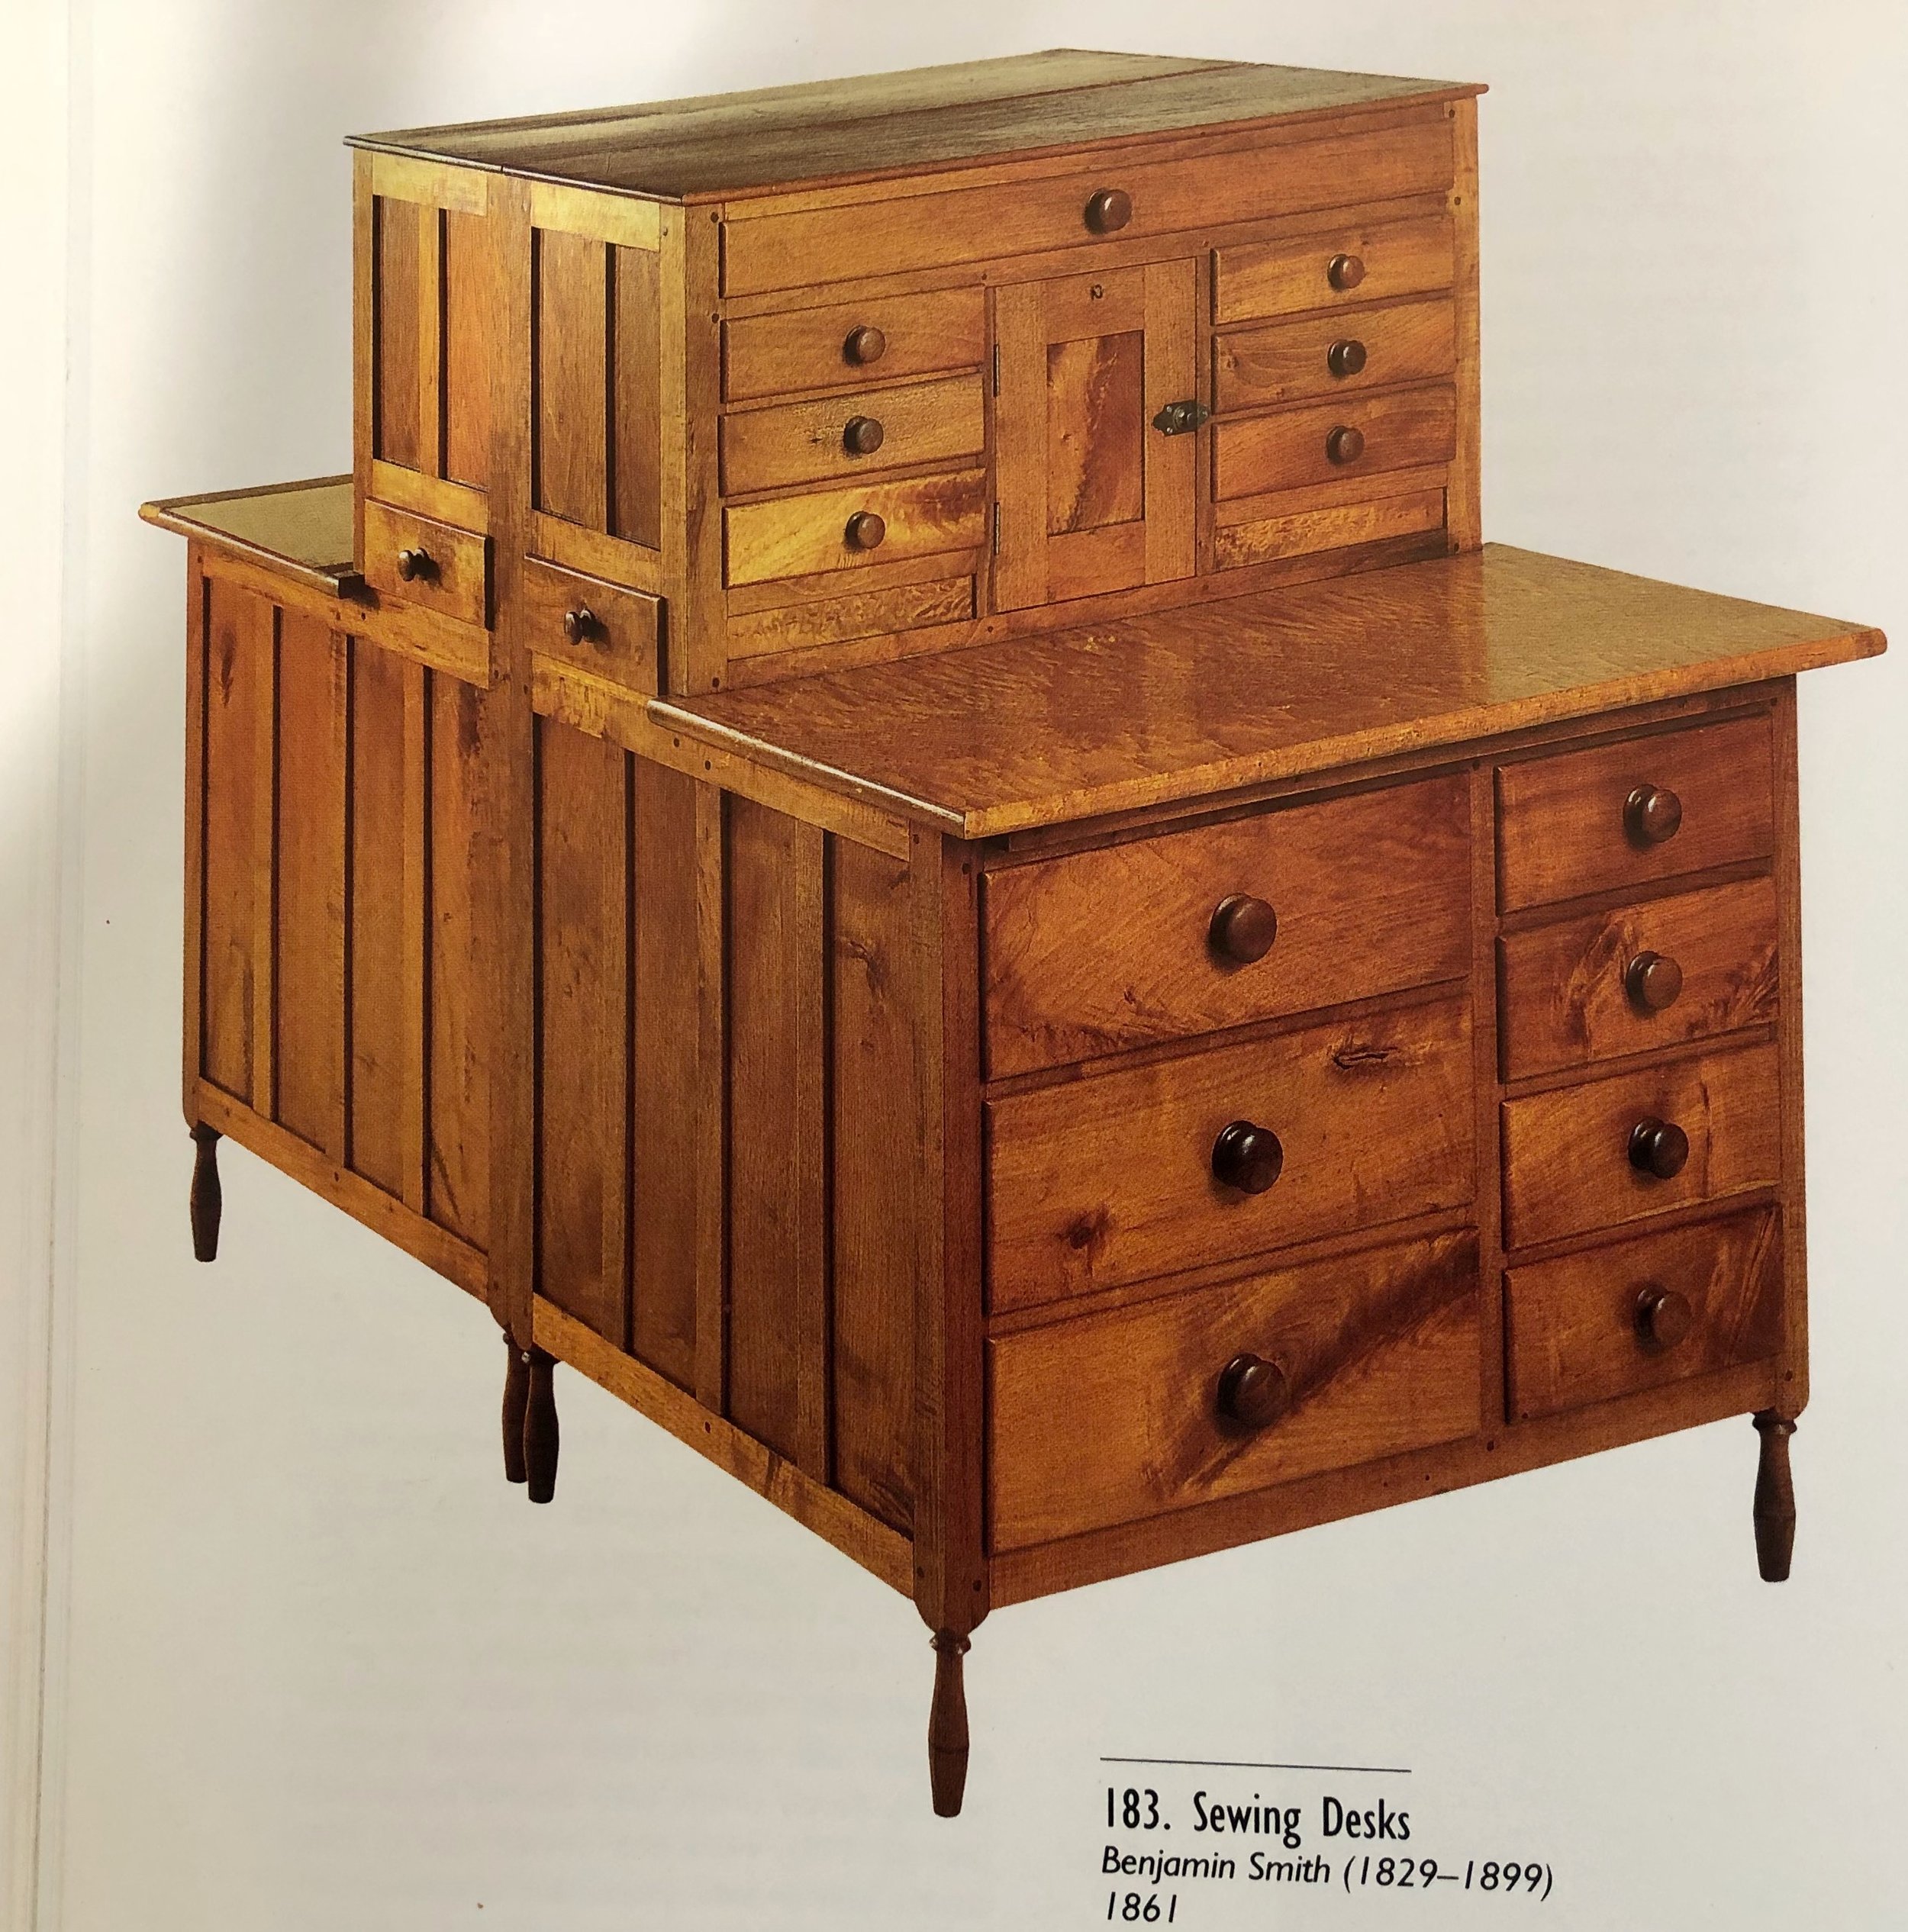
Sewing desks from Canterbury Shaker village with framed panel sides (1861)
from: Rieman, T.D. and Burks, J.M.. The Complete Book of Shaker Furniture; Abrams, 1993.
Employing an upper shelf unit substantially narrower than its supporting cabinet (as in Shaker example 159 above) this design came together in the rough drawing shown below.

Shaker-inspired Hallway Hutch
Materials
Cherry boards of six varieties, differing in their thickness, lumber mill cut and figure were purchased. Of special note was the 12 inch wide, plain sawn plank that would furnish the door fronts. Sixty-four board-feet, in all, were brought back from the choice selections at Highland Hardwoods. The hinge and door hardware would be finalized later in the build.
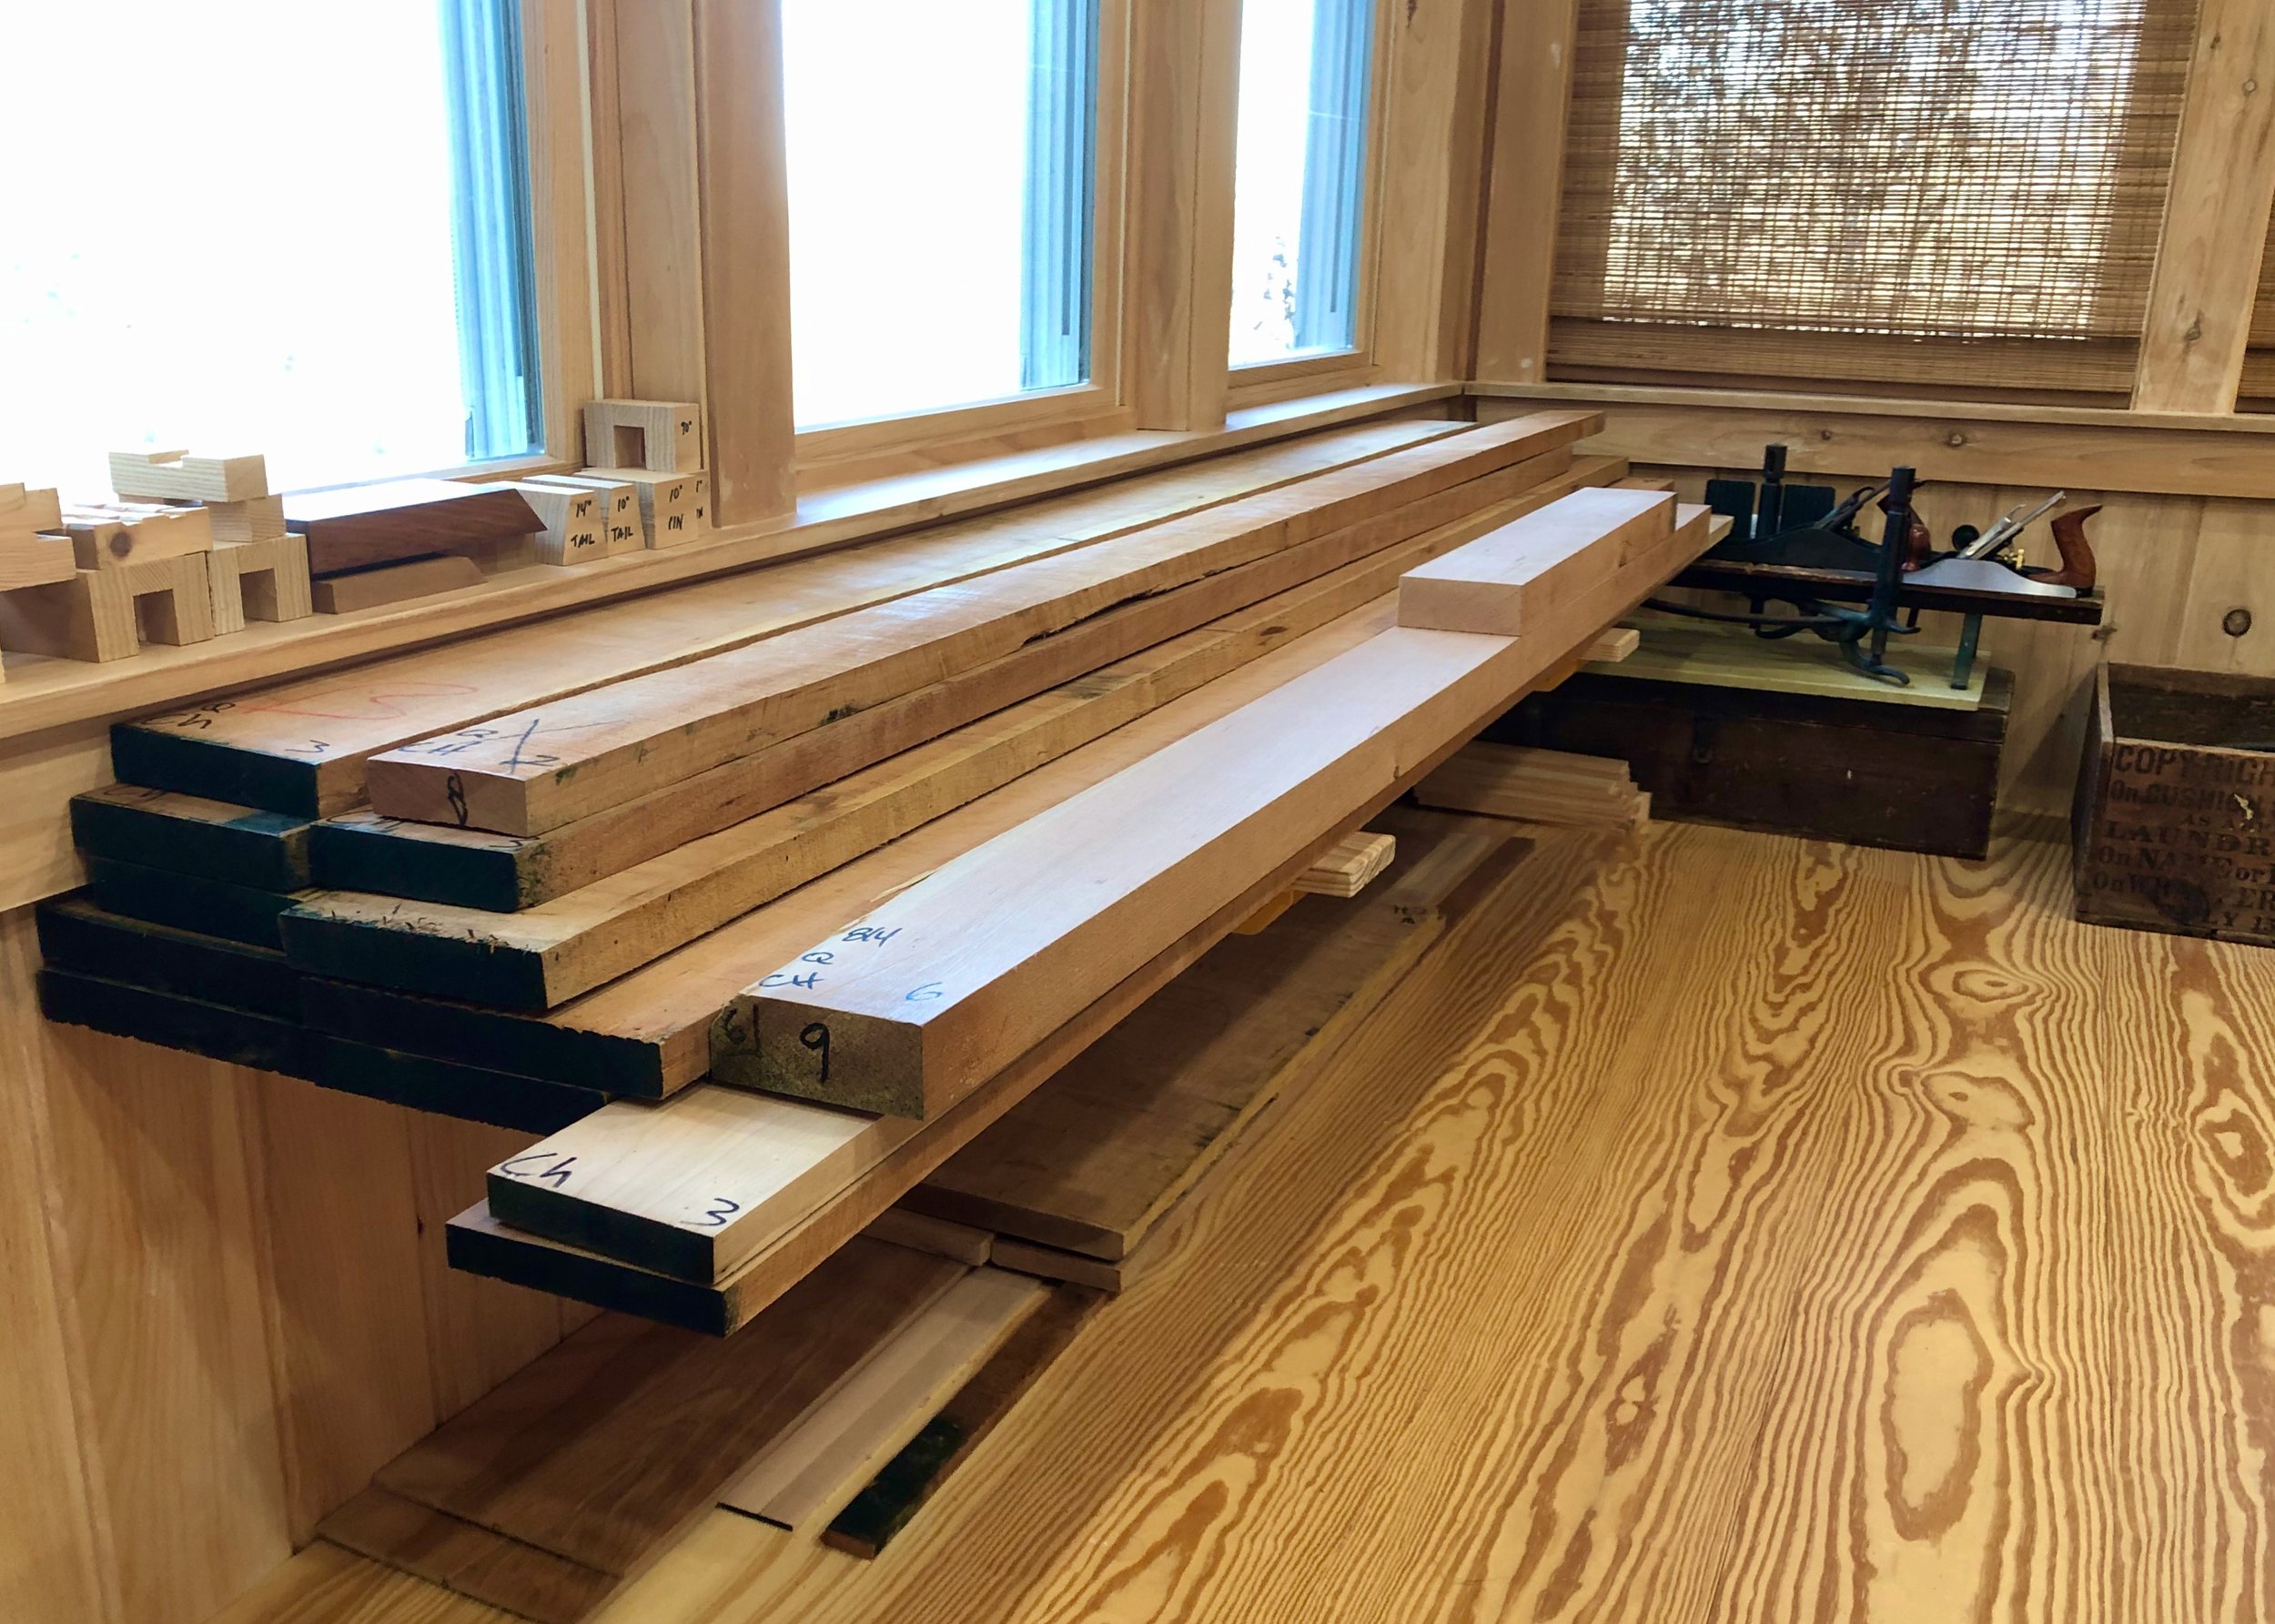
Hallway hutch cherry
Dimensioning
Construction in the workshop would follow the natural order: frames before panels; cabinet before shelves. But first there was a puzzle to solve. Given there are approximately 70 parts to be fashioned from the 6 different plank types, a good deal of time is spent on Projects such as this simply deciding which components are to be cut out of which boards and from where, exactly. The trick is to work around board widths, sapwood, knots and other defects, but the opportunity to select for grain character adds a creative dimension to the game. This is surprisingly enjoyable!

Frame part assignments penciled into quarter sawn cherry stock
To start, the leg parts were milled from an 8/4, quarter sawn board to form 1 1/2 in. square poles that were then cut to final length. Before slicing grooves that would hold the panels I wanted to define a foot feature. Many Shaker pieces have this bottom portion of the legs shaped at the lathe to form a candle pin-like foot (see sewing desk, above). I don’t own a lathe, and, besides, I felt these stout, 3 inch “feet” would look funny in that style. Instead, I chamfered the corners at the router table. This irregular octagon profile gives some definition to the leg bottoms without trying to make them into something they are not.
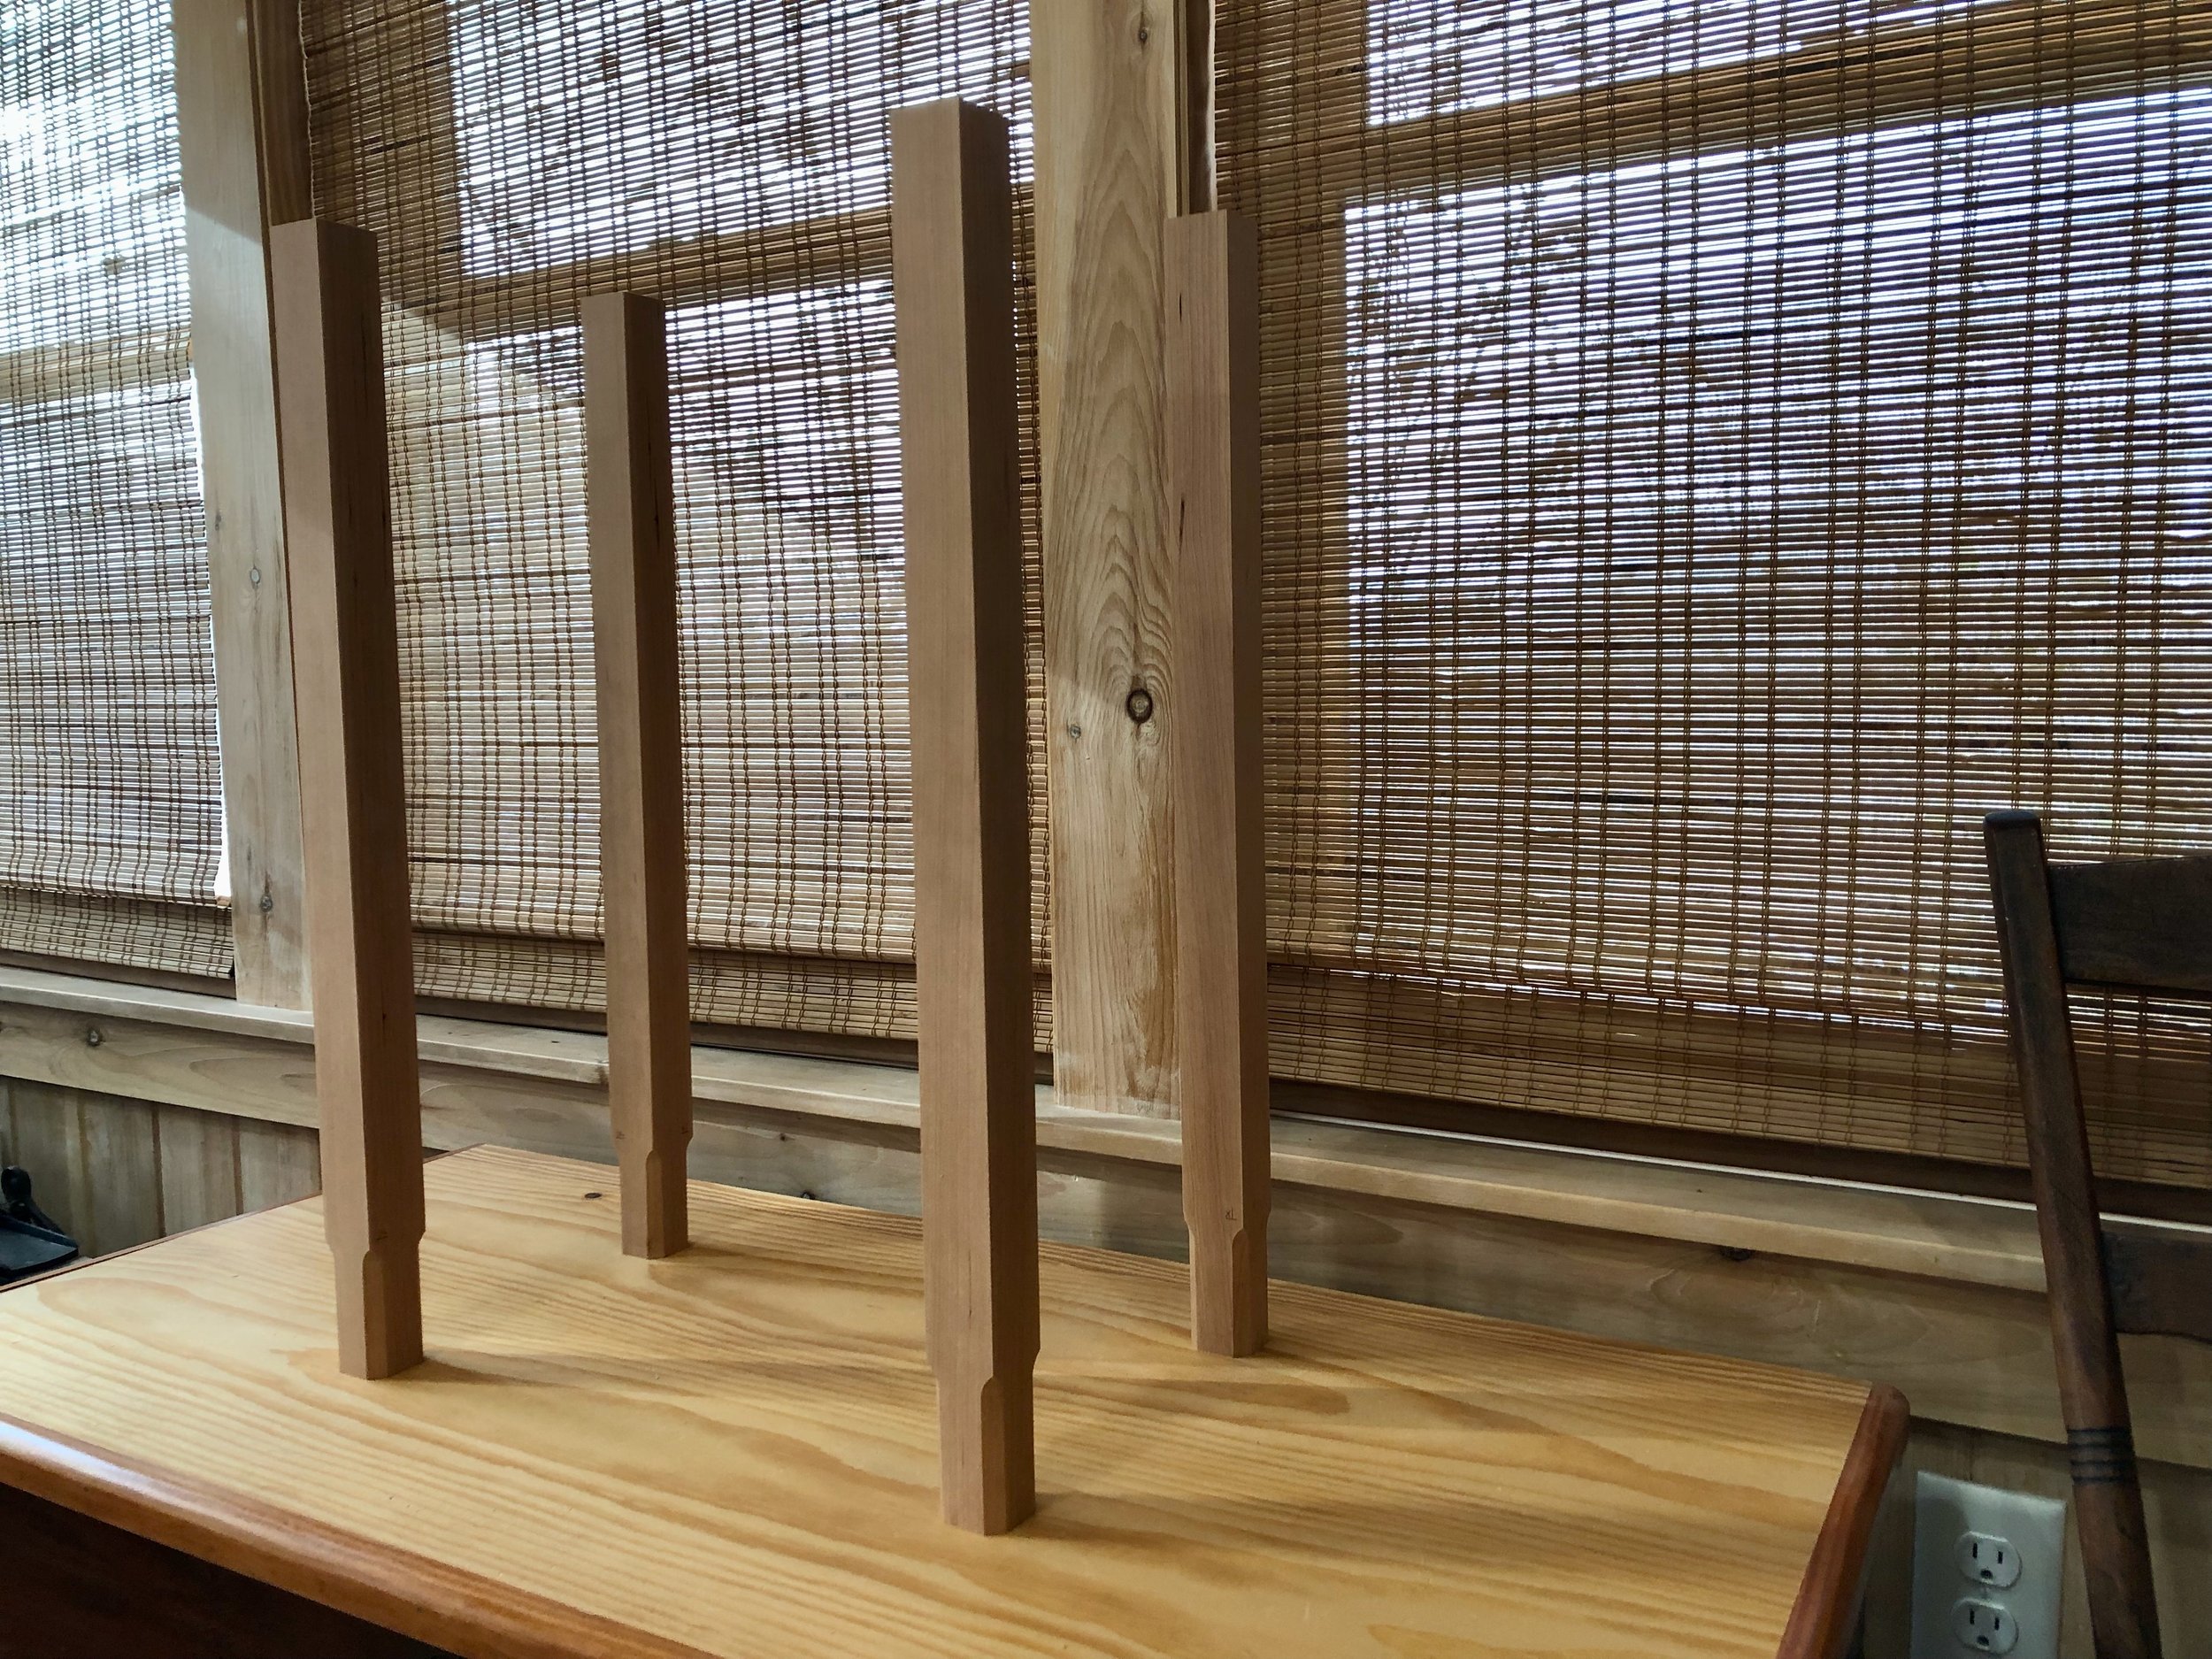
Leg parts chamfered at the base
Following this, the legs were marked and then modified with sockets and grooves, at the mortiser and router table, to accept the panel and rail parts. Next, the cabinet rails were prepared, also from quarter sawn stock, and then grooved with a dado blade on the table saw so as to align with the panel slots previously routed into the leg parts. Finally, tenons were formed at both ends of the rails to fit the sockets mortised into the legs. All 12 parts were then assigned to their final positions (left/right, front/rear, top/bottom) which served to uniquely mate each mortise with a tenon. Chisels and a shoulder plane were used to fine tune every mortise-tenon pair, after which a dry fit of the cabinet skeleton was achieved.
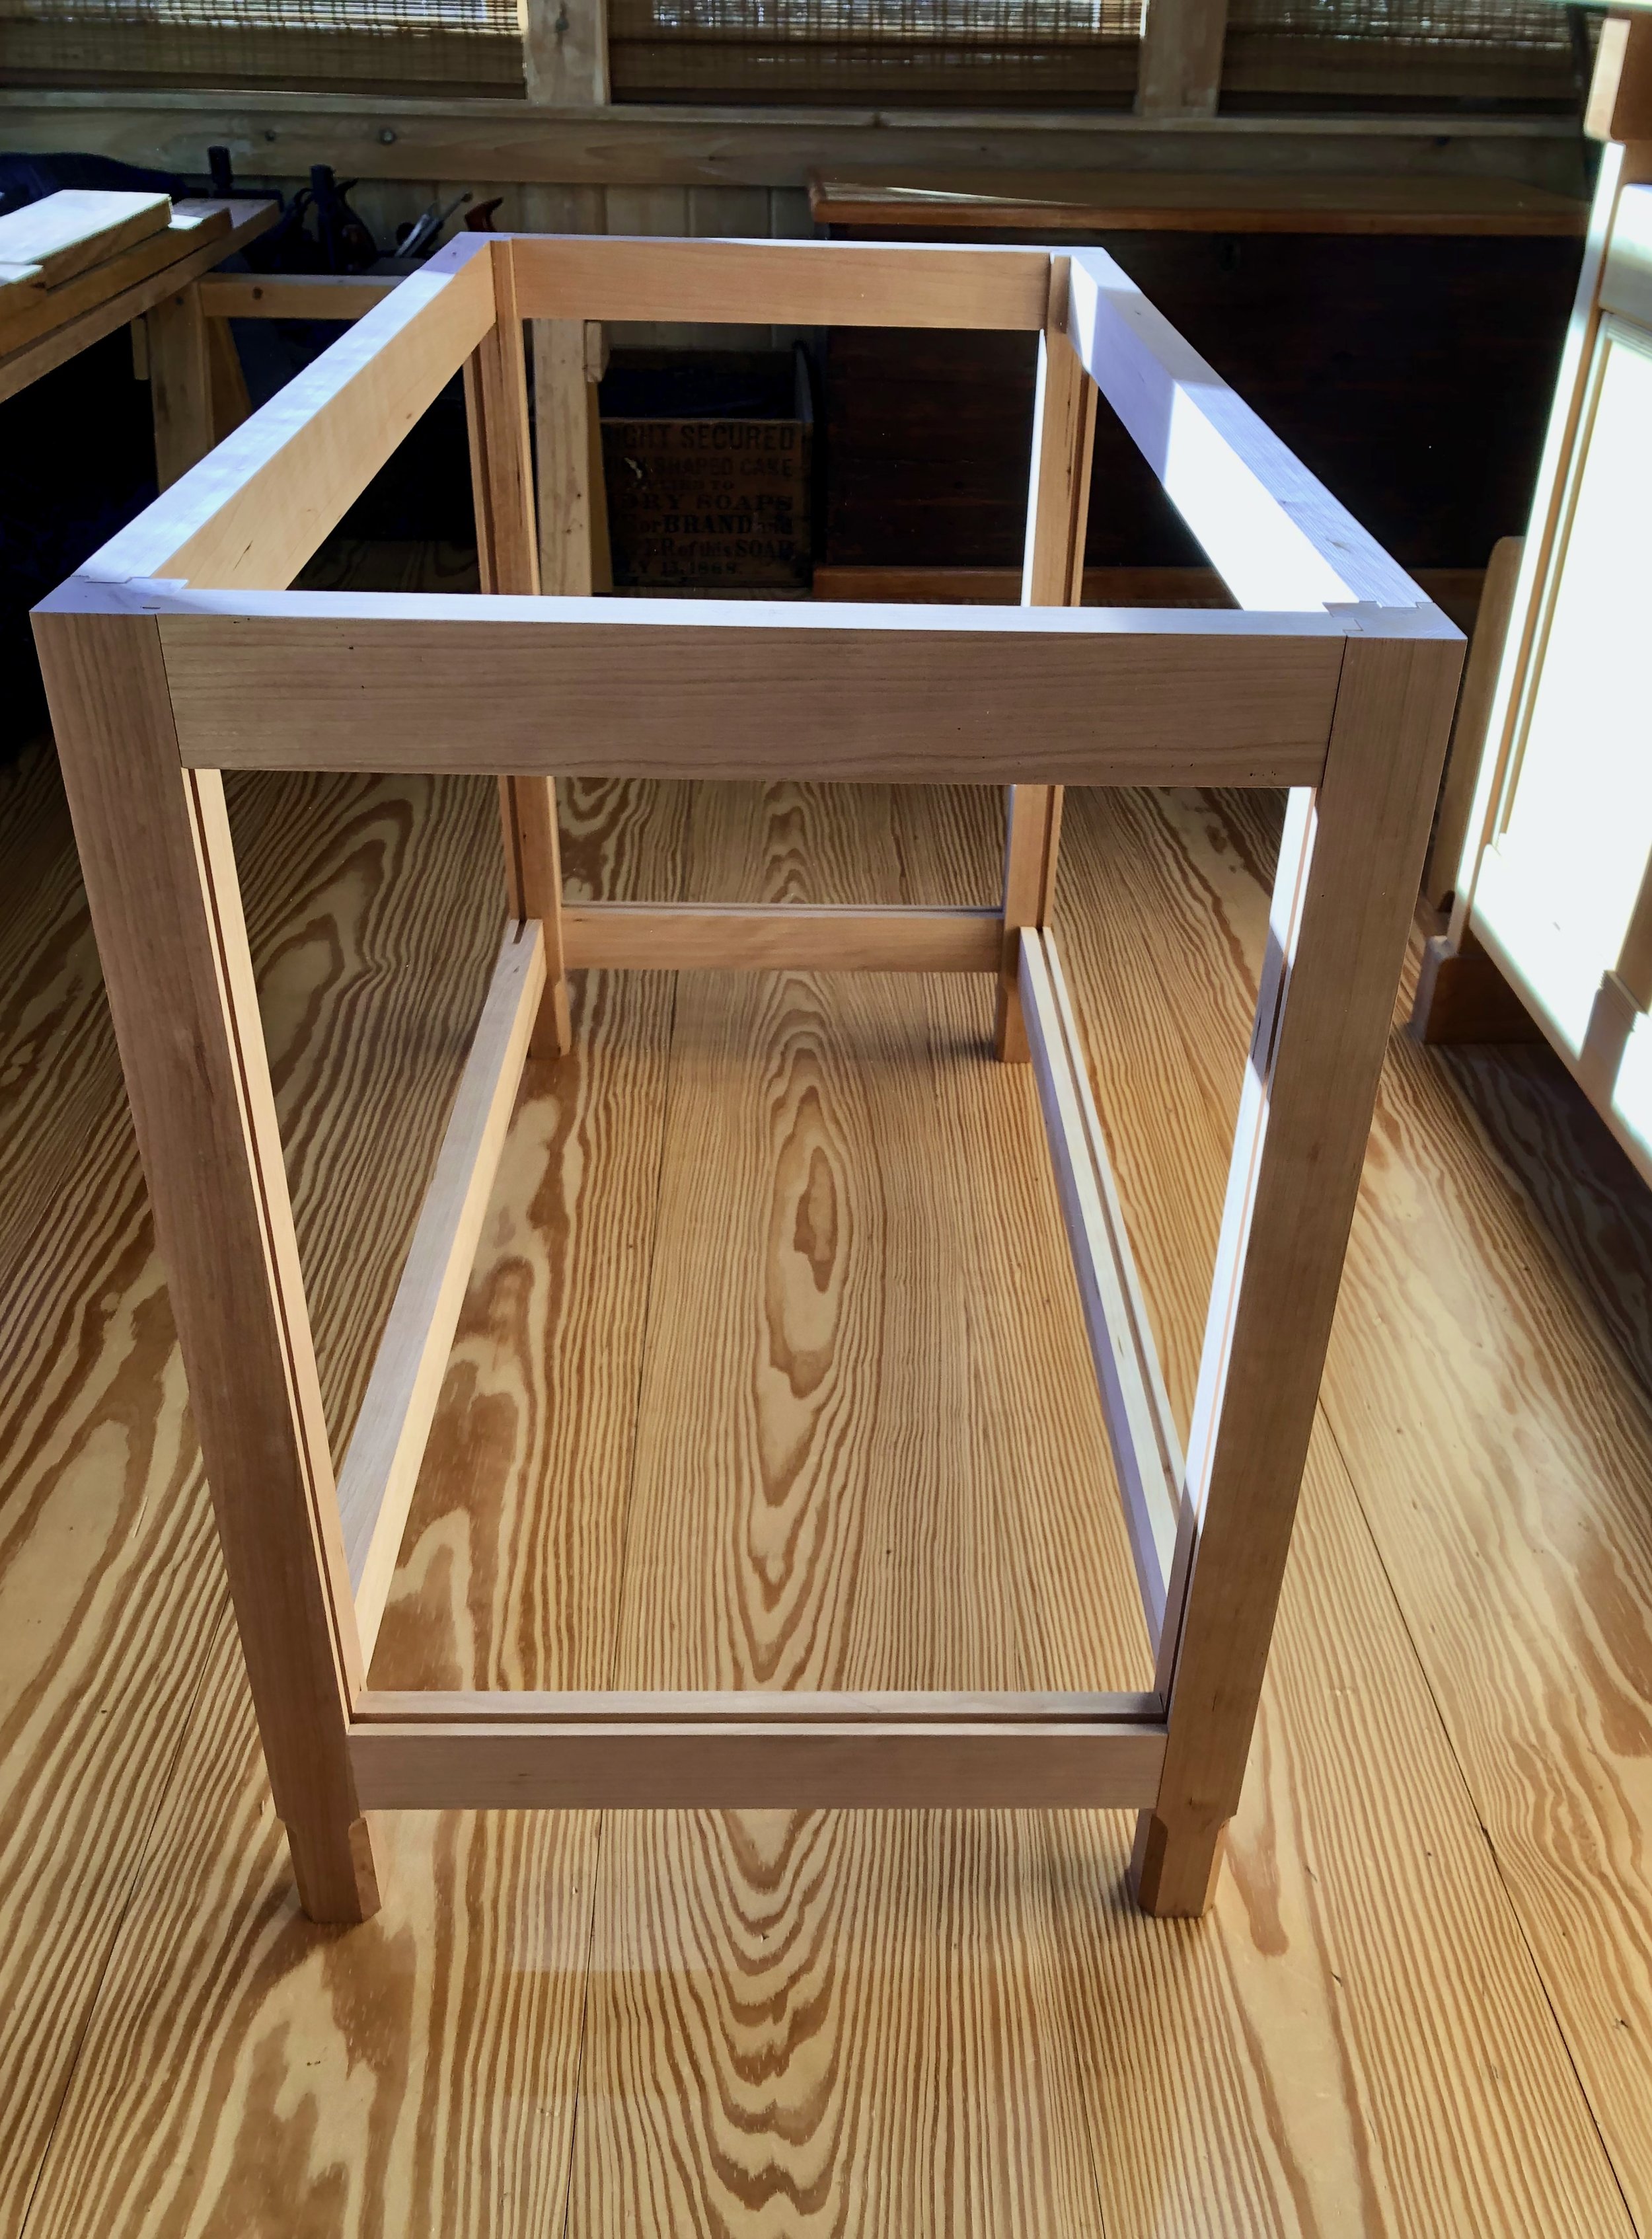
Dry-fit skeleton
To complete the cabinet frame I would need to create: 10 stiles; a center rail; and 2 hinge “panels” (for lack of the appropriate term). I would also need to fit the cabinet floor, made of birch plywood, into newly formed grooves within the bottom rails. The stiles and hinge panels were easily fashioned in a manner similar to the rails (above). For the center rail I used dovetail-like joints, instead of tenons. This part would be dropped into slots chiseled from the front and back rails during assembly. A second dry-fit confirmed that all was well.

Dry-fit frame with floor and center rail, atop
The panels came next. These were produced en mass from a single 4/4 plain sawn board to ensure consistency of grain and color. The plank was first chopped and ripped to rough dimensions, and the resulting pieces were flattened on both sides at the jointer. Still too thick, these boards were then re-sawn down the spine at the band saw to get “two for one”. The thinner boards were each thickness planed to 1/4 in. depth and ripped to their final width at the table saw - 13 plus a spare.

Cabinet panels
During assembly, the panels would slide into grooves within the frame structure and be left “floating” to expand and contract in response to changing humidity. As such, following some smoothing operations, I gave them their first coat of the polyurethane finish prior to glue-up.
The final pre-assembly step was to build an internal shelf. For this I would use another piece of birch plywood modified with cherry trim. The trim serves two purposes: first, it hides the unsightly edge of plywood lamination; and second, this thick band would arrest the shelf’s propensity to sag, over time. Material for the trim was supplied from those scraps that were beginning to accumulate near the table saw. A couple long ones were milled to rough dimensions, chopped to length and then glued unto the prepared shelf board. After curing, a block plane was used to even-off the edges and make everything uniform. This shelf would be supported by small pegs attached to the cabinet’s stiles and would be adjustable thanks to a series of holes pre-drilled into these members.
Cabinet shelf and stiles
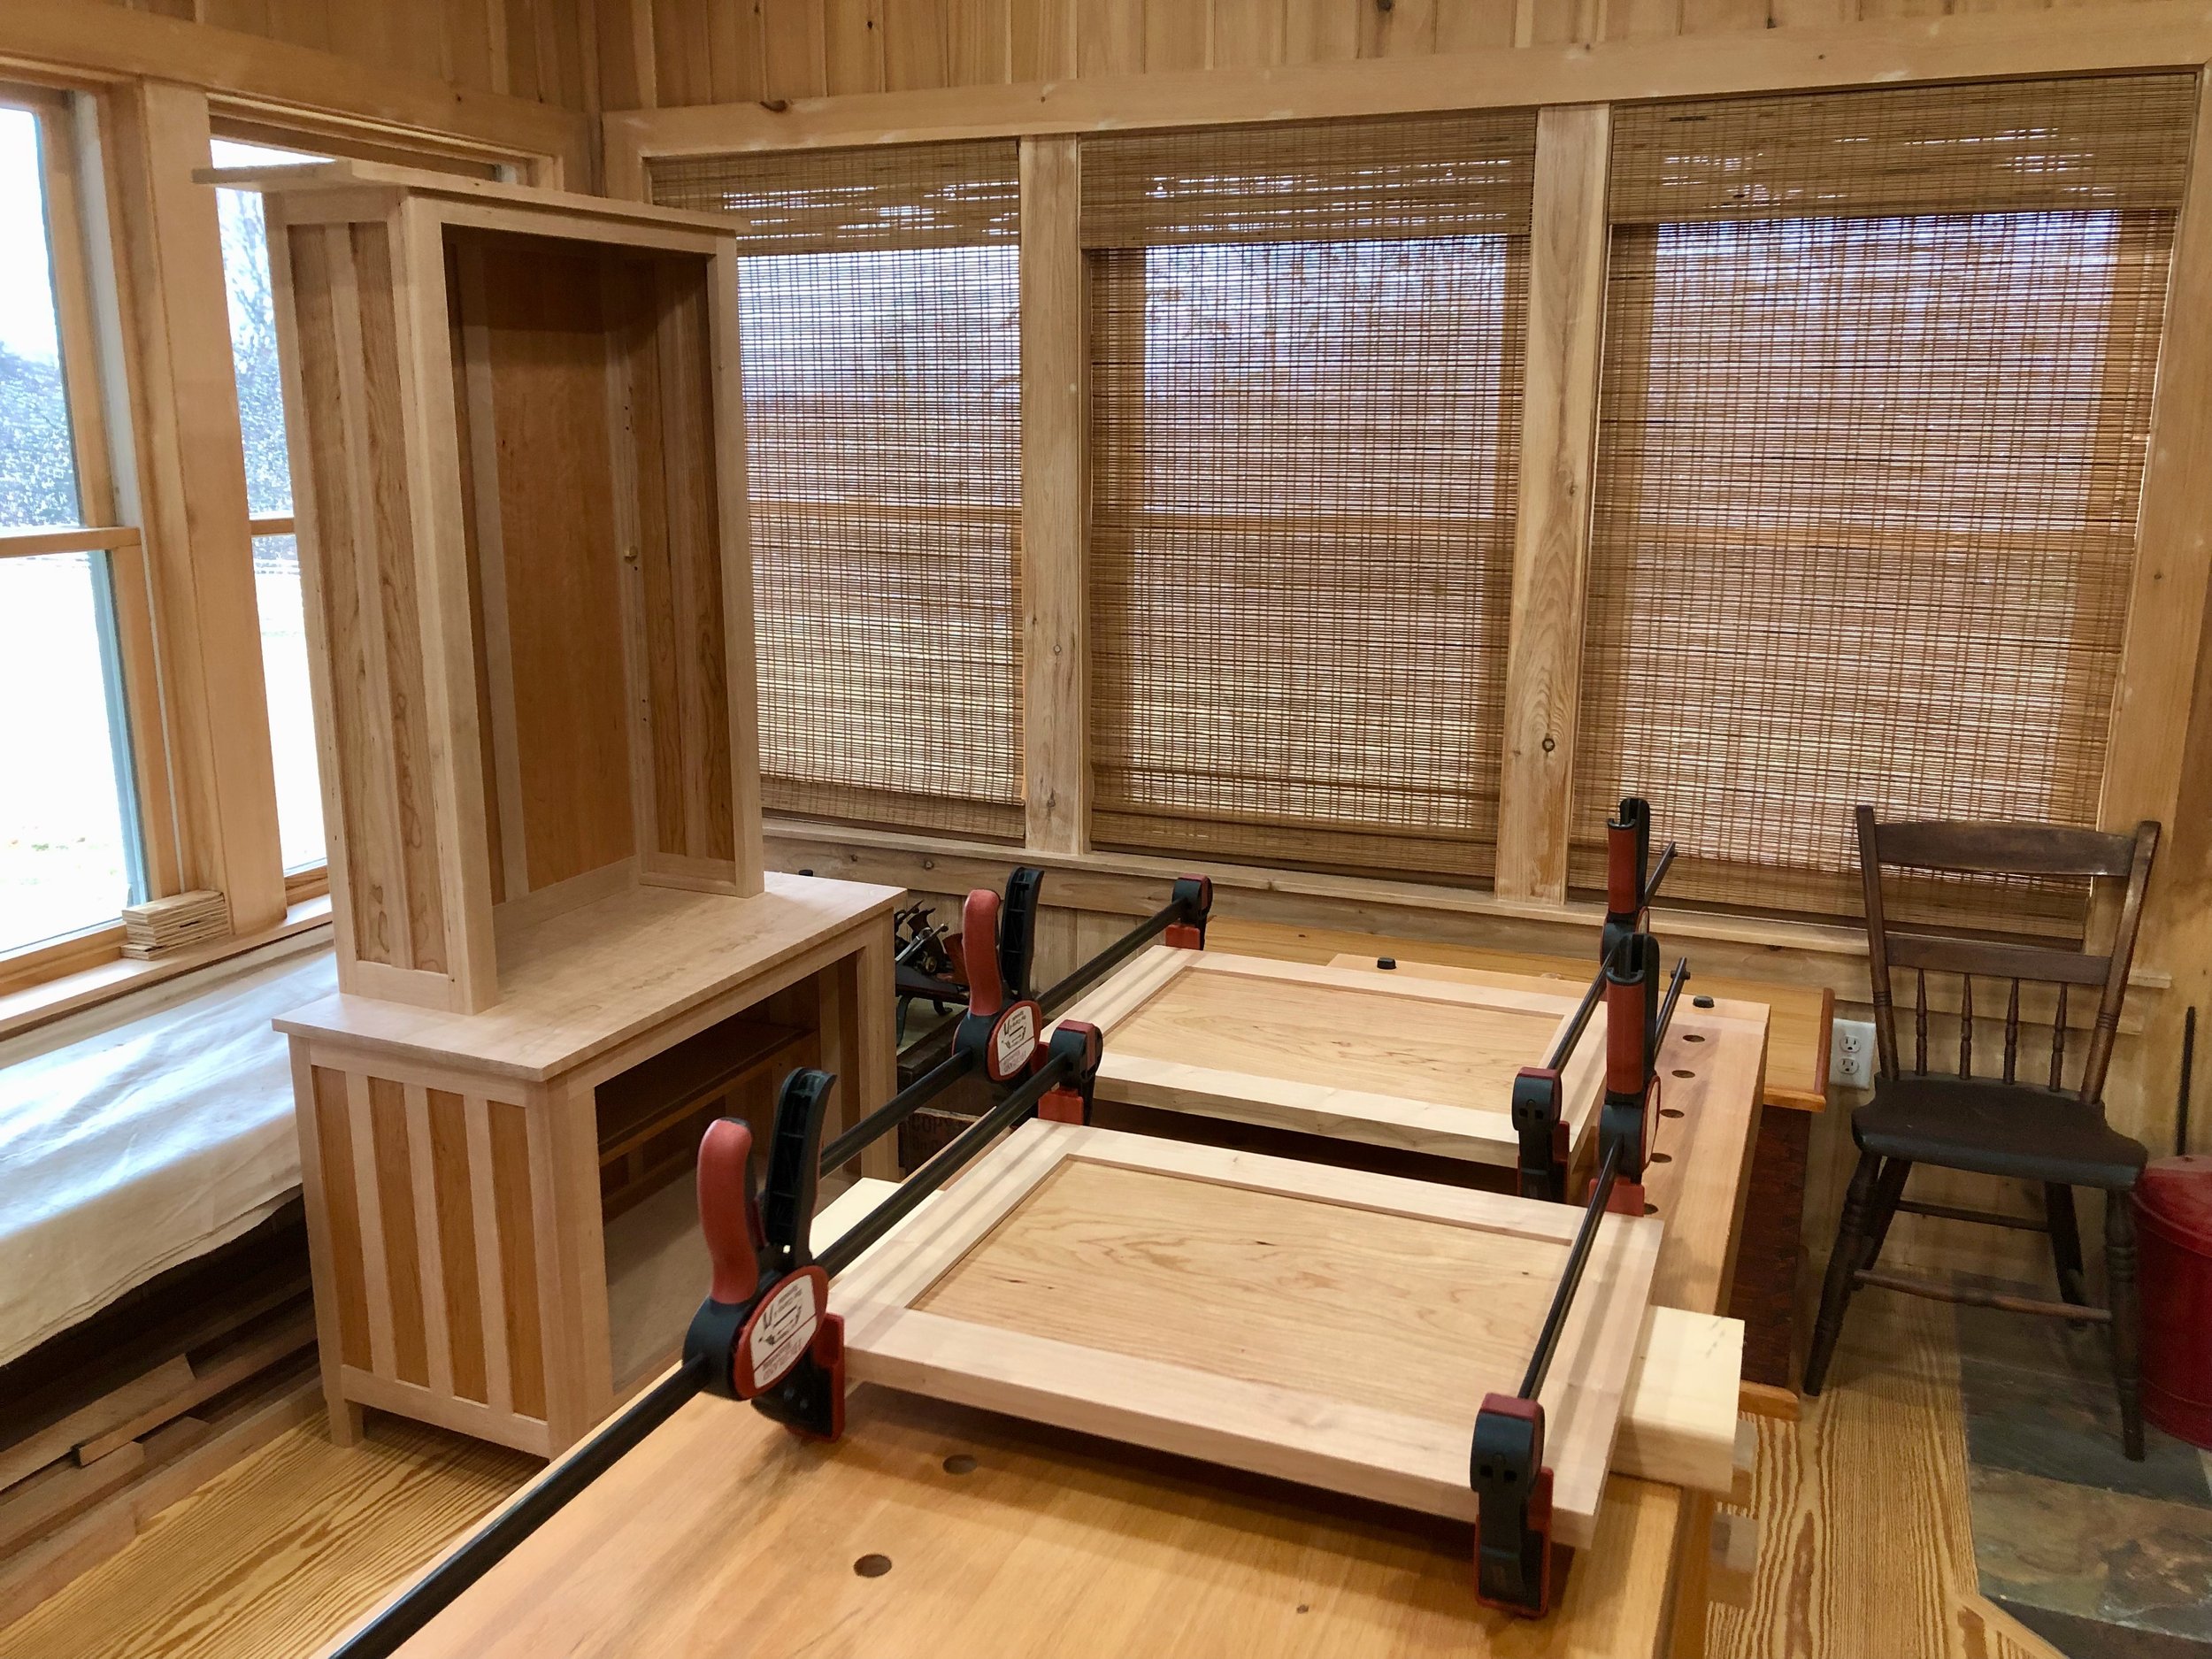
Following a half-day of card scraping and sanding the frame parts it was time for glue-up, which would occur in stages. Construction of the back and two side “sub-assemblies” would proceed outwards from the center, and so to start things off the central stile (sides) and panel (back) were glued into place along the bottom rails. This makes it foolproof to slide the other components into place during the next step.

Pre-glueing the central members to the bottom rails
Once dried, the remaining panels and stiles were slipped (glue-free) into the back and side “constructs”. A couple foam rubber pads were inserted into the grooves along each side to absorb swelling while keeping the panels held snug at all times. Next, the floor was inserted into the back rail, and then the front rails and hinge boards were glued together and slotted into place. Following a squareness check, the sides were glued-up and brought into position. All of the tenoned parts were then hammered tightly “home” and clamps applied to hold things together. The table was brought down from the bench to the floor and some final measurements made to assure that all was square before the final cure. This description was certainly more detailed than required but it will help me as a reference for the next build. After all, there are no instructions to follow here and, even with spousal assistance, these multi-component, time-sensitive glue-ups can get complicated.
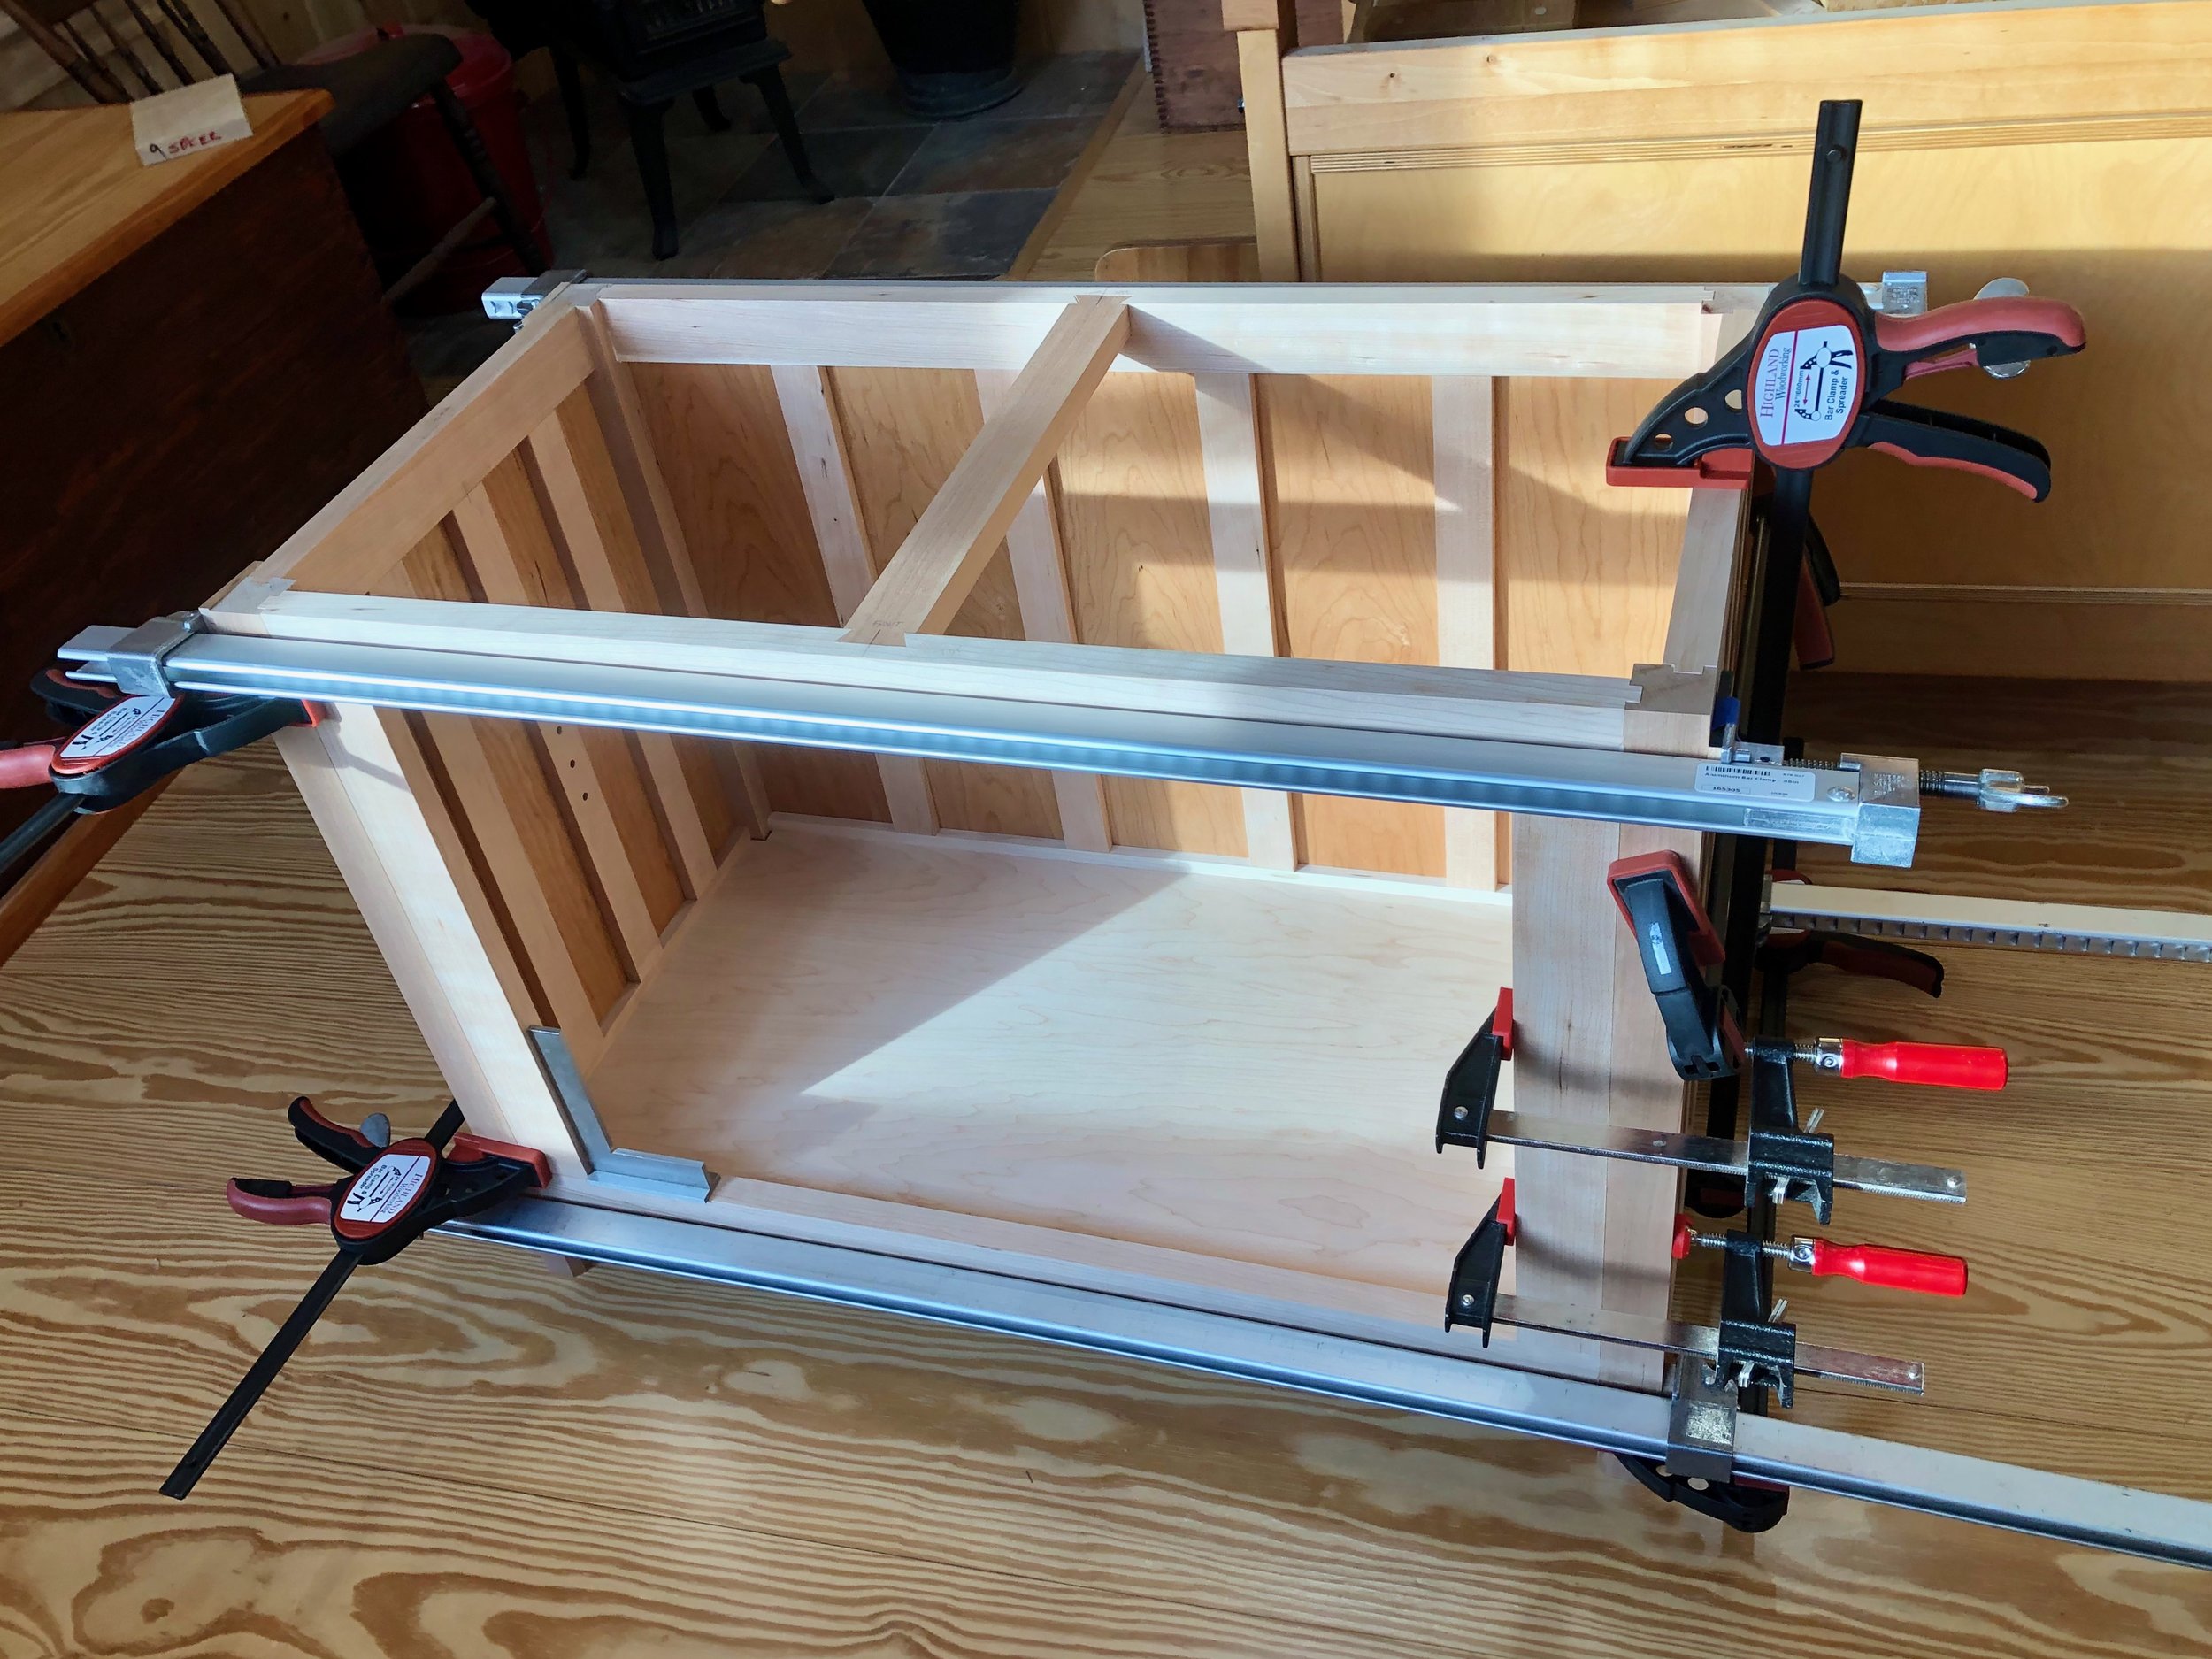
Cabinet glue-up
I like the way the mortise and tenon joints seated during this build, but just to be sure everything stayed tight over time I decided to add some reinforcing pins at the corners, 16 in all. There are four steps involved here: hammer-out the 5/16 in. dia. pins (dowels) from cherry scraps; drill holes into the joints; tap a gluey pin into each hole; and then saw things flush. Believe it or not this takes half a day, but it is worth it for the added stiffness and decorative feature produced.

Pinned joints
On to the top. This is just a simple, three board construct that I tried to enhance through the choice of wood. I found a spectacularly grained curly cherry board at the yard that I imagined would ignite the top of this otherwise strict and regular hutch. So-called “curly” wood is produced naturally in some trees that are either genetically programmed for fiber production in this manner, or because their growth environment (e.g., hillside, wind exposure) induces growth by this extra strong formation. The wavy fiber patterns present a challenge when working the wood but, once finished, the lively surface pays it off. On to the shelves.
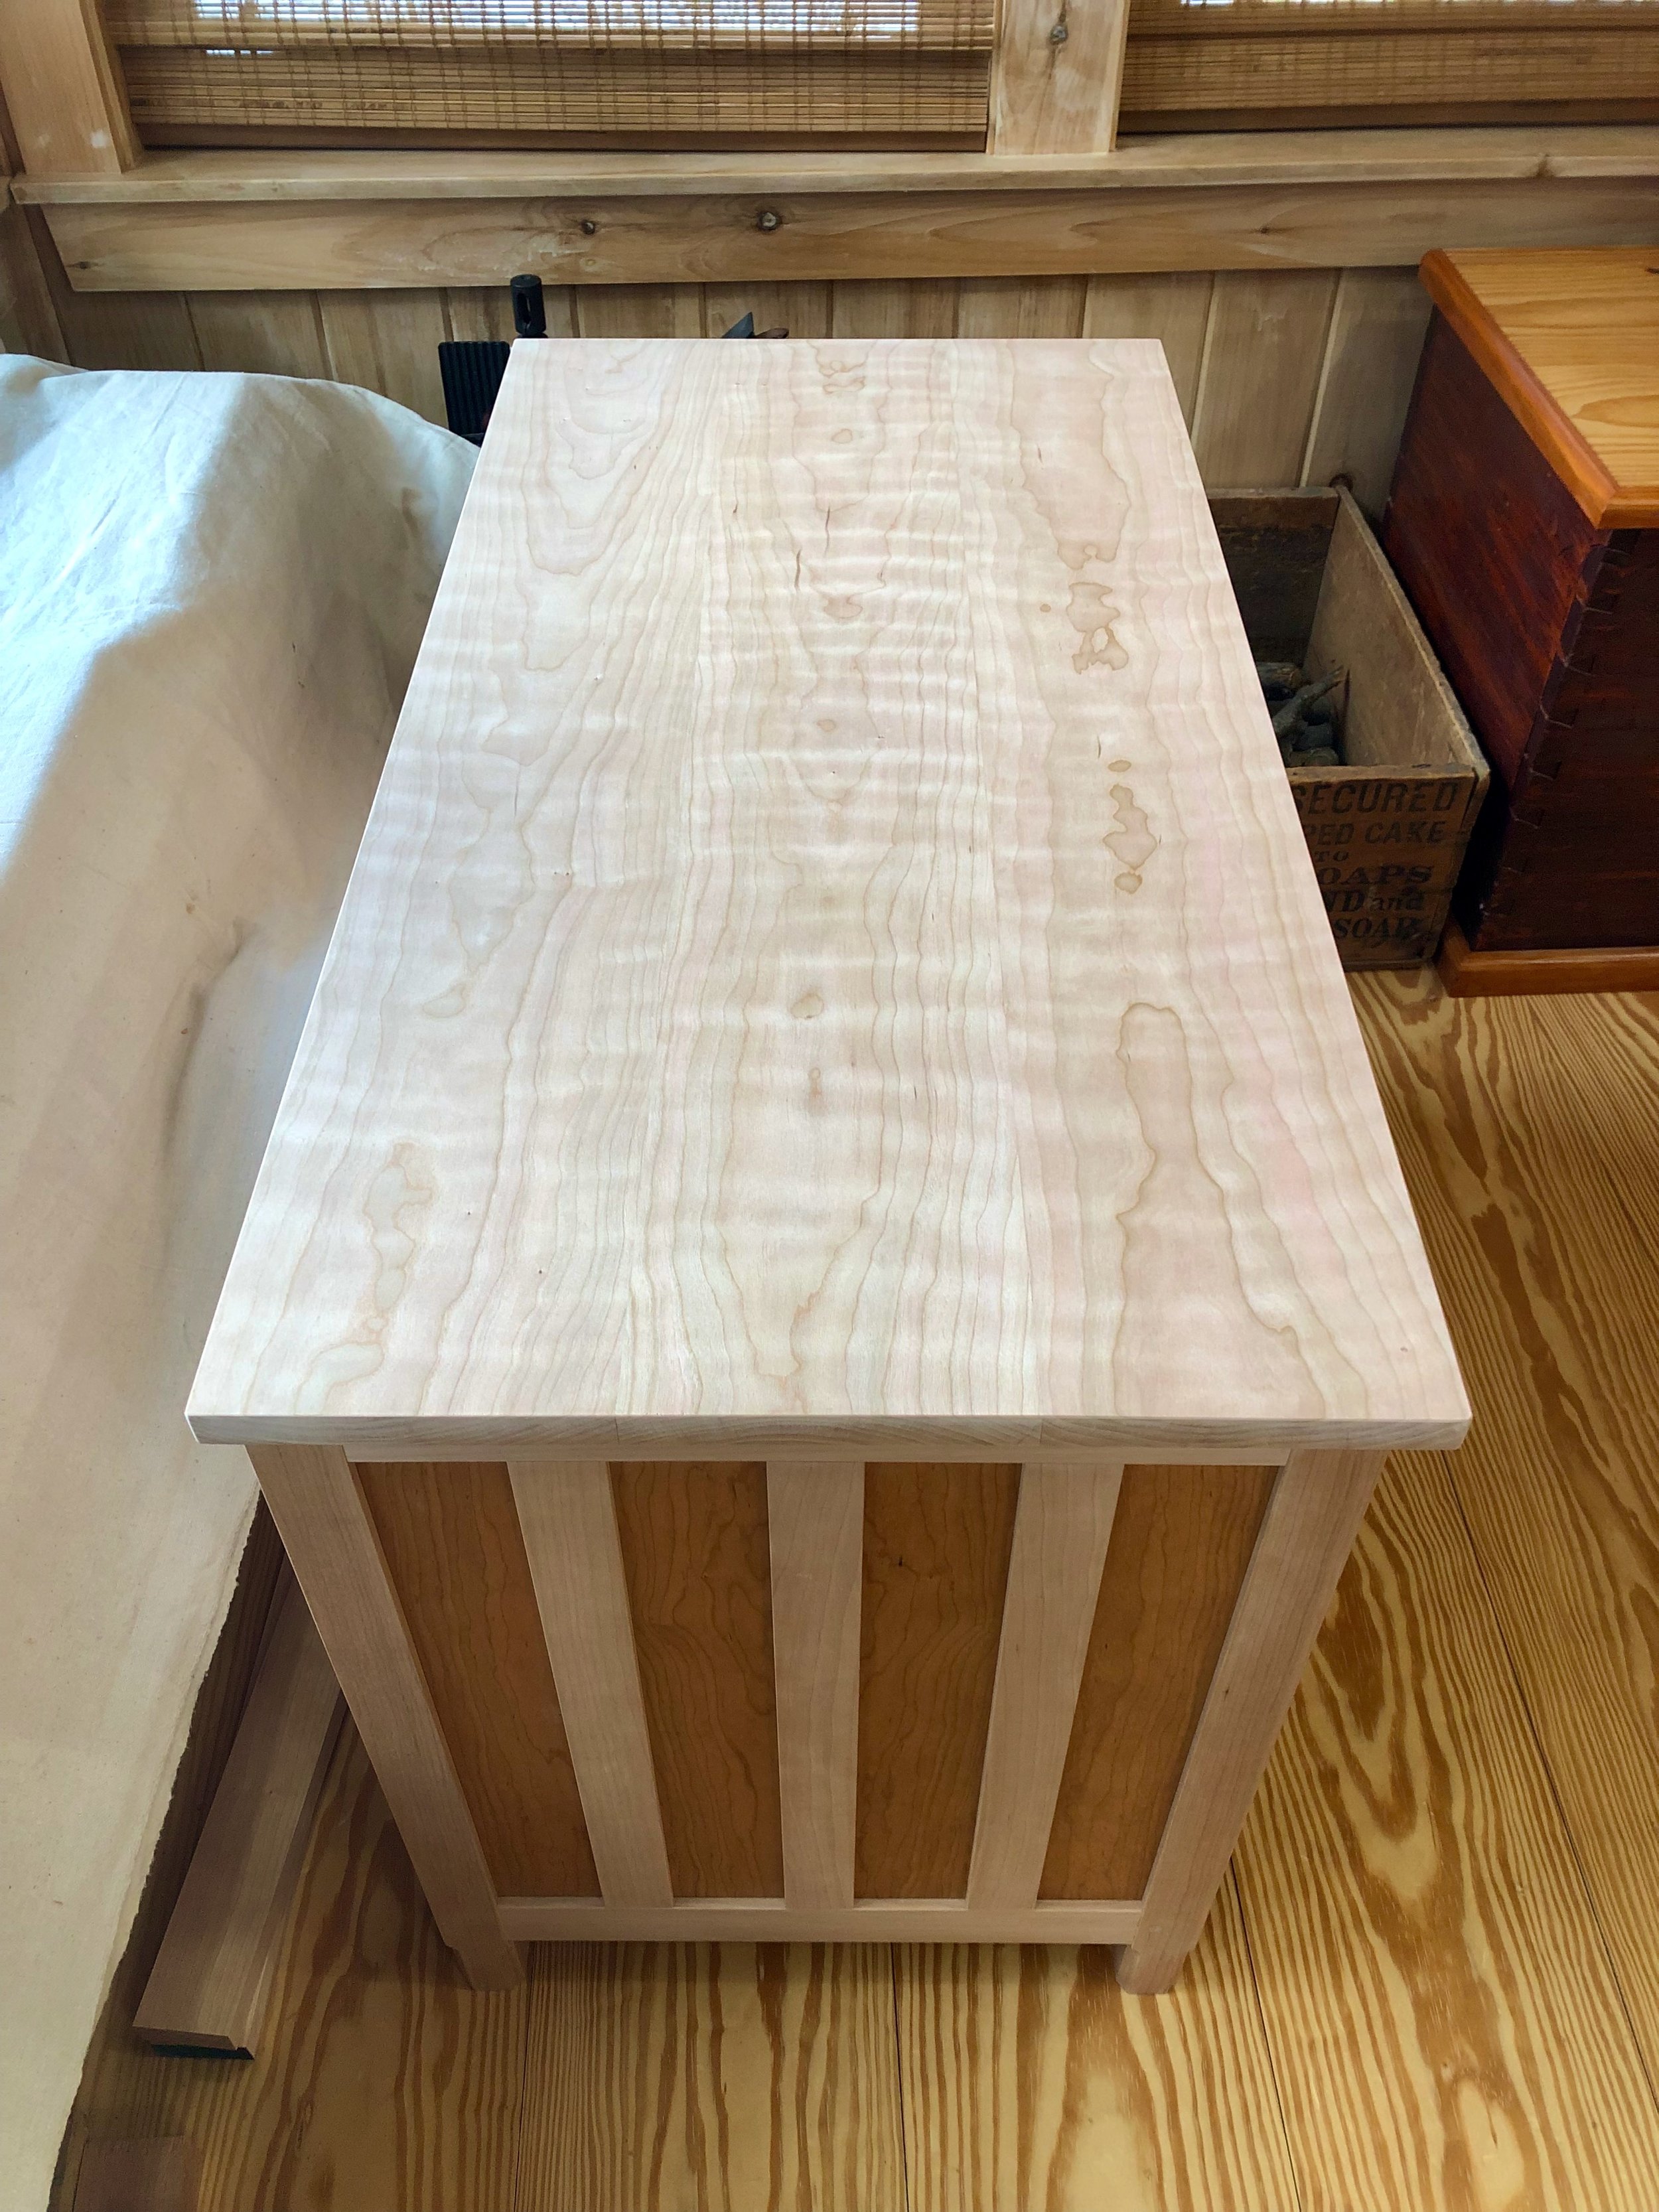
Unfinished top
Shelf unit
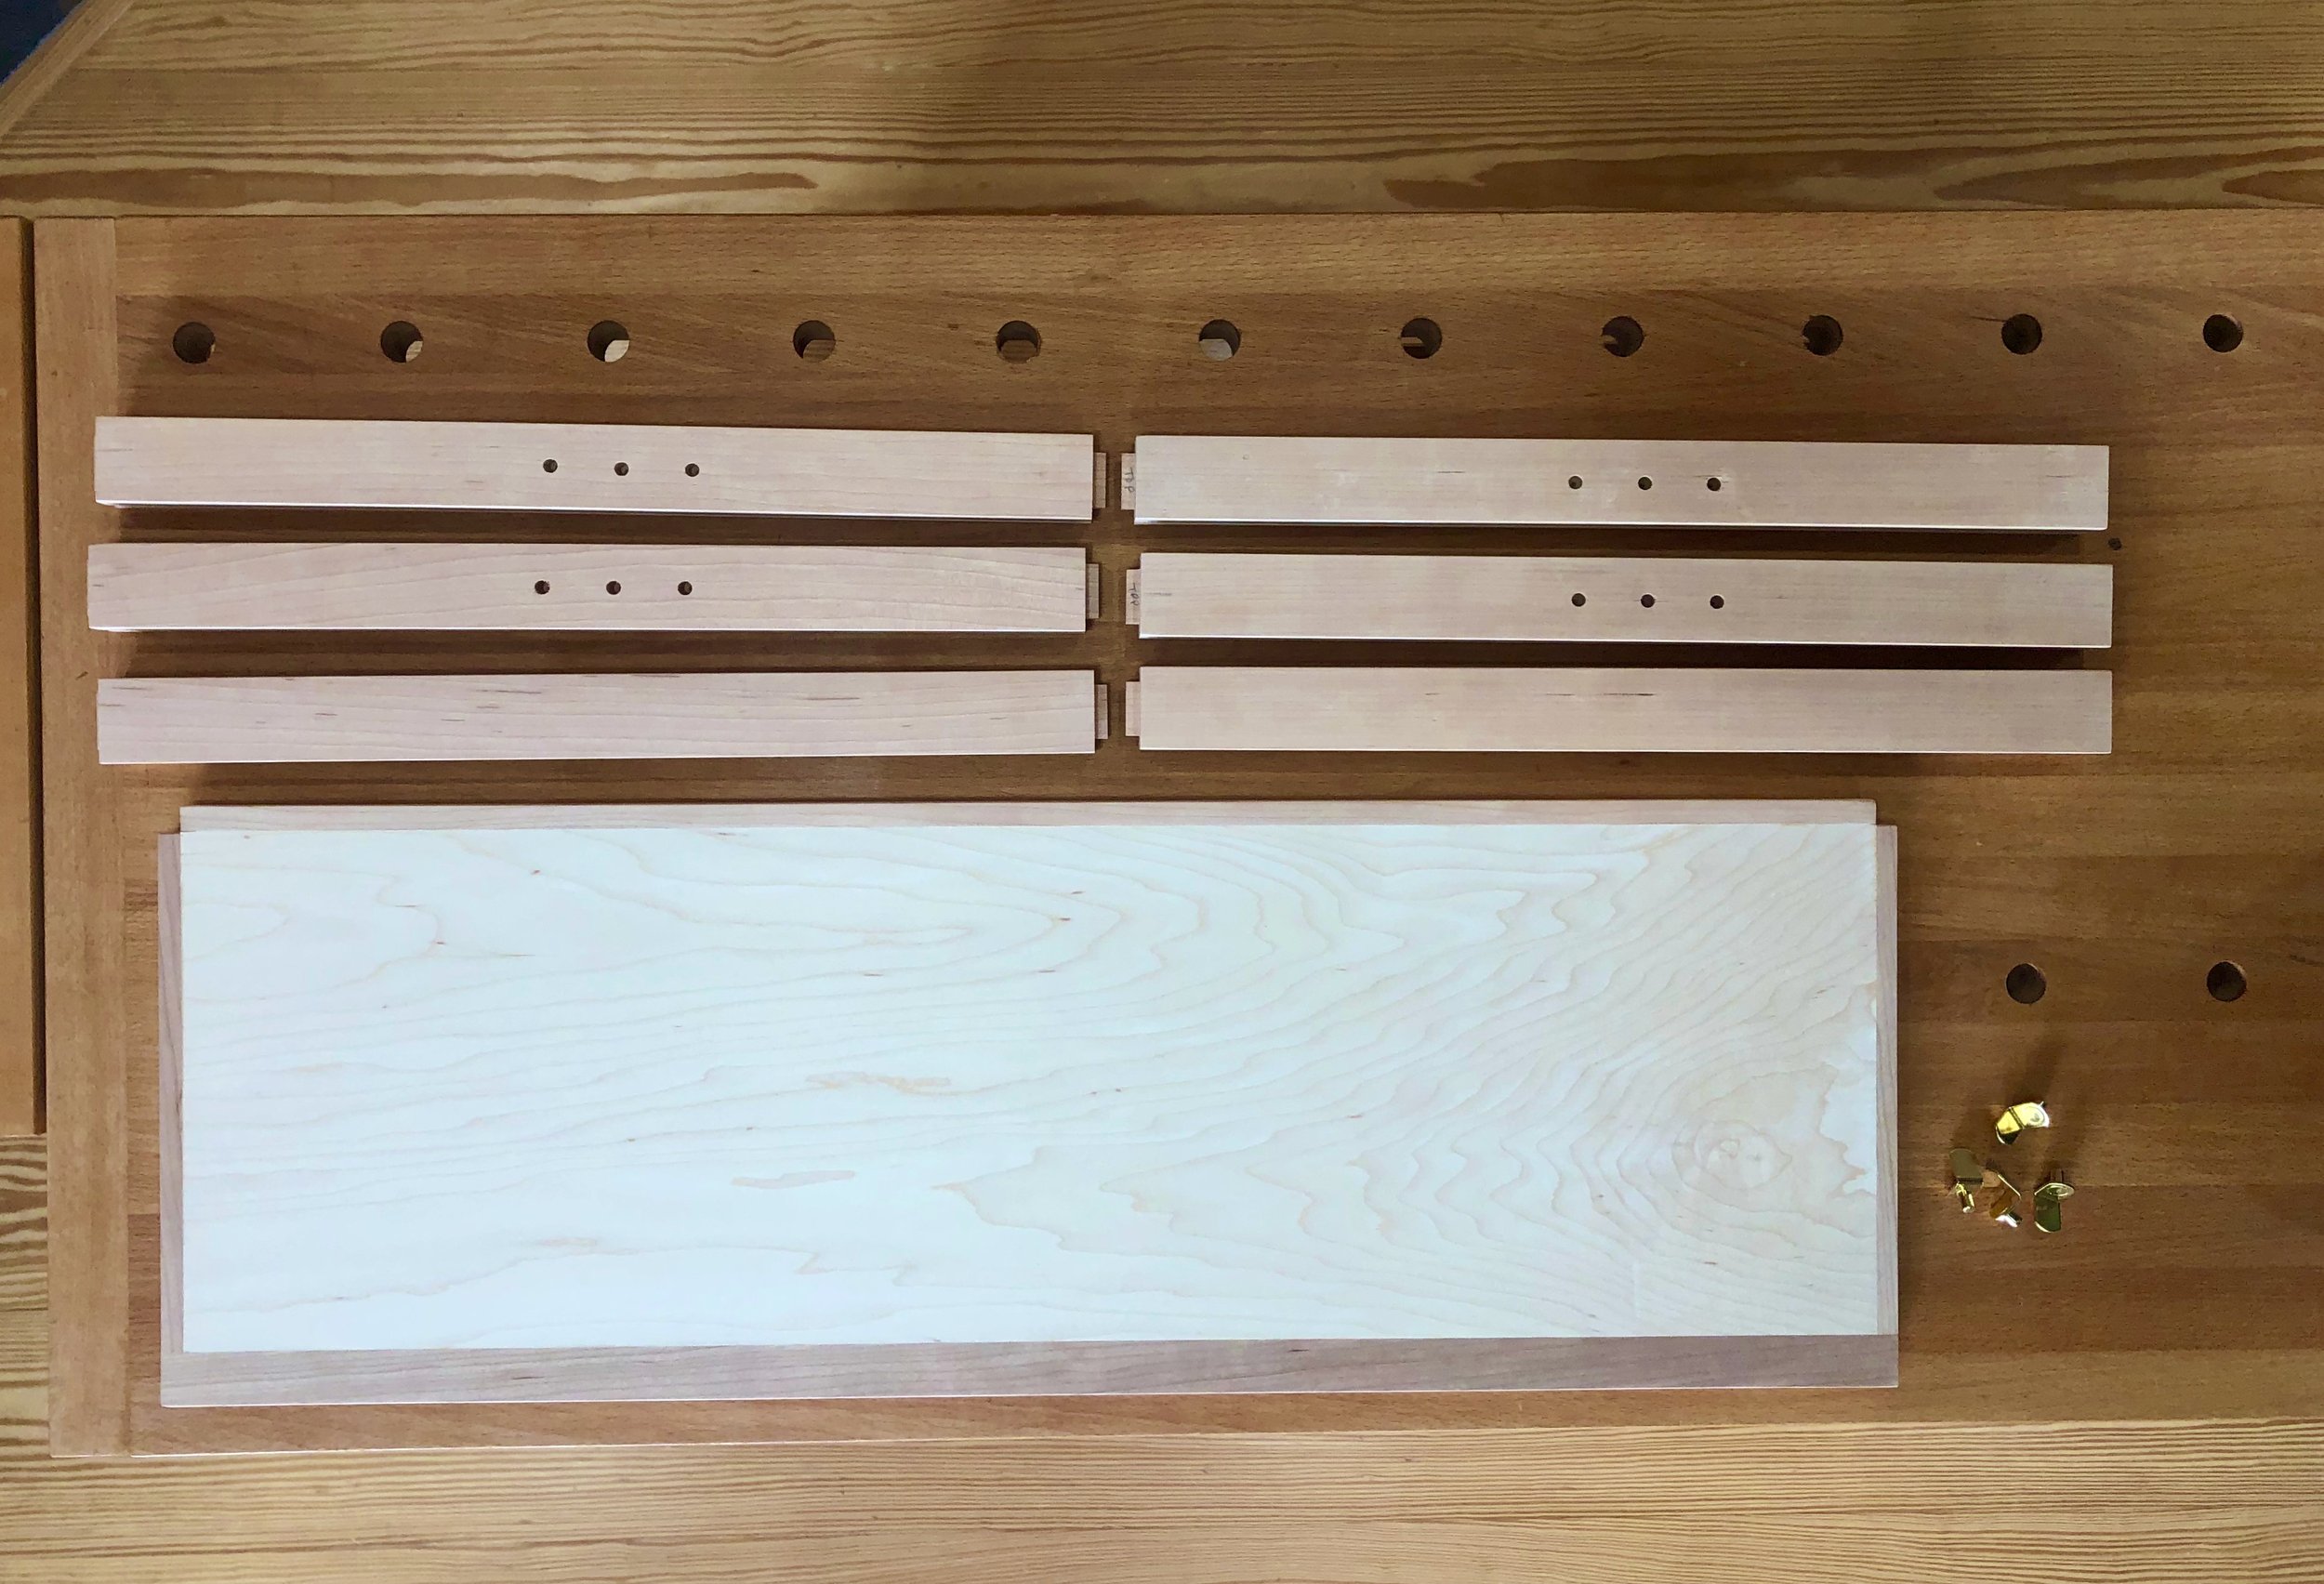
Many aspects of the upper shelf unit construction were identical to the cabinet work. Performing all of the dimensioning and joint forming steps took about 3 weeks, and provided a collection of 21 parts, including the massive back panels.
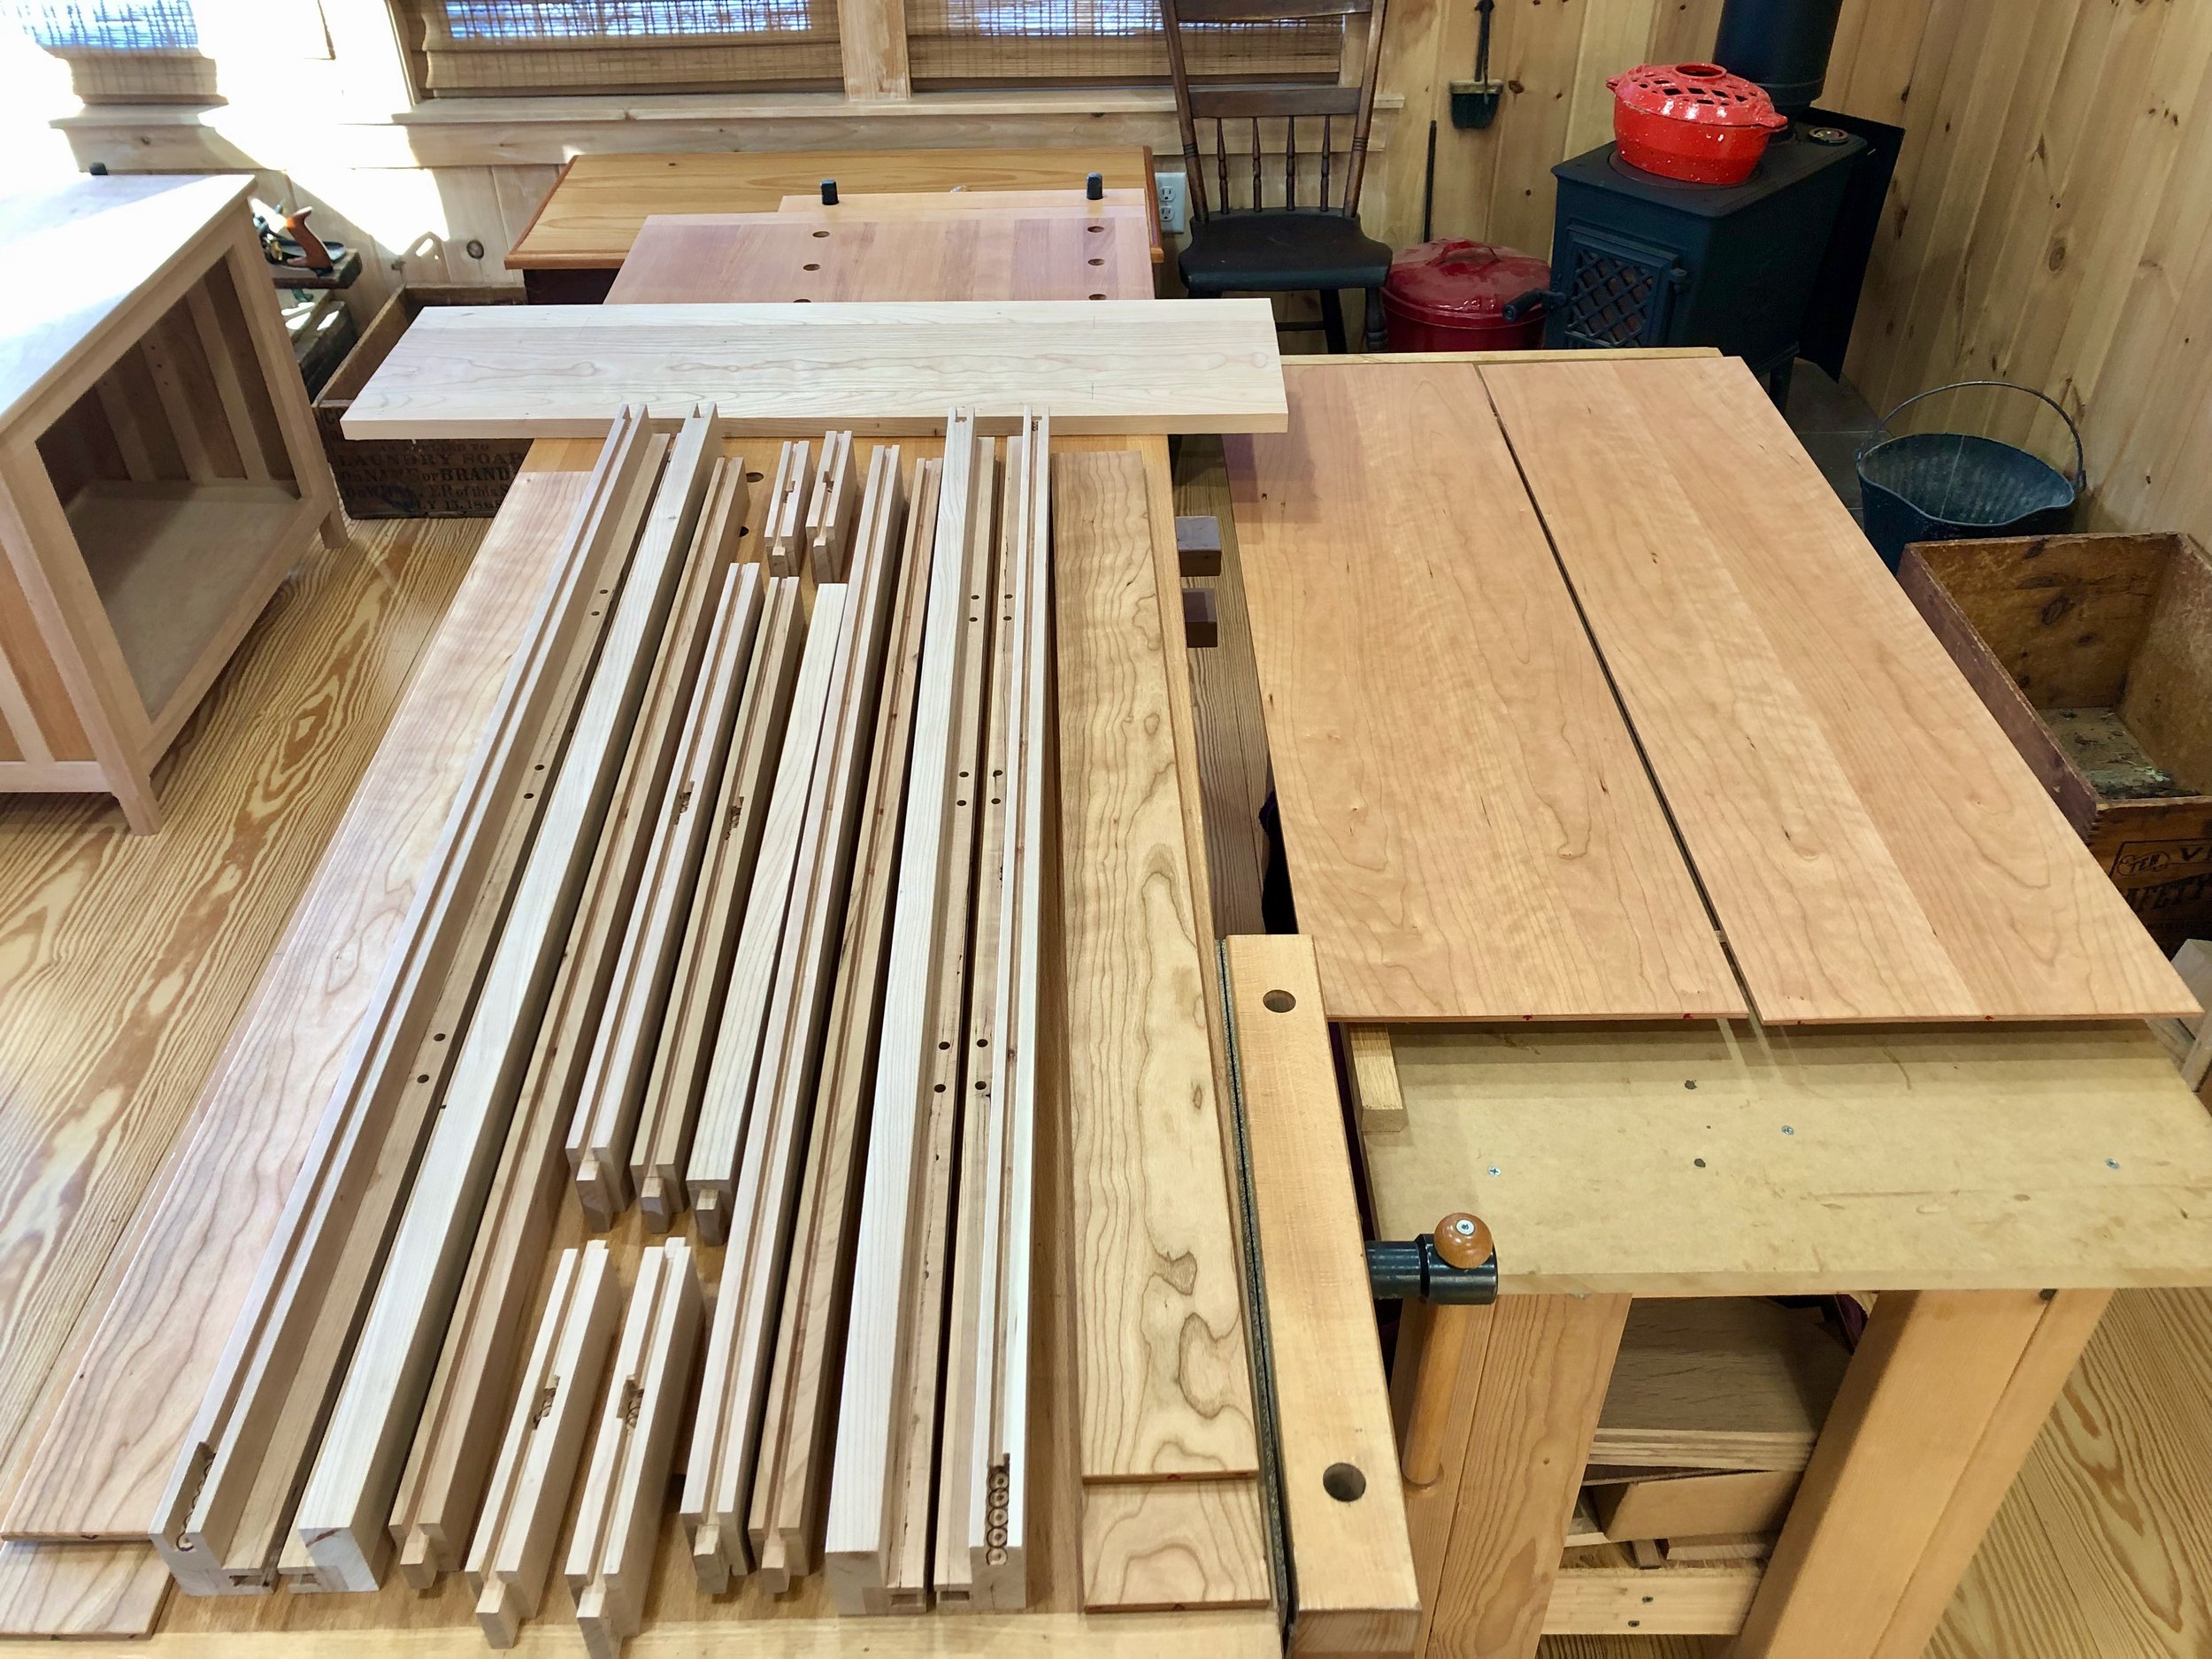
Shelf unit parts
Assembly of the shelf unit proceeded stepwise in a sequence similar to the cabinet glue-up. I first put the two side “sub-assemblies” together as it is easier to square these up while they are lying prone on the workbench. Once cured they could be placed atop the cabinet for a first glimpse of the final form.
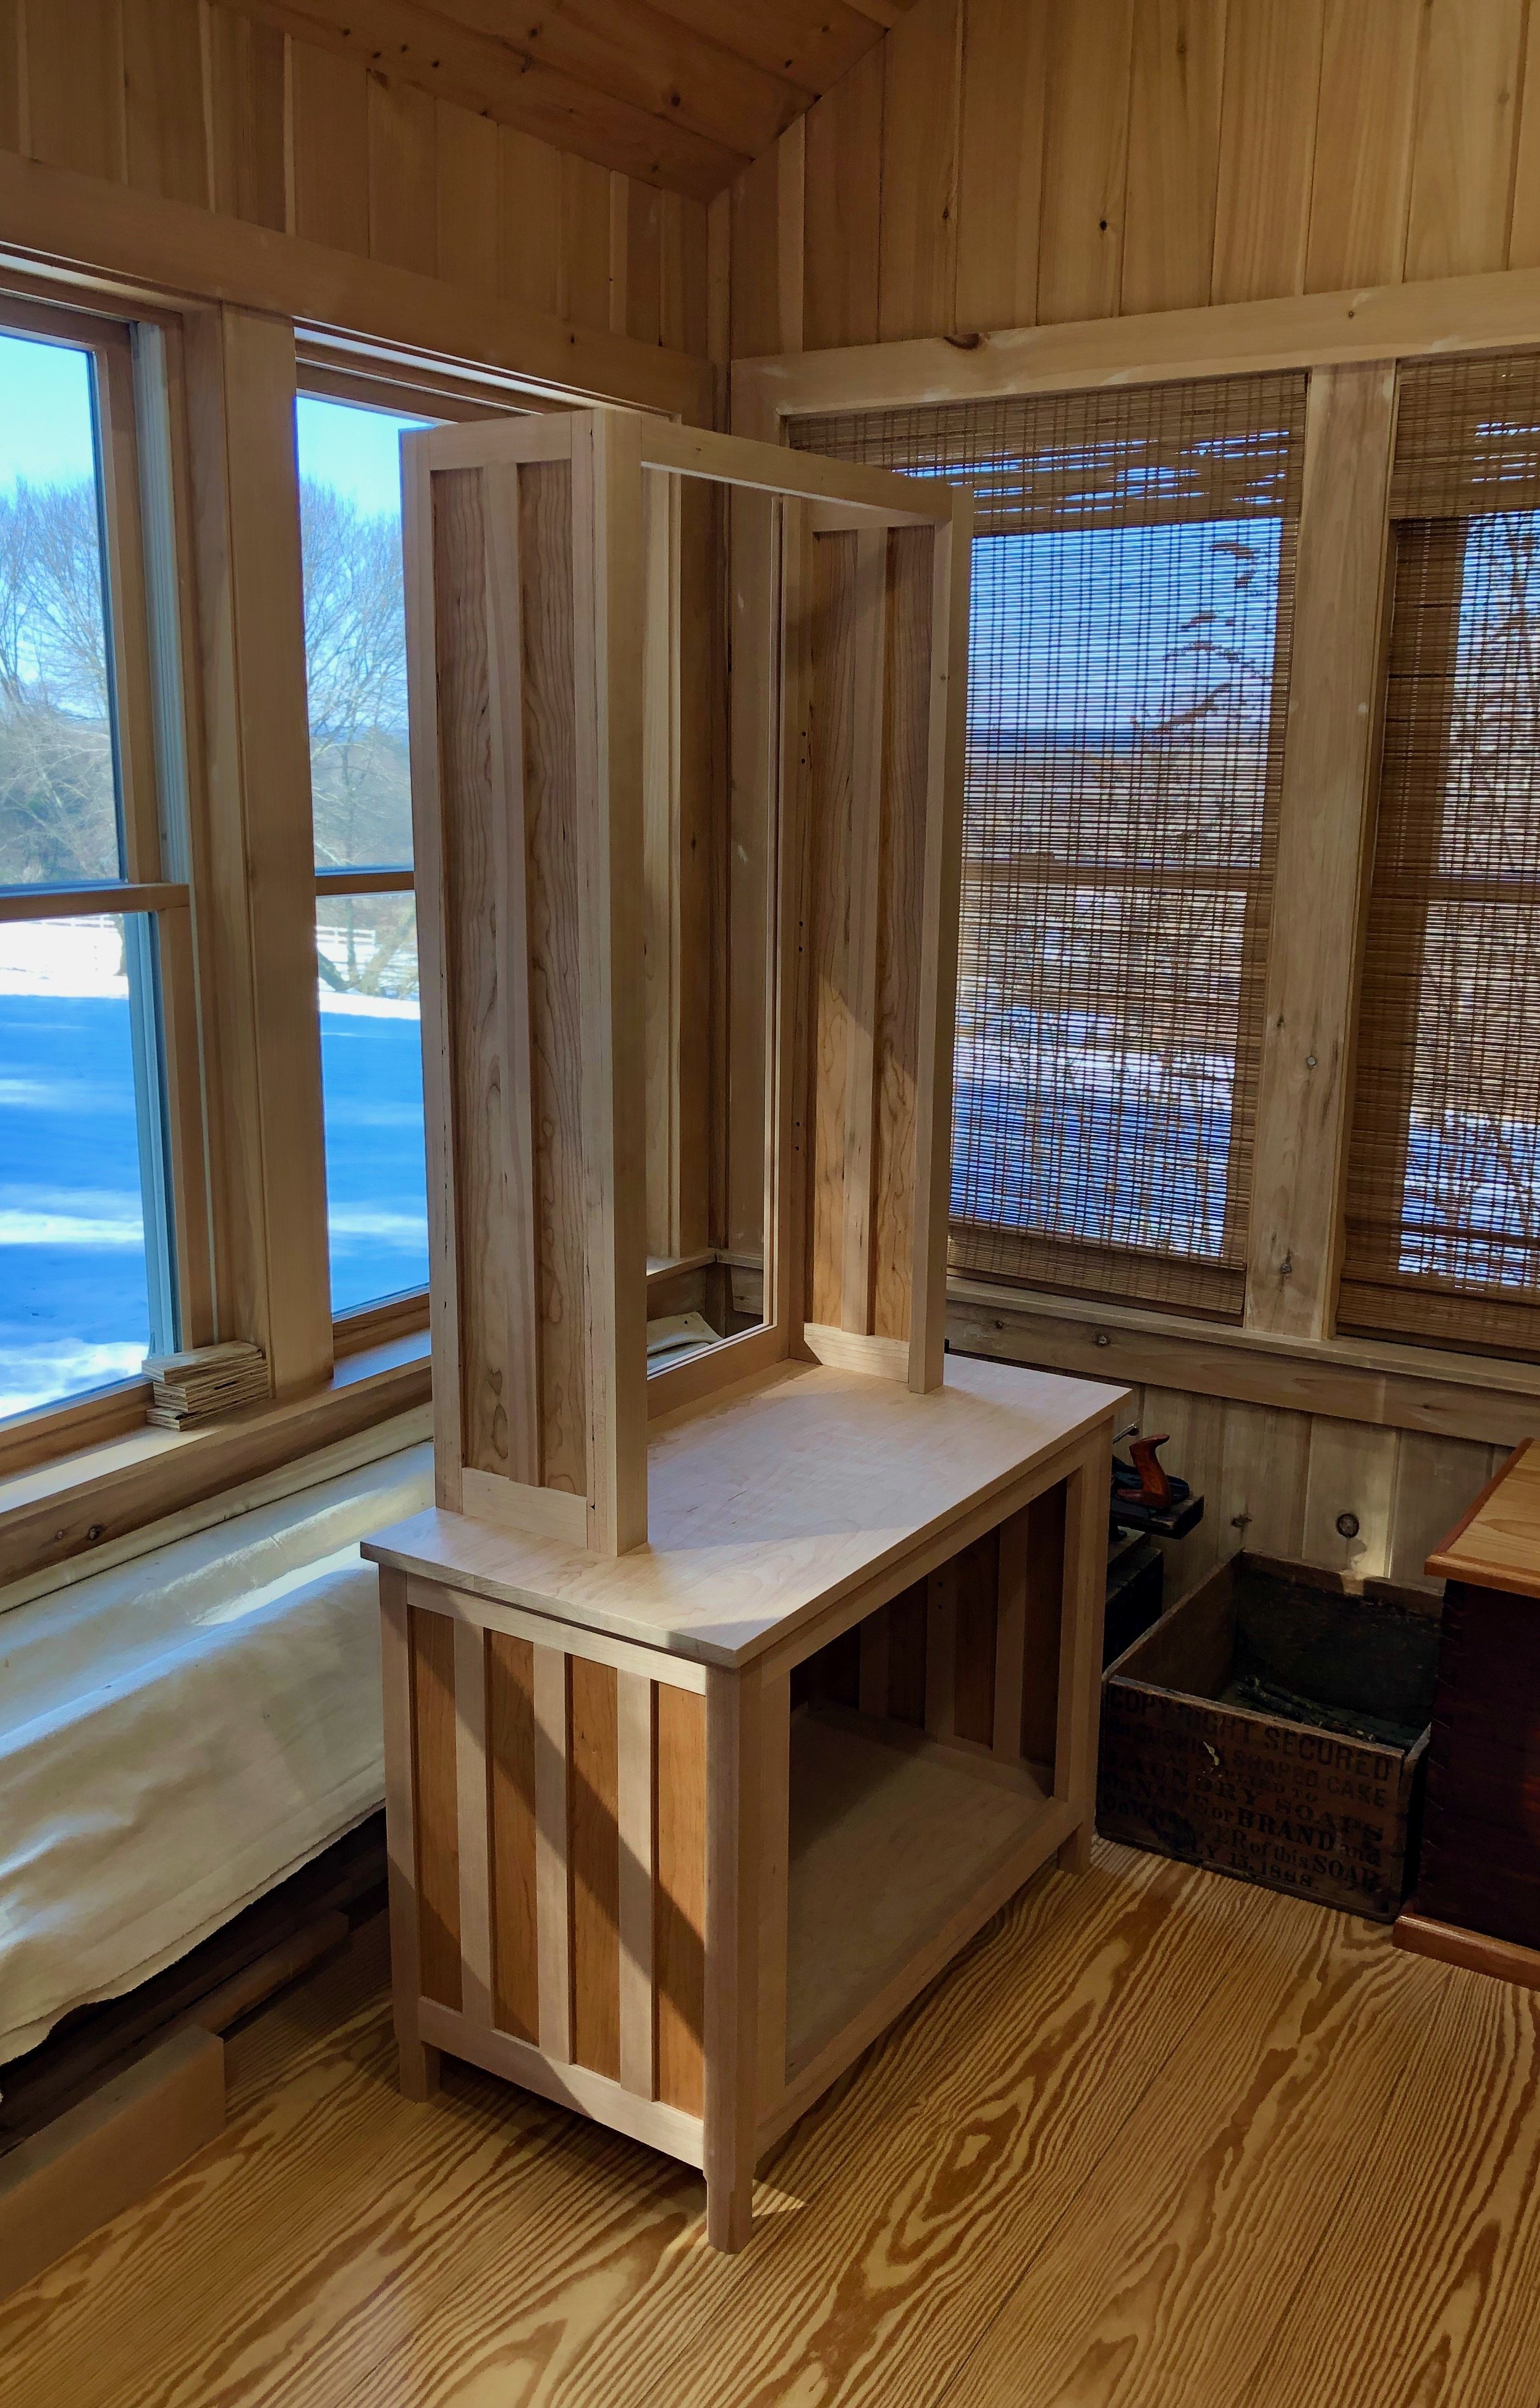
Side sub-assemblies glued-up and dry-fit together on top of the cabinet
Before joining the sides with the back section I added plates to their bottoms for eventual attachment to the cabinet top via bolts. I also detoured to make the three shelf boards at this stage in order to simplify the test-fitting exercise. Since I needed to join narrow boards together to make the shelves, I decided to use 3 boards/ea., and stagger their placement to fit within the corrugated interior of the framed panel unit. These were milled from 4/4 plain sawn stock. Prior to assembly, the center board was cut to exact length and then glued to two oversized outer boards. The new shelf constructs were milled to 5/8 in. depth at the thickness planer, trimmed to their final width/length and then further notched to fit the cavity interior. They would rest on pegs with some ability to adjust for height. At the customer’s request, a plate groove was cut into each shelf using the table saw. First, a shallow line was plowed across the length and then, after resetting the fence, an angled cut at 30° was made to bevel the backside of the groove.

Shelf boards (pre-plate groove)
Finally, the back rails and panels could be glued into place. The top piece was then trimmed to its final dimensions and the edges beveled slightly. This would be attached once the finish has been applied.

Final shelf unit glue-up
Doors
The inset doors for this hutch were made by the same, framed panel construction as the cabinet sides. Quarter sawn cherry boards were prepped and then grooved on one edge to receive the panels, and an extra deep mortice was bored at positions where the rail parts join the stiles. The last step was to create haunched tenons at the end of the rails.
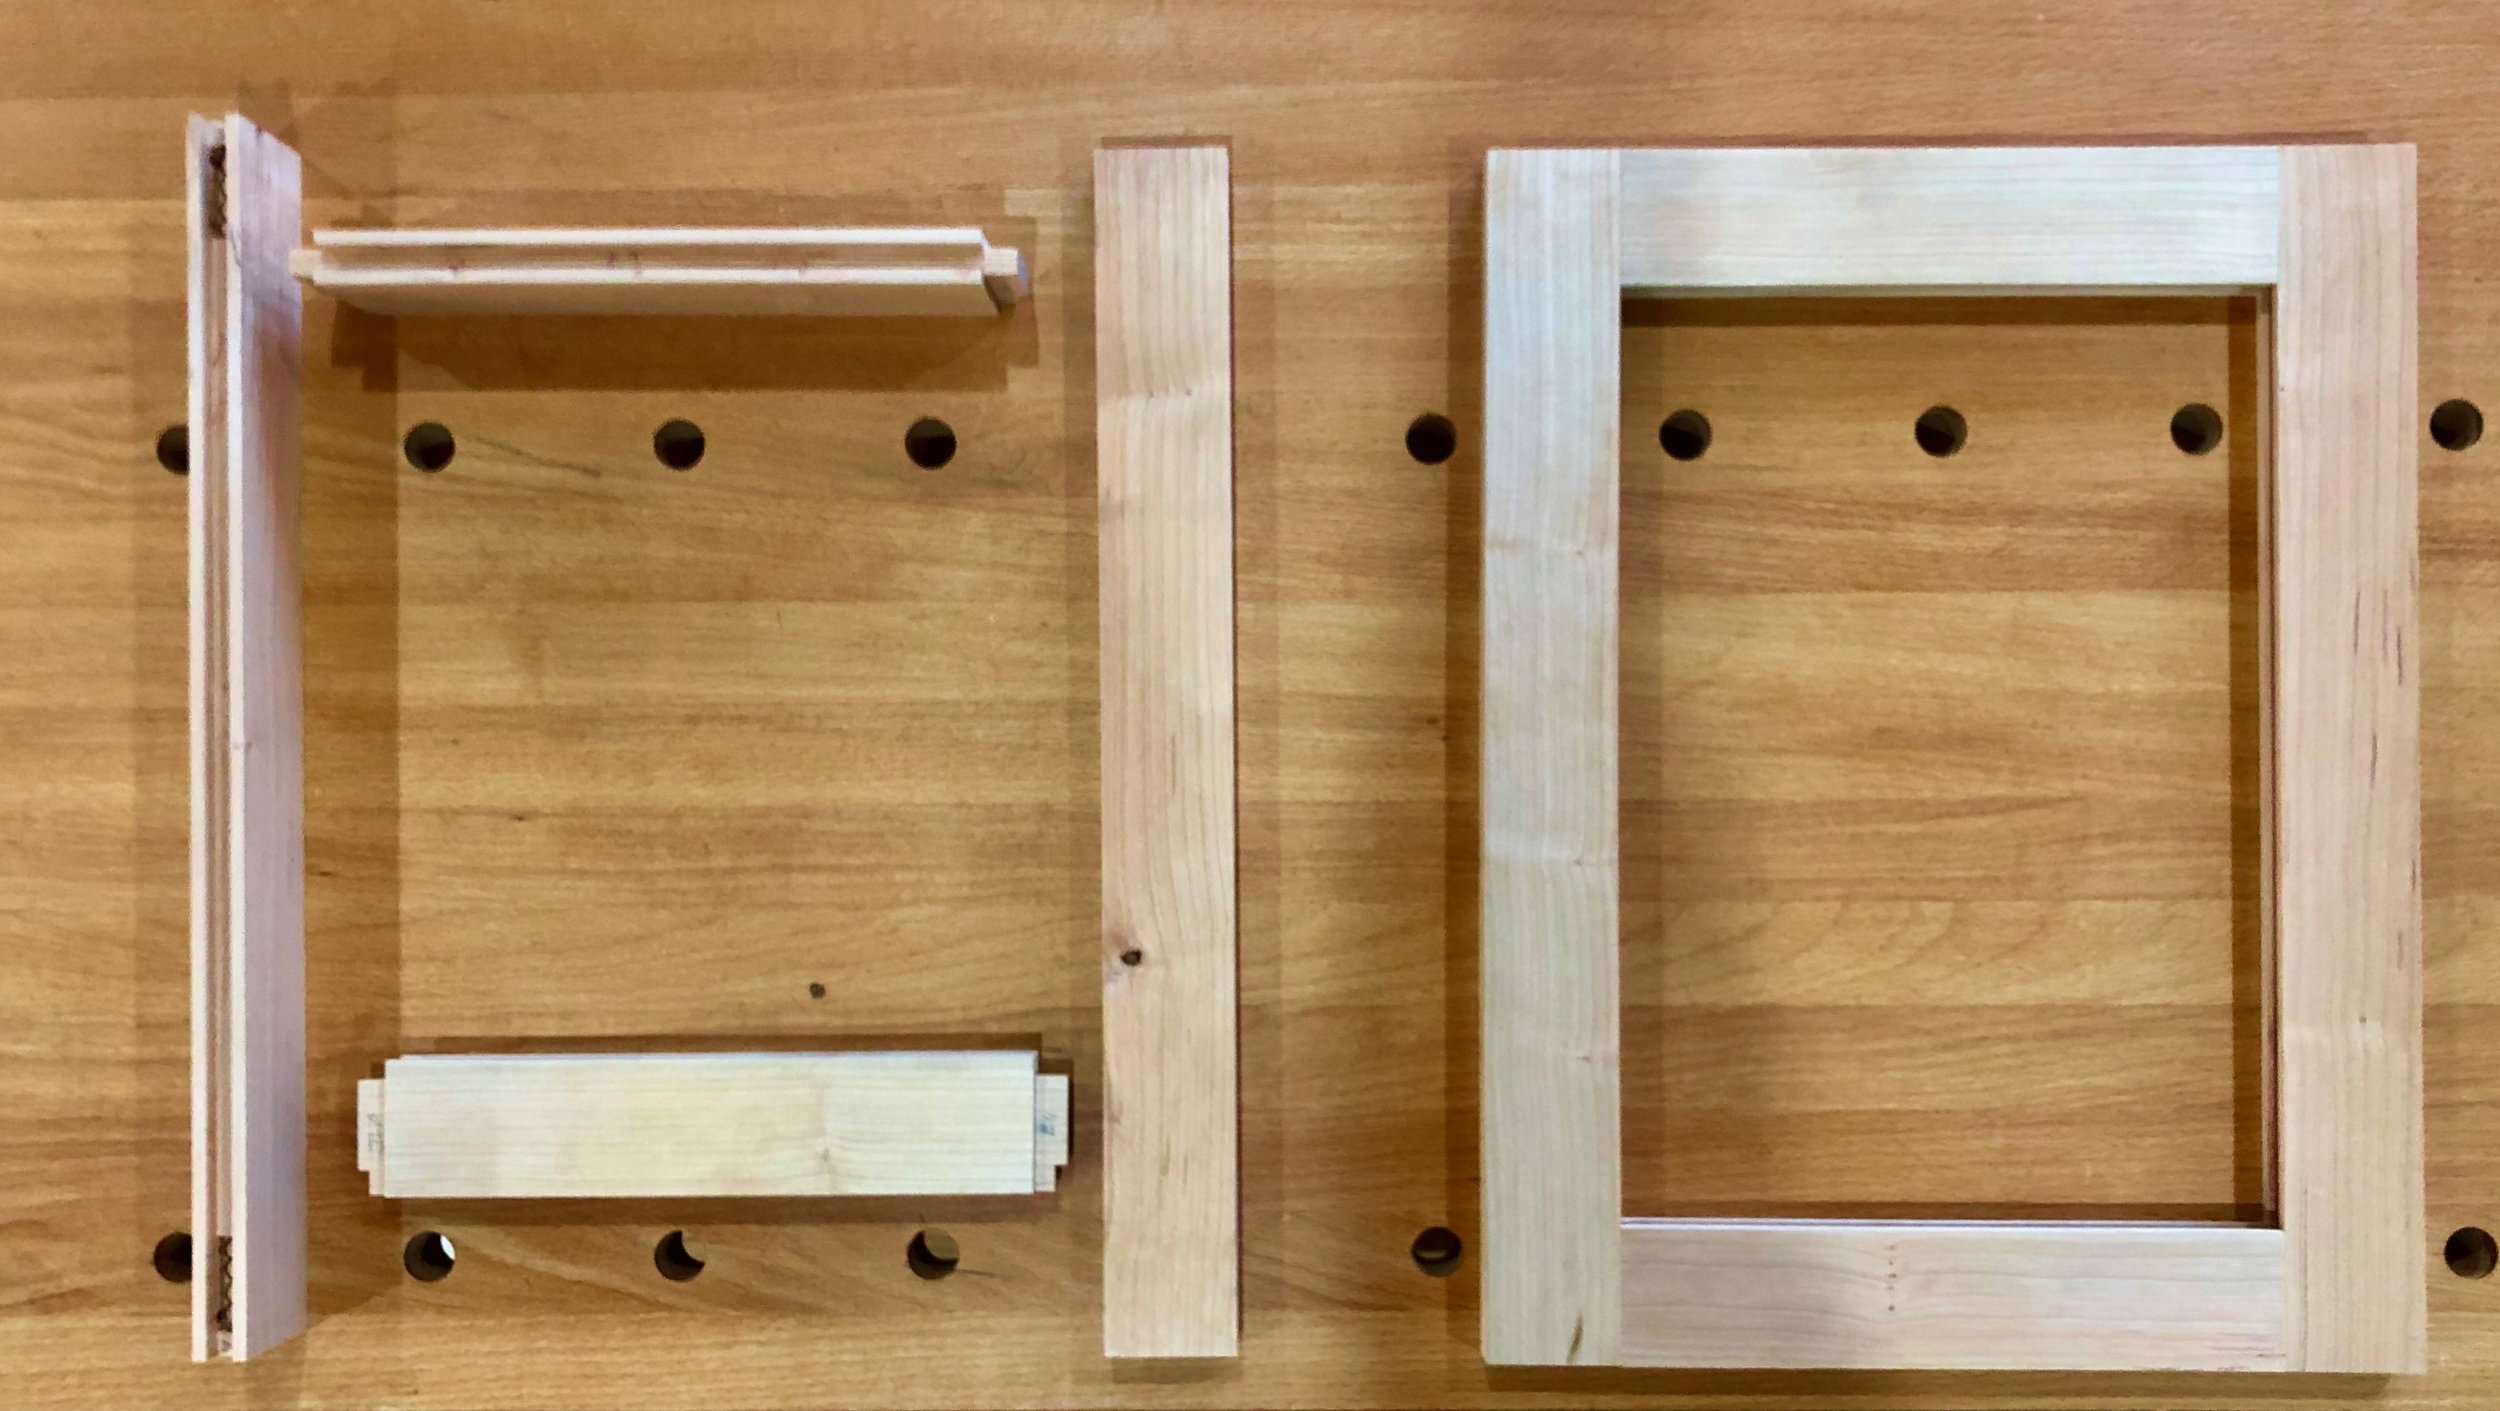
Door frames
Cherry panels of 3/8 in. thickness were then prepared and given an application of gel poly. Finally, the doors were glued together to complete the “construction” phase of the Project.
Door glue-up
Finishing Steps
On a big project like this there’s much to be done after the parts have been put together. For starters, all of the wood needed two applications of gel polyurethane. As finishing procedures go, this one could not be easier: rub the pudding-like material into the wood surface in a circular motion, wait a few minutes, and then wipe “dry” along the grain. After a couple days, smooth the completely dried surface with a gray Scotch-Brite pad and repeat. I find this produces a soft sheen and substantial moisture protection with minimal “splotching” of the cherry wood, which oil finishes are apt to do.

Finishing scene
Next, it was time to fit and hinge the doors. The inset doors had been constructed to generously fill the cabinet opening. To achieve a final fit with uniform clearance all around, the edges would need to be repetitively hand planed & test fit. I made this iterative process easier with the purchase of a lab jack, a useful device employed often during my days in the chemistry lab. With the cabinet lying flat on its back I could raise the doors up into position and check for clearance using the scissoring action of the lab jack lift.

Experimenting on the doors
Surface mounted hinges were selected, in black, along with oversized black knobs. The 2 in. round hinges are an uncommon variety, but I was able to locate some from My Pulls on Etsy (via Indonesia) and they provided the prefect decorative touch - not Shaker, but interesting and still simple. Some round iron knobs were found to match at Lee Valley Tools.

Door hardware
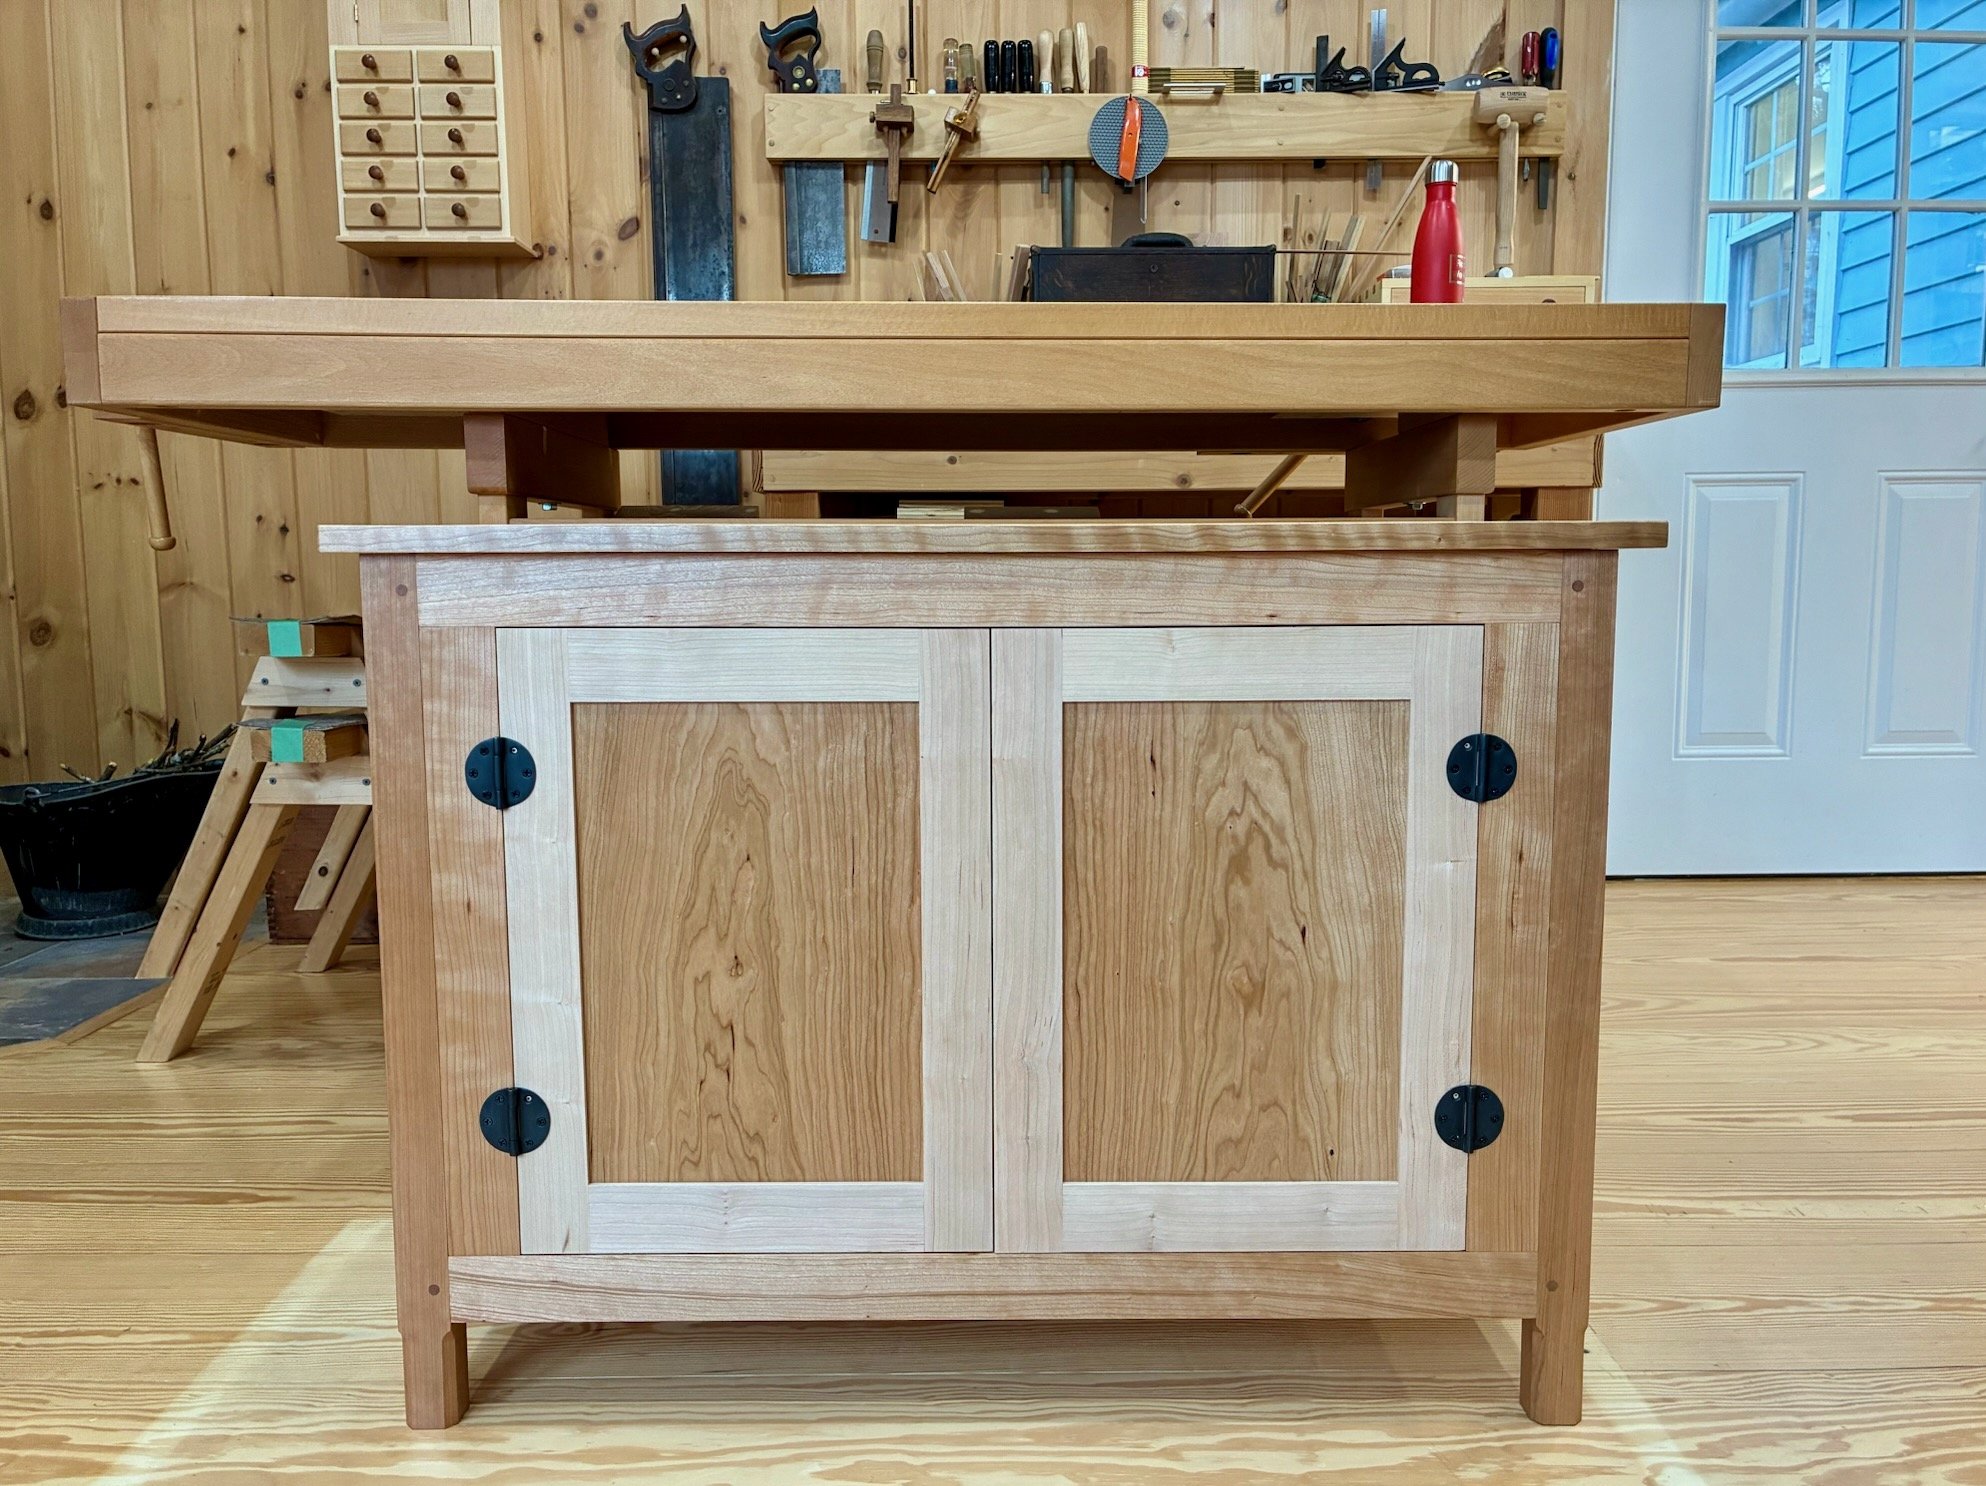
Hinged doors
Once the hinges and knobs were mounted I installed magnetic catches (top and bottom) to serve double duty as both latch and door stop. The hardware was then removed and the doors given a final sanding before finishing with the polyurethane. I also took the opportunity at this stage to freshen the entire hutch with an application of Howard’s Feed-n-Wax polish. Next, the cabinet top was secured to the frame using figure eight desktop fasteners, and the same procedure then used to mount the shelf top. With the two units complete it was time to mate them together. For ease of transport, this would to be a reversible attachment, and the decision was made to use brass bolts secured with wing nuts to do the job. After marking their positions (and taking a deep breath) I drilled 4 holes into that beautiful cabinet top. Everything went well. The brass bolts do their job but look at bit out of place, and so as a final touch I made a couple of thin cherry plates to conceal their presence.
At long last, the Project is complete. When spending this much time on a build it helps to care about the wood as well as the ultimate owners. Both instill a desire to do your best.

Cherry hutch

… making a home in the hall