The Bookshelf Bench

“There is more in the influence of inanimate things than we suspect … upon the development of character”. - Gustav Stickley (1909)
I’ve been interested in Craftsman furniture lately; building pieces and also understanding the story behind this early 20th century movement, more generally known as Arts & Crafts. While there were others involved, Gustav Stickley, a first generation American son of German immigrants, is my hero here. He invented the “Craftsman” style and did more than just design furniture. He realized ideals. Stickley had a vision that, through honest and forthright architecture, interior design and furnishings, an environment could be created for the nurturing of similarly fashioned citizens. In practice, his stated aim was to “make furniture which would be simple, durable, comfortable and fitted for the place it was to occupy and the work it had to do.”* His furniture wasn’t built to impress the neighbors, it was simply intended to fit in and do work. I like that purpose and admire Gustav for branding his efforts so. It is easy to appreciate the direct beauty of his style. This furniture might appear to be timeless, but studying the couple hundred items for sale in his 1909 catalogue, issued at the height of his career and just 6 years before he would declare bankruptcy, one comes to realize the rapidity with which furniture evolves. Yes, everything evolves in response to the influences of pressure. For furniture, the selection pressure of “doing work” means “form should follow function” - no different than for any feature of living organisms (see: Galapagos finches). And “fitting in”, or not, means the threat of extinction is ever present. In the 1909 Stickley catalogue there are many pieces listed for sale that, if not actually extinct some 112 years later, are found only in furniture sanctuaries (aka antique shops). For instance, when was the last time you shopped for a settle? How about a rocking chair, library table, sheet music cabinet, magazine cabinet, smoker’s cabinet, sewing table, toilet table, shirtwaist box, telephone stand, or costumer (a hat and coat stand)? Pretty eye-opening. I can think of a few items “doing work” in homes today that had yet to be conceived in 1909, but not many: coffee table; entertainment center; futon; bean bag chair. Hmmm. It seems we’ve spent the past century innovating in the areas of indoor plumbing, walk-in closets and the World Wide Web to the detriment of furniture … pity.
*Stickley, G. Catalogue of Craftsman Furniture, 1909, p.3.
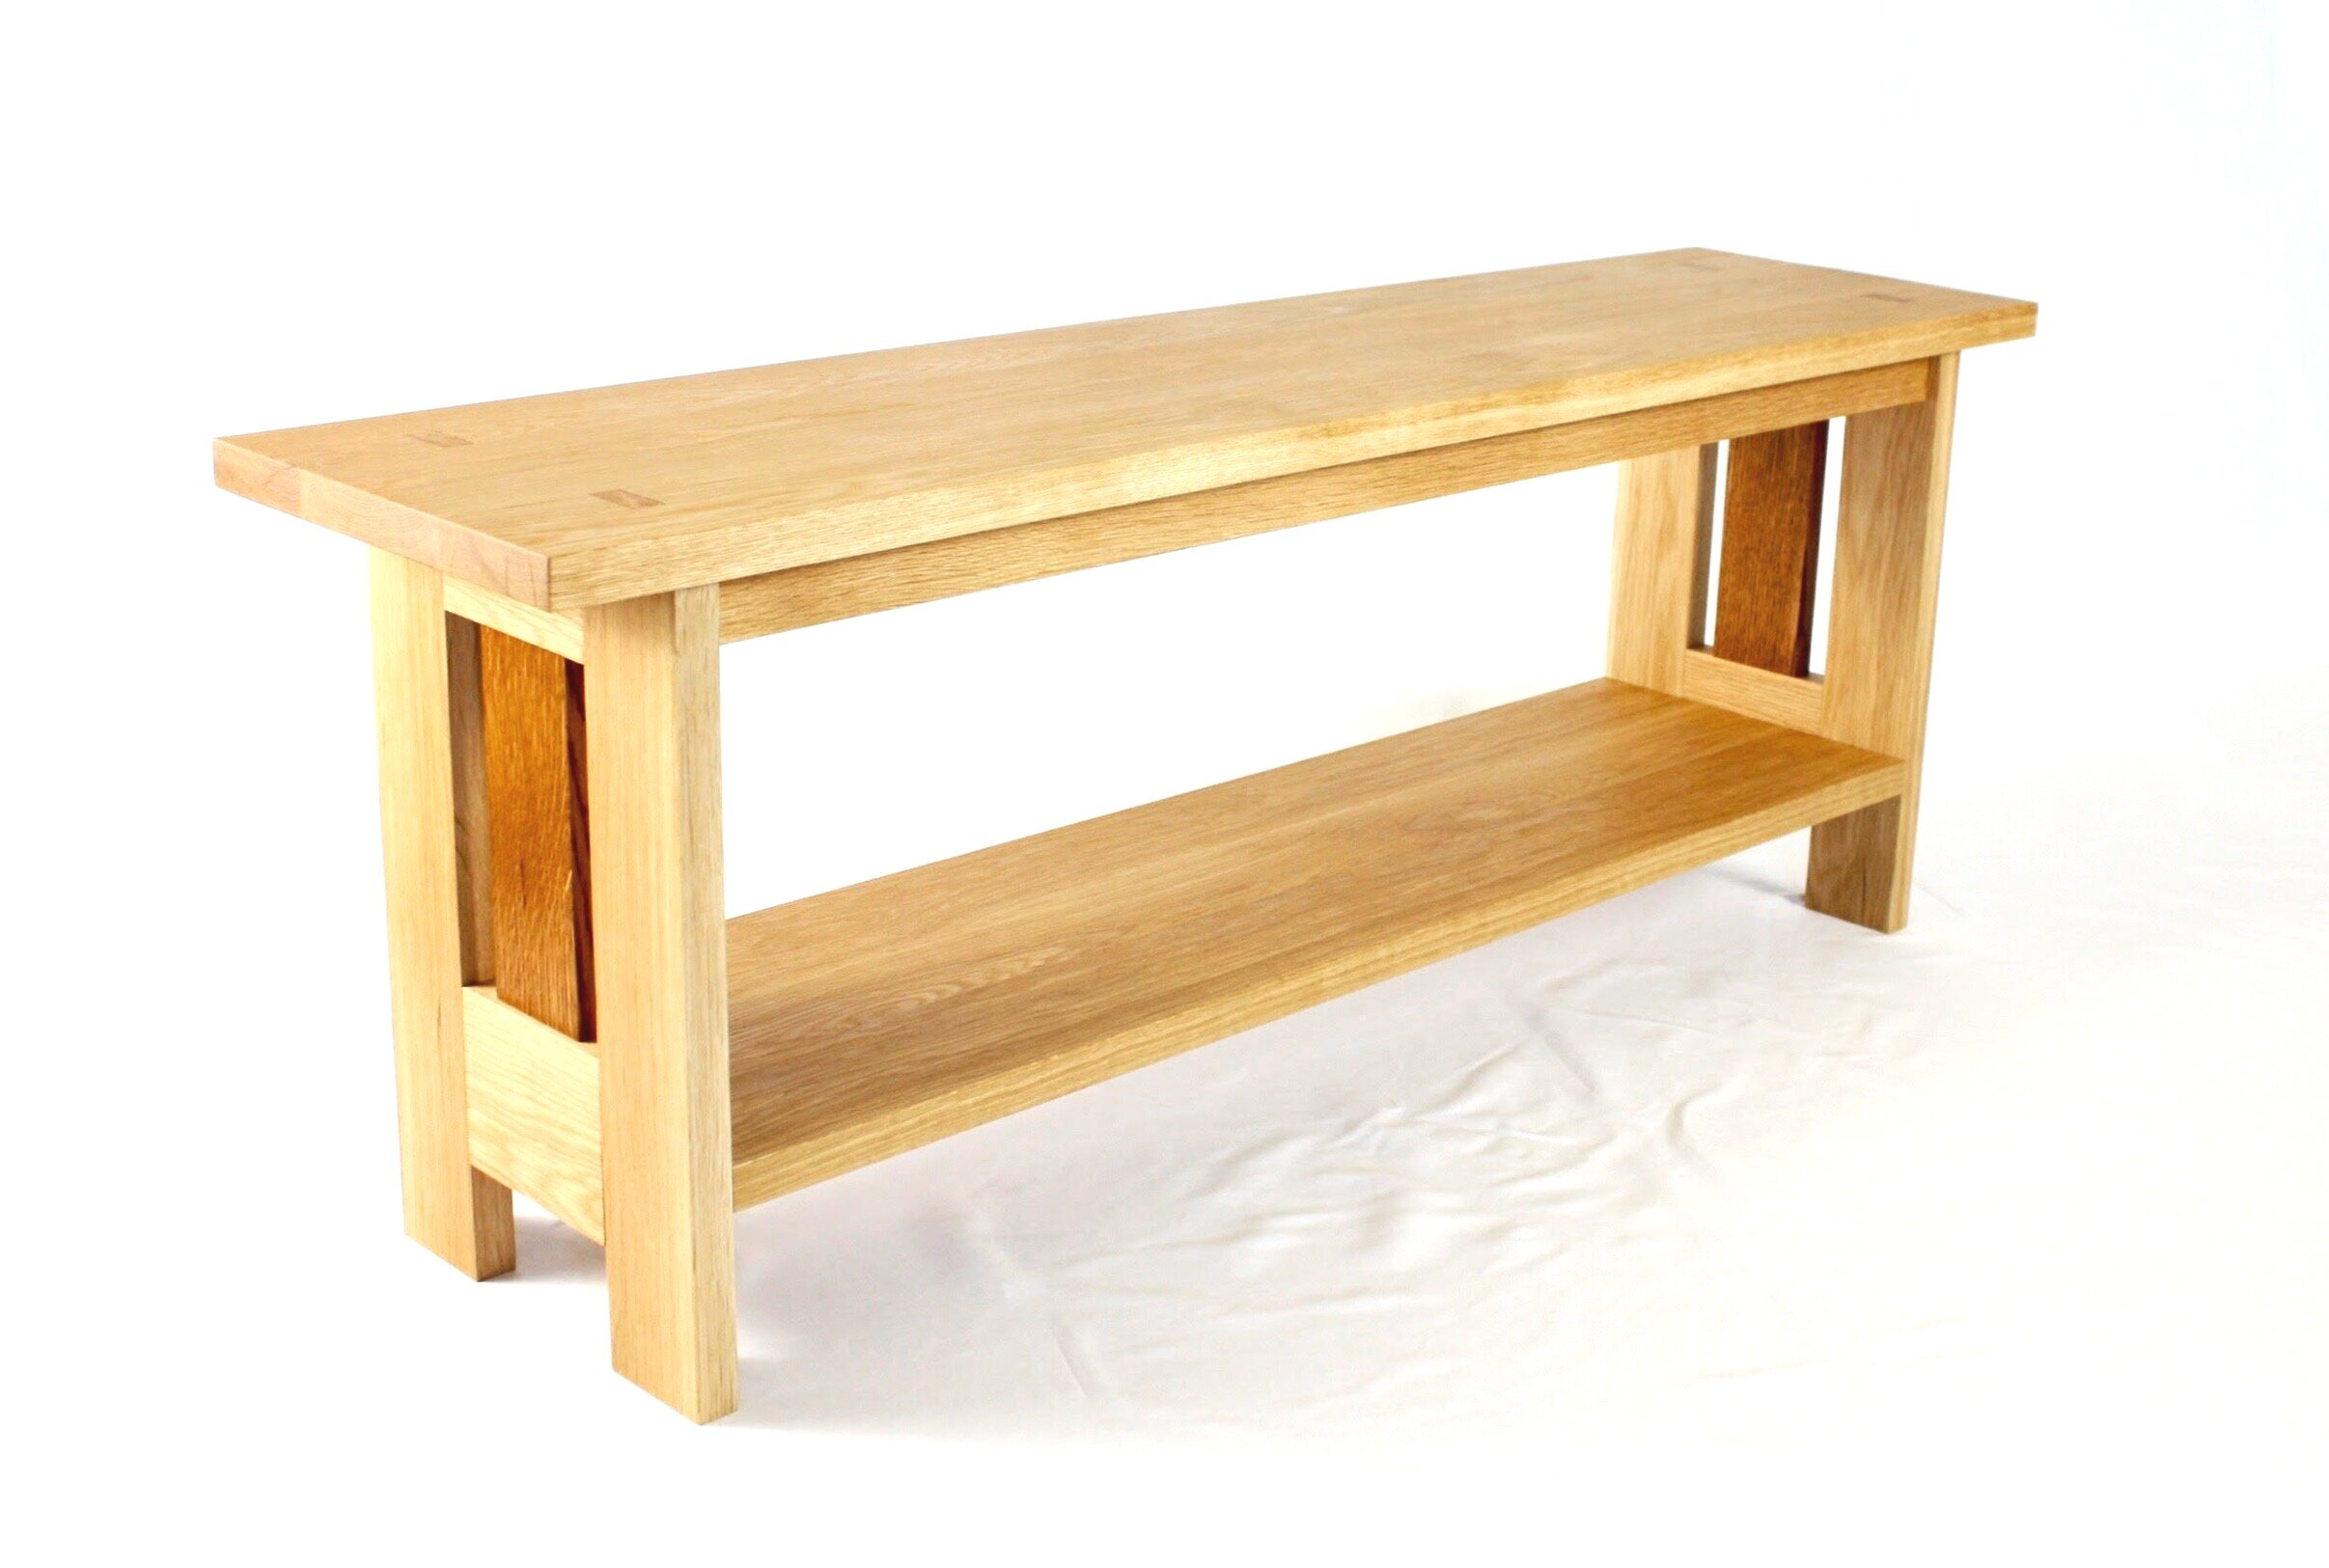
But that’s enough about furniture philosophy. Let’s talk about the latest Project: a bookshelf that can also be used as a bench. This was a request from my older son, Ben, and his wife Allison. They’ve just moved to a new apartment and could use a few additional furniture pieces. A book shelf and some extra seating was needed, and since they have A LOT of books, and comparatively little floor space, they also needed furniture that was ready to fit in and do work. Ben had the notion of a low book shelf that might be sturdy enough to also serve as a seating bench. The stout, utilitarian image conjured by this idea seemed perfectly suited to the Craftsman “simple, strong, comfortable” ethos, even though I could not find a single example in the 1909, 1912 or 1915 Stickley catalogues. Undeterred, it was decided that Craftsman evolution should climb out onto the bookshelf bench “branch” and hope for survival.
Design
Borrowing heavily from structural aspects of the tables and bookcases illustrated in the catalogs, and bounded by customer-supplied dimensions, a basic design was proposed. The plan was to use leg “boards” as opposed to “poles”. This style is reminiscent of Korean table design, and also matches how Craftsman bookcases are constructed. The legs pieces would hold the top with through tenons and their broad torsos could act as bookends. The shelf portion was to rest within dados cut into the leg boards and also be supported with a stretcher underneath. The 48 inch top would enjoy the additional support of “apron” rails which, although not required for the bookshelf function, should help in the bench department. And since this top would also serve as a bench seat, I would need to further stiffen or otherwise shore-up the platform - TBD. The plan was still somewhat fluid at this point and subject to change once the thing started to come together, but it was good enough to calculate the lumber required.
Materials
If it’s Craftsman, then it must be white oak. I picked up 21 bdft of 5/4 S3S material (i.e., 21 board feet of 1 1/4 in. thick boards that had been further surfaced on 3 sides, making for smooth boards of approximately 1 in. final thickness) at my favorite yard. All I needed to do was color-match the four individual boards for the sake of harmony. Simple.
Dimensioning
There are a couple critical dimensions in this piece that all relate to aspects of the leg board so it was decided to start there. Instead of using a single plank for the legs, I constructed each “board” from 5 smaller pieces. This makes for a stronger member and one less susceptible to warp. It also provides the opportunity to add some character in the form of material and shape. I planned to make the center “muntin” sections from quarter sawn white oak left over from an earlier project as a design feature. A copy of the shop plan is shown below defining the requisite mortice and tenon cuts that were performed without further description.


The legs would need further modification, but first the shelf had to be completed for reference. The shelf underlying the bench top would be 40 inches in length and 11 inches wide. Three narrower planks were thickness planed to uniform depth and then glued together to achieve this surface. The length was trimmed square at 41 inches and then 1/2 in. rabbets fashioned along each end, and a shallow 1 in. wide dado scored down the center of the underside. These would mate with the leg boards and stretcher, respectively, during glue-up. Next a dado was made in the bottom rail of each leg to accommodate the shelf, and then mortices were cut just below these to receive the stretcher. This effectively sets the book shelf height at 11 3/4 inches. The tenons at the top of the legs, marked by a prior table saw incision, were also completed at this time.
The 48 in. long and 12 in. wide table top was constructed of 3 boards, each specifically dimensioned prior to assembly. The central board would measure exactly 5 inches in width to fit between the two tenons on each leg. The corresponding “mortice” for these tenons would appear at the moment of glue up when the two 3 1/2 inch wide outer boards, previously notched on the table saw, were mated with the center plank. The picture below shows this best.

Pre-assembled table top showing nascent mortices. Biscuits are used to align and join the three boards.
The whole thing could be assembled now and hold-up just fine as a bookshelf, but I wanted to get some aprons underneath the top to support its function as a bench. There were several inter-dependent decisions to be made here regarding “height” of the apron boards, inset from the edge, mortice depth and type of seam with the bench top. Most of these are cosmetic, but the apron height needed to be substantial enough to provide strength while not unduly narrowing the opening for books. I was not able to locate engineering guidelines for this dimension so I chose 1 1/2 inches, meaning books taller than 10 1/4 inches would have to duck upon entry. Mounting the aprons required 1/2 in. deep mortices cut into the leg pieces and these were placed so that the aprons would be inset 1 inch from the edge of the top. Attempting to reduce the number of simultaneous fits during glue-up, it was decided that the top would merely ride on the aprons without any slots to “catch” them. In between the aprons, three 1 in. x 1 1/2 in. oak boards were inserted for extra rigidity under load. I could have cut additional dados into the apron sides to secure these but felt that they could be held in place by pocket screws just as well and without suffering any wood removal along the slender beams. Feels stiff enough.

Dry fit (top removed) showing three oak board inserts pocket-screwed to the aprons.
Assembly & Finish
Getting close to glue-up, but I needed to first clean-up the surfaces and remove the mill marks, smooth out the glued seams on the shelf and soften the sharply angled edges. This was done with a combination of hand planes, card scraper and sandpaper. It took a good half-day to complete the operation (and the top is still undone) but once in the proper mood I find it a satisfying activity to bring out the best in these wooden parts that up to this point had been handled rather harshly.
I also played around with finishes for the two muntin pieces at the center of the legs. Once glued together, Stickley would have subjected the entire furniture piece to the fumes of ammonia for a day or two, allowing the caustic gas to chemically react with the tannin components of white oak. This process uniformly darkens the color of wood and it was his treatment of choice. He used a few other finishing schemes, but the beautiful, deep brown color we associate with Craftsman/mission-style furniture is the result of ammonia fuming followed by a rub down with furniture wax. I was happy leaving the oak bookshelf bench to patinate naturally over time, but thought I might try to duplicate the rich brown color on the two muntins as an homage to Gustav. I flirted with fuming and will certainly use this procedure someday, once I create a chamber to safely do so. Instead I chose the dye/seal/stain/varnish process, best described by Jeff Jewitt, that allows us counterfeiters to spend three-times the effort reproducing the look of fumed oak. It works particularly well on quarter sawn wood grain and I had played around extensively with this during earlier picture frame and clock Projects. Here’s how it goes: after treating the wood with water, allowing to dry and then sanding the raised grain, I used a “medium brown” water-based dye to color the wood; followed by a coat of oil-based sealer; treatment with an “Early American” colored wiping stain to darken the pores; and finally a satin-sheened wiping varnish to finish. I liked the look of the test piece enough that I then spent the next four days treating the real pieces. (Gotta make me that fuming contraption soon!)
With all of the pieces properly prepared it was time for glue-up. This involved assembling each glue-moistened leg piece together and then fitting these constructs to an upside-down shelf and stretcher. Once clamped, the entire piece was flipped upright and the apron section carefully banged into place with a mallet. After a check that all of the matching length dimensions were indeed equivalent, seams tight and angles square, the middle top section was inserted into place, glue was applied to the biscuited edges and then the outer boards were tapped in tight. Desktop fasteners were used to firmly mount the top to the frame, the clamps repositioned during a final measurement check and the glue allowed to do the rest of the work overnight.

15 pieces all fitted, glued and clamped.
To complete the top I needed to first trim the protruding leg tenons with a flush-cut saw and then shave them even closer with my new block plane. The entire table surface was touched-up with a hand plane and the remaining mill marks erased with the familiar scraper/sandpaper duo. The ends of the three mated top boards had been left uneven and so these needed to be trimmed square with the track saw, leaving a 3 in. overhang on each side. All sharp edges were then softened and the entire piece worked lightly with 220 grit sandpaper to remove residual clamp marks. Finally, four coats of gel polyurethane varnish were applied to complete the bookshelf bench.
Got Character?