

Twin Tabourets

I know … I had to look it up, too. Tabouret is one of those French words with several meanings (and spellings) that you have to coax from context. It describes my new Project, and since I had no intention of making a: 1. low one person stool; 2. embroidery frame; or 3. drum; it had to be 4. small, usually portable stand. That’s the one! - two, actually. My little sister, Lisa, had recently made a polite request for a couple of “small, usually portable stands” to be used in her home office and, of course, I was happy to oblige. In truth, I only happened upon the high falutin “tabouret” term when searching for table design ideas, but if you grew up with the lovely Lisa Renee Goulet you would agree that her tables require le raffinement. Lisa also stipulated that the tabourets be distinct from each other. Maybe the fact that she had to grow up with identical twin brothers (me & Mike) accounts for her aversion to symmetry? Anyway, fraternal twin tabourets it would be.
Design
The winning designs were found in a book of furniture plans* compiled from The Craftsman magazine founded in 1901 by Gustav Stickley, a leader of the Arts and Crafts movement in America. I had had my eye on several of the Stickley pieces in this book (clocks, desks) and was happy to now have the occasion to take action. One article, originally from the April 1905 issue, described plans for “two tabourets almost identical in construction” - bingo! The article also mentions that these would “be a useful addition to any room for the purpose of holding a jardiniere”. (Ever notice how sterile our vernacular has become, some five generations removed from the great influx of European immigrants?) Anyway, I looked it up and “jardiniere” is another French word that describes either: 1. an ornamental pot for plants; or 2. a garnish of mixed vegetables.** So this should give Lisa plenty of options. In fact, her twin tabourets were intended to support specific objects in the office and so a bit of customization was warranted. The request for a small table to support a fountain could be made almost exactly to the “Round Tabouret” plan, whereas a second table of sufficient height to support a lamp behind an upholstered chair would require stretching the dimensions of the “Square Tabouret” plan by 7 inches. Also, the original plan called for a square top, but since this was to be positioned in a corner of the room, a triangular, three-legged design was proposed. Some quick sketches were made but these were no better than my doodles from the original article.
* G. Stickley Making Authentic Craftsman Furniture: Instructions and Plans for 62 Projects Dover, 2018.
** The comedian Steve Martin famously remarked that “Those French have a different word for everything.” Recently I’ve concluded they have words for some things which they reuse on all the rest.

Materials
Since I had been making furniture for a year under the Red Top and for three years, part-time, in my former workshop I had quite an accumulation of plank end-cuts (aka leftovers) from all of the usual hardwood species . I was also the keeper of some antique wood passed down two generations from my grandfather Otto. Surely, some combination of materials from this collection could be used to make these small items. What I was searching for was a theme to connect the two siblings. Since the legs of the two would be made in the same manner, I chose the same wood for both: redwood, obtained from some very old, 2 x 4 in. planks salvaged by Otto during the demolition of something, based on the substantial fractures sustained along their 12 foot lengths. Anyway, it looked like the legs could be excised from between the cracks and these would give each piece a nice, dark foundation. The table tops are what distinguish the pair and I needed the wood to impart personalities here. For the smaller, round top I chose a striking piece of hard maple, leftover (I hope) from an upcoming desk Project. The brown grain flowing wildly through the cream colored summer wood is a pattern only Nature could conceive. The triangular top would be made of cherry, my favorite wood to work with and one whose color should pair nicely with the redwood below. Its grain is strong but not flashy. This piece’s flair comes from performing its function on only 3 legs (show off!).
Dimensioning
You know what we say in the workshop, “no grain, no pain”. Okay, what we mean to say is that “grain is a pain”. Okay, okay, nobody’s been heard actually saying those words, but I’ll bet they’ve been muttered out of earshot. Grain, the alternating layers of spring and summer growth, is what makes wood such a special building material, imparting strength as well as beauty. When things go well during a tree’s development the grain flows straight and parallel. This is most evident in the mature lower trunk. Higher up, where branching, the search for sunlight and wind effects take their toll, the grain becomes much more interesting. Wood derived from this area is where the action is at! How much action the woodworker wants to experience is up to the decisions made at the lumberyard when they select the species and, within species, the specimen board they chose to work with. Forewarned is fair-warned.
Now, power tools with sharp blades generally laugh at all wood grain. They slice through it without much notice of the divots left behind, descriptively referred to as “tear-out”. And, with some strategy to dictate the proper direction of feed into the tool, most wood can be dimensioned on a jointer, thickness planer or router with minimal tear-out damage. However, the manual version of these machines, hand planes in all of their varied designs, cannot be mastered until one appreciates and anticipates the effect of tool orientation with respect to grain. This is easy to understand in theory, but takes experience to truly know how to execute without flaw - take it from someone who does not yet truly know.
I diverted toward thoughts on grain as the wood chosen for the round tabouret top, hard maple, represents one of the most challenging materials to dimension smoothly. Tough fibers, densely packed and weaving in all directions are what distinguish this wood. To achieve the 15 inch diameter of the top, 3 boards (all derived from the same plank) needed to be edge-glued together. Use of my handy biscuit joiner works well in these applications and, while modern wood glues are reported to fasten boards on edge with no need for further “doweling”, I prefer to use biscuits when constructing table tops or any surface intended to support a load. Prior to assembly I attempted to align the grain in these three boards to facilitate subsequent hand-planning. The intention is to have the grain running “up” and through the surface of the board ahead of the plane blade to eliminate the heartbreak gouges of “tear-out”. However, the issue with this piece of maple is that the grain undulated and was variously up, down and sideways throughout the 16 x 16 in. surface. My cautious attempts to even-out the glued seams with a #4 smoothing hand plane worked well in spots but created pits and rough patches whenever the grain took a dive. It basically made things worse. So bad that I decided the best course for correction was to get out the router plane jig and zip-off the top 1/16 in. of the surface. This worked well and produced a slightly ridged terrain (think: newly mowed lawn) that could be smoothed readily with an orbital sander - much better than its precursor (think: pot-holed asphalt). Better craftsmen could have done the job with a hand plane and I aspire to be that craftsman, one day. The glued top was left in a polygon shape as the flat, square edges would facilitate subsequent manipulations. It would be liberated as a circle in the final cut.
By comparison, the cherry wood used for the triangular top appeared courteous and well-mannered. Three boards were also required to achieve the 12 in. altitude dimension. I needed every bit of depth from these 5/4 boards which had already been thickness planned and didn’t dare risk another session with the router plane jig, so once these were glued, a preliminary surfacing to even-out the joints was done with the orbital sander. At this point the triangular top was cut to the final dimensions. I used my track saw to create the two long sides and then chopped off the vertices with the miter saw to leave 2 inch “nubs” at the corners.

Cutting the sides of the triangular cherry top using a track saw.
The next step was to create mortices (rectangular holes) in the underside of these tops to receive the tenoned legs. The original plans called for “through tenons” where the leg piece would protrude all the way to the upper surface of the table. This is a stronger construction method than the use of “blind” tenons, which stop part-way into the table top, and one that I would have chosen to use if the tables parts were all made of the same wood species. However, since the table tops and legs were intentionally made from different materials, I thought it best to let each element “represent” without interference from the other. It’s a design decision with minimal impact on structural integrity.
The order of operations when making this joint is to decide on the tenon dimension, cut the mortice openings accordingly, and then fashion the tenons to fit exactly within the opening. While the legs for each table differed in thickness, I decided that a 1/2 in. square tenon that was also 1/2 in. in length would do the job for both. The position for the mortices were marked on the underside of each table and then cut using a mortiser. This handy power tool is simply a direct-drive drill press designed to hold a square, hollow chisel in which resides a coarse drill bit. It allows one to accurately cut square holes in the same manner as a drill press is used to bore round ones. As a power tool the mortiser replaces the chisel & mallet. The bottoms of the tops were morticed without incident and the interiors cleaned-out smooth with a chisel. Now on to the legs.

Morticed cherry top
As mentioned, by some mysterious trauma the antique redwood 2x4’s had suffered oblique fractures along their length and so the first step in preparing the legs was to remove the cracked sections using my miter saw. This left 5 segments of varying lengths, sufficient to produce all of the leg and cross brace pieces (stretchers) from the same stock. The segments were in turn, jointed “flat” on the 4 in. surface and thickness planned to remove the rough, discolored wood along the opposite face. This produced boards with parallel sides, which were jointed again on one of the 2 in. sides. Stock prepared in this manner can be easily turned into square leg pieces by sequential passes through the table saw using the rip fence set up one leg’s width from the blade. Rip, rotate 90 degrees, rip again.


While a 1/2 in. mortising bit was used on the tabletops, upon clean-out the dimension becomes a bit wider than that. The corresponding tenons will be cut using a dado blade stack on the table saw using my new cross-cut sled to register the piece and ensure consistency within and between legs. In the event, the dado stack was built up to a blade width of 1/2 in. and raised to a height “x” above the cross-cut sled such that (2x + 1/2) = width of leg in inches. A stop was clamped to the back of the sled at the edge of the saw blade opening and this allowed the top of each leg to be tucked against the stop block and cut in 4 sequential passes: 4x(cut, rotate 90). Of course, I made a test piece first to confirm dimensions of the final tenon for each leg type. I tried to make them just a bit thick and then sanded them to get a snug fit into the mortices. Worked well.


Next, mortices would need to be cut into the legs to receive the through tenons of the stretchers. The set-up is the same as for half-tenons only a “sacrificial” board would be placed underneath the leg to receive the mortice bit as it bore through. This saves the bench from getting cut but does not completely eliminate tear-out from the exit hole in the leg, thus it is important that the “show face” of the leg be positioned to receive the mortice bit at the start of the cut (i.e., facing up). This operation went well, applying a 1/4 inch bit incrementally for a series of cuts to achieve either a 1 1/2 or 1 3/4 in. mortice “slot”, depending on the table leg. Afterwards, the openings were smoothed using a chisel.
The stretchers were prepared from leftover redwood: jointed; resawn; thickness planned to 3/8 and 1/2 inches in depth for the small and large table, respectively; and then ripped to 2 1/2 inches in width. Again, using the dado blade and sled, the tenons were cut on one side of each stretcher to the proper 1/4 in. thickness and a length that was 1/2 in. longer than the leg width. With the tables upside down and legs akimbo (see above), the half-cut stretcher could be laid in place alongside the leg and marked for the second tenon cut. This exact marking is important and will correct for any deviations that may have occurred during the table top morticing step. The second tenons were dadoed to size and all pieces then taken to the bandsaw to create 3/8 in. shoulders.
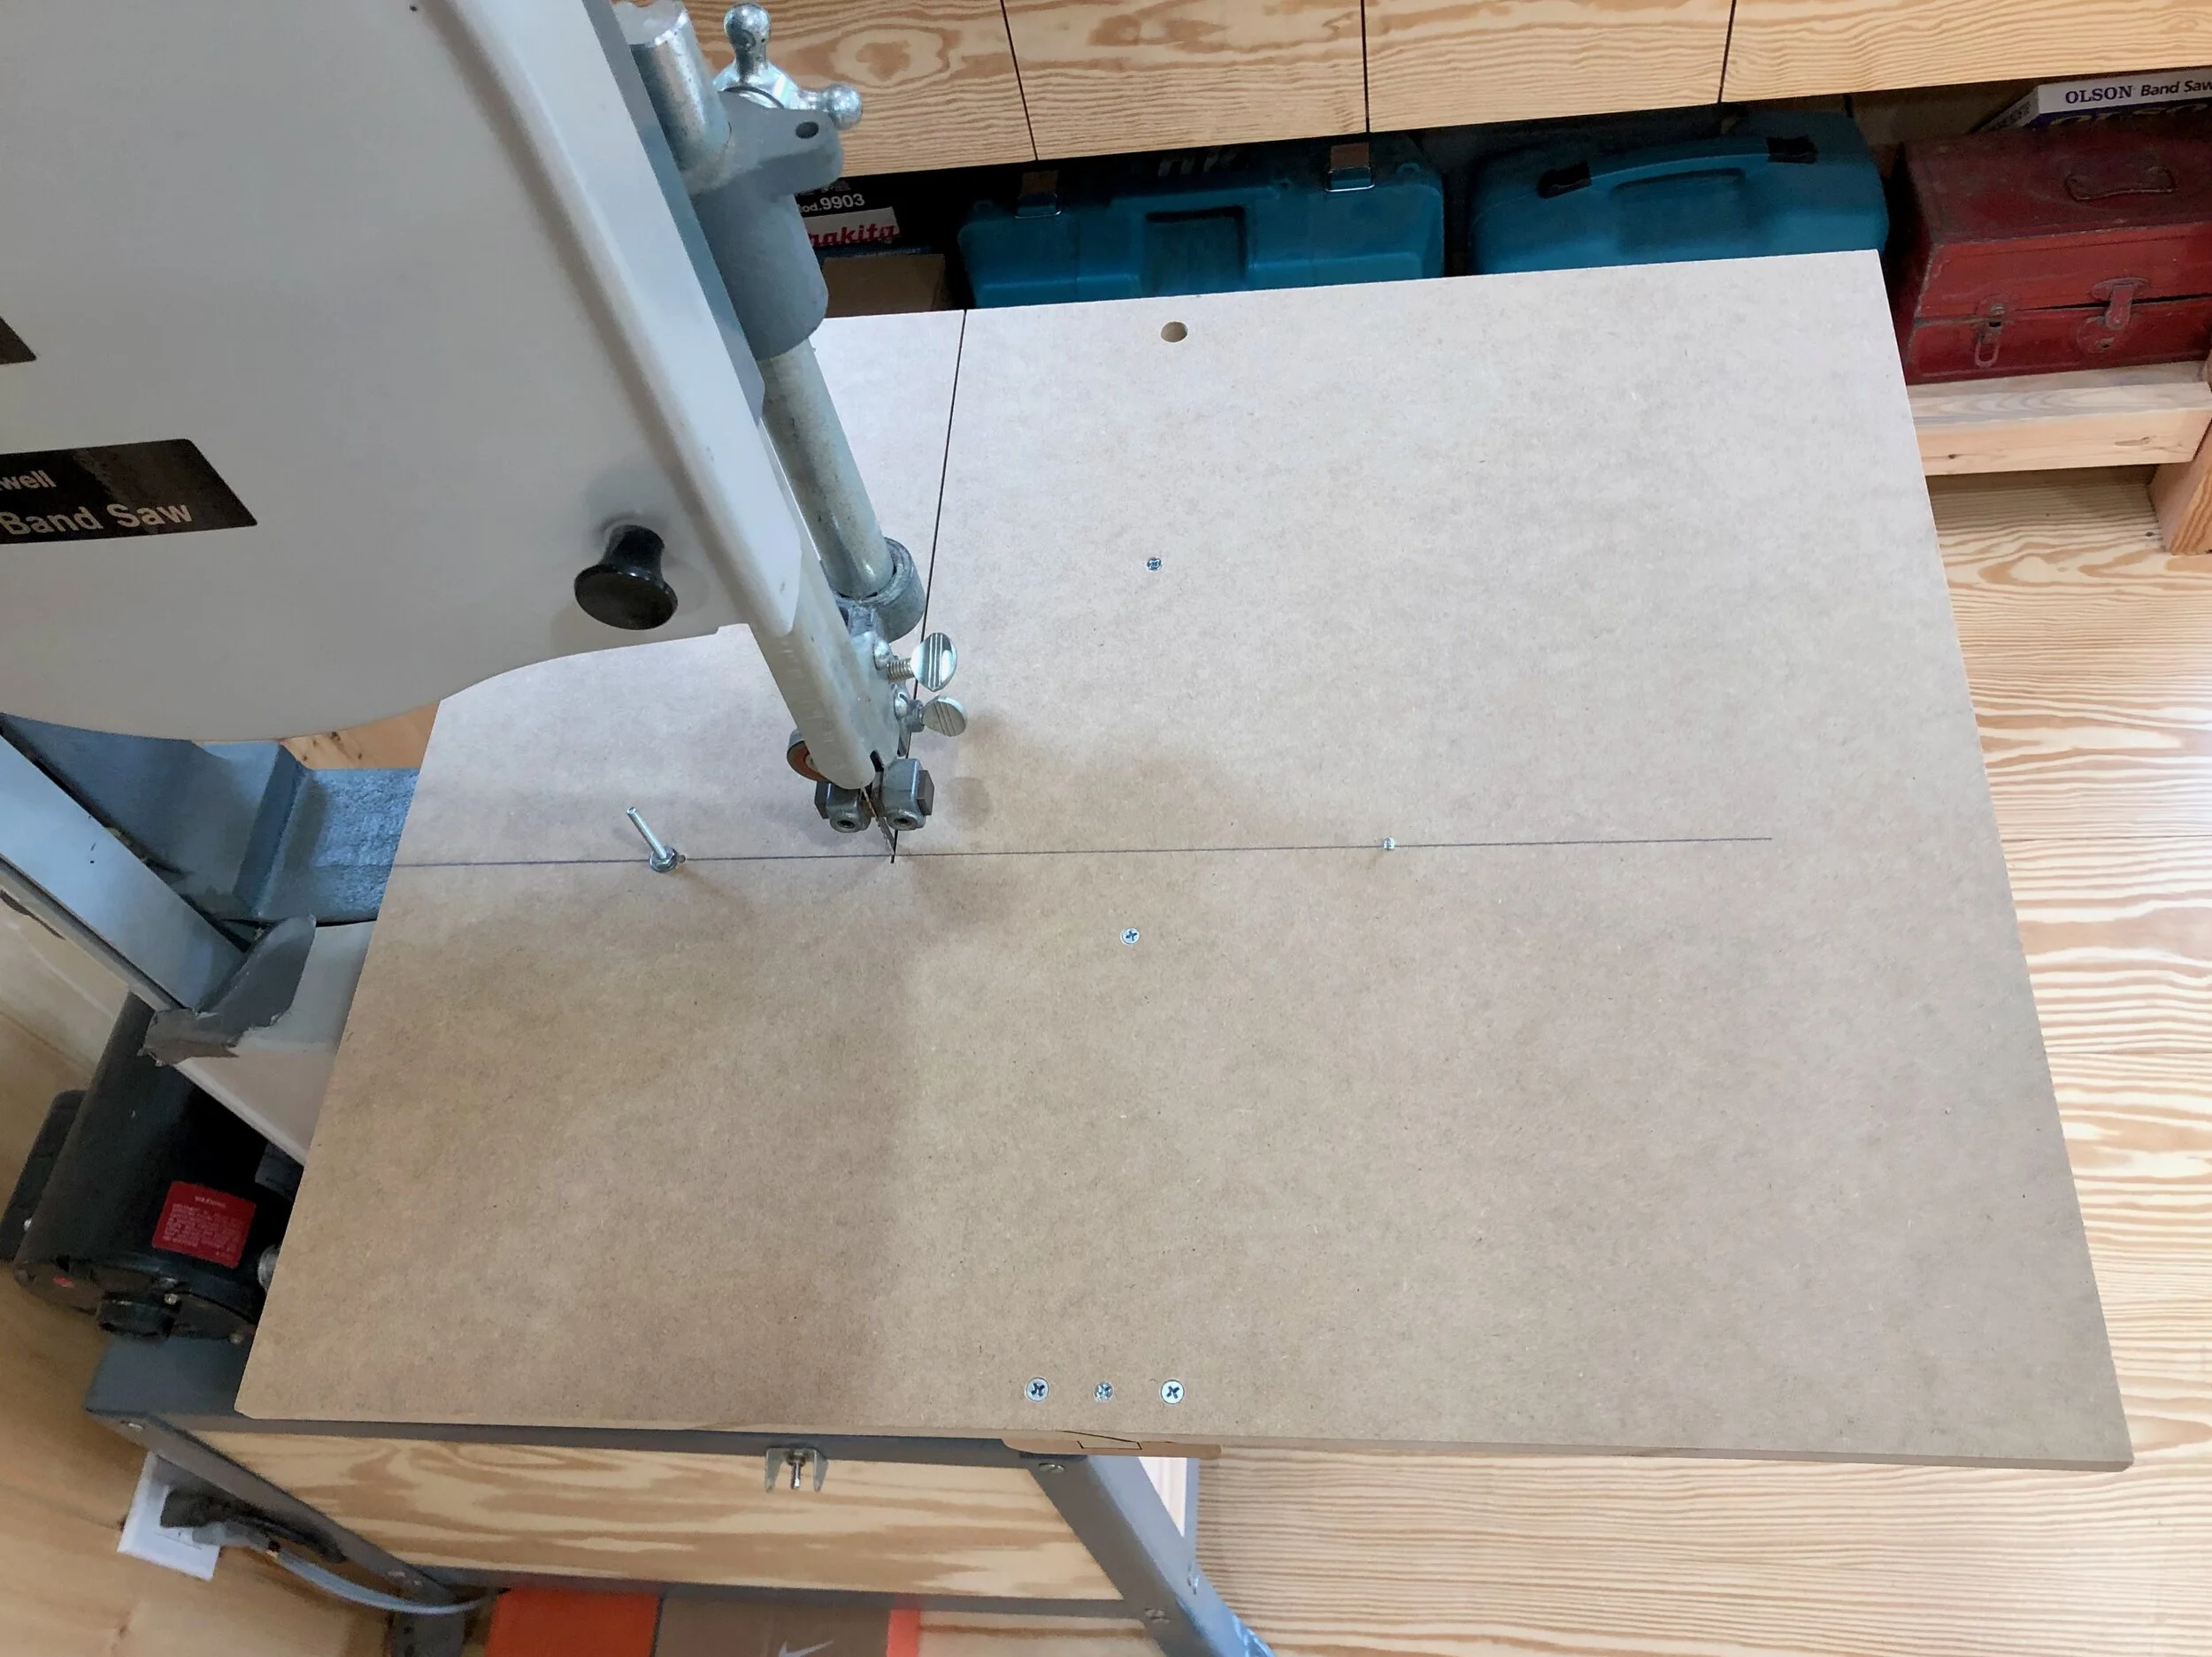
The pattern and mode of intersection for the stretchers for both tables were taken from the design of the round tabouret (see renderings above). The desired curve was sketched on card stock paper, cut out and used as a template to mark one stretcher for each table. The stretchers pairs were then placed on top of each other, taped together and the pattern cut out on the small bandsaw. Some sanding with a course drum bit mounted on the drill press and a little hand polishing made for a smooth curve which then needed to be notched in the center to allow intersection. The notching was easily done on the bandsaw by first un-taping the boards, flipping one board 180 degrees, and then re-taping them together followed by marking the center. Two incisions, one-half of the width at the centerline (3/4 in., in this case) and one stretcher’s thickness apart were made with the bandsaw. The notch was then chopped out of this with a hand chisel. For the three-legged stretcher assembly, one stretcher was then cut-off 1/2 in. past the intersection point.

Redwood legs and stretchers cut to final dimensions
Finally, it was time to cut the round top. This was a satisfyingly easy step using my home made circle-cutting jig on the small bandsaw. This jig aligns a pivot point with the front edge of the saw blade. A small indentation is made in the board to be cut at the center of the desired circle and the board then plopped on top of a screw protruding at the pivot point, previously inserted one radius length from the blade. With the saw running, the jig is slid into place, “loading” the board and positioning the saw blade at the circle’s edge. The board is then rotated on the pivot above the fixed jig and a perfect circle is sliced.

Last was a treatment of all edges. The bottom edge of the triangular top was chamfered, as were the three legs using the appropriate bit on the router table. The legs for the round table were similarly treated using a round-over bit to smooth the edges. In both cases I opted to not treat the leg edges in the area of the stretcher joint. I wanted there to be some indication of purpose to this region, much like the flare of a knee or elbow joint along an extended limb. It’s subtle but I hope it works. All pieces were then hand sanded down to 220 grit.
Assembly & Finish
The glue-up was a straightforward affair, given the nature of tenon joinery and perhaps some accumulating experience on the assembler’s part. I decided to use gel polyurethane varnish for the finish. Even with a satin gloss it should add life to all the woods and give a durable waterproof protection to the tops, but not blotch the cherry as an oil might. Four days of wipe/dry/repeat and voilà! Les tabourets sont finis!
With Love …
