

Screen Play
The interior of our 73 year old ranch-style home is a pleasant space, made even more so by a series of renovations conducted over the decades. By the time we purchased the 2019 version, several walls that had once partitioned the dining room and living room from an adjoining bedroom were gone. We enjoy the wide open expanse of this living area, but there is one nook, used as an office by the Chief of Domestic Operations, that would benefit from having its own space. She didn’t want a new wall, just a room screen. That’s the Project here.
First, let’s consider the room screen. Thought to have been invented in China during the 4th century B.C., screens have a considerable past. While I would venture that very few homes use a screen, today, we all have had encounters with them, either live or in photographs, so they are not that far removed from the present. One can readily conjure scenes from old movies where dressing screens played a major role, or from Japanese woodblocks where papered screens were used to divide rooms. They always looked nice and practical, didn’t they? Indeed, screens are useful objects that for some reason we rarely choose to use.

Kitagawa Utamaro, The Silver World (Gin sekai 銀世界) Japan, 1790.
The Metropolitan Museum of Art
Design
Unlike proper walls, screens are a part of the room’s decor, which means they need to fit in. Our screen will be like those from early twentieth century America, modest and made of wood. Gustav Stickley was a fan of room screens and sold two designs in his catalog for years. They were priced around $25 at the time, but I see one example listed today for $9,500 on an antique dealer’s website. Hmm … !
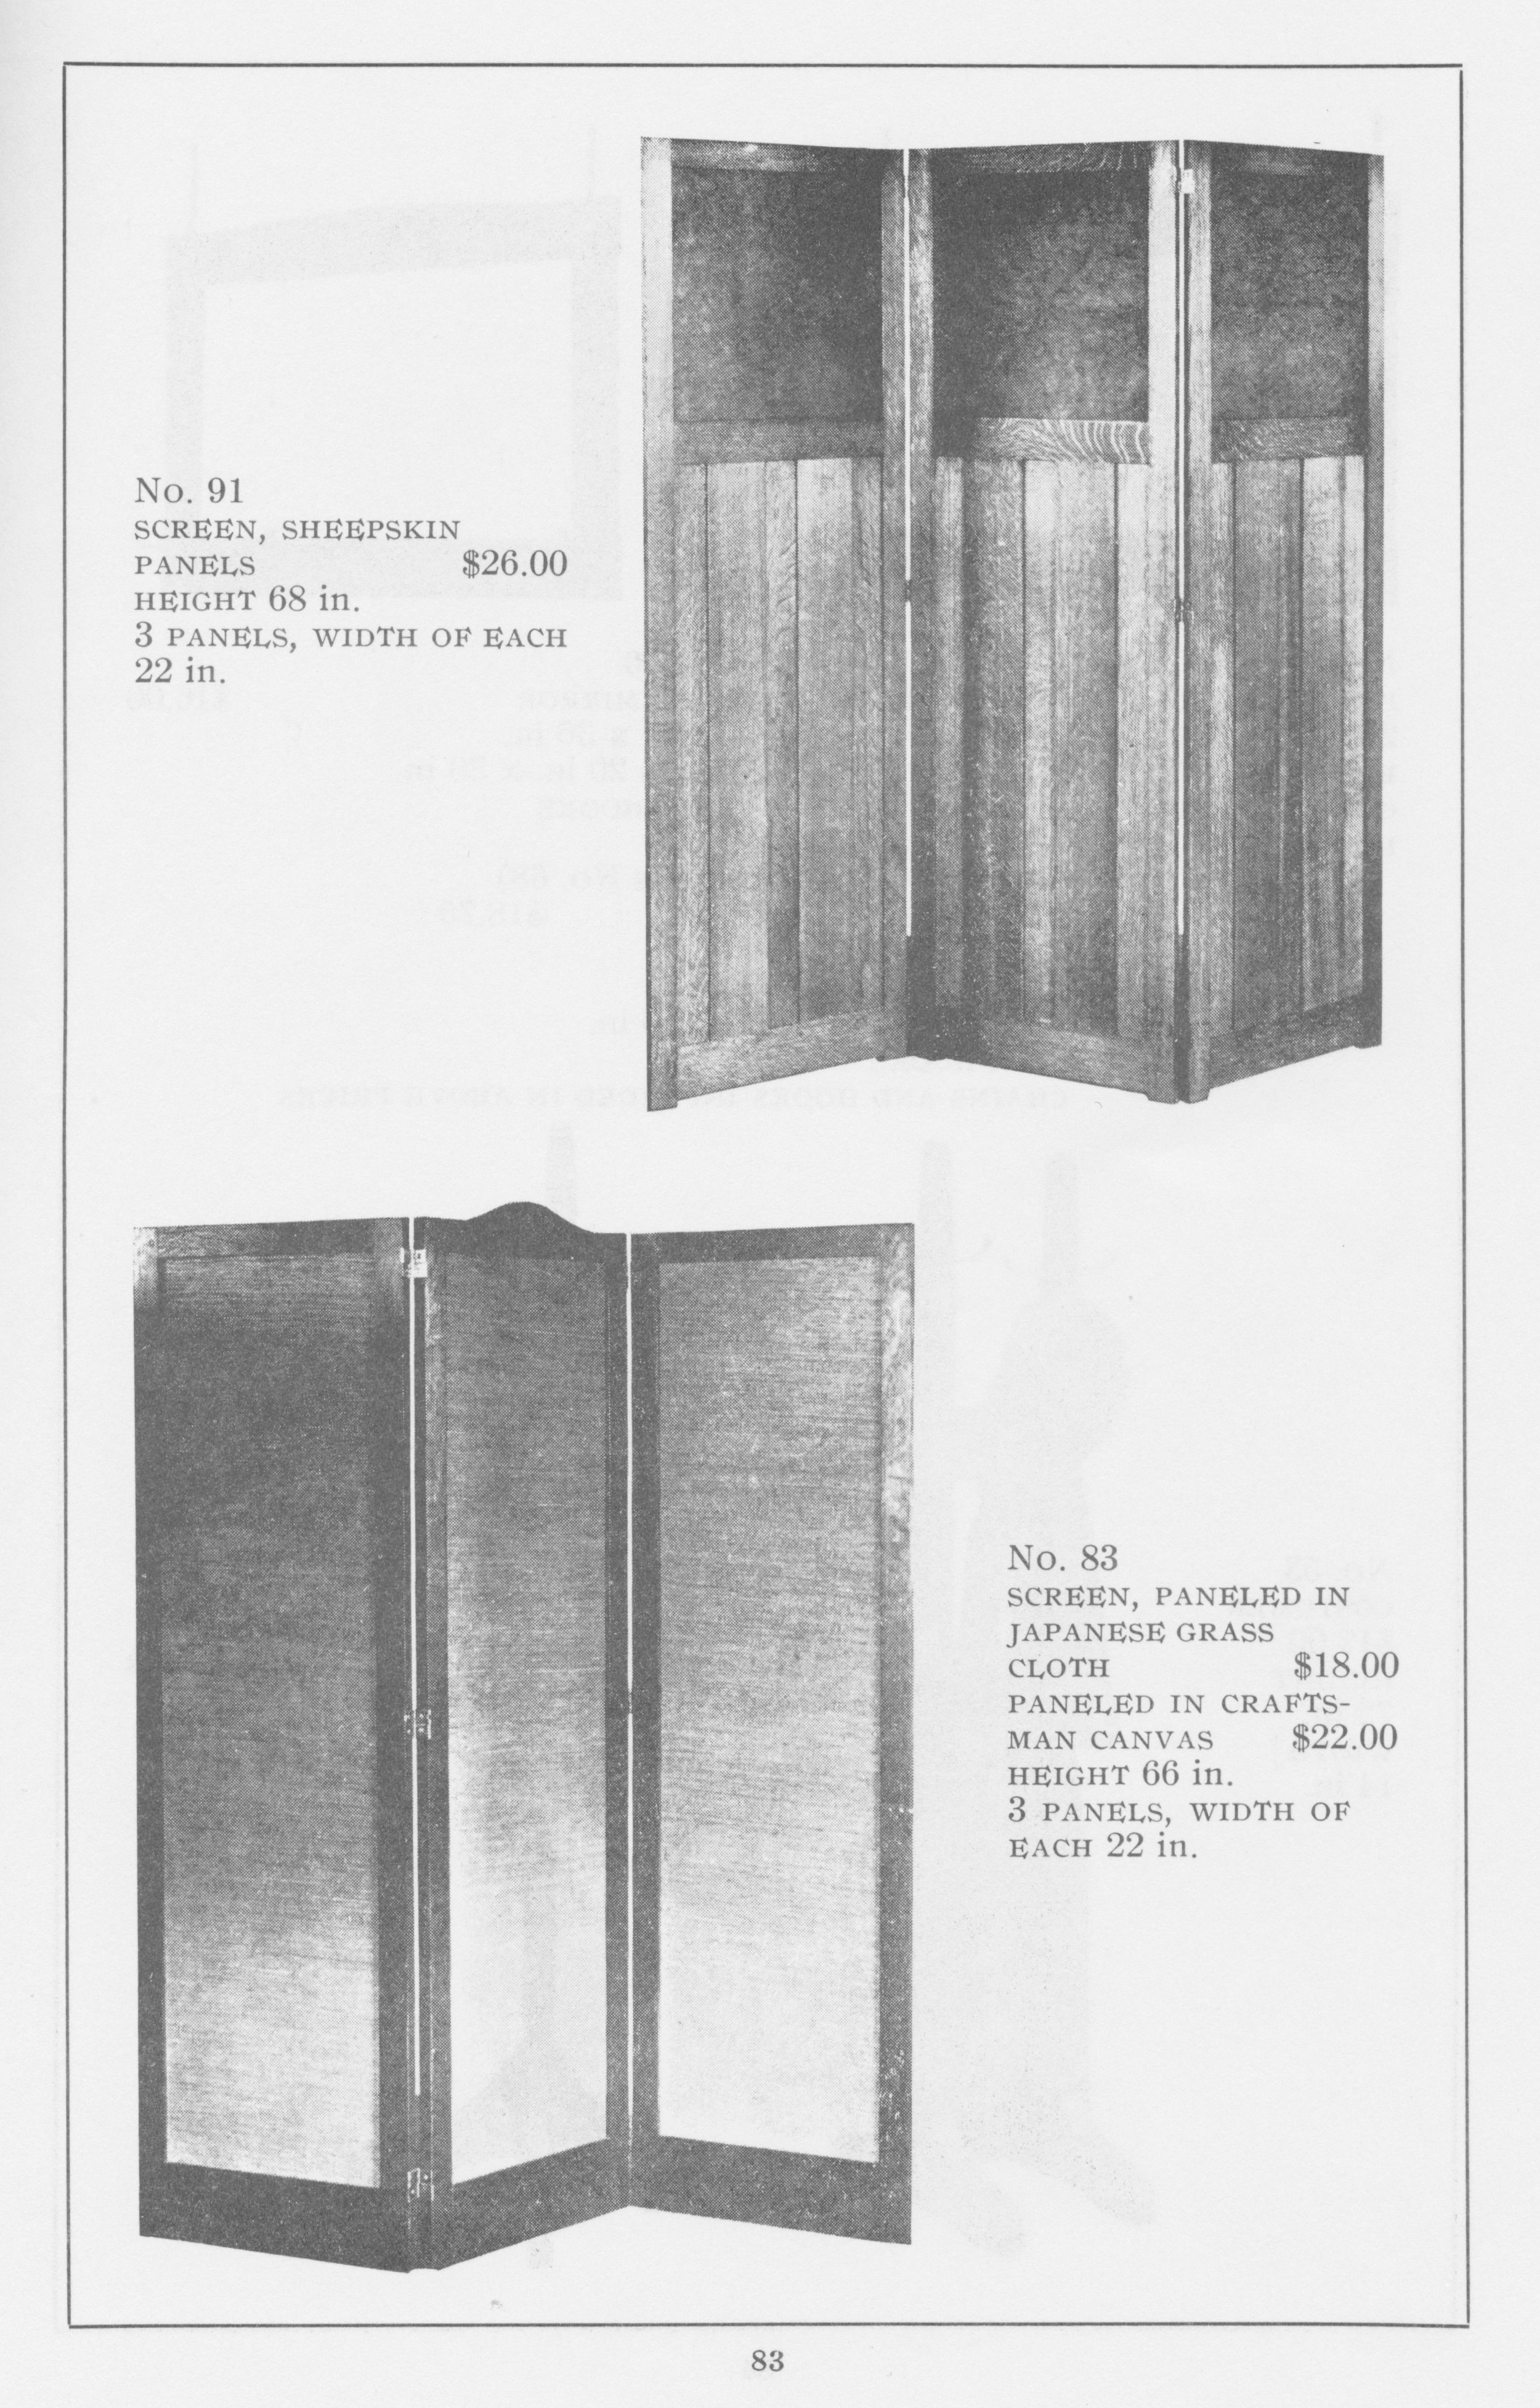
Screens offered by Gustav Stickley in the 1909 Catalogue of CRAFTSMAN FURNITURE
Of the two Stickley screens, No. 91 seems the best suited for a living room. The long waist of paneled oak is striking, however, sheepskin is not right for our purpose. Restored versions of No. 91 often have replaced this material with a linen or burlap panel but we wanted to admit some light into our sectioned-off space and so our version will possess wooden slats. I sketched a plan that included a mullion and a couple of shaped slats in each upper panel and it looked right.
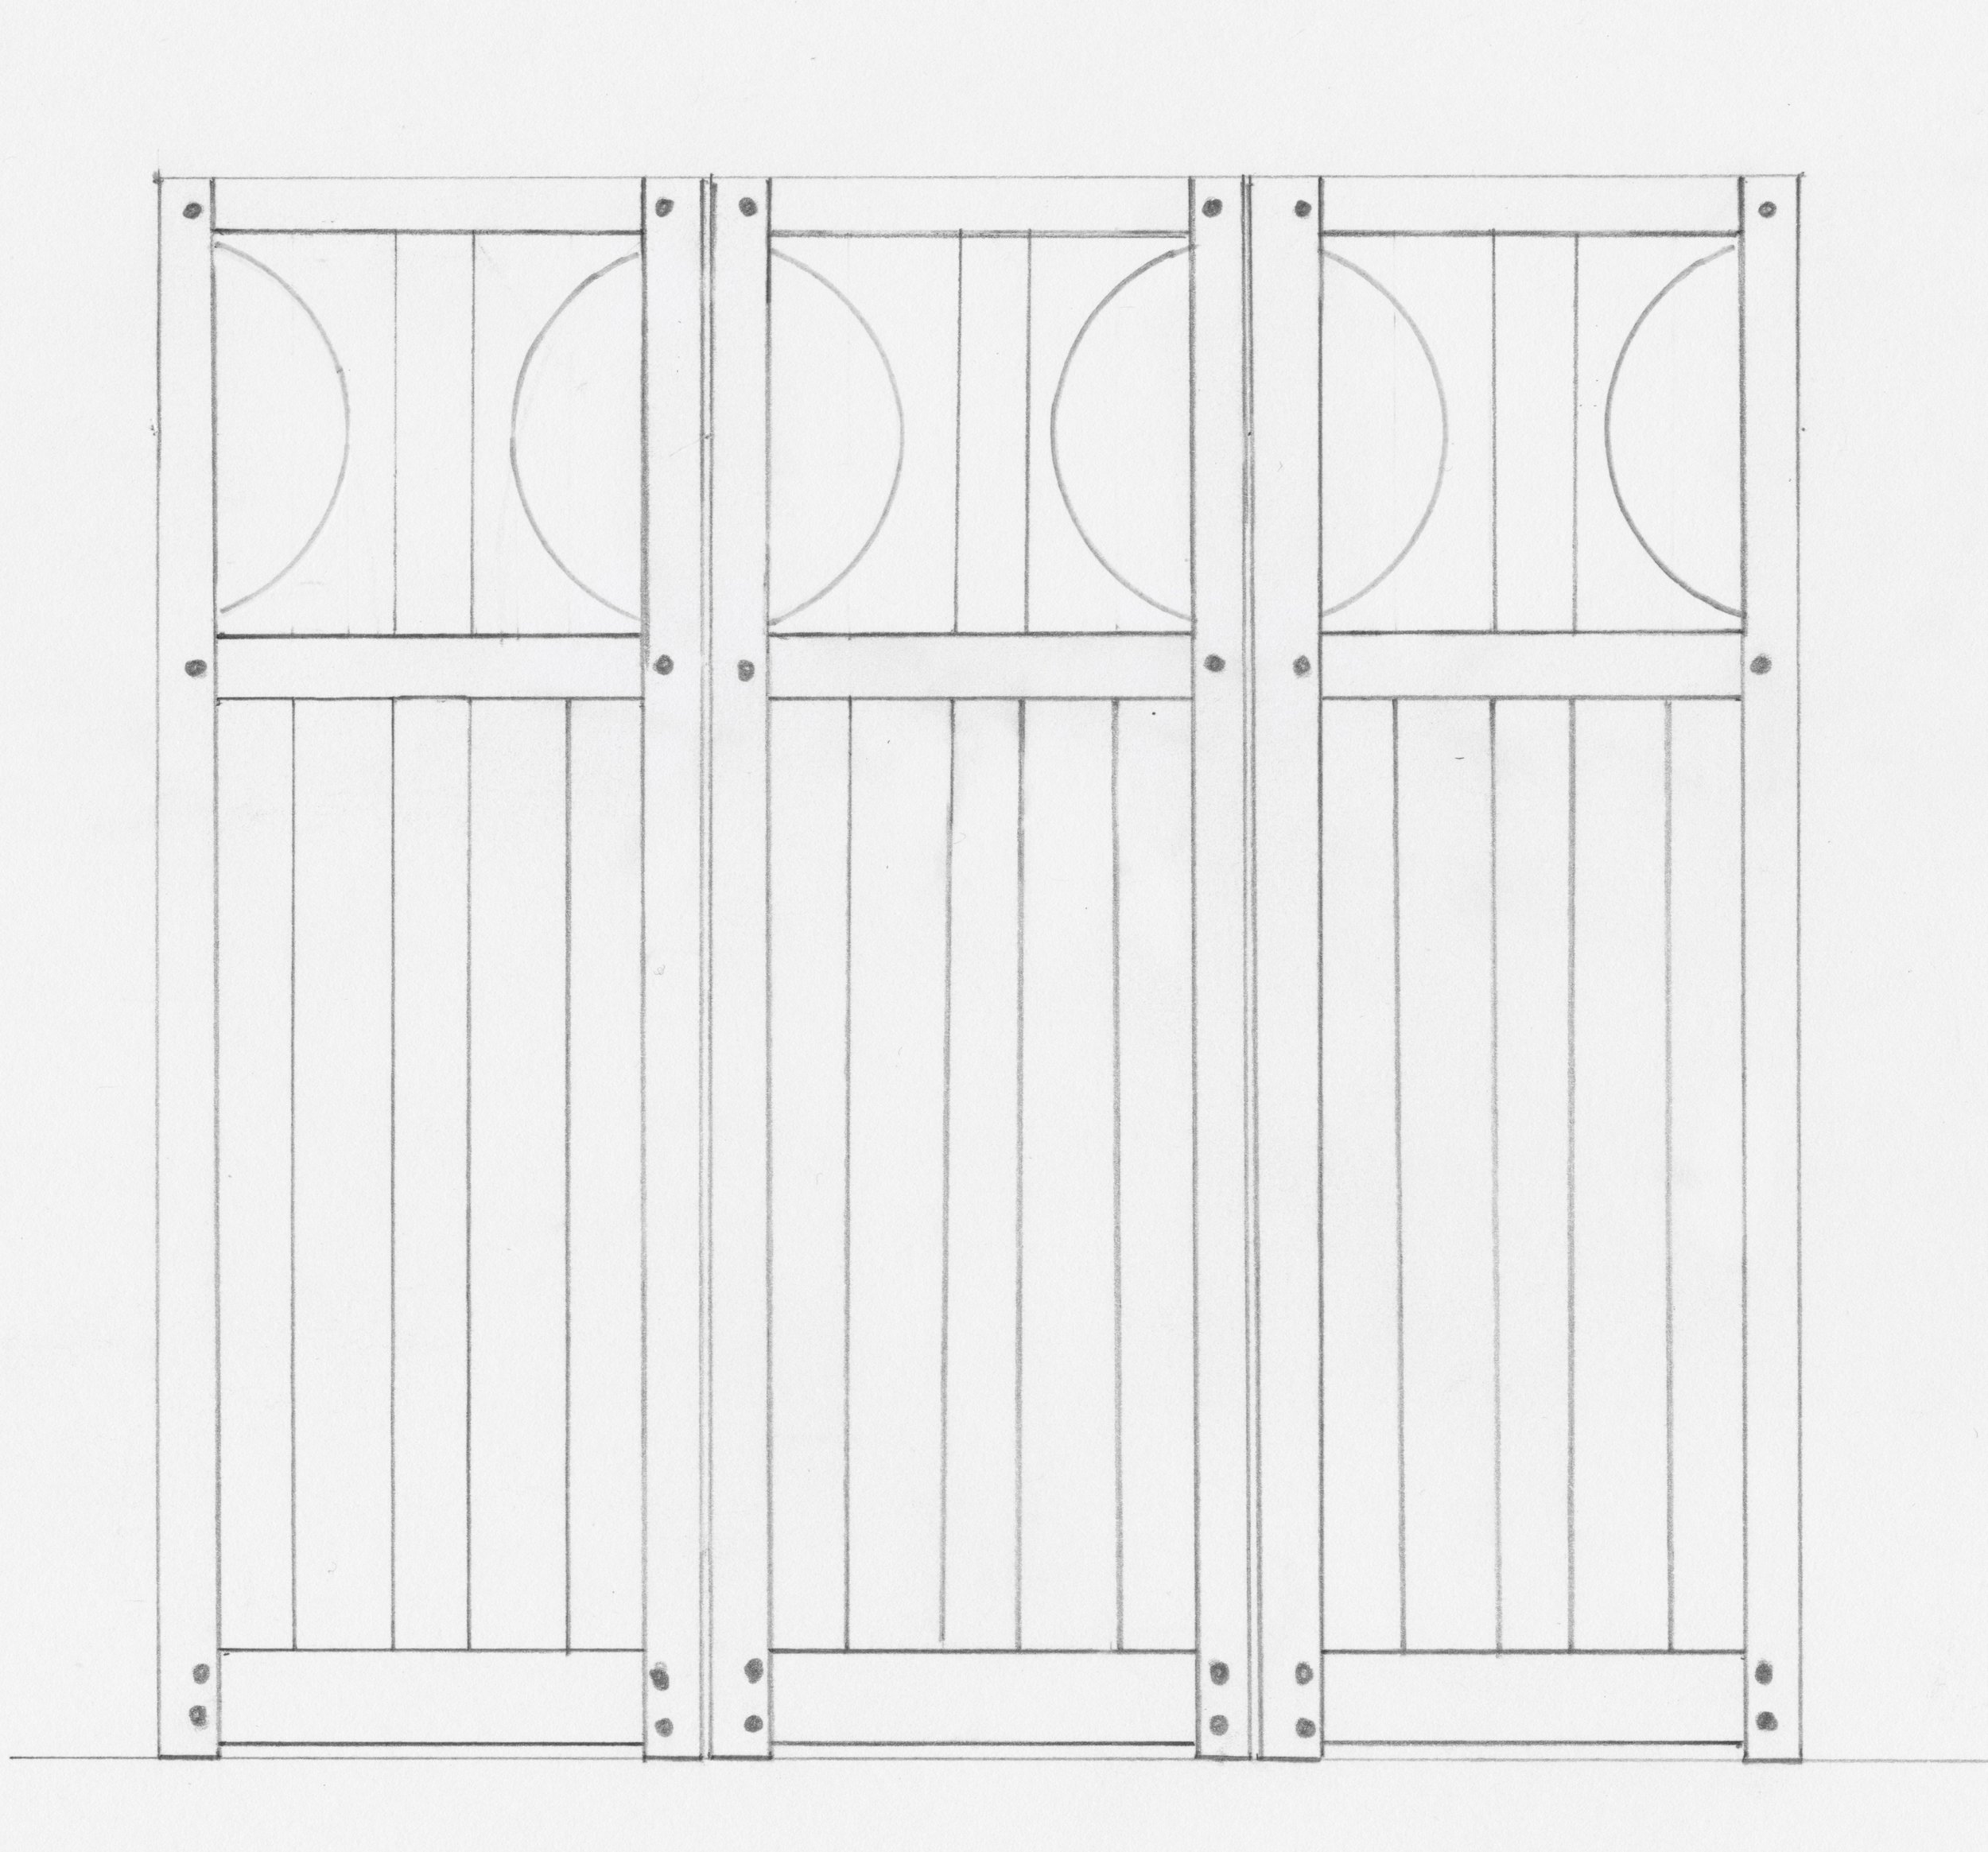
Room screen: rough plan
Materials
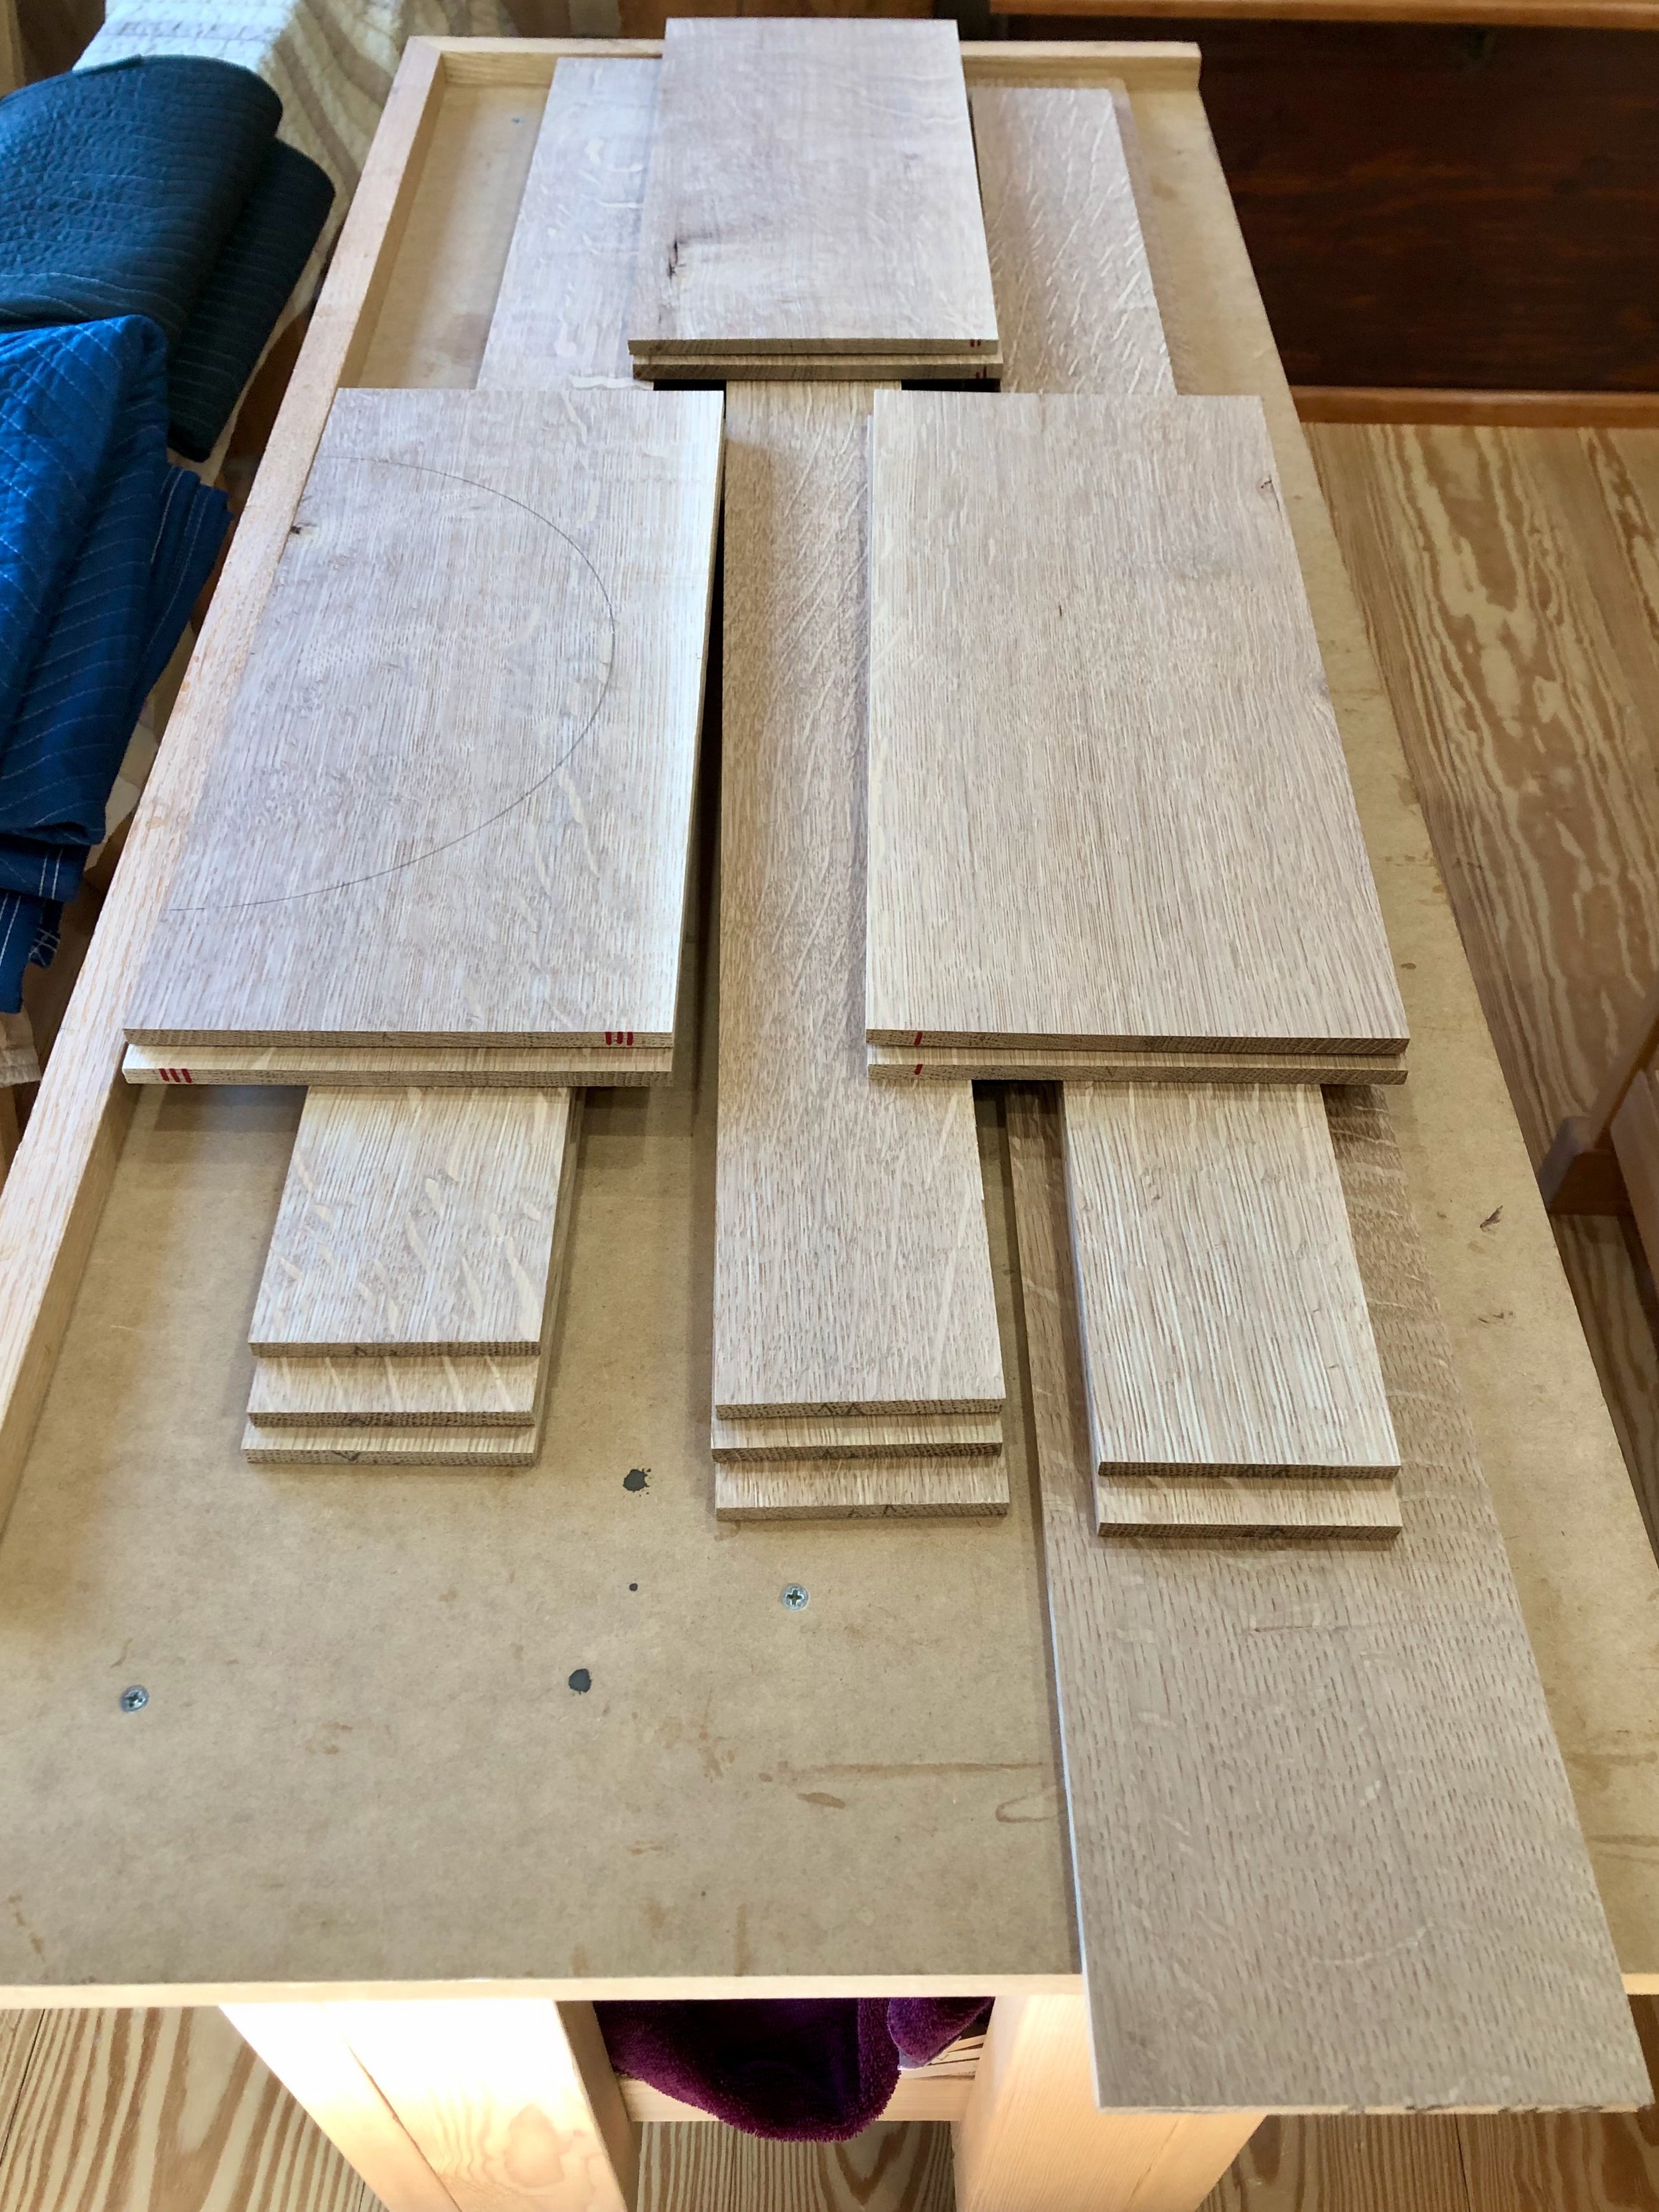
All that is needed to construct this screen is quarter sawn white oak, some double-acting hinges and glue. I picked up the lumber at Highland Hardwoods and got the hinges from a nice online store called Furniture Knowledge.

Screen materials
Dimensioning
Each section of the screen contains 13 elements, which are made in triplicate to form the whole - a little production run, of sorts. The joinery is not complicated: a few mortise and tenons with some grooves for the flat panels and slats. The primary objective is to make all parts flat and straight so that, in the end, the screen stands with integrity. I had to work some to make the semicircular slats, but in general, once a tool was set up to produce an accurate cut, part preparation went quickly. Captioned pictures below give you a feel for the process.

All frame components planed to 1 inch thickness with the raw panel wood lurking in back
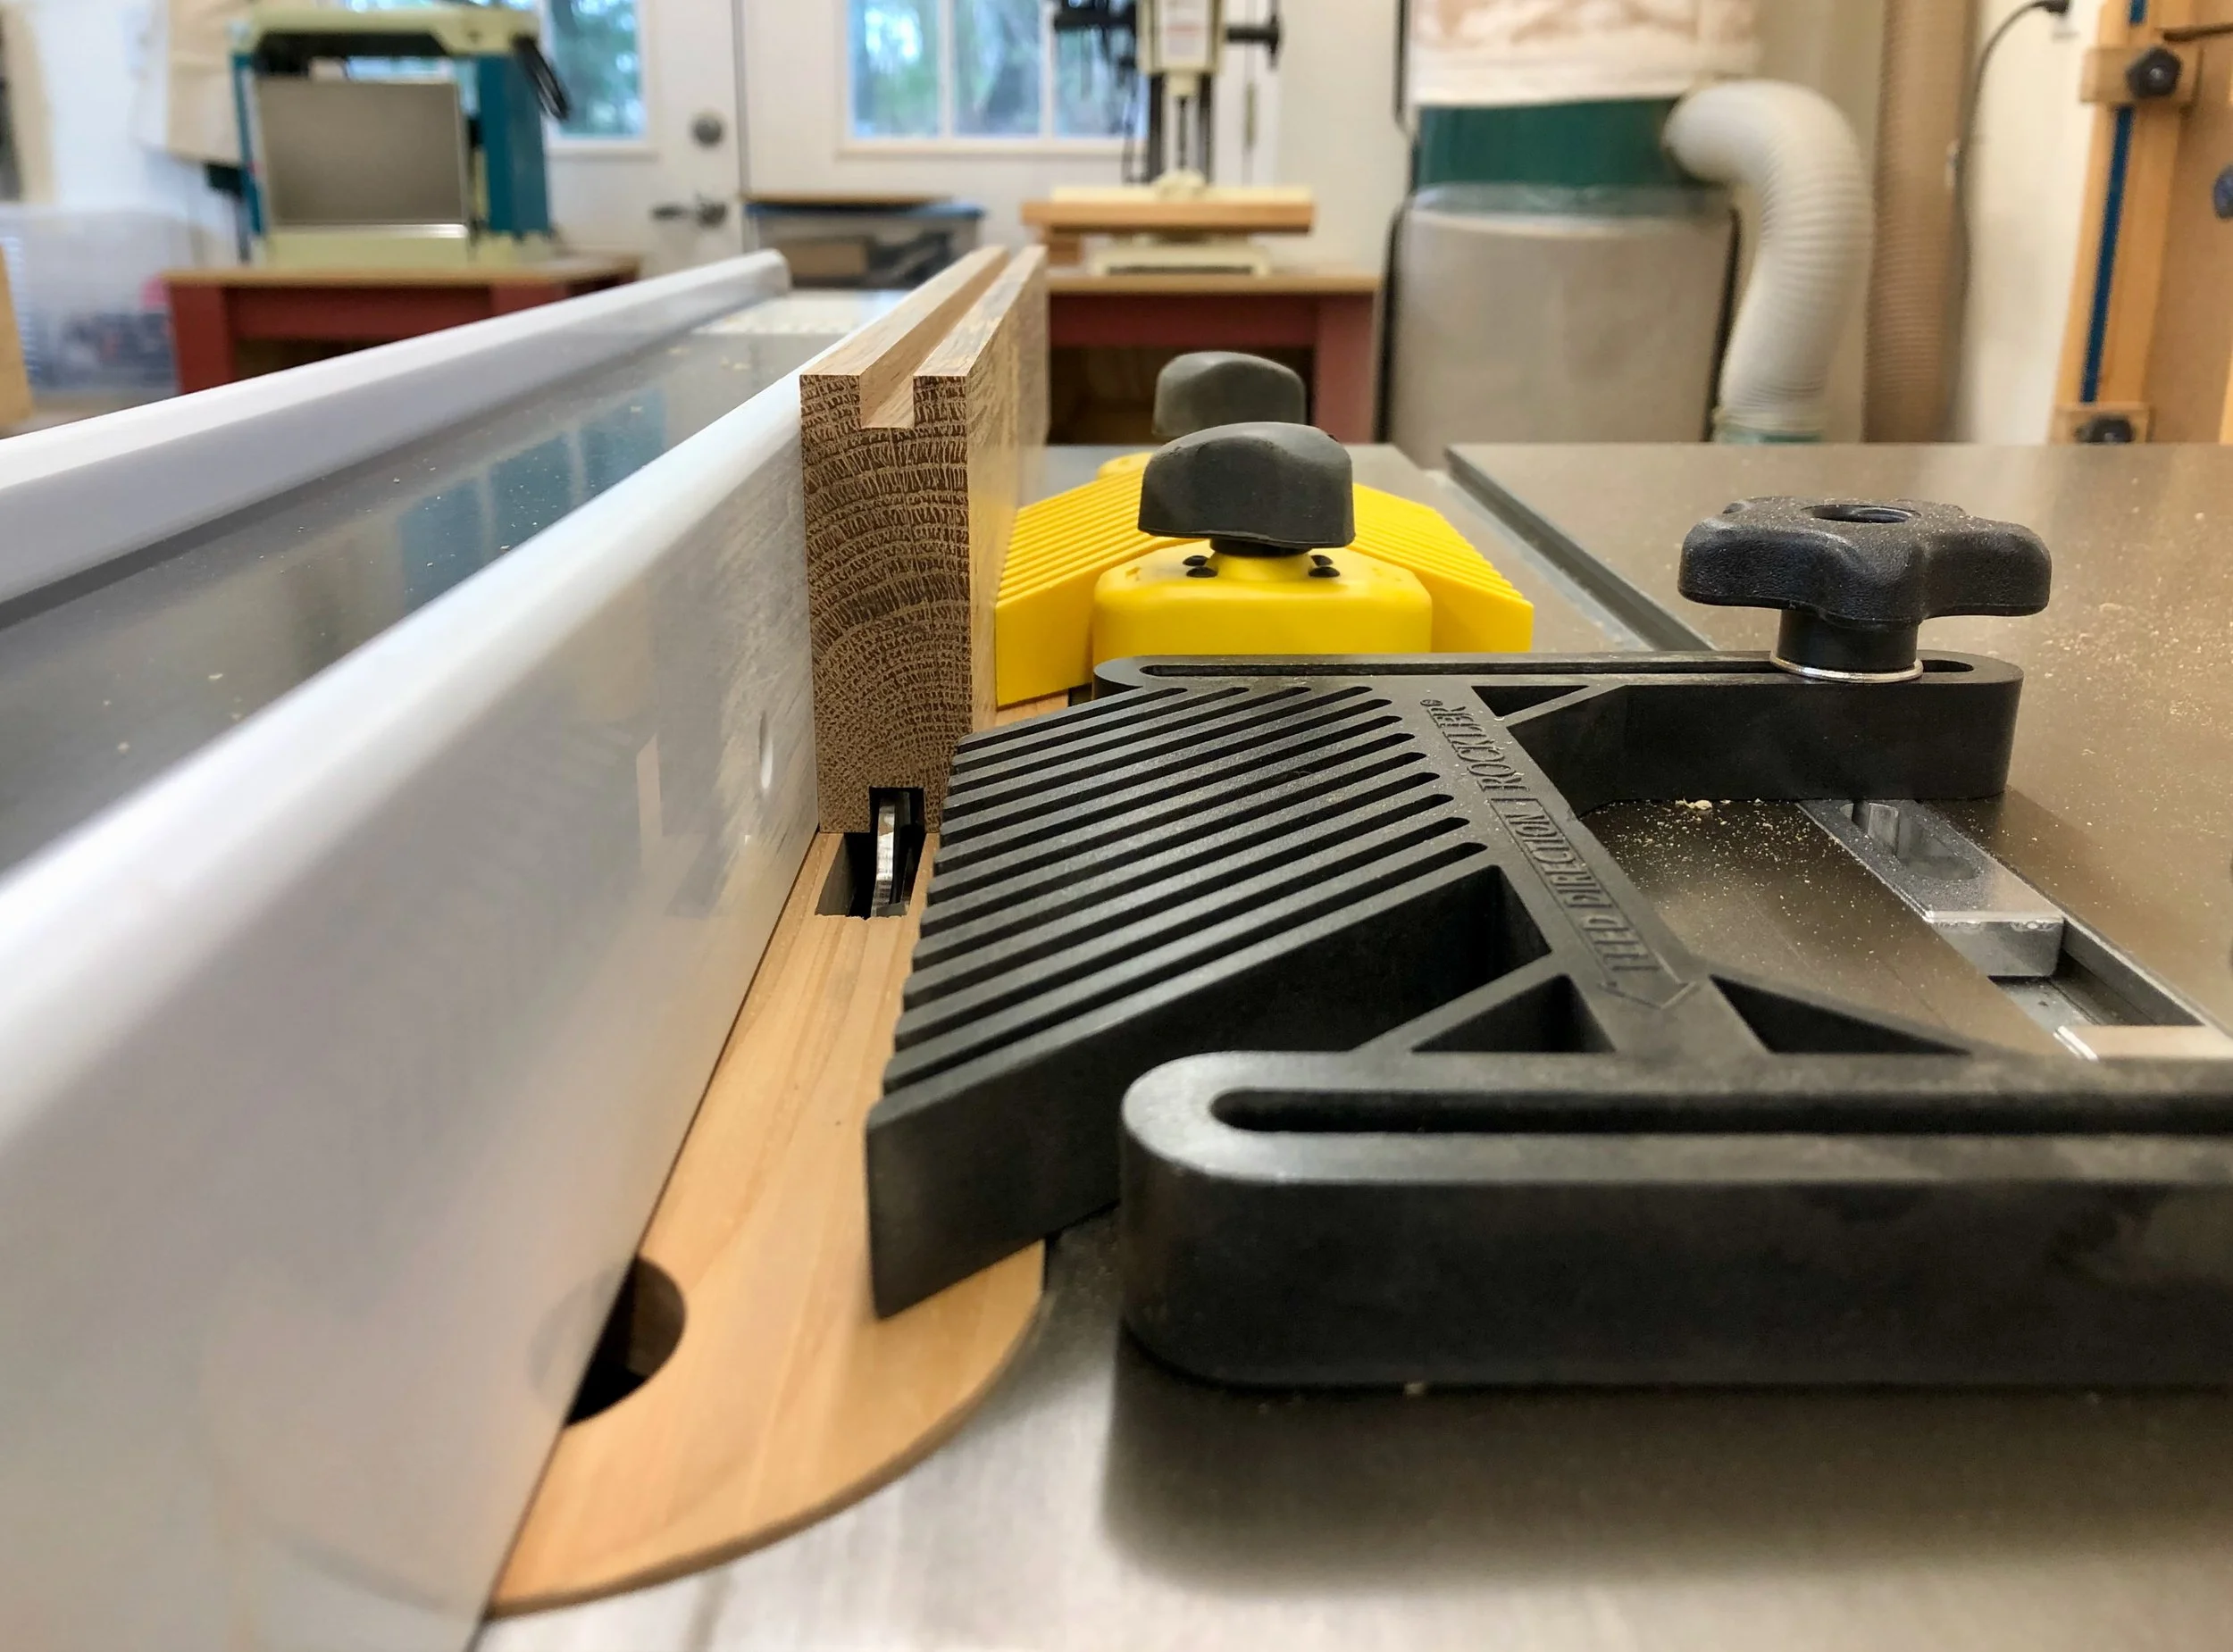
Cutting grooves into stiles at the table saw
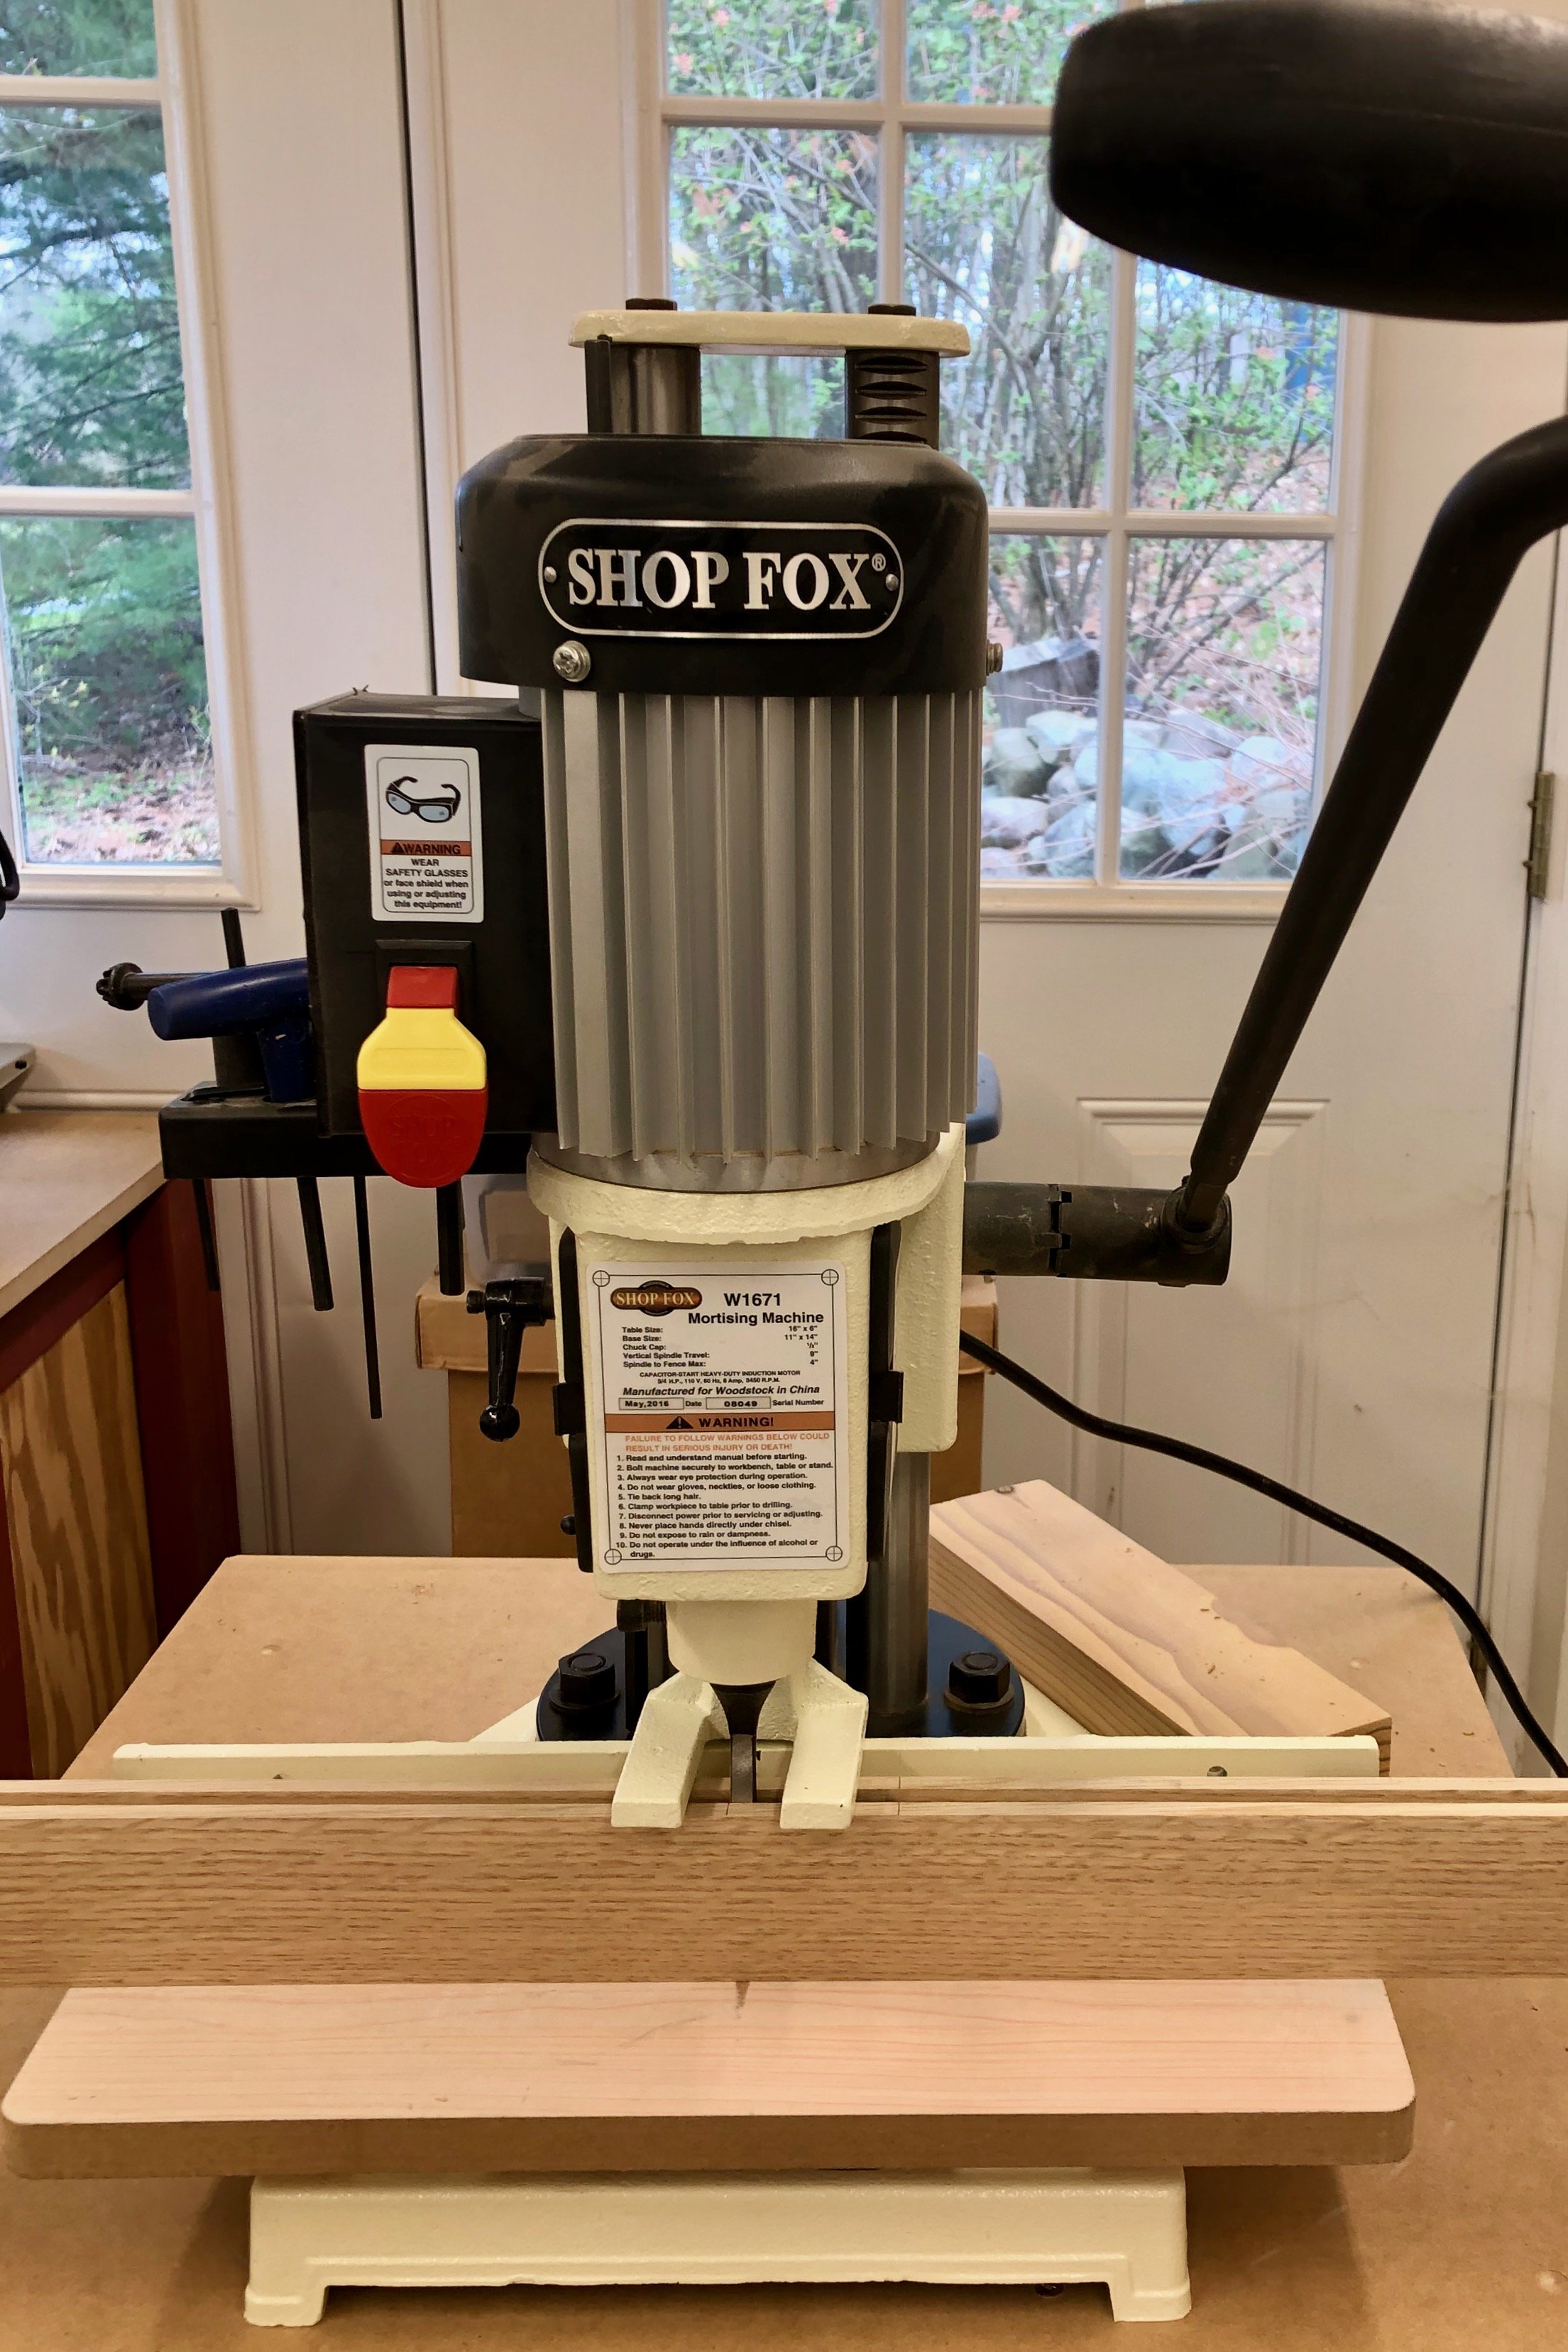
Creating deeper mortises within the leg grooves to house the rails
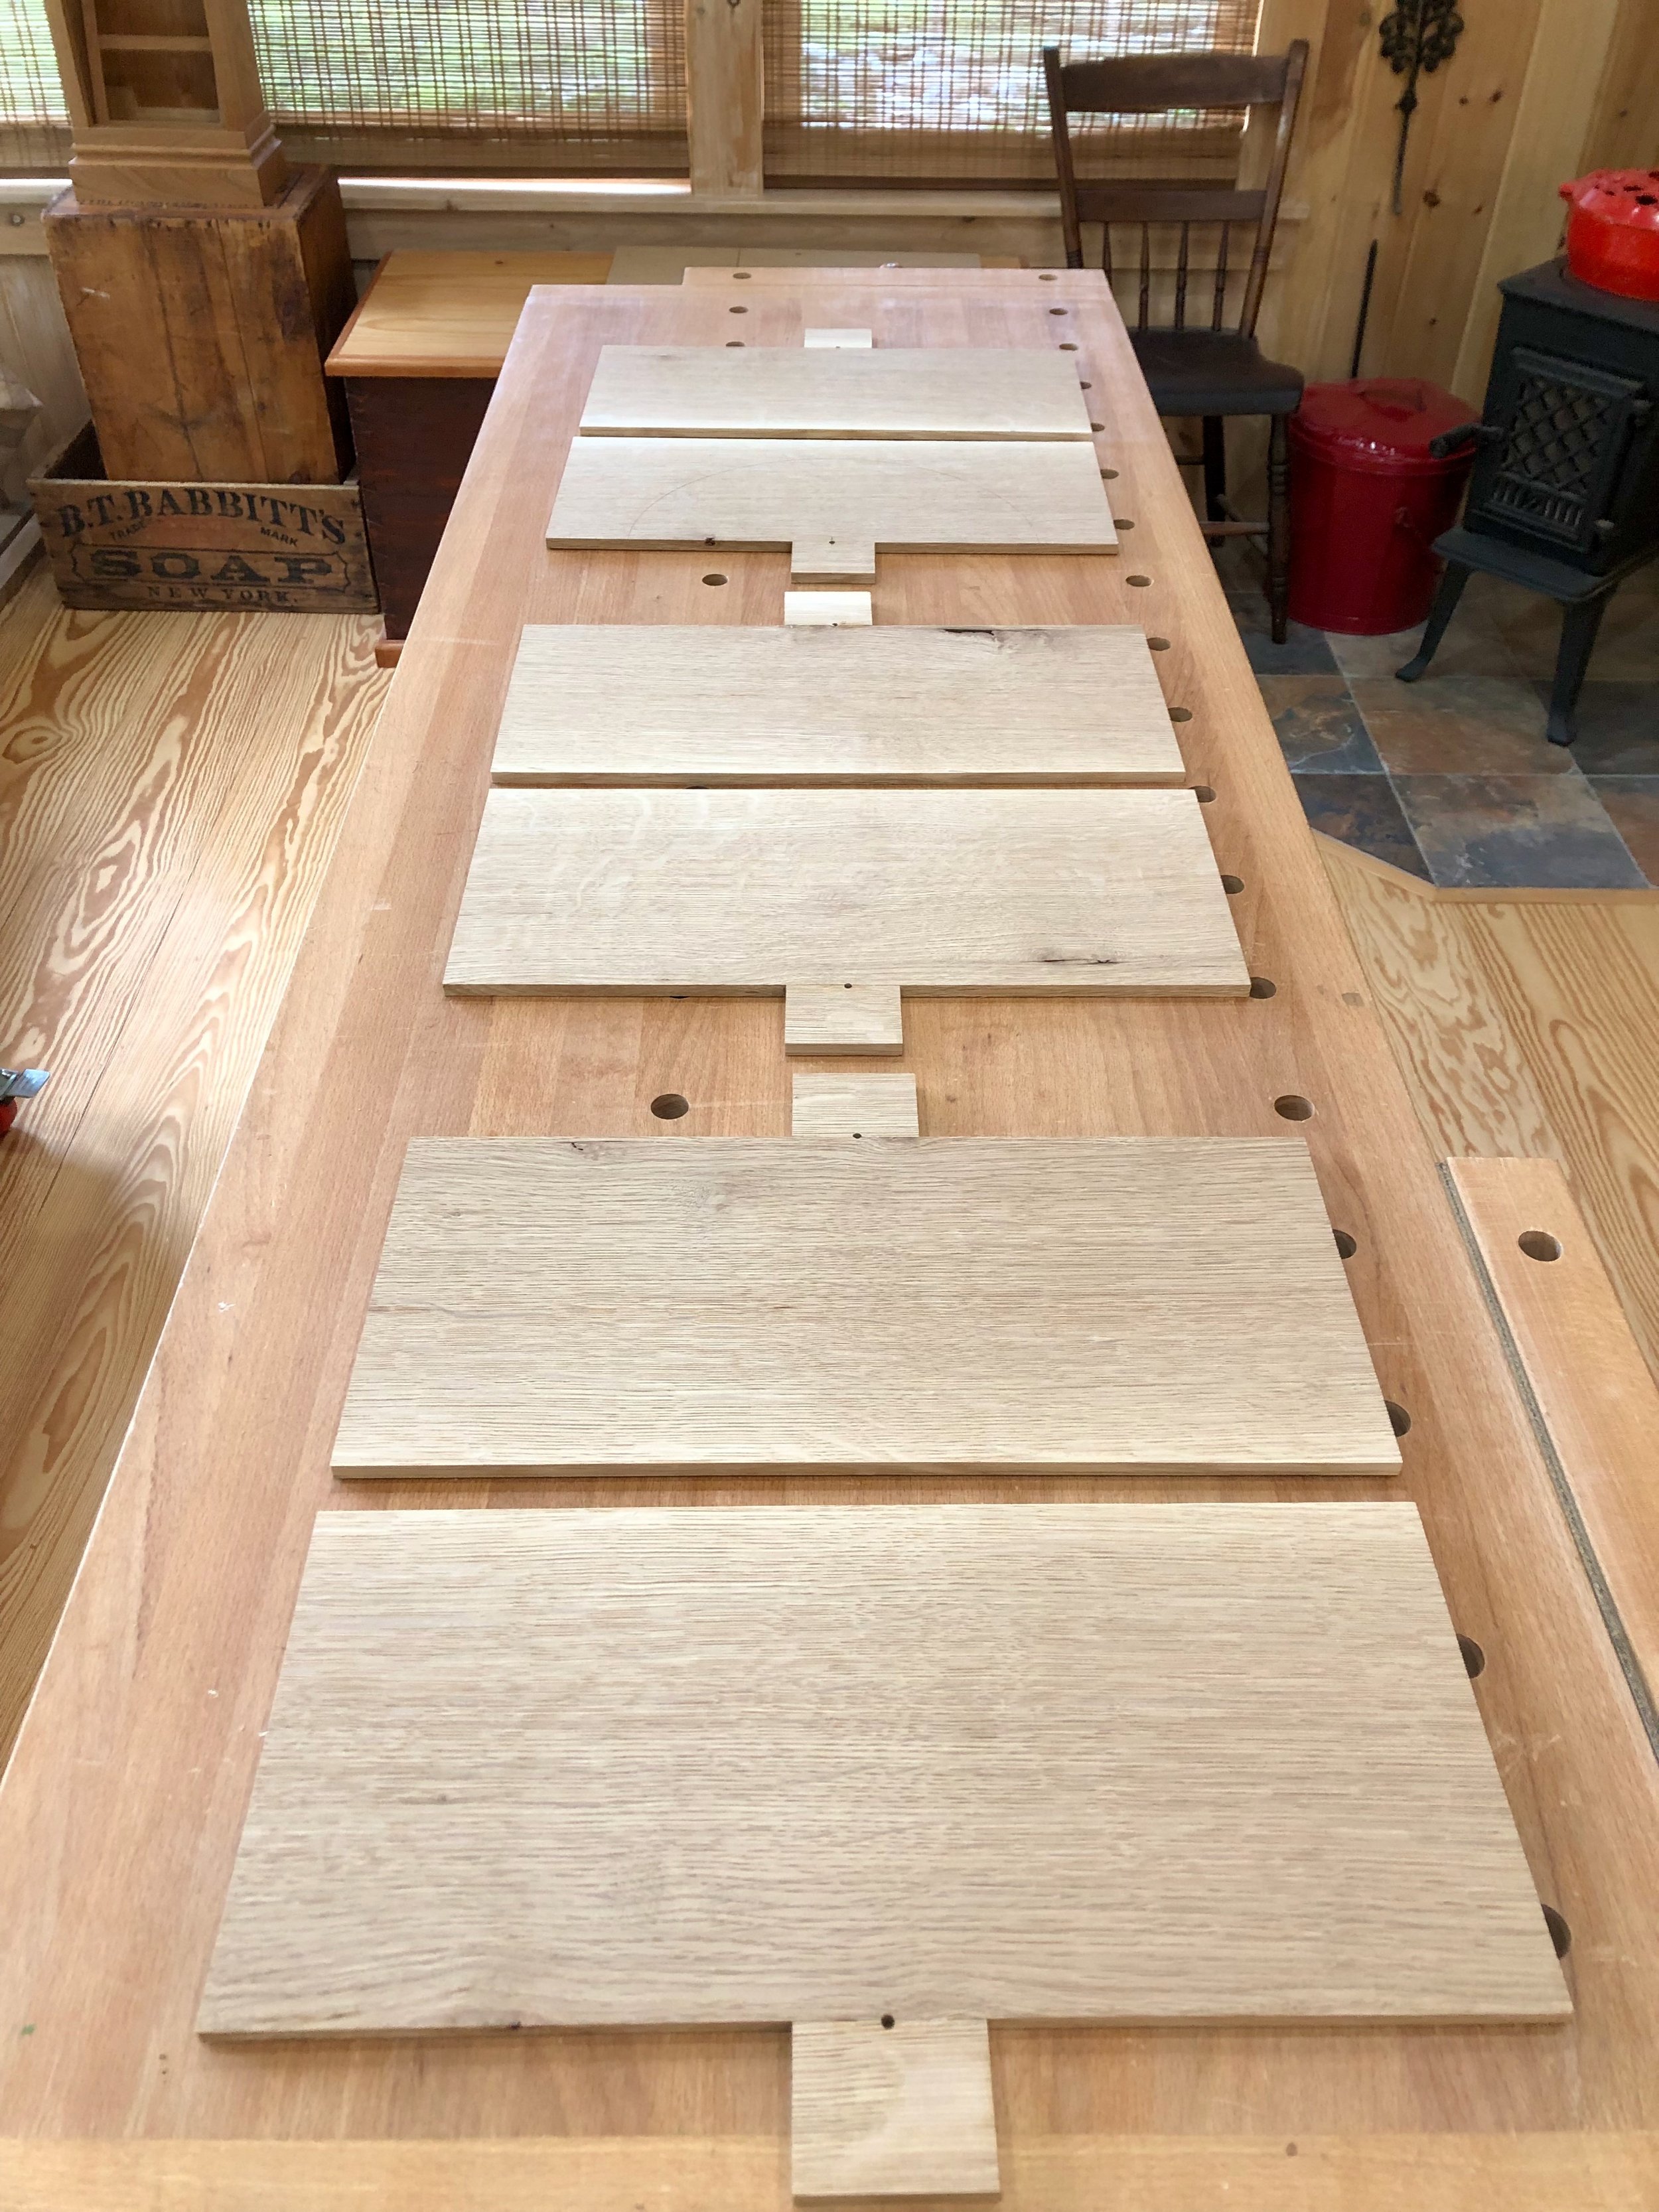
One of the joys of working with wood is to celebrate the grain. Quarter sawn white oak, in particular, is rich with grain character and I find it is important (enjoyable!) to harmonize the grain flow, color, rays and flecks of adjoining parts when possible. It gives the wooden components an additional purpose and helps to create a personality for the piece. With 3 versions of every part, each containing two sides and two vertical orientations there are many permutations to consider in selecting which eight frame members go into each of the three sections, and why. Fortunately, with quarter sawn oak there are no wrong decisions, just ones that are more right.

Frame parts grooved, cut to final length and assigned to their respective sections (A,B,C)
After creating tenons for the rails at the table saw, the methodical process of planing cheeks and cleaning mortises was conducted to achieve a nice and snug dry-fit of the frame parts.

Dry-fitting the frame together
Next it was time to make the thin panels; these would be fashioned to tuck snugly within the grooves created above. 4/4 boards chosen for their grain figure were cut to rough widths at the table saw, run through the thickness planer just enough to get an even surface and then resawn into two slices at the band saw. The best 15 of these boards were then thickness planed to 5/16 in. and assigned to the respective sections.
Rough-cut panels of proper thickness
I used the trusty circle-cutting jig to create the semicircular openings in the upper panels. First, small wood scraps were glued along one edge at the circle’s center to facilitate drilling a pilot hole at that position. These panels were then taped together and cut as pairs at the band saw. Worked well.
Book-matched panels with pilot holes ready for cut-out
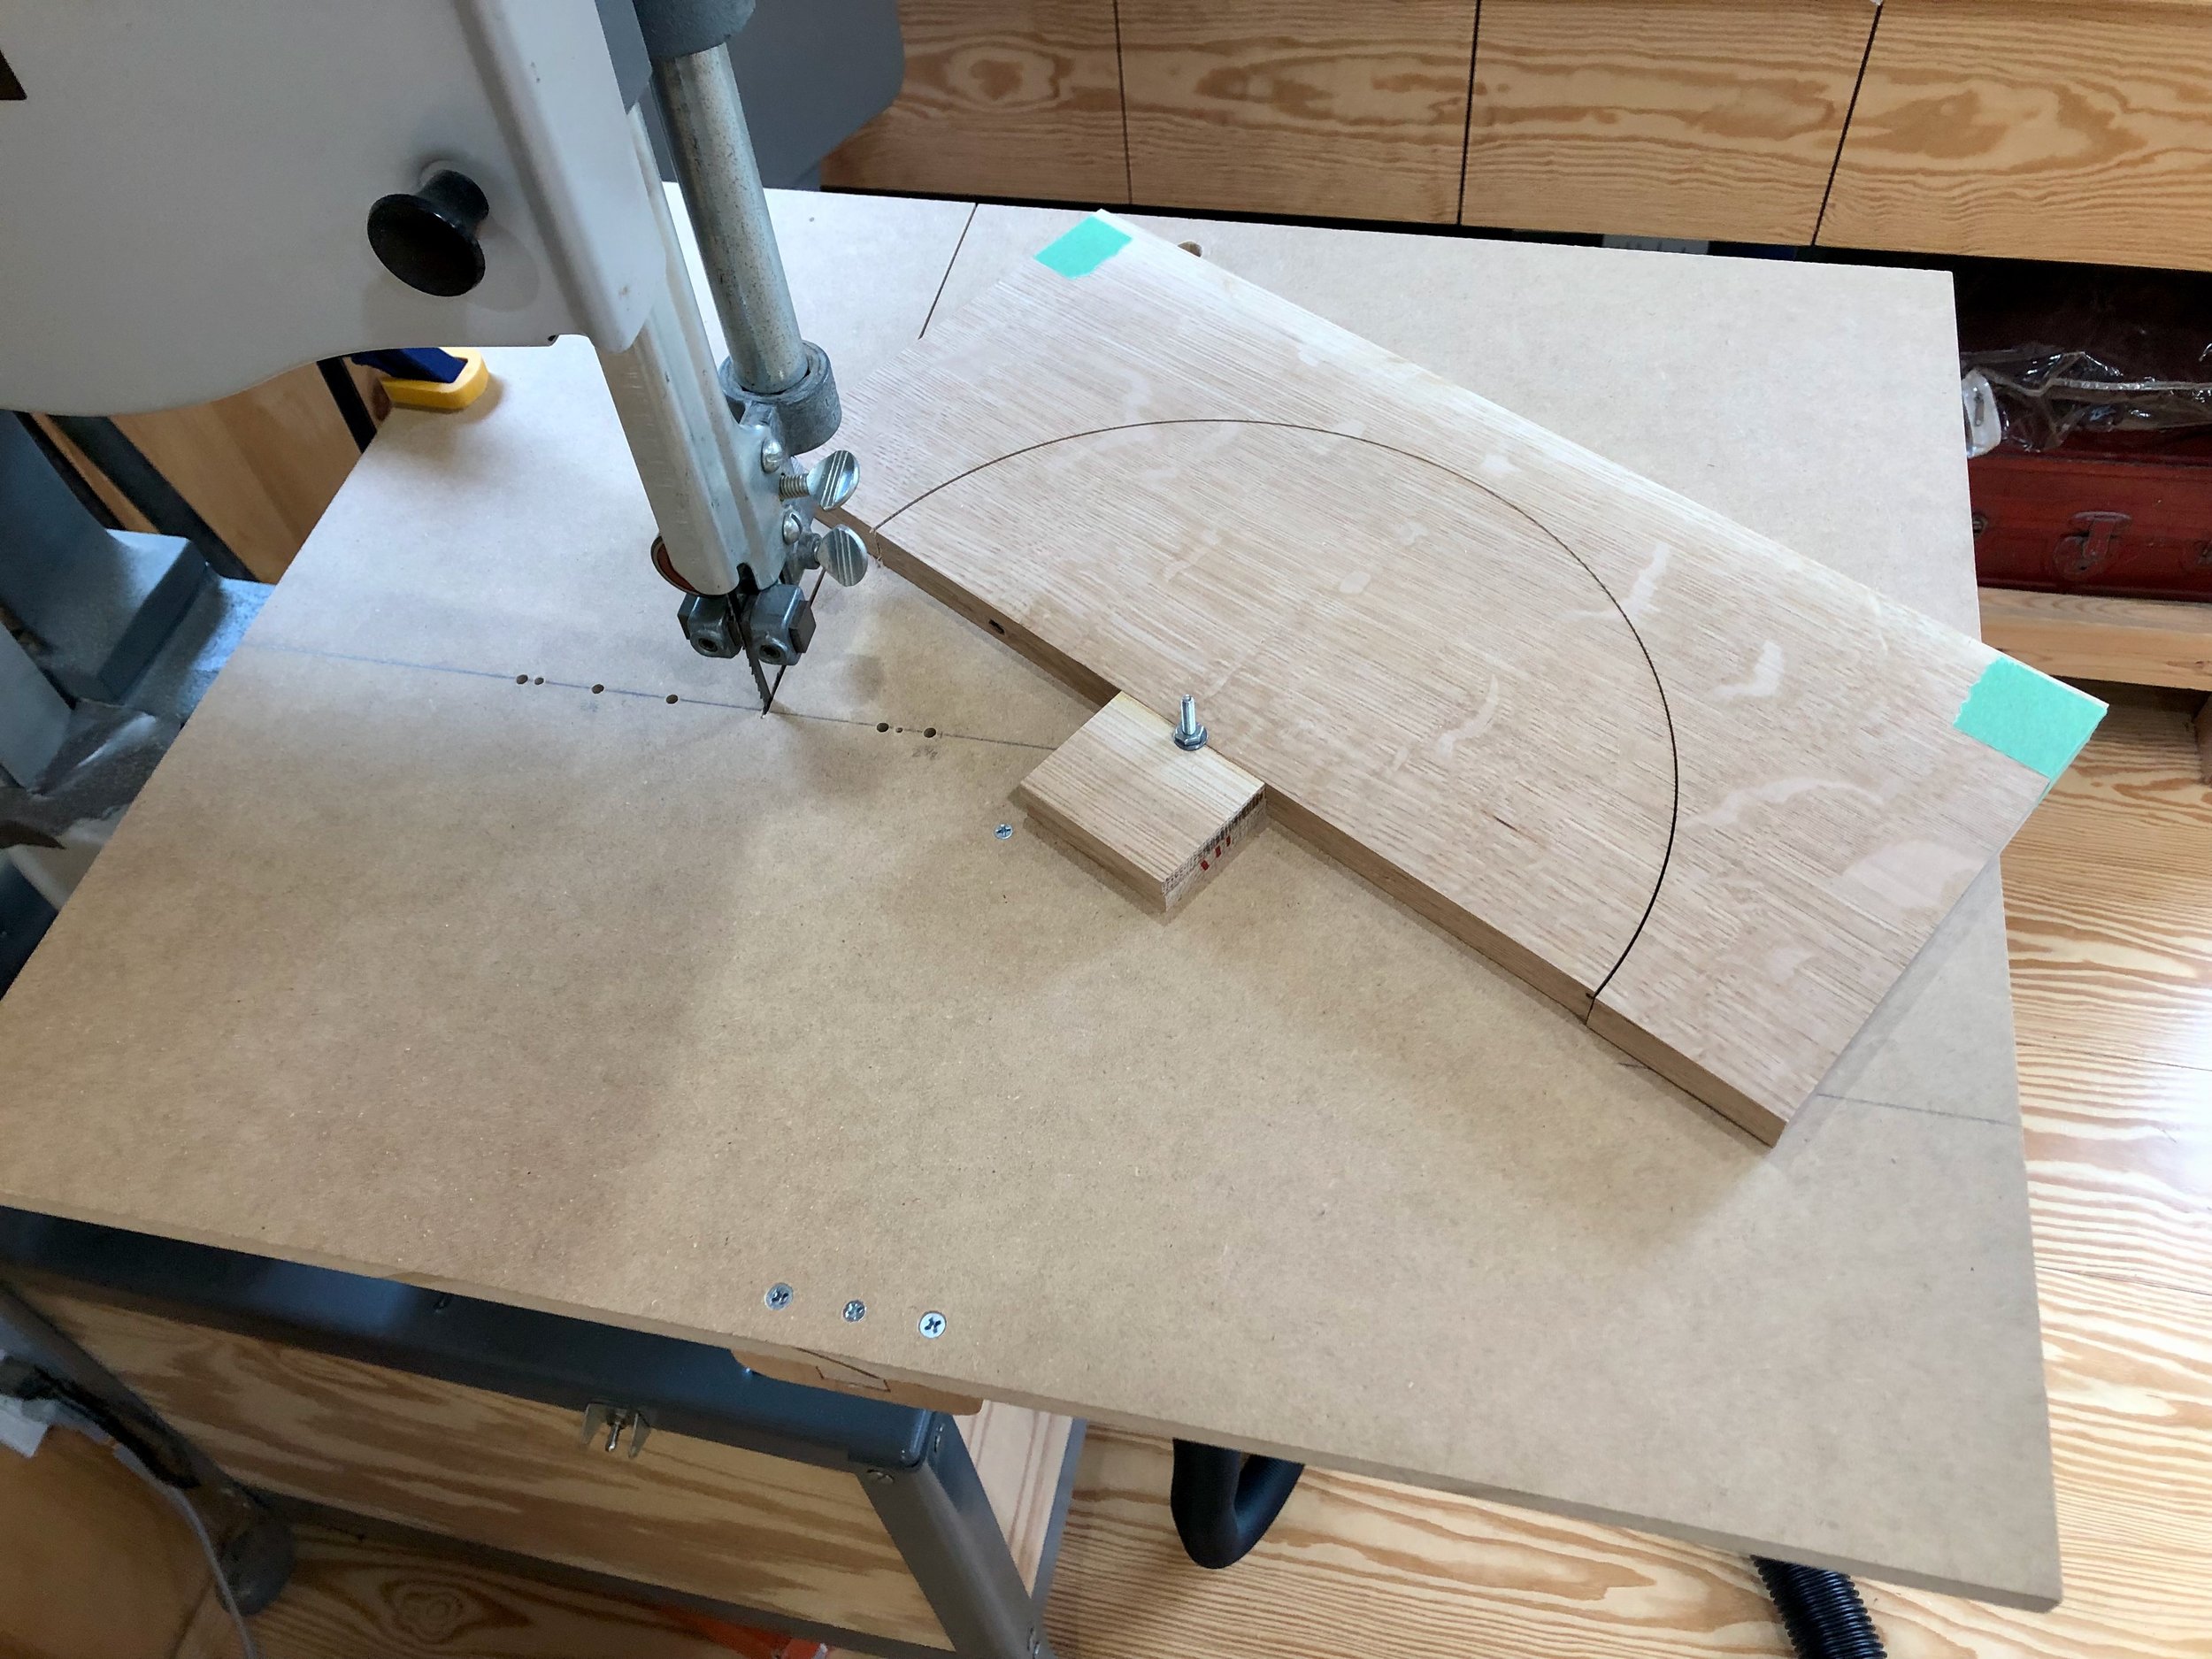
Cutting a pair of panels at the band saw
Getting close to assembly, it was time to card scrape the mill marks from all surfaces and trim the panels to their final dimensions. A subsequent dry-fit of the sections, one-by-one, gave assurance that all would go well during the glue-up.

Dry-fitting all parts in section C, while sections A and B look on.
Look closely at the picture above and you can see that a groove is visible in the frame by the semi-circle opening. This does not belong here and, with a bit of effort, could have been avoided during part prep. Instead, I chose to fix things at this point using leftover wood from the circle cutting step. Here’s how it went.
The small scraps of wood used for drilling the jig holes were, earlier, affixed using water-soluble glue. Thus, soaking the discarded cut-outs with water for a couple minutes followed by a sharp rap with a chisel was all it took to cleanly liberate the oak “half moons”. I then used the table saw to rip a 5/16 in. strip along the flat side of all six discards. These were exactly the right length to glue back into the exposed groove of the dry-fit sections. Upon disassembly, the proud surfaces were hand-planed flush to the frame.

Creating a “groove filler” at the table saw
Assembly & Finish
I began the finishing step prior to the glue-up. As the panels will be left to float in their grooves any shrinkage of these, over time, would risk exposing bare wood were they to be finished only after assembly. A primary coat, applied now, eliminates that possibility. Stickley’s Craftsman furniture employed ammonia fuming or other stains to color the wood, but I decided that a simple oiling would be all the finish needed for this Screen. The inspiration comes from the English Arts & Crafts designer C.F.A. Voysey. Working at the turn of the twentieth century he directed that his furniture be left unfinished or, at best, lightly waxed. Voysey was particularly adamant about this, and who am I to argue? Today, his oak furniture pieces look absolutely stunning; simple shapes enriched by naturally aged surfaces. That’s what I’m going for here, using boiled linseed oil as the agent.

“If you want to set my teeth on edge, talk about staining wood - especially brown. … I refuse to fume or stain it. It is best as Providence made it and I will not be a party to its degradation.”
– C.F.A. Voysey
All went well during the three glue-ups and, once cured, a hand plane was used to even up the seams along the top edge.

Scene during glue-up - the thin panels sporting a coat of oil.
The next step was to peg the mortise and tenon joints using oak dowels. Eight, 5/16 in. diameter pegs per section would be needed and these were pounded out from scraps at the dowel plate. Three drilling jigs were also constructed from leftover wood to ensure that the top, middle and bottom pegs were positioned identically within and between the sections.
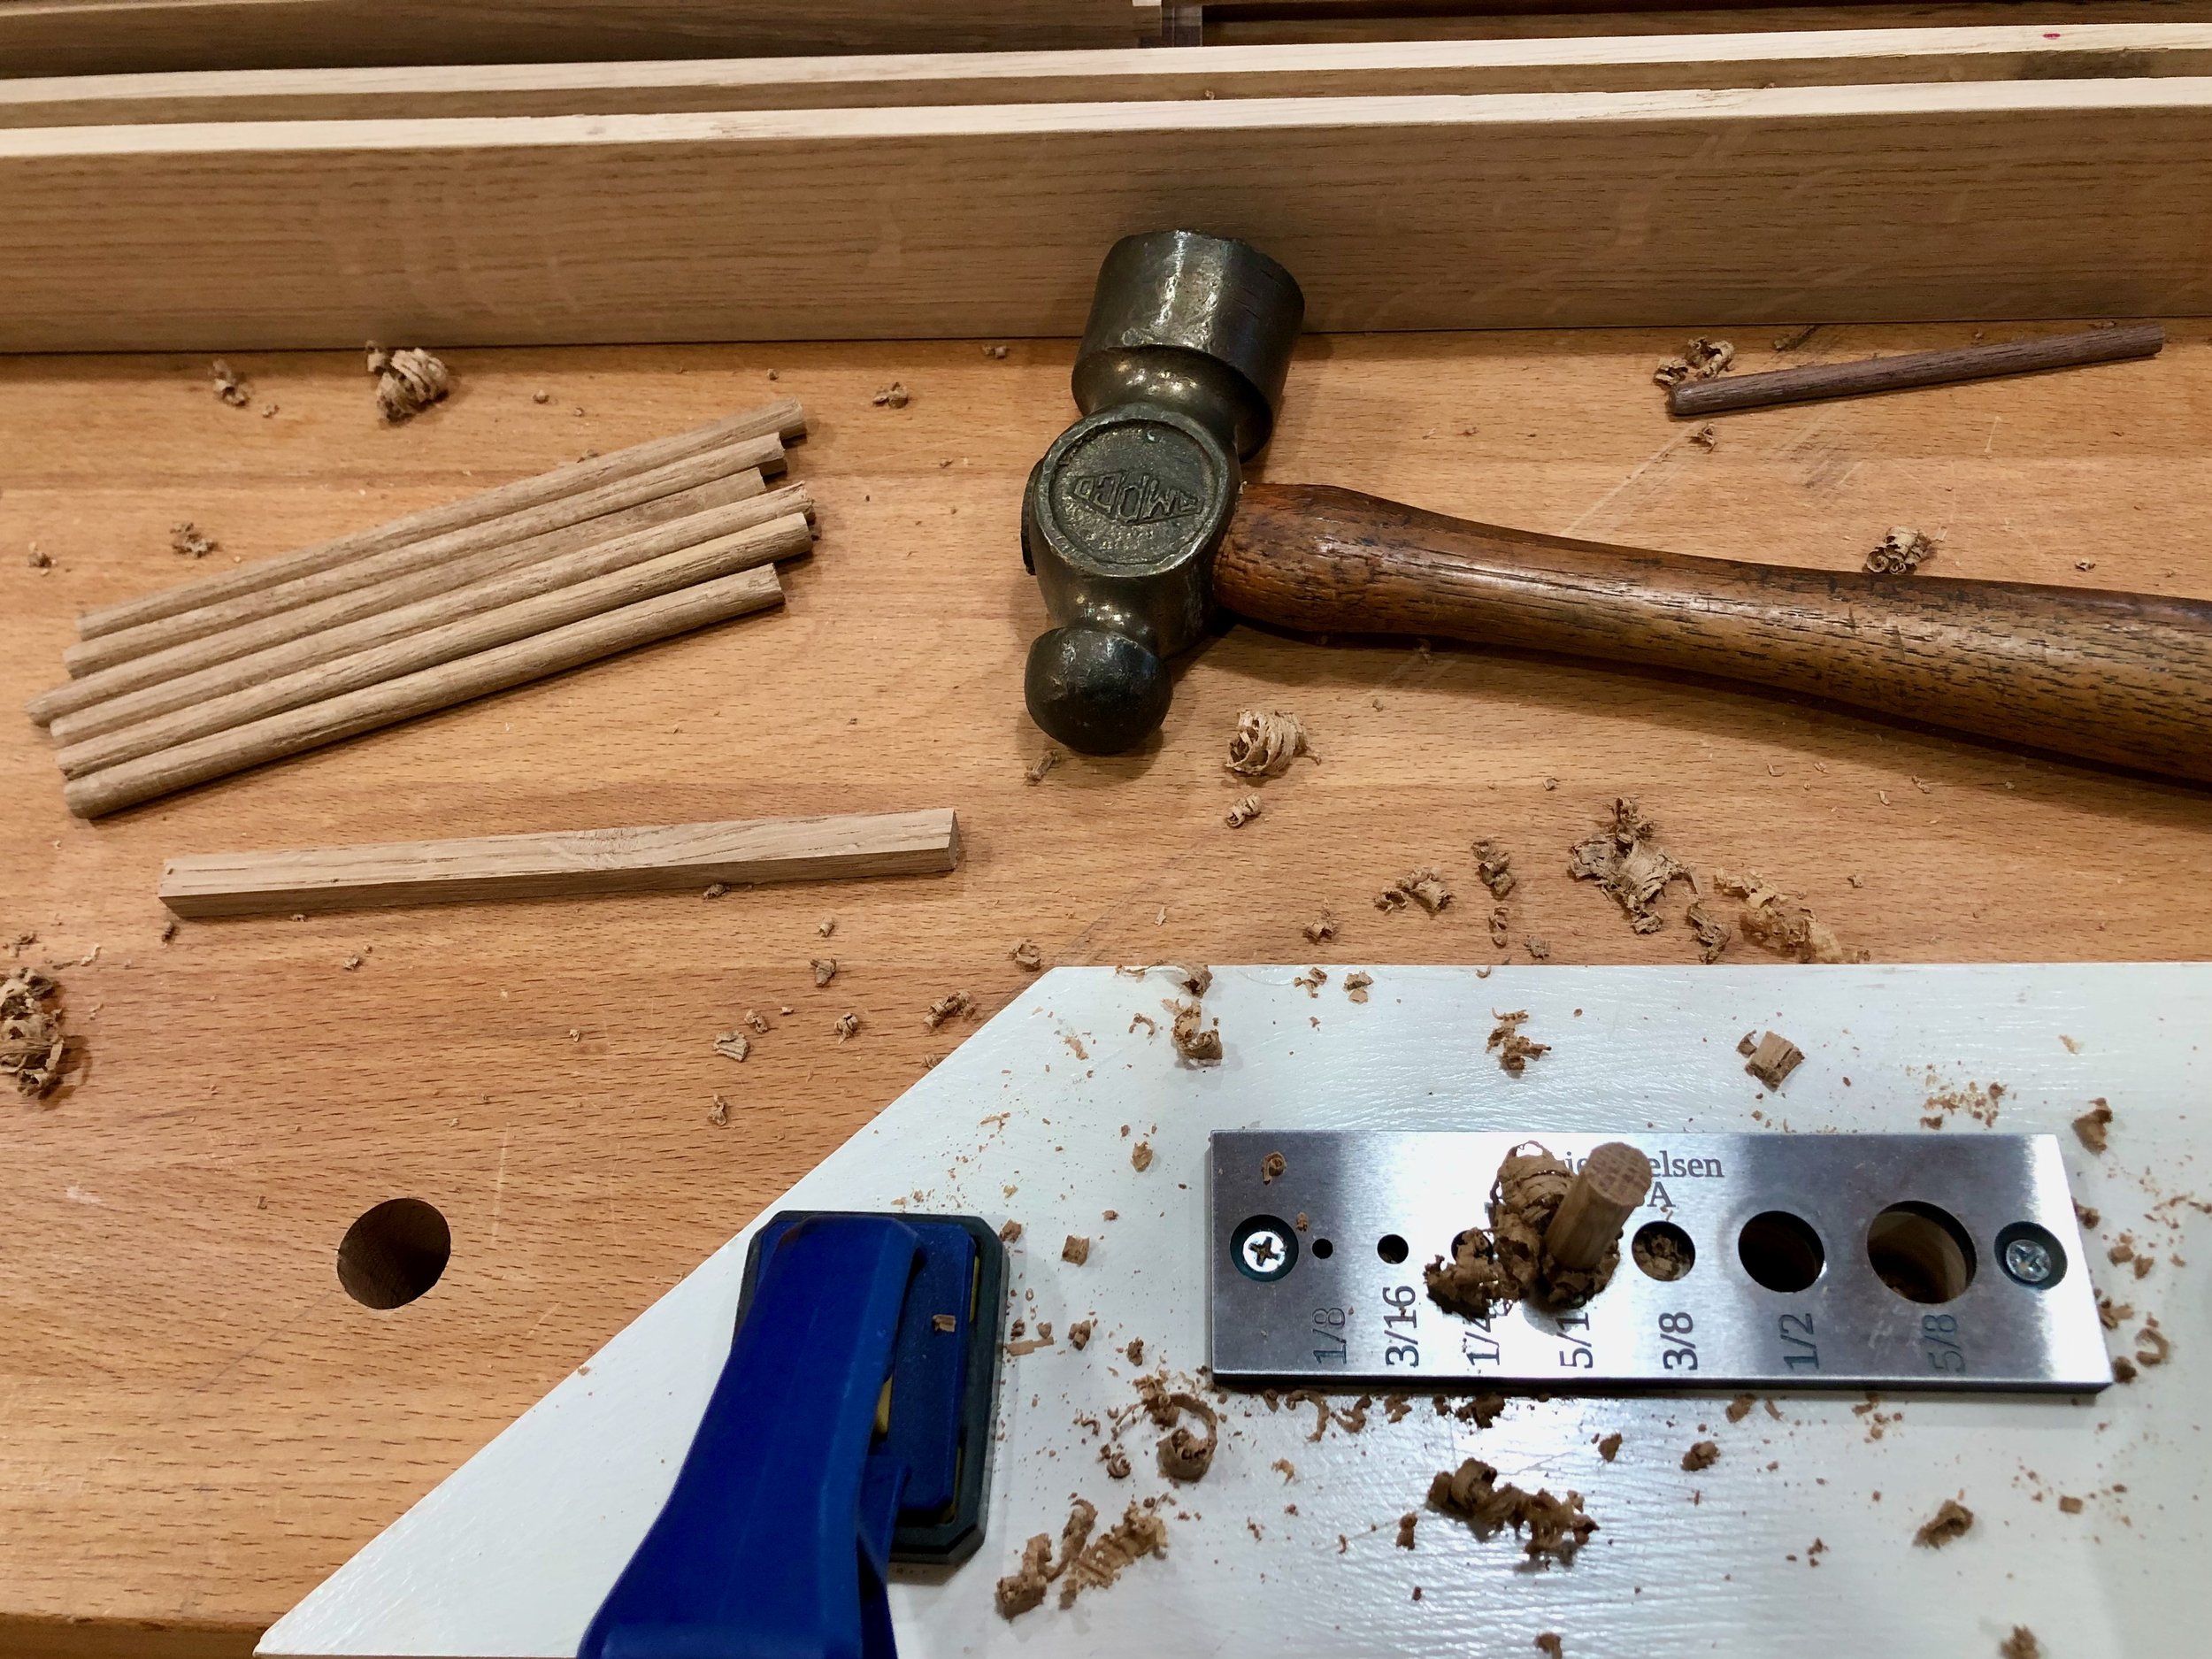
Pounding out pegs
It was now time to complete the finish. I chose to do that with the sections propped upright so that both sides could be oiled at once. The first coat was applied to all surfaces, and after a couple days to cure the frame members received their second coat. Buffing with a gray Scotch brite pad followed by a cotton cloth gave the wood a smooth surface with very little sheen. The color is now a bit darker than raw wood and the grain character is enhanced some, though not enough to have triggered Voysey (I hope).

Finishing the sections
The final assembly step was to install the hinge hardware. Section “B” is the star here as all six hinges attach to it. These were affixed at appropriate intervals with screws and then the other sections mated alongside. I had never worked with double-acting hinges before. They are an ingenious invention and easy to mount, using a 1/4 in. spacer stick between sections to keep everything even.
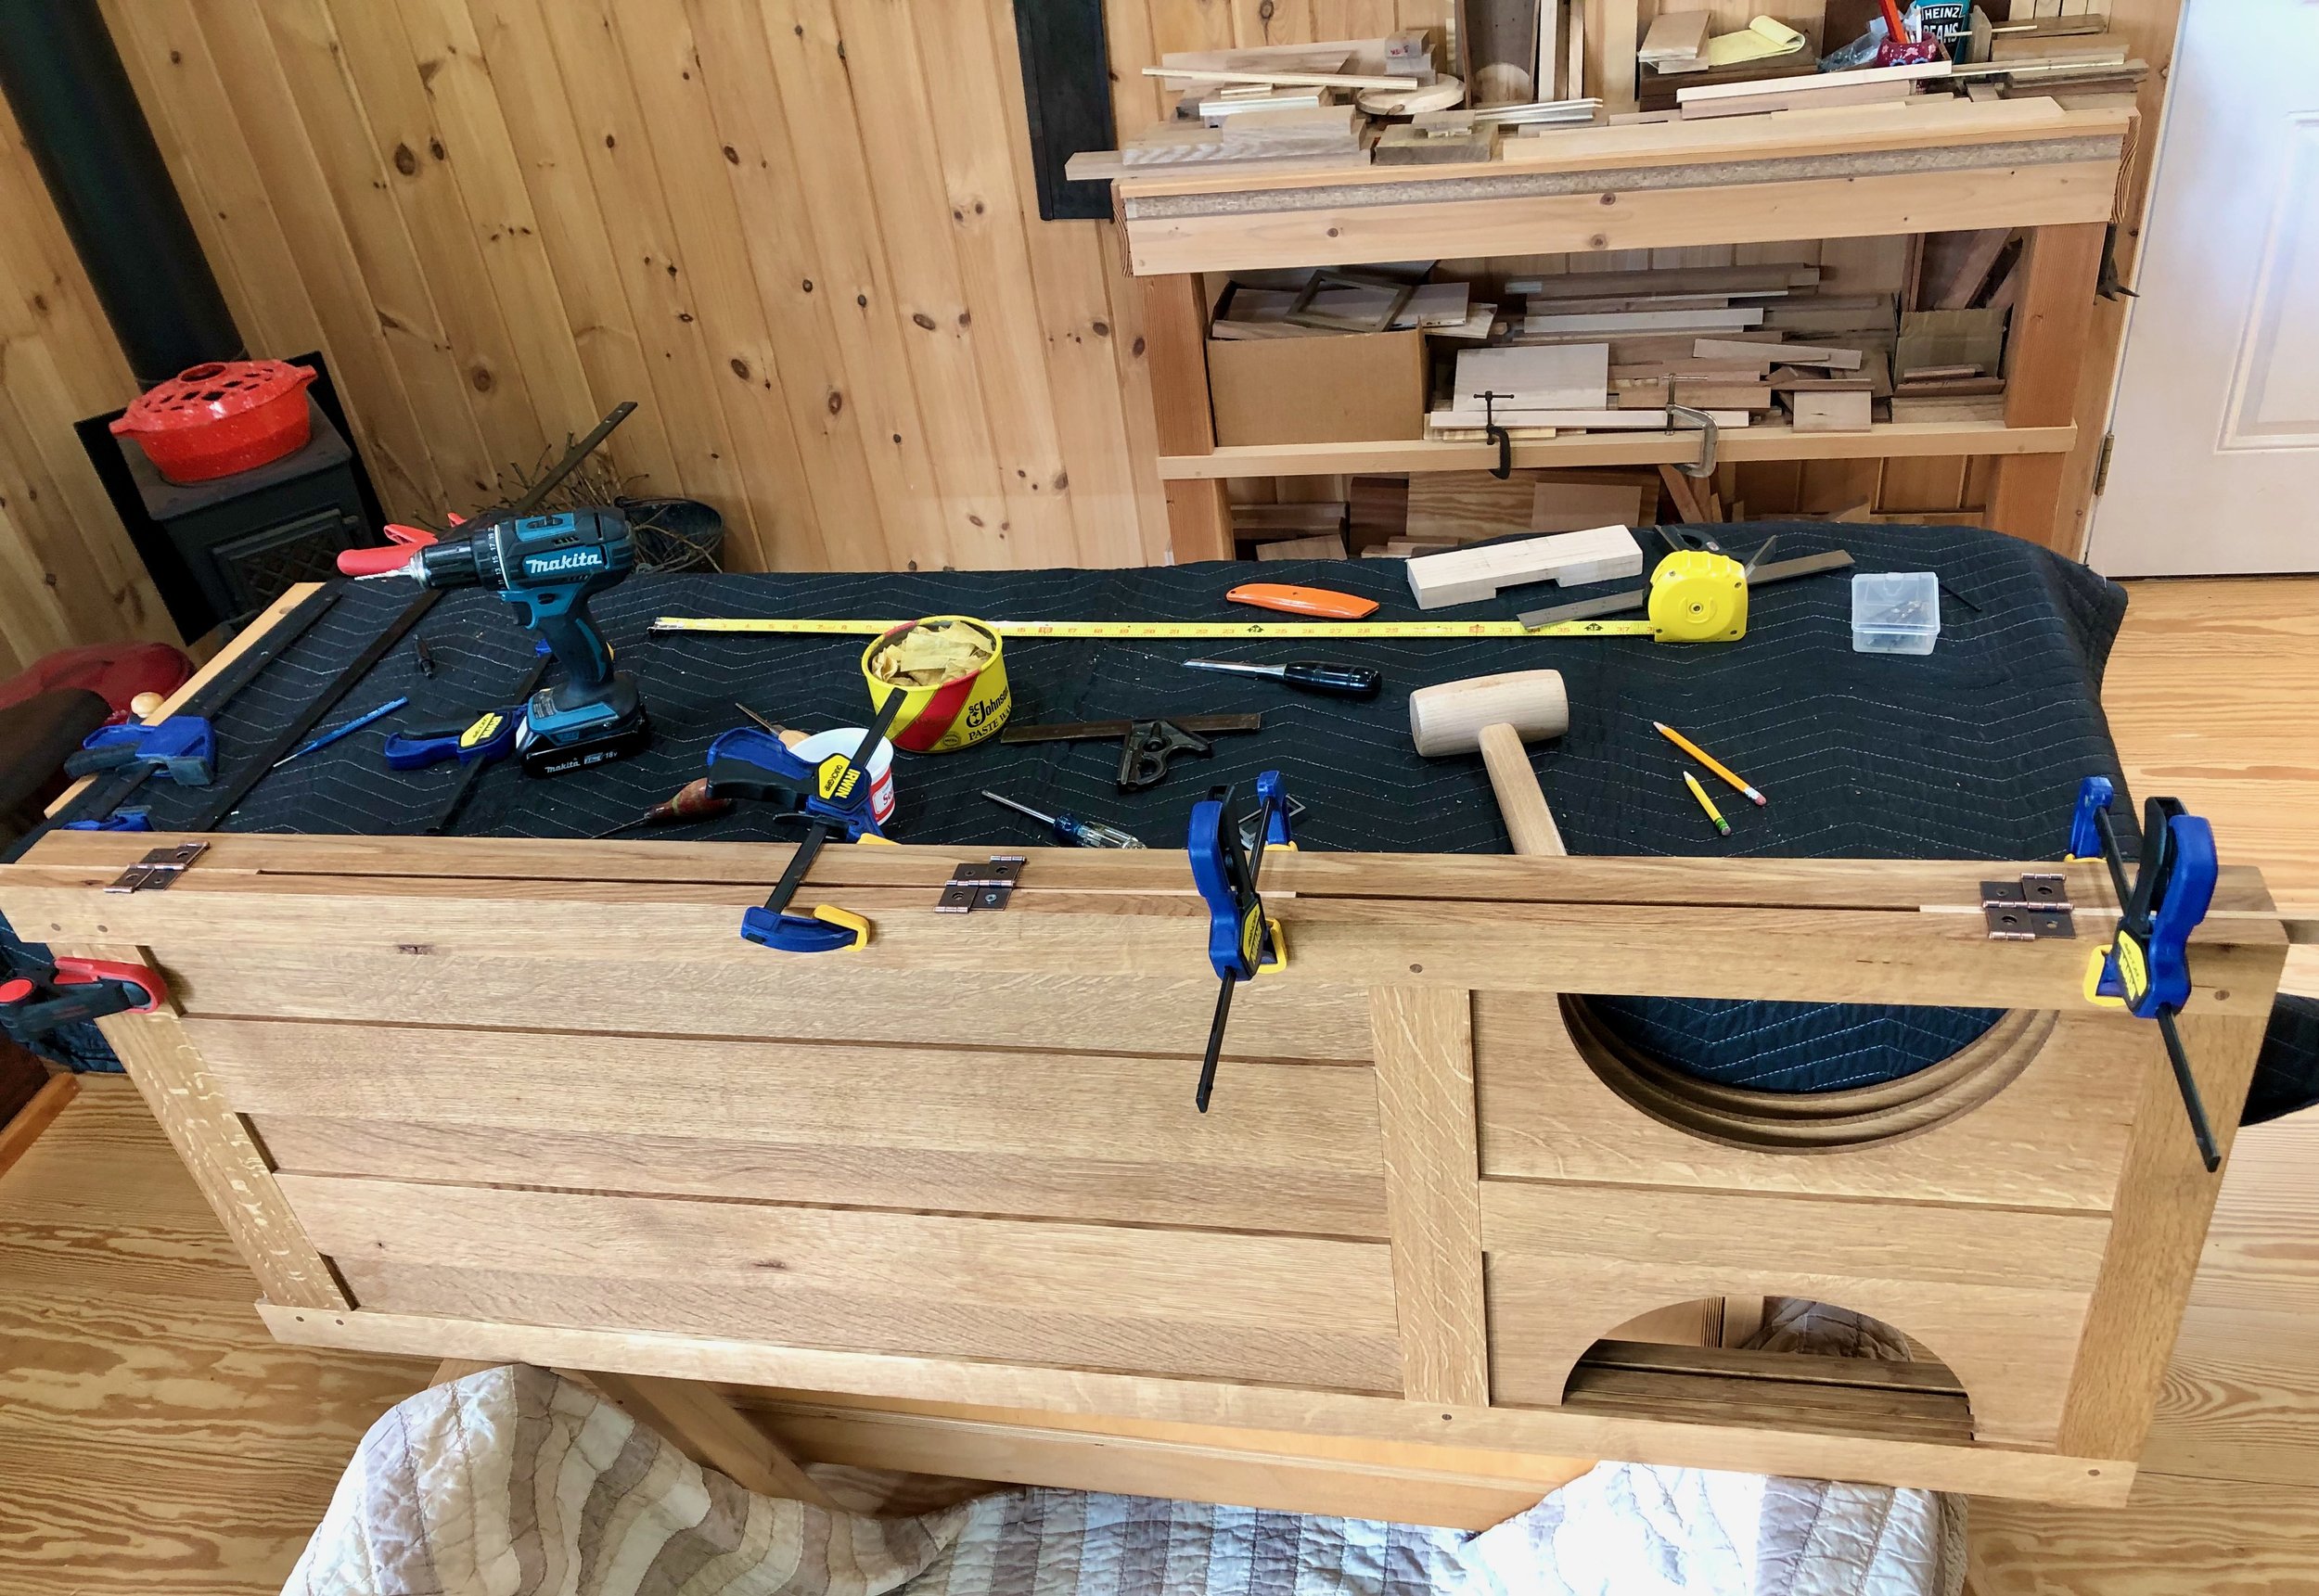
Mounting the third section using double-acting hinges and spacer sticks
That completes the room screen. It now stands, nice and practical, between our office and living room, while adding life to both spaces.

Room “screened”